SALUS 091FLRF Digital Programmable Thermostat User Guide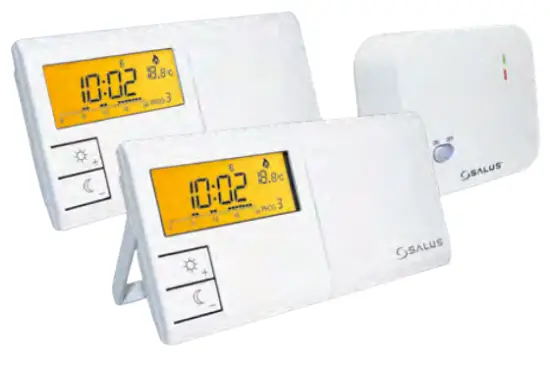
Introduction
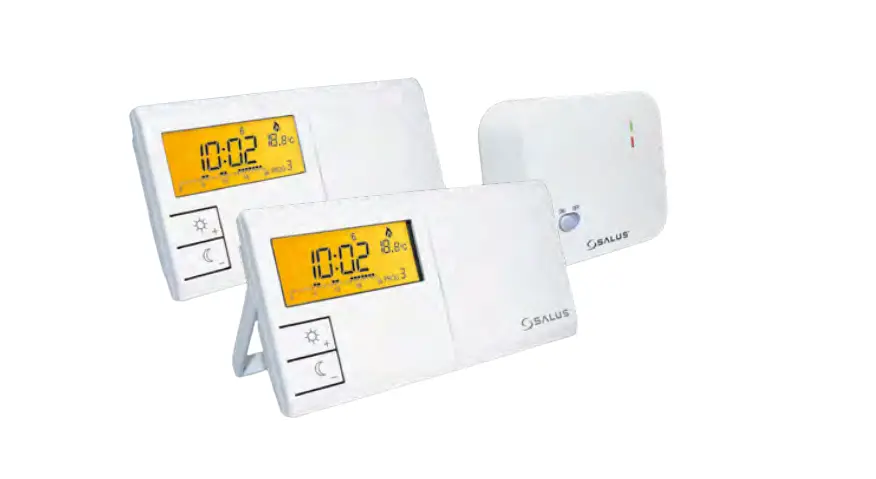
091FL/091FLRF is a programmable, weekly thermostat used to control room temperature in heating or cooling systems. Before use please read this manual carefully. Use only AA 1.5V alkaline batteries in the thermostat. Place the batteries into the battery slot located under the cover. Do not use rechargeable batteries.
Safety Information
Use in accordance with national and EU regulations. Use the device only as intended, keeping it in a dry condition. The product is for indoor use only. Installation must be carried out by a qualified person in accordance with national and EU regulations.
Technical specification
Wired thermostat 091FL
| Power supply | 2 x AA batteries |
| Rating max | 5 (3) A |
| Outputs | Voltage-free NO/COM relay |
| Temperature range | 5 – 30°C |
Wireless thermostat 091FLRF
| Thermostat supply | 2 x AA batteries |
| Receiver supply | 230 V AC 50 Hz |
| Receiver rating max | 16 (5) A |
| Receiver outputs | Voltage-free NO/COM relay |
| Temperature range | 5 – 30°C |
Proper thermostat placement
| Button | Function |
 | Comfort temperature or changing parameters up |
| Economic temperature or changing parameters down | |
| Set the day of the week | |
| Set the hour | |
| Set the minutes | |
| Temperature set point | |
| Weekly programming |
| Program selection | |
| Confirm function | |
| Factory Reset |
LCD Icon description
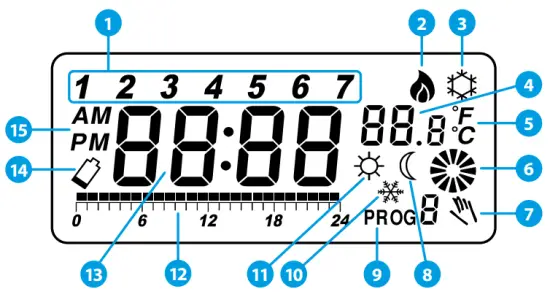
- Day of the week indicator
- Heating Mode ON
- Cooling Mode ON
- Room / setpoint temperature
- Temperature unit
- Controlled device working status (e.g. boiler)
- Temporary override
- Eco Mode
- Program number
- Antifrost Mode
- Comfort Mode
- Program timeline indicator
- Clock
- Low battery indicator
- AM/PM
091FL Wiring diagram
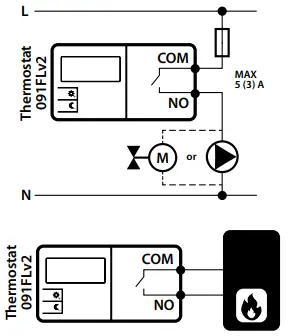
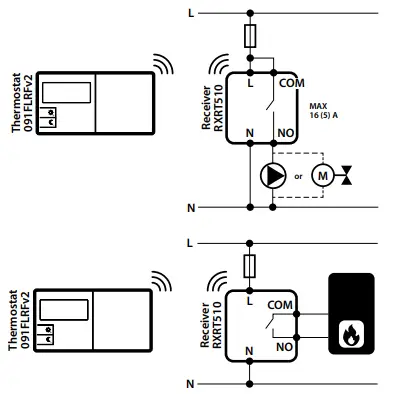
091FLRF Wiring diagram
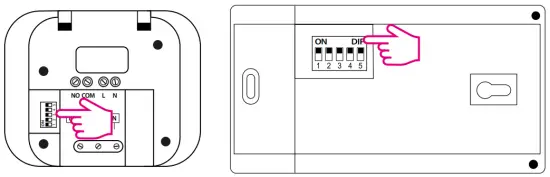
![]() CHANGING THE COMMUNICATION CODE OF 091FLRF Note: To prevent interference from other wireless devices it is recommended to change the communication code from factory setting.
CHANGING THE COMMUNICATION CODE OF 091FLRF Note: To prevent interference from other wireless devices it is recommended to change the communication code from factory setting.
- Use DIP switches (numbered 1-5) to change the communication code.

- Set DIP switches randomly – they need to be in the same position on both the receiver and the transmitter.
- Press
 Reset button after communication code changing.
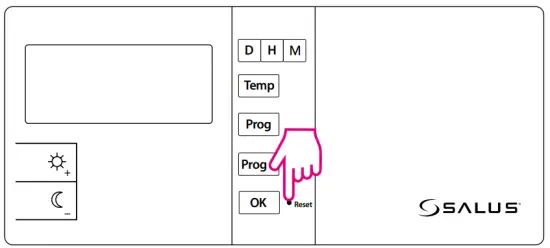
Setting Time
Press ![]() button to highlight the display.
button to highlight the display.
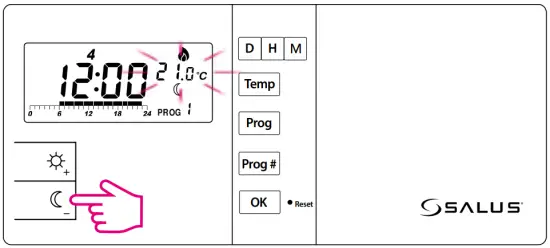
Press ![]() to set the day.
to set the day.
press ![]() to set the hour
to set the hour
Press ![]() to set the minutes
to set the minutes
Setting the comfort temperature
- Press
 button to highlight the display.
Press and then press .
Display will show current comfort temperature.
To change this temperature, press or  button.

Setting the economic temperature
- Press button to highlight the display.
Press and then press .
Display will show current economic temperature.
To change this temperature, press or button.- To confirm press button.
Programs
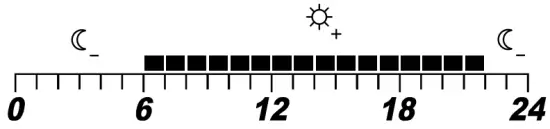
![]() Comfort temperature
Comfort temperature
![]() Economic temperature
Economic temperature
There are 9 programs available. Programs 0-5 are factory programs.
Programs 6-8 can be defined by user
Selection of factory (0-5) programs
- Press to highlight the display.
Select the day of the week by pressing button. - Press to set the program number (0-5) for the selected day.

Program 0 is a special program. It will set the thermostat to antifrost temperature (7°C) for the full day.
- To confirm press button.

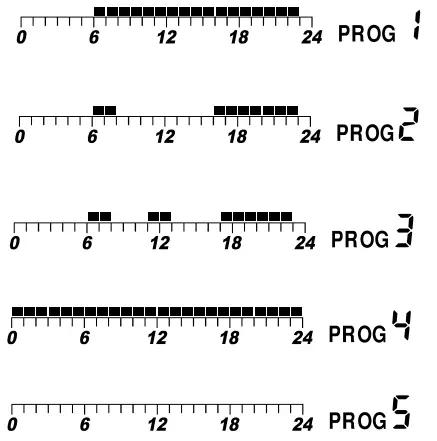
NOTE! Label with programs descriptions is sticking on the flip side of the cover.
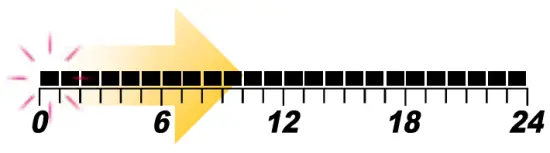
Choosing and programming (6-8) user programs
- Press to highlight the display.
Select the day of the week by pressing button. - Press to set the program number (6, 7 or 8) for the selected day.

Press or button (each pressing one of these buttons moves the timeline by one hour and assigns a comfortable or an economic temperature).- To confirm press button.
Press ![]() button to highlight the display. Then open service menu by holding
button to highlight the display. Then open service menu by holding ![]() button for 5 seconds.
button for 5 seconds.
 – Heating mode – the relay closes the contacts when there is a need for heating (default setting).
 – Cooling mode – the relay closes the contacts when there is a need for cooling (with 5 minutes delay).
Press or to select mode.
To confirm your option press. – Heating device delay switch disabled (default setting).
 – Heating device delay switch is ON (5 min)
Select by pressing or button.
To confirm your option press.- – Temperature span selection, possible values are 0.5°C or 1.0°C (default = 1.0°C).
Press or to set span.
To confirm your option press.  – Measured temperature correction* (value range: -3.0°C to + 3.0°C, default = 0.0°C).
Press or to set correction.
To confirm your option press.
 – Cooling mode – the relay closes the contacts when there is a need for cooling (with 5 minutes delay).
- this feature is available from 2.4 software version programs. Programs 6-8 can be defined by user.
Product compliance
This product complies with the following EU Directives:
091FL: 2014/30/EU, 2014/35/EU, 2011/65/EU
091FLRF: 2011/65/EU, 2014/53/EU ![]() 868.0 MHz – 868.6 MHz; <13dBm
868.0 MHz – 868.6 MHz; <13dBm
Full information is available on the website www.saluslegal.com
PRODUCER:
Salus Limited
6/F, Building 20E, Phase 3, Hong
Kong Science Park, 20 Science Park
East Avenue, Shatin, New Territories,
Hong Kong
IMPORTER:
QL CONTROLS Sp. z o.o. Sp. k.
ul. Rolna 4, 43-262 Kobielice


 Wired Programmable Digital Thermostat User Manual")


