![]() 36 Hudson Rd
36 Hudson Rd
Sudbury MA 01776

800-225-4616
www.tisales.com
 Series RCDP
 Series RCDP
3″-12″ Restrained Coupling for Ductile Iron on One End by C900, C909, Steel, IPS (Steel Size) PVC Pipe or SDR 35 Sewer Pipe on the other end.
Installation Instructions
Refer to the FMB website (http://www.fordmeterbox.com) for additional and most recent instructions and product information.
1. Measure the pipe diameter carefully, making sure the pipe O.D. falls within the range of the RCDP. Check to ensure the RCDP is not damaged. Thoroughly clean each pipe end to a smooth, bare surface sufficiently longer than the coupling length. Check the pipe surface to ensure the gasket bearing surface is free from dents, flat spots, or pitted areas that might impair gasket seating. Lubricate both pipe ends with an approved pipe lubricant meeting AWWA C111.
| SIZE | PVC SIDE RANGE |
| 3″ | 3.50 – 3.96 |
| 4″ | 4.21 – 4.80 |
| 6″ | 6.27 – 6.90 |
| 8″ | 8.40 – 9.05 |
| 10″ | 10.50 – 11.10 |
| 12″ | 12.50 – 13.20 |
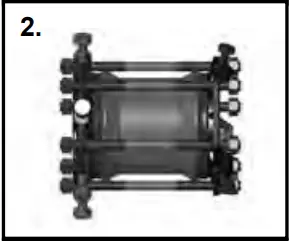
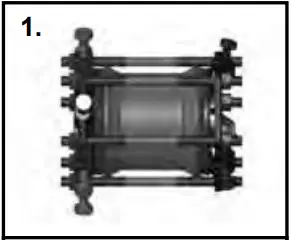
2. For ease of installation on larger OD pipe, it may be helpful to loosen the nuts on both sides of the RCDP. Disassembly of the coupling is not required.
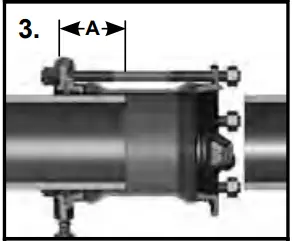
3. Stab each pipe end into the RCDP coupling. The black restraint gland should be installed on ductile iron pipe. The red restraint gland should be installed on plastic or steel pipe. Pipe must be inserted into the RCDP a minimum distance (see table and illustration) from the gland face. Measure and mark this distance from pipe end as a reference point for proper insertion. Center the coupling between the two pipe ends. The optimum pipe end gap for the RCDP coupling is less than 1″. Set deflection before tightening rods. (Maximum allowable deflection is 5°.)
| SIZE | “A” |
| 3″ | 4″ |
| 4″ | 4-5/8″ |
| 6″ | 4-3/4″ |
| 8″ | 4-13/16″ |
| 10″ | 4-7/8″ |
| 12″ | 4-7/8″ |
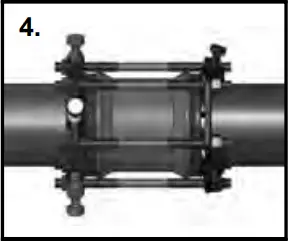
4. Tighten the nuts on the tie rods to the torque recommended in AWWA C111 (45-60 ft-lb for 3″ and 75-90 ft-lb for 4″-12″ sizes). Tighten in an alternating manner, (6 o’clock, 12 o’clock, 9 o’clock, 3 o’clock) maintaining the same gap between the restraint glands at all points around the RCDP sleeve. Repeat the process until all tie rods are within the recommended torque range. Use of a torque wrench is strongly recommended and required to ensure proper torque. It is important to ensure that equal torque has been applied to each tie rod.
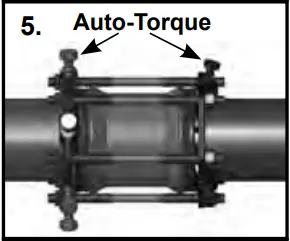
5. After correct assembly of the restraint glands, bring all restraint segments and wedges in contact with the pipe surface by turning the Auto-Tork actuating screws in a clockwise direction until initial contact is made with the pipe surface.
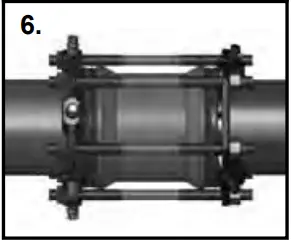
6. Tighten each Auto-Tork screw approximately 180° (1/2 turn), alternating among screws until the heads twist off. Never turn a single screw more than 180° without alternating to another screw. Note: To re-use or re-install the restraint after the Auto-Tork break-off heads have been removed; tighten the 5/8″ hex head of the actuating screw to 60 ft-lbs for the red restraint gland and 75 ft-lbs for the black restraint gland. Also, while it is not a requirement, it is always a good practice to recheck the tie rod torque prior to backfilling and/or after testing or applying water pressure. Be advised that extreme torque can over stress the coupling components. Not recommended for use on plain end fittings.

The Ford Meter Box Company, Inc.
P.O. Box 443, Wabash, IN 46992-0443
260-563-3171 / FAX: 800-826-3487
Internet: http://www.fordmeterbox.com
FORM # 91883-99 03/12


