![]() REVO 3D SCANNER
REVO 3D SCANNER
Revo Studio – User Manual
2022.4 V. 2.0.0

Introduction
Revo Studio is a post-processing application released by the Revopoint team to edit individual 3D models created by Revo Scan and align multiple 3D models so that they can be merged into a new 3D model. In this instruction manual, we will introduce the details about the application and how to adjust the parameters in it.
System Requirements
| Windows: Win 8/Win 10/Win 11 Memory :≥ 4G * Windows 7 is not supported. |  | Mac with Intel ×86/x64 cpu: Mac OS 10.15 and later Mac with Apple M1 cpu: MacOS 11.0 and later |
Note: To get a CD License Key, please post your request in the thread at this link –
https://forum.revopoint3d.com/t/windows-revo-studio-v3-0-5-4/4901
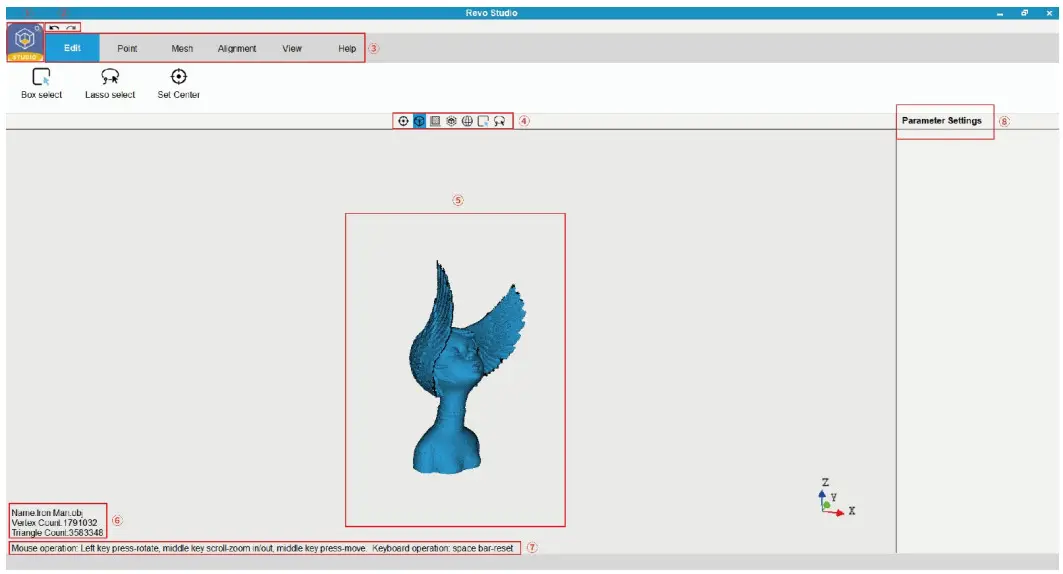
| ① Studio Icon: | Includes Import, Export, Recent Files, and Exit. |
| ② Undo & Redo: | Click the Undo icon to reverse the action of the previous step(s) as many times as necessary. As needed, click Redo to move forward to the desired step. |
| ③ Function Buttons: | Includes Edit, Point, Mesh, Alignment, View, and Help. |
| ④ Toolbar: | Includes shortcuts to Set Center, Orthogonal, Show/Hide Bounding Box, Show/Hide Track Ball, Box Selection, and Lasso Selection. These functions are described in their sections later. |
| ⑤ Center Window: | Displays the name of the model being processed. |
| ⑥ Information of the 3D model: | Provides details of the model (such as name & number of points) to verify identity. |
| ⑦ Mouse Command Prompt: | Displays the mouse’s function commands. |
| ⑧ Parameter Settings: | Adjust the parameters for any function allowing custom configurations. |
Process Model
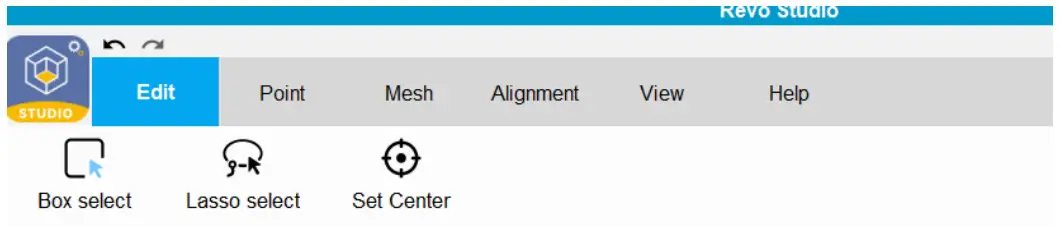
- Edit
In the Edit module, the available commands are Box Selection, Lasso Selection, and Set Center.
(Note: The words or phrases on the following UI will be improved.)
Box Selection: Select features of a model by drawing a rectangle around them. Lasso Selection: Create a completely free-form selection around the desired features by drawing a lasso. Set Center: Change the center coordinate of the 3D model. The object is repositioned so that the selected center is in the middle of the work screen. Any rotations will be around this center point. - Point
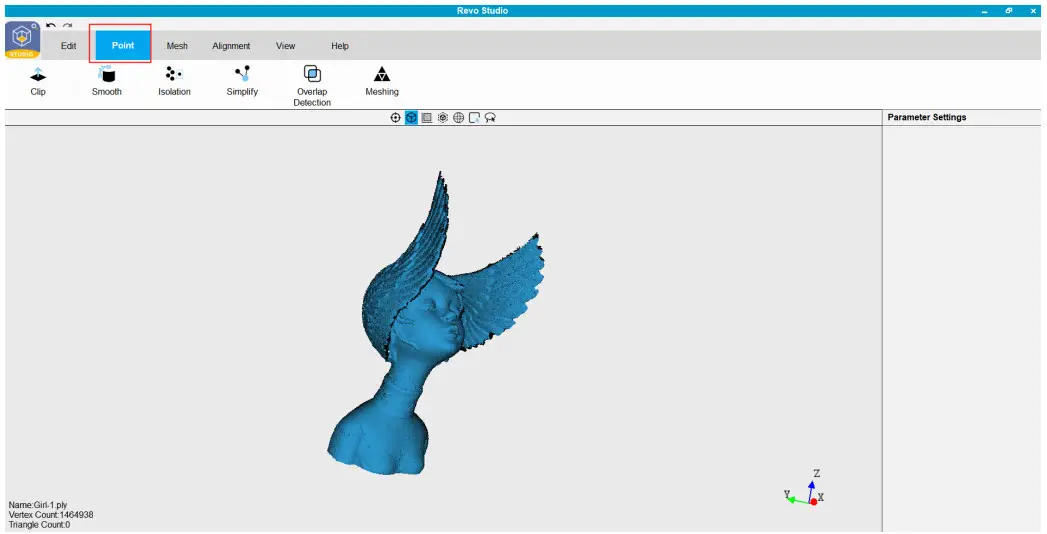
In the Point module, the available commands are: Clip, Smooth, Isolation, Simplify, Overlap Detection, and Meshing to edit the point cloud of a 3D model.
Clip: Clip the model plane. Use this function to remove unnecessary parts of the scan. Click the right mouse button and drag; the clipping plane will appear as a line (the plane is seen on-edge). The portion of the model in the direction of the arrow will be saved. Click Apply to finish. If needed, click the right mouse button again to cancel the operation. Smooth: Smooth flat or curved surfaces; this function can be applied repeatedly as needed. Adjust the Parameters: There are two smoothing methods: Geometry and Normal. Geometry refers to the features in the scanned object. Normally refers to the calculated directions of each facet.
In the BASIC and ADVANCED parameters, set the amount of smoothing as needed. In ADVANCED, higher values for Radius and Iteration result in smoother surfaces.Isolation: Automatically remove point cloud data that is isolated from the main body of the object (for example, a portion of the arm when scanning a person’s head). For parameters in ADVANCED, higher values for Radius, Angle, and Isolation Rate remove more of the point cloud data. Simplify: Simplify the point cloud (remove data points that do not improve the accuracy of the scan). Overlap Detection: Detect and delete overlapping, and unnecessary, data points in the point cloud. Meshing: Convert the point cloud into a meshed 3D model. - Mesh
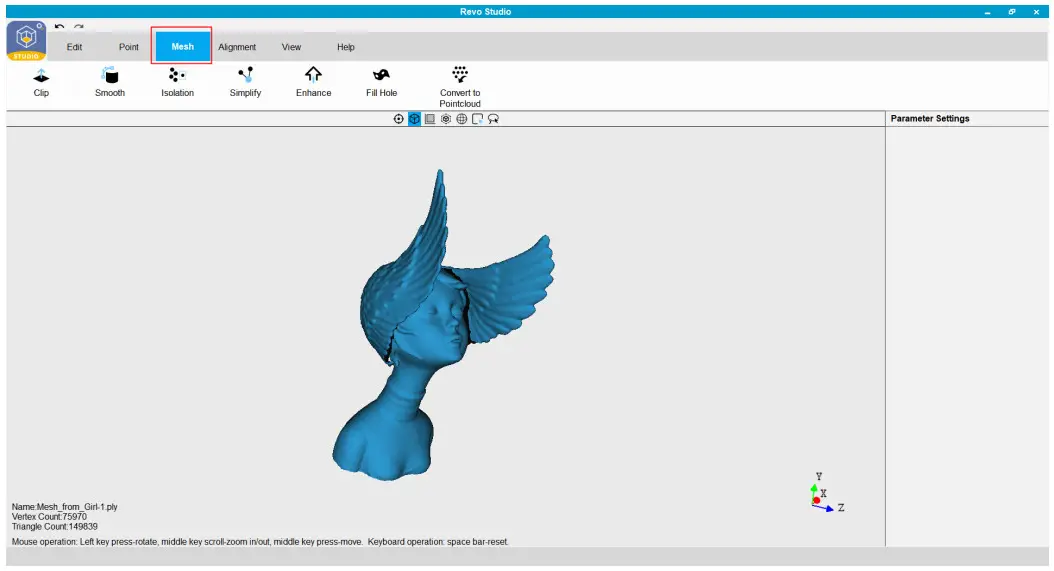
In the Mesh module, the available commands are Clip, Smooth, Isolation, Simplify, Enhance, Fill Hole and Convert to Point cloud.
Clip: Clip the model plane. If there are unnecessary surfaces or meshed data that would not be excised by the Isolation command, use this function to manually remove it. Smooth: Smooth flat or curved surfaces; this function can be applied repeatedly as needed. In the parameters for BASIC and ADVANCED, set the amount of smoothing as needed. There are two smoothing options for ADVANCED: Geometry and Denoise. Isolation: Remove extraneous meshed data that is separated or only loosely connected to the main body. Simplify: Simplify the mesh file (reduce the number of polygons in the model while retaining as much detail as possible). Enhance: Sharpen the details of the 3D model. Fill Holes: Fill the missing part(s) on the model’s surface. Currently, this function only works when filling small holes because gross distortions typically result when filling holes that are a significant portion of the object’s volume. Convert to Point Cloud: Convert the meshed 3D model into a point cloud. - Alignment
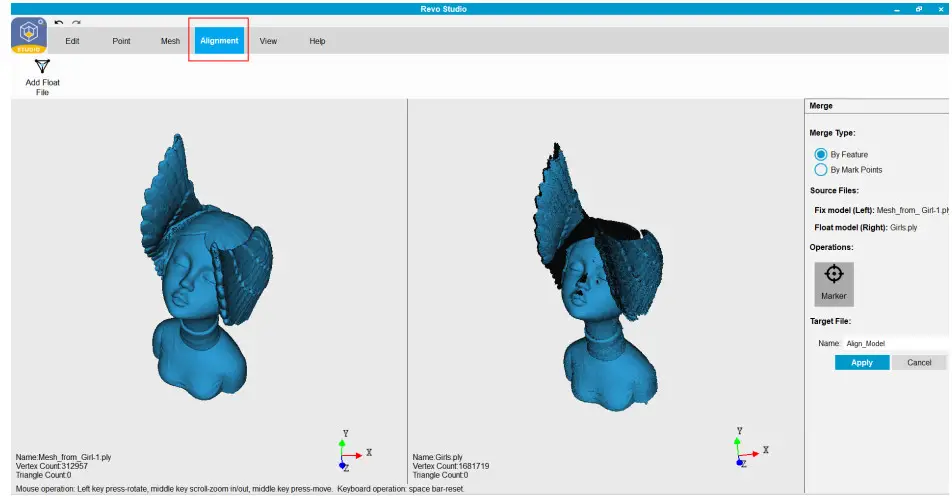
In the Alignment module, multiple scans can be combined and merged into one object, two at a time. Select Add Float File to import every new scan that is to be merged with the current model. Merge Type allows for automatic (By Feature) and manual (By Mark Points) alignment. Automated alignment needs a minimum amount of overlapping areas with the same, unique features; 20% in common is a good starting point for most projects. Both point clouds and mesh objects can be aligned. Manual alignment requires a minimum of 3 pairs of corresponding points on the two scans.
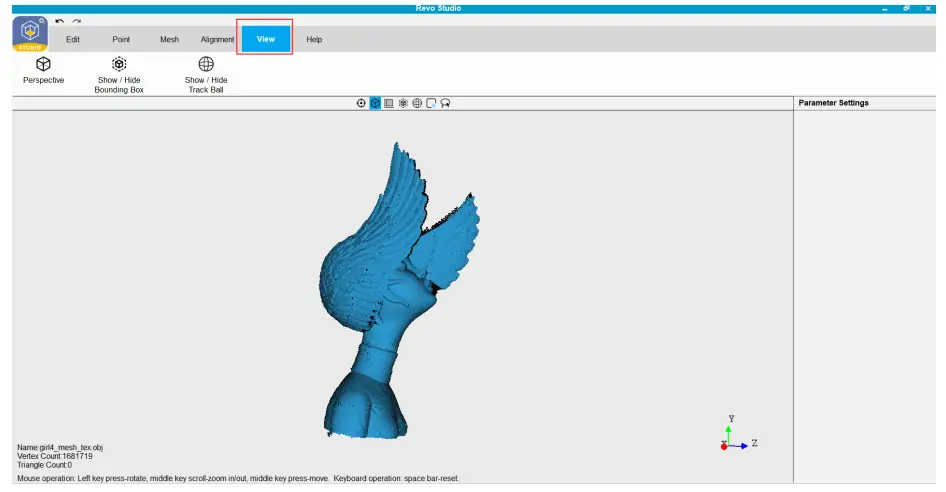
- View
In the View module, the available commands support visual aids for reviewing the model.
Icon  :
:Switch between Perspective and Orthogonal. Icon  :
:Display or hide the bounding box. Icon  :
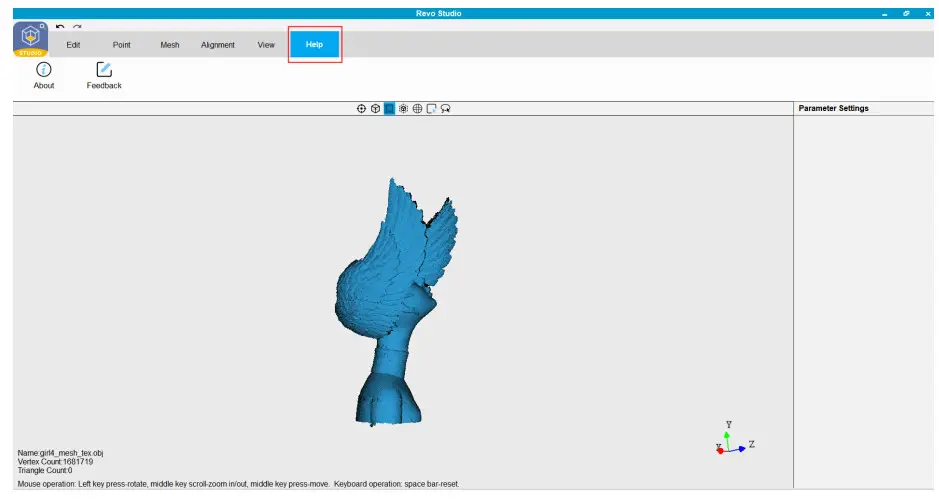
:Display or hide the trackball. - Help
The Help section contains the About information and Feedback popup.
The About popup includes the Revo Studio version and links to the official website & user forum.
The Feedback popup supports bug reporting and general feedback to our developers.
Warning
The product cannot be returned if the “Warranty Void If Seal Is Broken” label is damaged or removed.
Follow Revopoint 3D Technologies
 |  |
| https://www.facebook.com/OfficialRevopoint3d | https://www.instagram.com/officialrevopoint3d/ |
 |  |
| https://www.youtube.com/channel/UCdjd5Yw5FuiDHlw087PHNXA | https://twitter.com/Revopoint3d |
This content is subject to change.
Download the latest version from https://www.revopoint3d.com/download/3d-scanner-app/
If you have any questions about this document, please contact [email protected]
Support & Help
If you need any help, please visit our official website or official Forum:
 |  |
| http://www.revopoint3d.com/support | https://forum.revopoint3d.com/ |
Contact Us
Tel (US): Toll-free +1 (888) 807-3339
Tel (China): +86 18124196779
Live Chat: https://www.revopoint3d.com
Email: [email protected]
Skype: +1 323 892 0859
 Our customer service team provides 24-hour online services support.
If you have any questions or feedback, please don’t hesitate to contact us!


