![]()
![]()
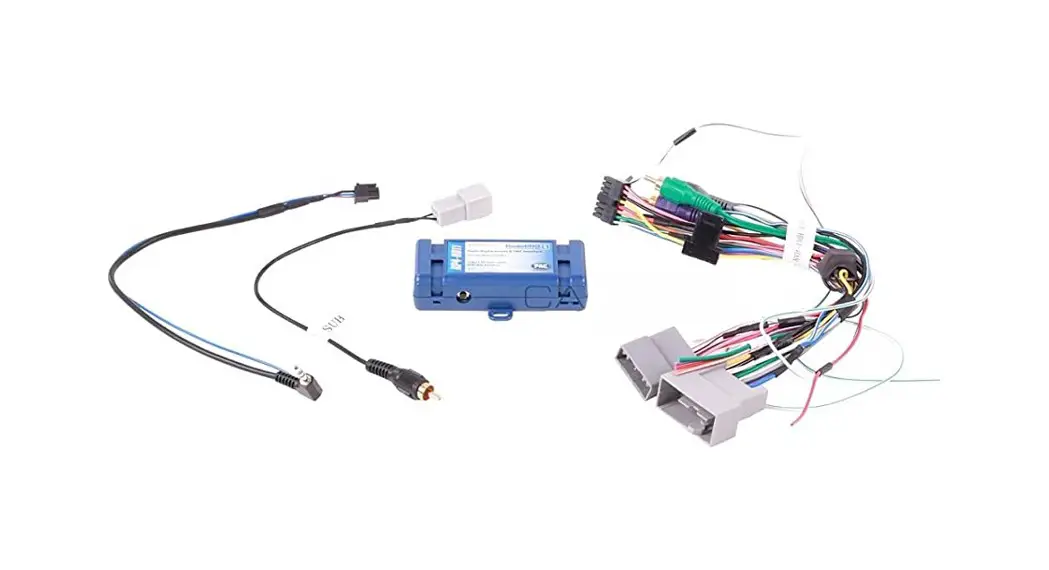
RP4-HD11
Rev. 012015
Radio Replacement & Steering Wheel Control Interface for Honda Vehicles
Optional Steering Wheel Control Programming
If you wish to re-assign the SWC functions or utilize short press long press dual command functionality, the interface must be programmed in the specific order shown on the chart below. If you come across a function in the chart that your steering wheel does not have, or you do not want to program, press and release the program button on the side of the interface to skip that function. The LED will flash off and on confirming that you have successfully skipped that function and are ready to proceed to the next one.
SET RADIO SELECT SWITCH
![]()
| Alpine | JVC | Kenwood | Clarion | Pioneer/Other | Sony | Fusion |
| 1 | 2 | 3 | 4 | 7 | 8 | 9 |
Other = Advent, BOYO, Dual, Lightning Audio, Rockford Fungate, Visteon
PLEASE NOTE: The screen on the dash can not be in the “Vehicle Menu” mode when reprogramming the SWC. If the screen displays “Vehicle Menu”, press the Menu button on the SWC to leave this screen and ensure you are in the proper mode before proceeding.
- Turn the key to the ignition position.
- Press and release programming button on the side of the interface.
- Within 7 seconds, press the button that is to be learned on the steering wheel. The LED will turn off when the button is pressed.
At this point you have two options:
A. For short press functionality: Release the button within 1.5 seconds. The LED will turn back on.
B. For long press functionality: Hold the button until the LED starts blinking. Release the button and the LED will go back to solid. - If you need to program more buttons, repeat step 3 for each additional audio function on the steering wheel.
- If you come across a function in the chart that your steering wheel does not have, or you do not want to program, press and release the program button on the side of the interface to skip that function.
- Once programming is completed, wait seven seconds. The LED will flash three times indicating end of programming.
- Test the interface for proper functionality. Whenever a SWC is pressed the LED on the interface should blink. If any function does not work, repeat the programming steps
Optional Programming Order
| Alpine | JVC | Kenwood | Clarion | Other* | Pioneer | Sony | Fusion | |
| 1 | Volume + | Volume + | Volume + | Volume + | Volume + | Volume + | Volume + | Volume + |
| 2 | Volume – | Volume – | Volume – | Volume – | Volume – | Volume – | Volume – | Volume – |
| 3 | Mute | Mute | Mute | Mute | Mute | Mute | Mute | Mute |
| 4 | Preset + | Source | Source | Source | Preset + | Preset + | Preset + | Source |
| 5 | Preset – | Track + | Play | Search + | Preset – | Preset – | Preset – | Track + |
| 6 | Source | Track – | Track + | Search – | Source | Source | Source | Track – |
| 7 | Track + | Band/Disc + | Track – | Band | Track + | Track + | Track + | Audio |
| 8 | Track – | Preset/Disc – | Disc/FM + | Send/End | Track – | Track – | Track – | Power |
| 9 | Power | Select | Disc/AM – | Send | Band | Band | Band | |
| 10 | Enter/Play | Attenuation | Answer | End | N/A | Phone Menu | Reject Call/Source (Bluetooth equipped radios only) | |
| 11 | Band/Program | Phone Receive | Voice Dial | Answer Call | Answer/End Call | |||
| 12 | Receive | Phone Reject | On Hook | End Call | ||||
| 13 | End | Voice Dial | Off Hook | VR | ||||
| 14 | VR | Power | Mute (Multimedia units only) | |||||
| 15 | Preset + | |||||||
| *Other = Advent, Boyo, Dual, Lightning Audio, Rockford Fungate, & Visteon | ||||||||
SWC Re-calibration
This section only applies to the Answer, Hang Up and Voice buttons. All of the other buttons are data driven and will never require recalibration.
SWC re-calibration is necessary when the SWC operation is erratic or non-existent. This process re-calibrates the SWC values to the RP4 interface so it will know what they can be set to for button function assignment. The interface must be programmed in the specific order shown in the chart below. If you come across a function in the chart that your steering wheel does not have you must press and release the program button on the side of the interface to skip that function. The LED will flash off and on confirming that you have successfully skipped that function and are ready to proceed to the next one.
The SWC and radio command assignments can always be restored to default values by entering re-calibration mode (Steps 1-2) and not pressing any buttons. After 7 seconds the re-calibration mode will time out and all default values will be restored.
- Turn the key to the ignition position.
- Press and hold the programming button for 7 seconds until the LED begins blinking. When the LED begins blinking, release the programming button.
- Within 7 seconds, press and release the button that is to be learned on the steering wheel. The LED will turn off when the button is pressed and come back on when it is released.
- If you need to program more buttons, repeat step 3 for each additional audio function on the steering wheel.
- If you come across a function in the chart that your steering wheel does not have, press and release the program button on the side of the interface to skip that function.
- Once programming is completed, wait seven seconds. The LED will flash three times indicating end of programming.
- Test the interface for proper functionality. Whenever a SWC is pressed the LED on the interface should blink. If any function does not work, repeat the programming steps
After you have re-calibrated the SWC buttons, the default SWC button assignments will be the same as what is listed in the chart on page 3. If you wish to re-assign button functions you must also go through the programming process on page 4.
| Answer |
| Hang Up |
| Voice |
Product Updates (Firmware)
The RP4-HD11 can be updated with new firmware as it becomes available using the PAC-UP interface updater (sold separately). Please visit www.pac-audio.com/firmware for available updates.
Follow the procedure listed below to update the RP4-HD11:
- Unplug all connectors from the RP4 interface
- Set the rotary switch to position 0
- Connect the PAC-UP
- Update the interface
- Disconnect the PAC-UP
- Set the rotary switch back to normal operating position
- Re-connect the RP4 to the vehicle
![]() Pacific Accessory Corporation® | Clearwater, FL 33760
Pacific Accessory Corporation® | Clearwater, FL 33760
Ph. 866-931-8021 | [email protected]
©2015 Pacific Accessory Corporation
www.pac-audio.com
Rev. 012015


