INTRODUCTION
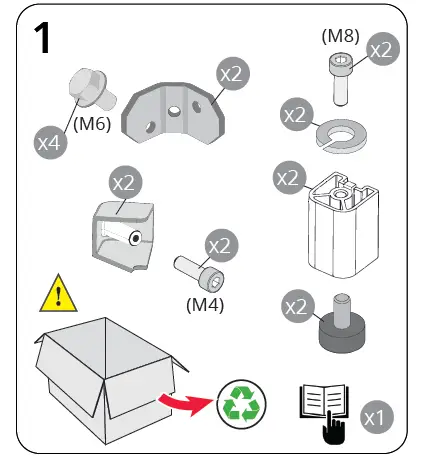
- Take the parts out of the box.
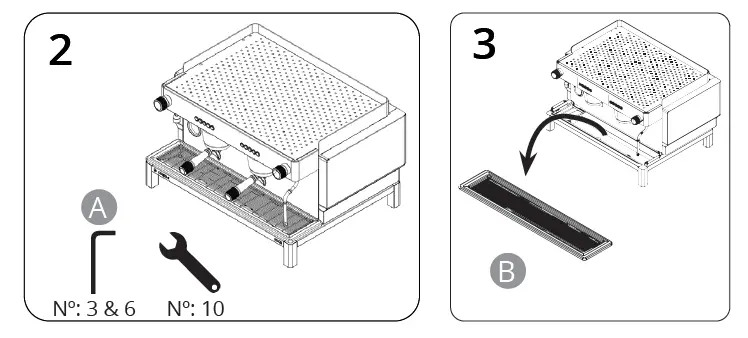
- Prepare a spacious and clean area to work. A wrench (nº10) and allen hex key (nº 3 & 6) will be needed. (A)

- Remove the dip tray, set it aside. (B)

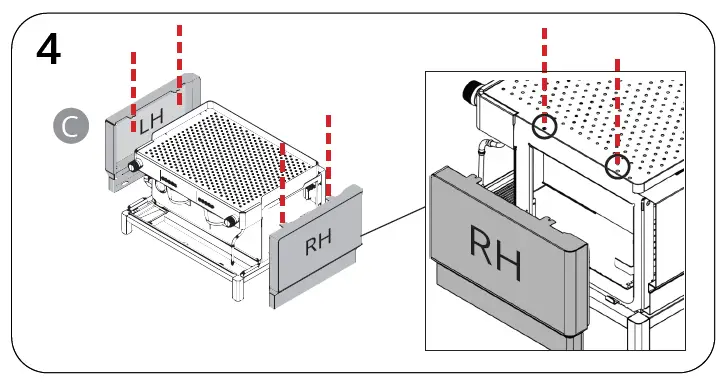
- Side panels: Loose the four screws marked (C). Side panels should be removed easily.
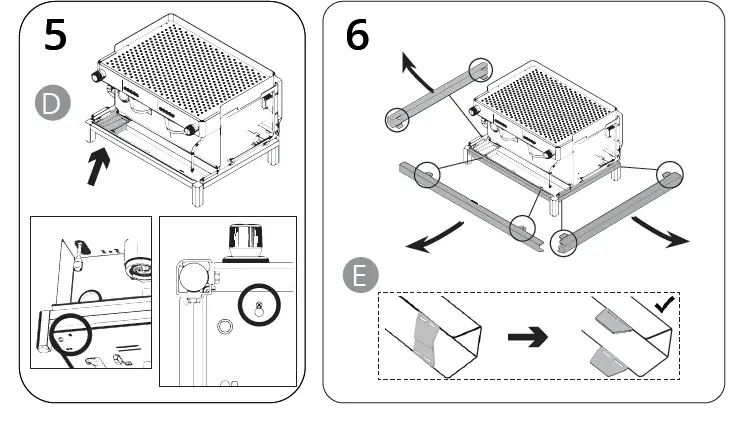
- Drain cup: Loose the screw below the machine (D). Move the drain cup in order to step 6 can be done easily. DO NOT remove it or disconnect anything.

- Turn 90º degrees the metal flexible tab marked (E).

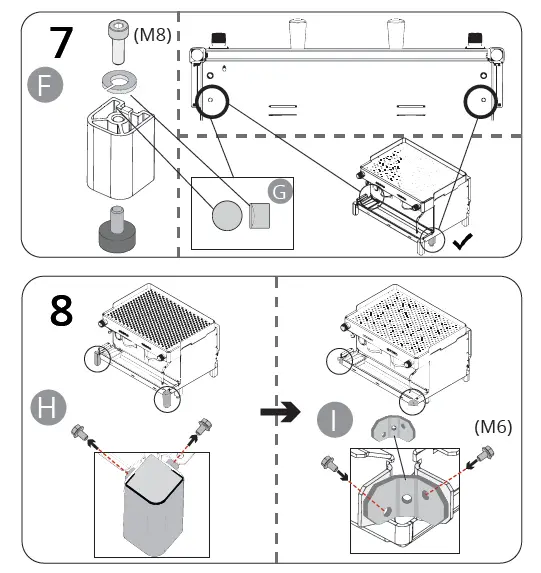
- Assembly the new feet (F). Locate the pin and screw it (G). (Screw M8 + Washer + allen hex key nº 6 will be neded).

- Dismount the old feet (H) and remove the 2 screws. Place the new part and screw it (I). (Screw M6 + wrench nº10 will be needed).

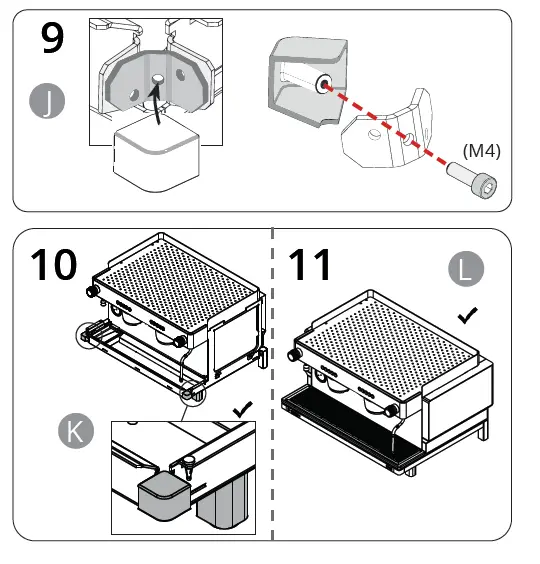
- Place and screw the new corner part (J). (Screw M4 + allen hex key nº 3 will be needed).
- New feet are now in place (K).
- Reassembly the rest of the parts into the machine (reverse steps from 6 to 3). Machine should now look fully assembled with the new feet (L).