ZK Teco KF1000 Series Face Reader
Product Overview
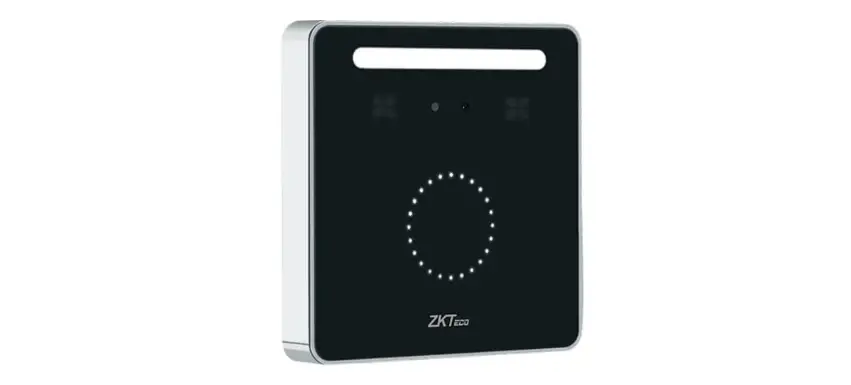
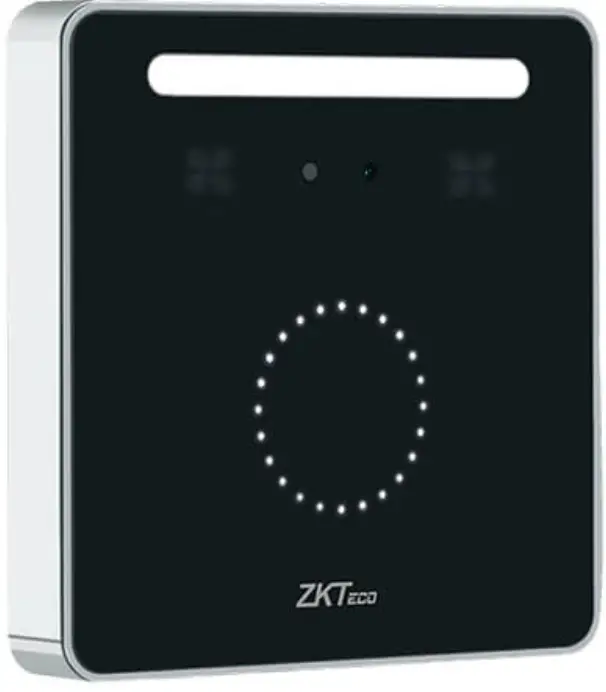
KF1100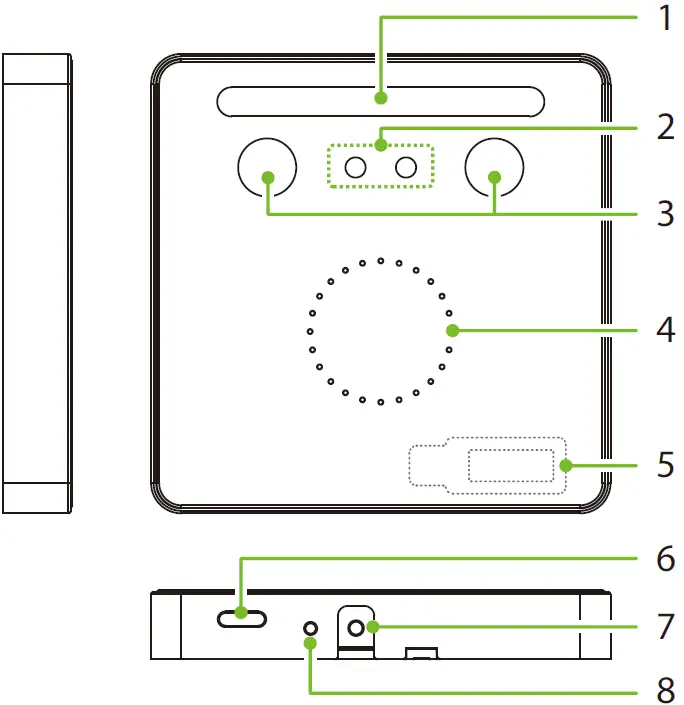
 KF1200
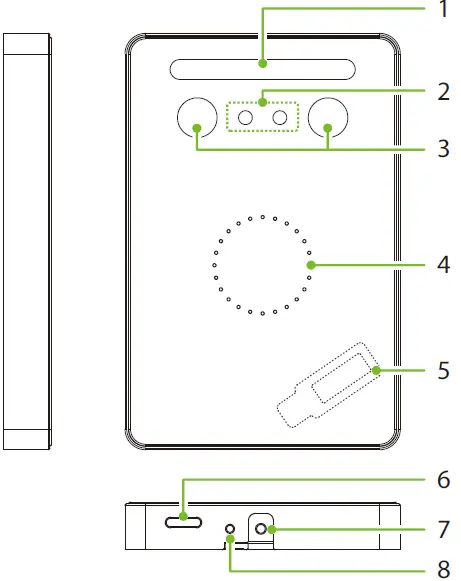
Note:
Features and parameters with ★ mark are not available in all devices.
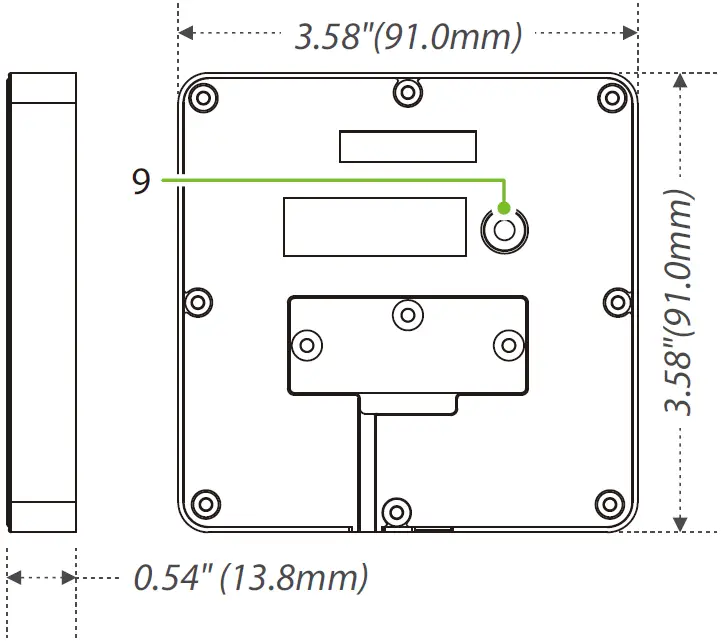
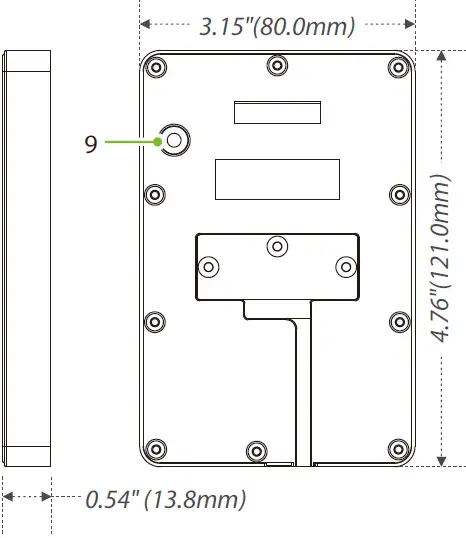
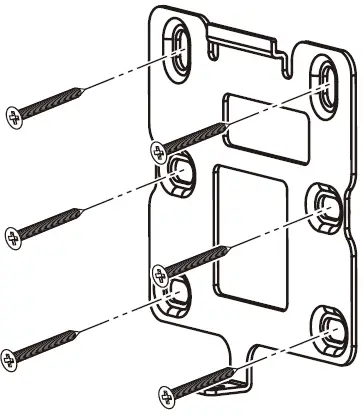
Back Plate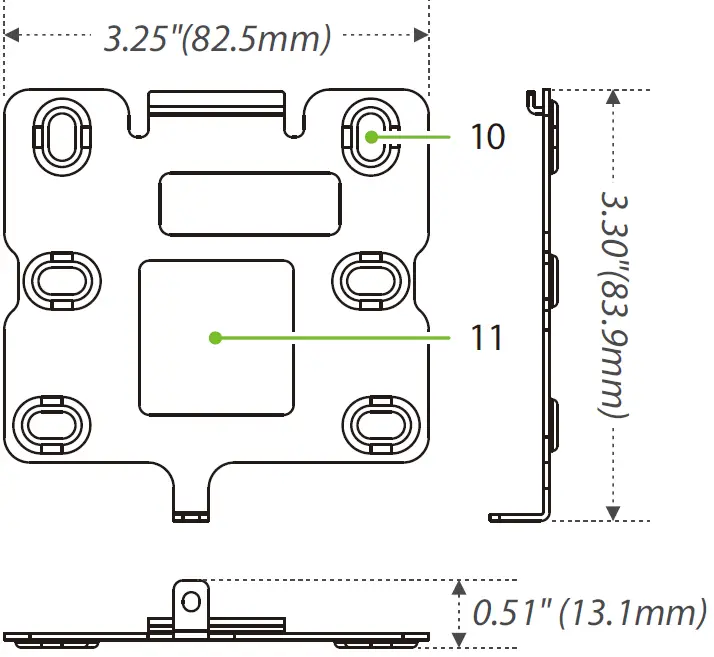
| No. | Description | No. | Description |
| 1 | Flash | 6 | Speaker |
| 2 | Camera | 7 | Tamper Switch |
| 3 | Near-Infrared Flash | 8 | Restart Button |
| 4 | LED Indicator | 9 | Reset Button |
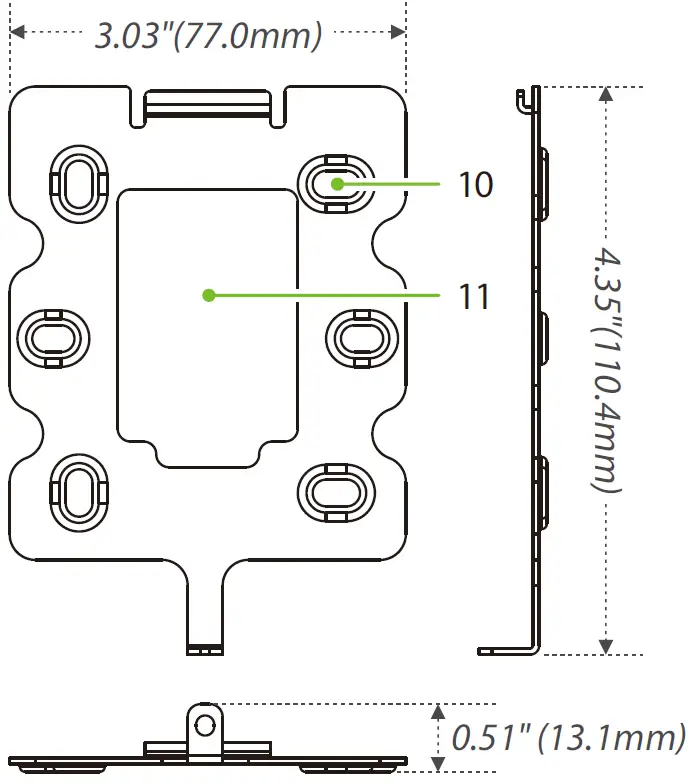
| 5 | Receive Antenna | 10 | Mounting Hole |
| Card Reading Area | 11 | Wiring Hole |
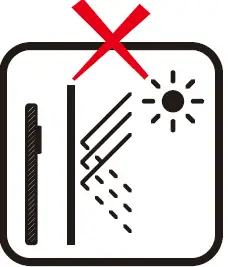
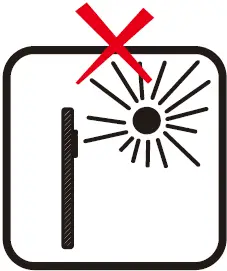
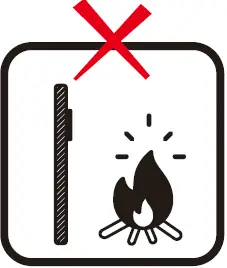
Installation Environment

- INSTALL INDOORS ONLY

- AVOID INSTALLATION NEAR GLASS WINDOWS

- AVOID DIRECT SUNLIGHT AND EXPOSURE

- AVOID USE OF ANY HEAT SOURCE NEAR THE DEVICE
Device Installation
Install on the wall
- Attach the mounting template sticker to the wall, and drill holes according to the mounting paper.
- Secure the back plate on the wall with the wall mounting screws.
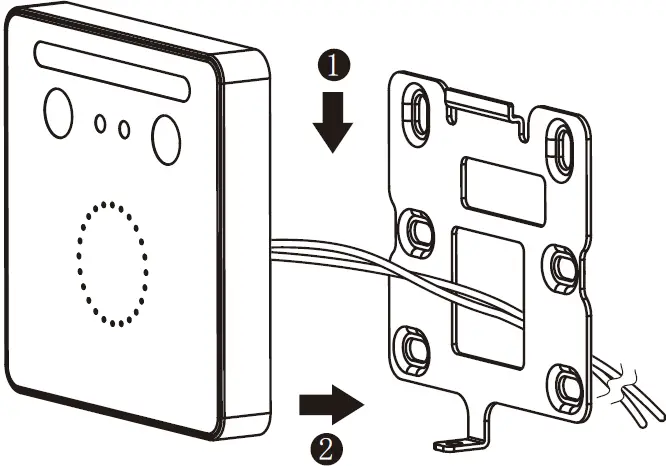
- After passing the wires through the wiring hole and connecting them to the device, and then attach the device to the back plate from top to bottom.
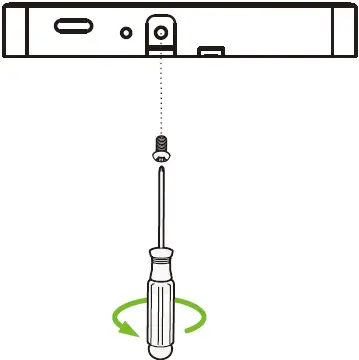
- Fasten the device to the back plate with a security screw.
Note:
The installation method of KF1200 is the same as that of KF1100. Only KF1100 is used as an example, and will not be repeated here again.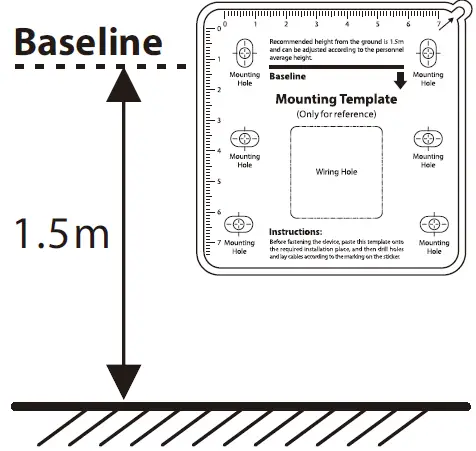
Standalone Installation
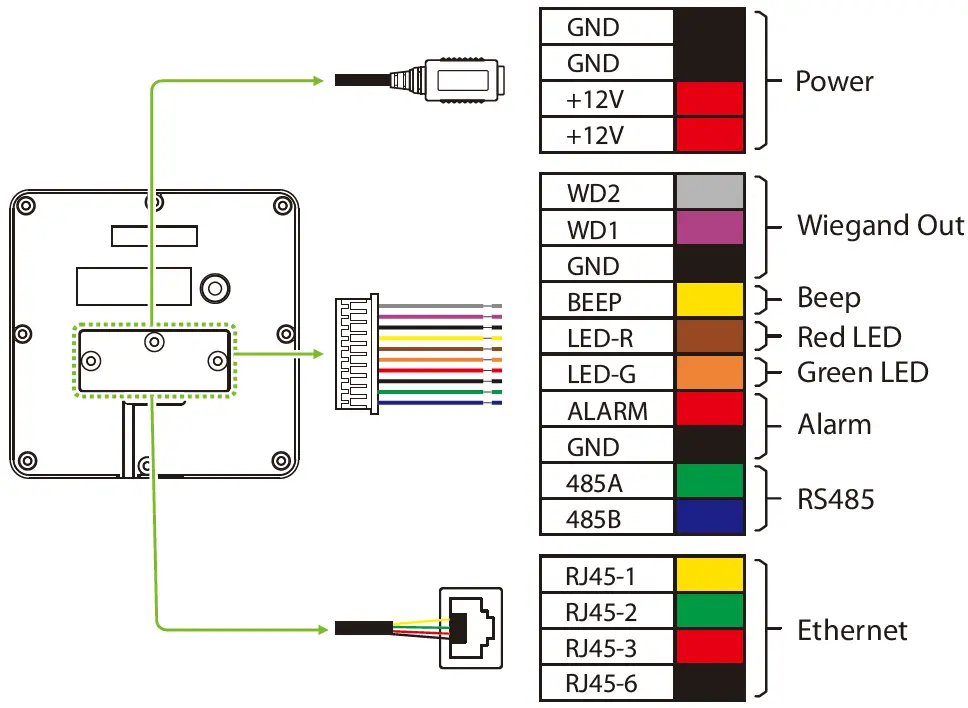
Terminal Block
Power Connection
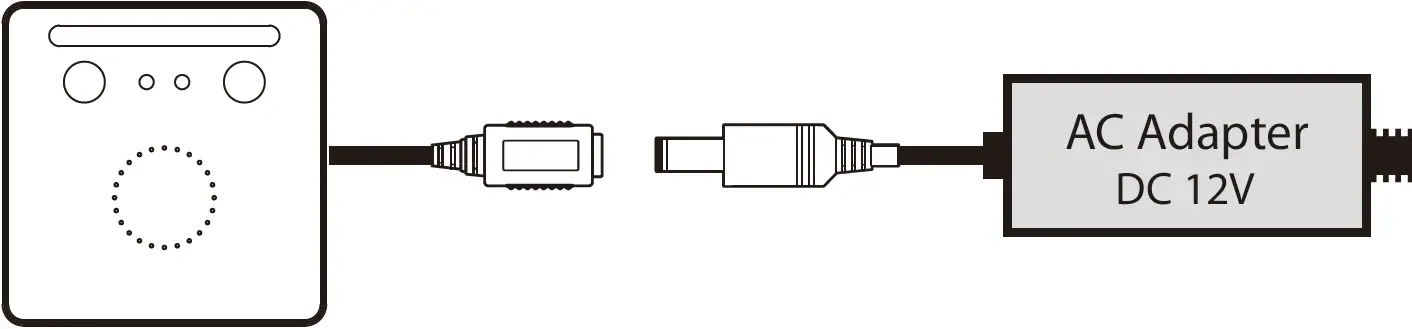
- Minimum AC adapter:12V, 1.5A, Recommended AC adapter:12V, 3A.
- Use an AC adapter with a higher current rating to share power with the other devices.
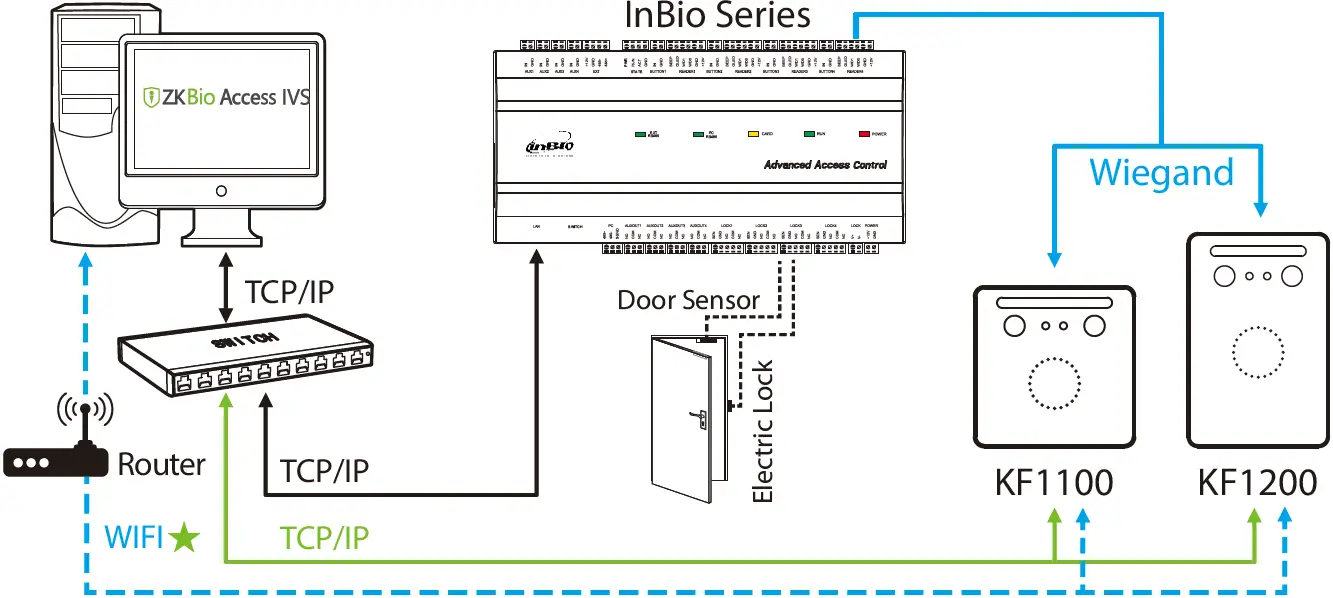
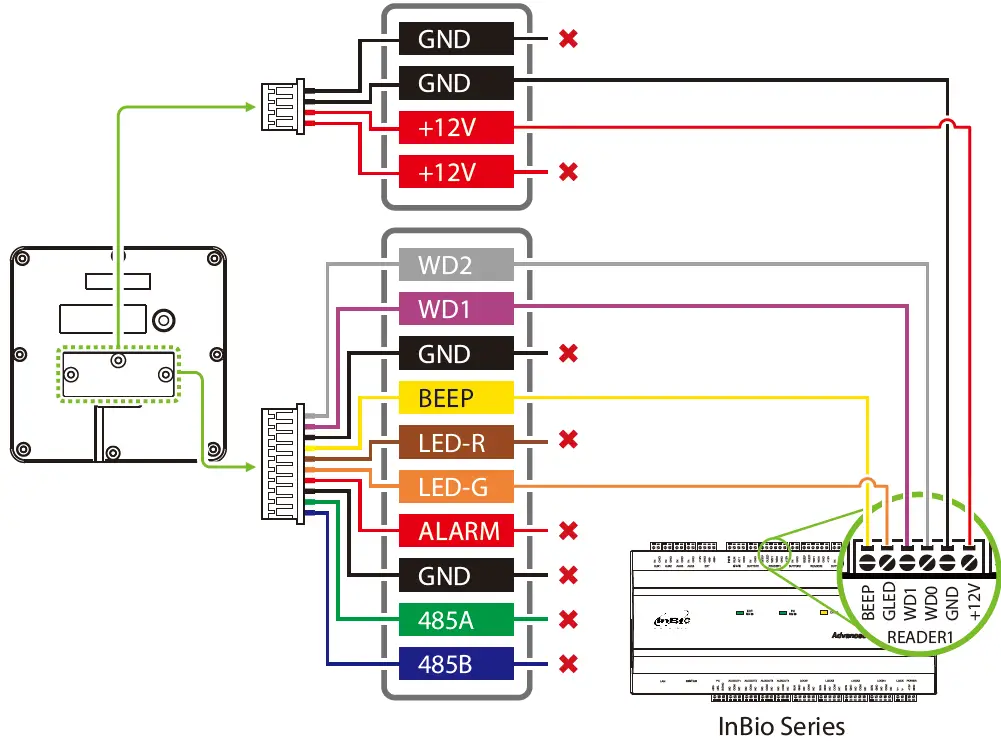
In Bio Connection
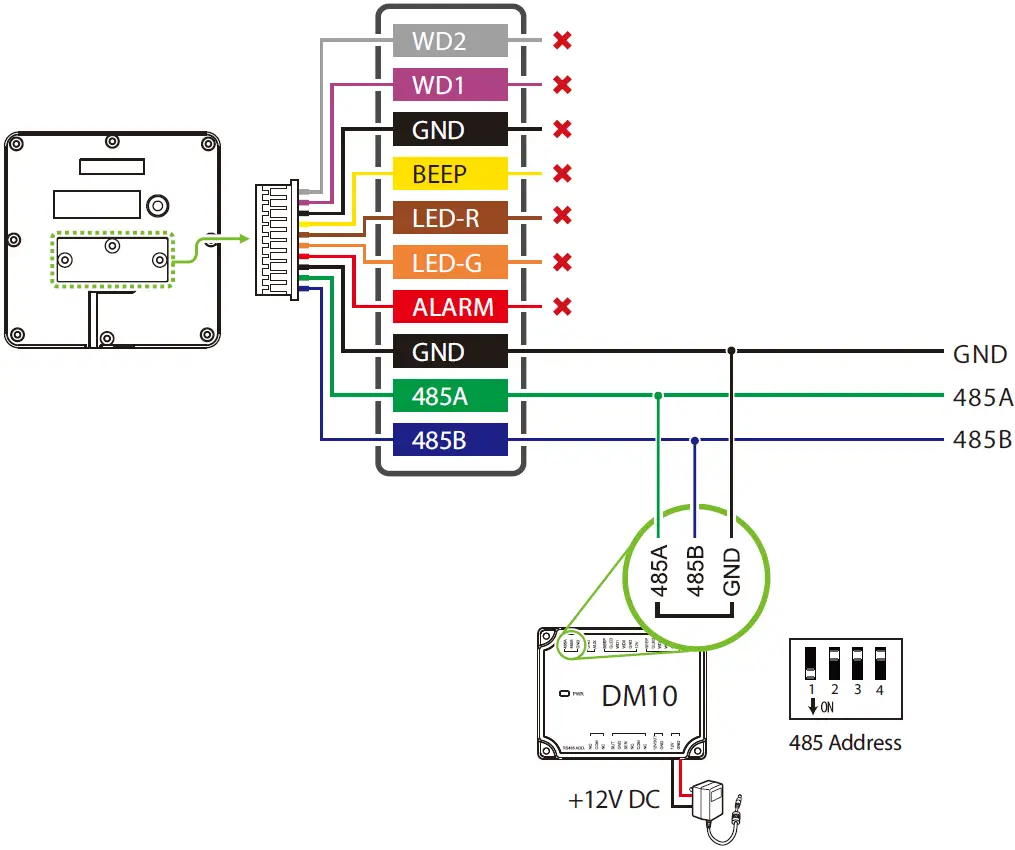
DM10 Connection
 Note:
Note:
- You need to manually enable the DM10 function on the Web Server to access. The path: [Advanced Settings] > [Serial Comm] > [Serial Port] > [Dm10].
- A KF1000 series only supports connecting one DM10.
- Set the 485 address of DM10 to 1.
- Each device requires a separate power supply.
- For more details, please refer to the User Manual.
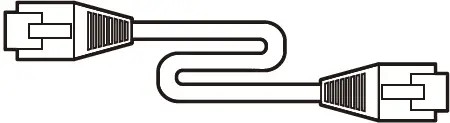
Ethernet Connection
Connect the device and the computer software over an Ethernet cable. As shown in the example below:
- Default IP address: 192.168.1.201
- Subnet mask: 255.255.255.0


- IP address: 192.168.1.130
- Subnet mask: 255.255.255.0
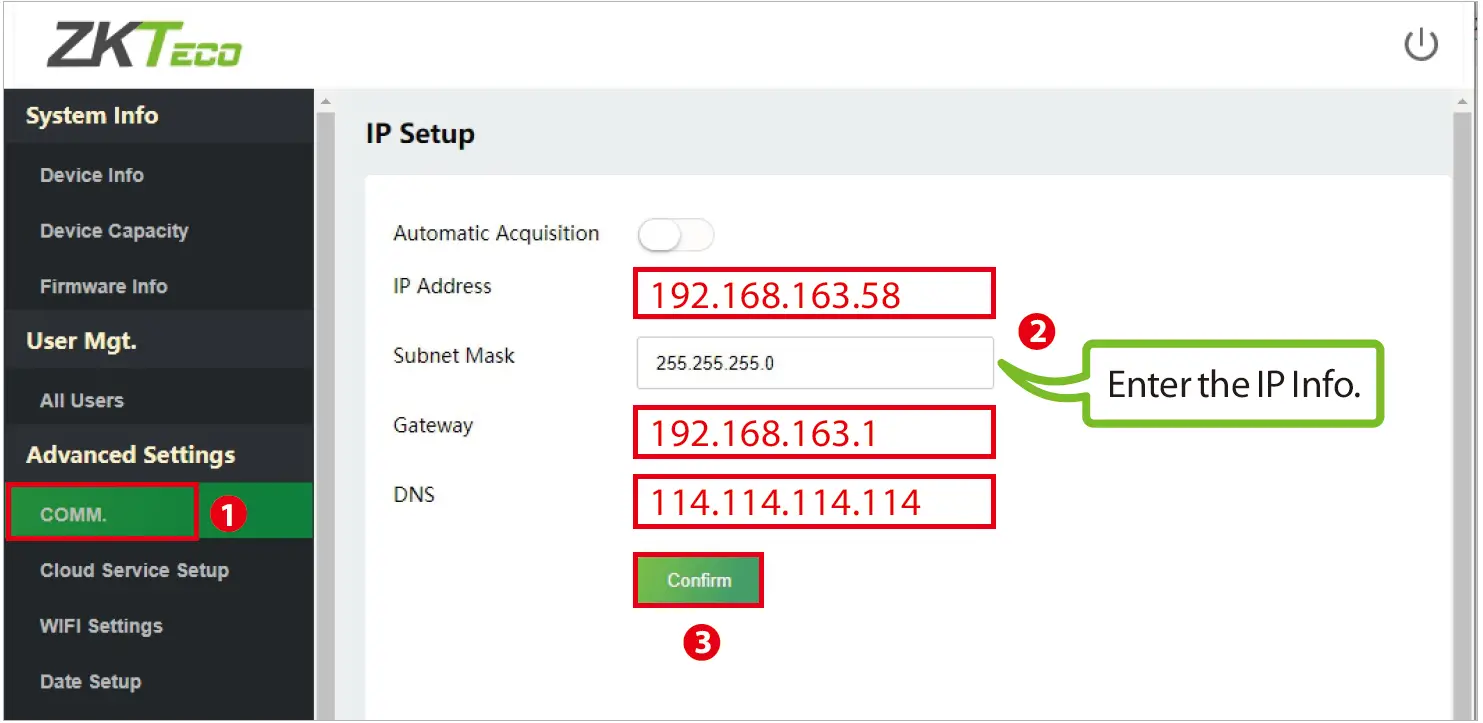
On the Web Server page, click [Advanced Settings] > [COMM.] > [IP Address] to change the IP address and then click [Confirm].
Note:
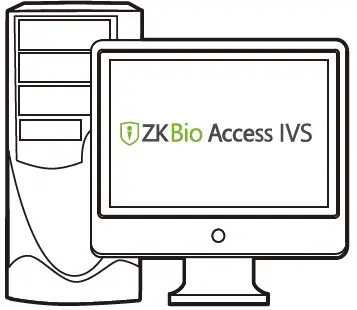
In LAN, the IP addresses of the server (PC) and the device must be in the same network segment while connecting to the ZK Bio Access IVS software.
Login to the Web Server
After the device is powered on, connect the device using a cable network to access the Web Server by entering the IP address and the server port in the address bar of your browser. The IP address is set as: https://device IP address: port. By default, the port is 1443. For example: https://192.168.1.201:1443 User name: admin Password: admin@123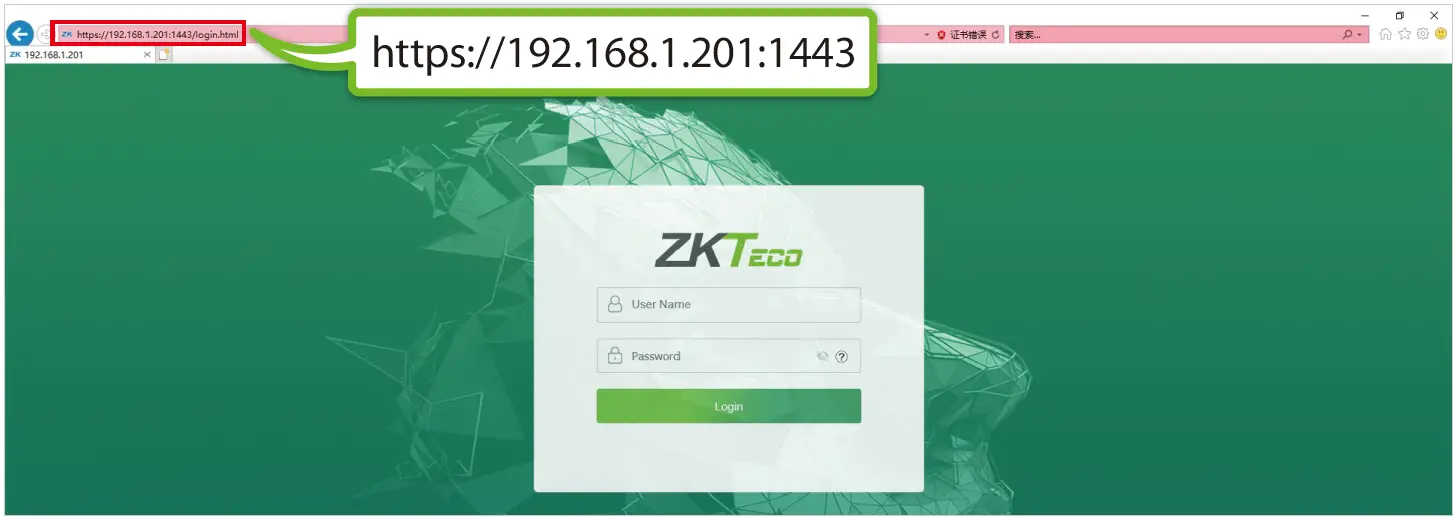 Note:
Note:
After logging in for the first time, the user needs to change the original password and then log in again before it can be used.
Quick Start
![]()
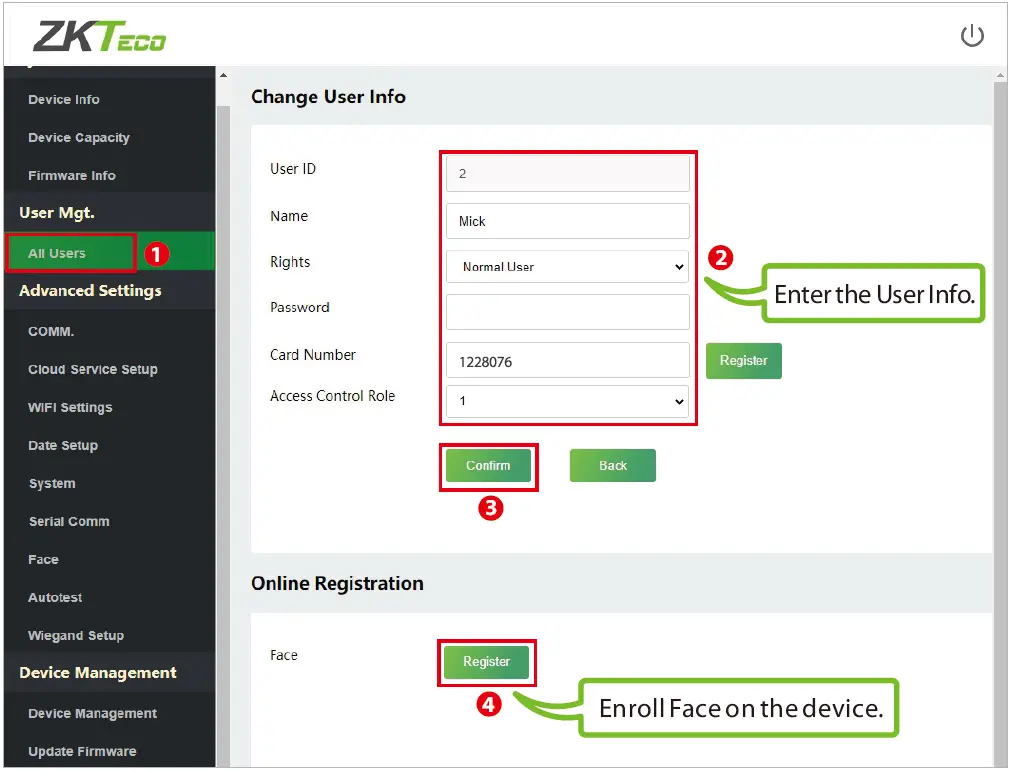
User registration
- Registering on the Web Server
Click [User Mgt.] > [All Users] > [New User] to register a new user on the Web Server. Enter the User ID, Name, Password, Card, setting user role and access control role. After entering the basic information of the user, click [Confirm], and then select the face and click [Register]. Follow the device prompts to face the camera and re-cord the face until the LED indicator turns green.
 - Registering on the software (ZK Bio Access IVS)
 After entering the basic information of the user, click [Confirm], and then select the face and click [Register]. Follow the device prompts to face the camera and re-cord the face until the LED indicator turns green.
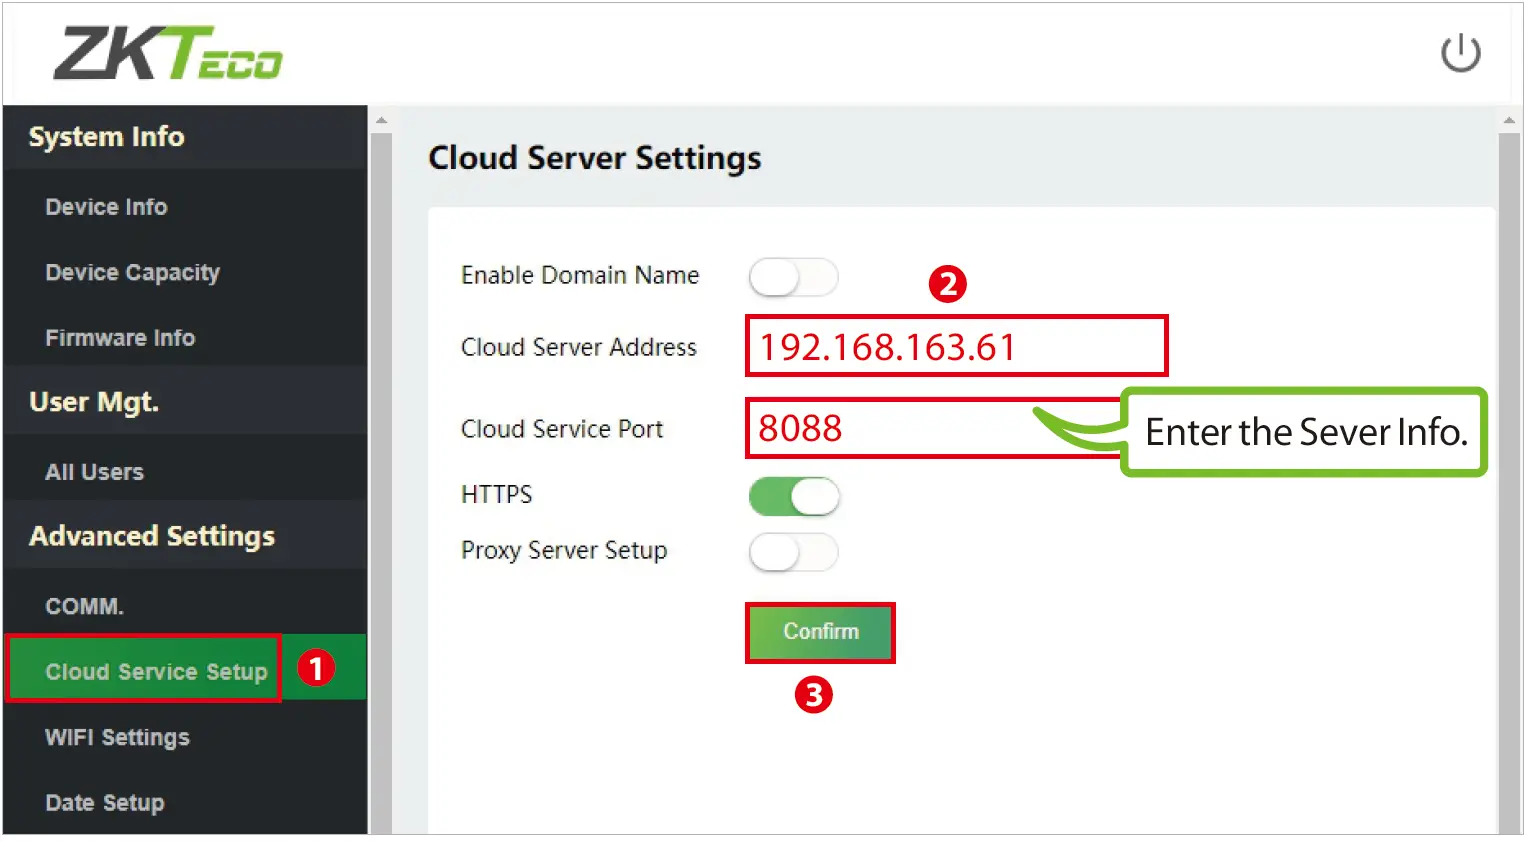
- Click [Advanced Settings] > [COMM.] > [IP Address] to set the IP address and then click [Advanced Settings] > [Cloud Service Setup] to set cloud service ad-dress on the Web Server. As shown in the figure below.

 Cloud Server Address: This is the IP address after the software installation. Cloud Service Port: Default is 8088.
 - Click [Access] > [Device] > [Device] > [Search] to search the device on the software. When an appropriate server address and port is set on the device, the searched devices are then displayed automatically.

- Click [Add] in an operation column, a new window will pop-up. Select Icon Type and Area from each dropdowns and click [OK] to add the device.
- Click [Personnel] > [Person] > [New] and fill in all the required fields to register new users in the software. Note: The card number must be entered for use with the inBio series controllers.
- Click [Access] > [Device] > [Device] > [Control] > [Synchronize All Data to Devices] to synchronize all the data to the device including the new users.
For more details, please refer to the ZKBioAccess IVS User Manual.
 Cloud Server Address: This is the IP address after the software installation. Cloud Service Port: Default is 8088.
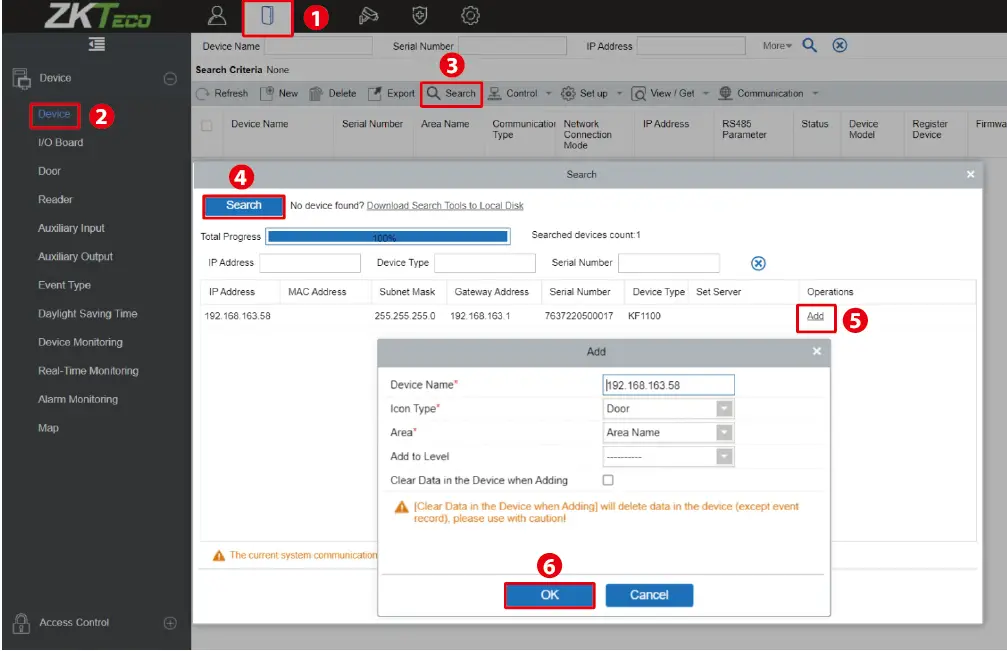
User Authentication
The terminal can detect the face within a range of 0.3 to 1.5 metres. When the device senses a change in external brightness, it changes to the face verification interface automatically and when the device indicator turns green, the verification method is successful.
View records
View records on the software
Click [Access] > [Reports] > [All Transactions] on the software to view the records.
WIFI Settings
Click [Advanced Settings] > [WIFI Settings] to enable the Wi-Fi function, set SSID and enter the password. Until the connection status shows “Connected”, which indicates that the WIFI connection is successful.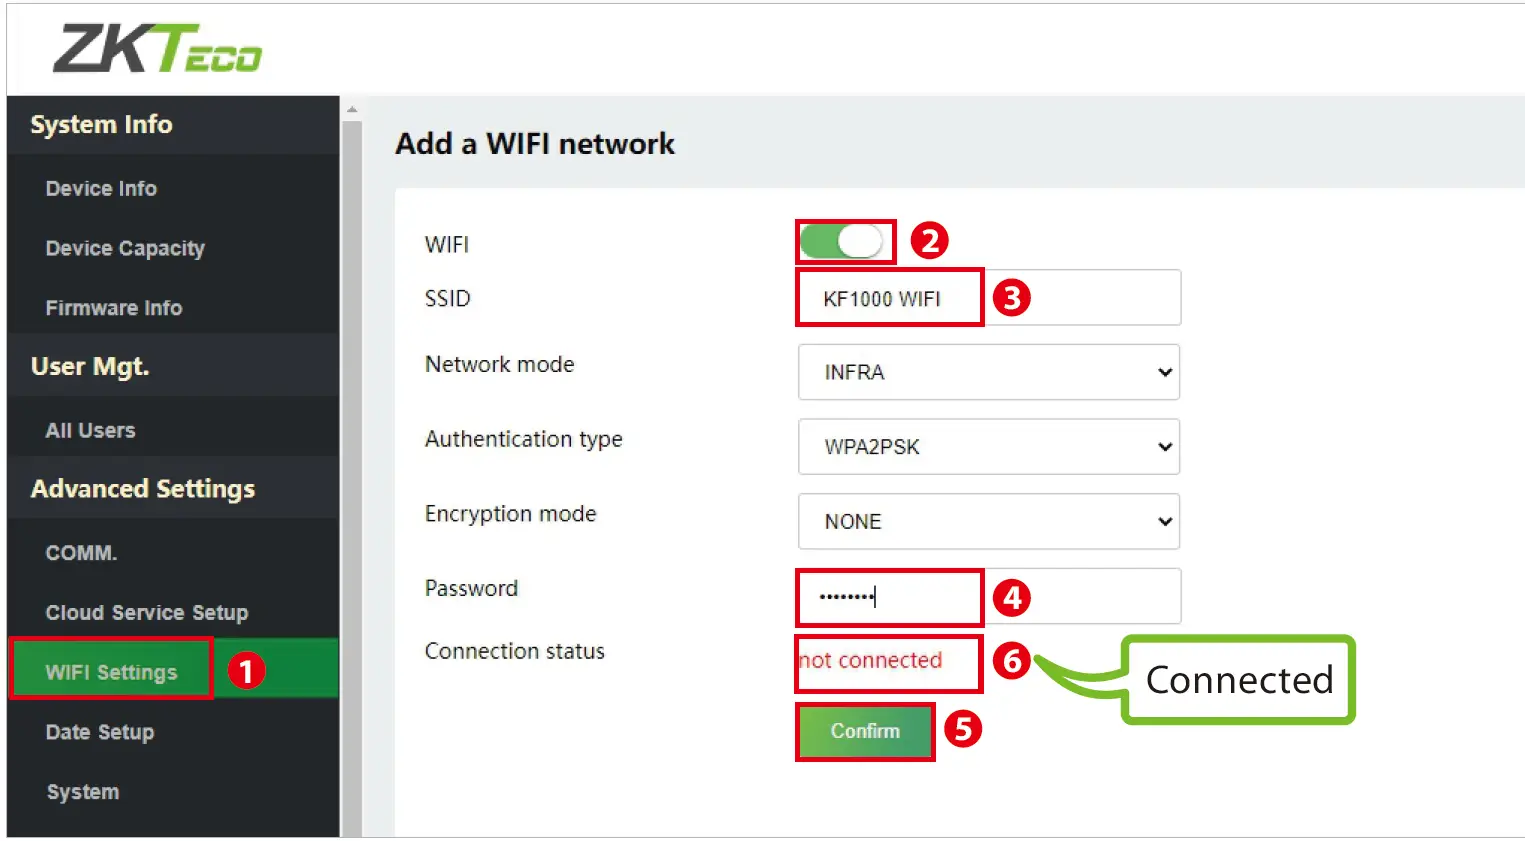
Factory Reset
If you forget the Web Server password, you can restore the factory settings by press-ing and holding the reset button for 5 seconds, and then logging in again with the initial password.
Note:
This function does not have any clear registered user data.


![Zkteco Speedface-v5l[qr] Series Visible Light Facial Recognition Terminal User Guide](https://static-data1.manualsee.com/1/img/411/2395082/2022/03/ZKTeco-SpeedFace-V5LQR-Series-Visible-Light-Facial-Recognition-Terminal-fea.png "Zkteco Speedface-v5l[qr] Series Visible Light Facial Recognition Terminal User Guide")


