![]()
V9018002 M Ceiling Lamp No. 2
Instruction Manual
V9018002 M Ceiling Lamp No. 2
contact with water is impossible | combination with a dimmer. consult the sales outlet for the correct type | the fitting must be earthed | |
work only with the indicated voltage | waste in the rubbish bin, bring it to a staging area for electrical waste | distance between the lamp and the illuminated materials/objects |
safety directions
Please study the instruction manual carefully before installing or using this product.
Keep this user manual for further reference / two persons are needed for installation.
- The luminaires may only be installed by authorized and qual ed technicians according to valid regulations for electrical installation.
- Maintenance of the luminaires is limited to their surfaces. During maintenance, no moisture can come into contact with any areas of the terminal connections or voltage control parts.
- Take account of the minimum separation distance from other objects and the room required around the fitting.
- If in any doubt, consult a professional, taking local installation requirements into account. Some countries stipulate that lighting may be installed only by registered installers.
- When replacing a lamp, wait for it to cool, for a minimum of 5 minutes.
- Clean with a clean, dry cloth or brush, use no solvents or abrasives. Avoid dampness on all electrical components.
- Take account of all available technical information.
- If the external flexible cable or cord of this luminaire is damaged, it shall be exclusively replaced by the manufacturer or his service agent or a similar qual ed person in order to avoid a hazard.
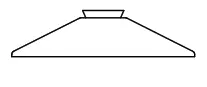
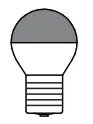
| 1x ceiling lamp (frame + power cord + ceiling pot) | 2x set wall brackets + spacers (wall plugs included) | 1x lamp shade | 1x Led bulb silvered cap 4W – 350lm 2700 K (dimmable) energy class A+ |
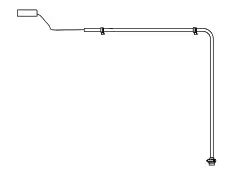 | 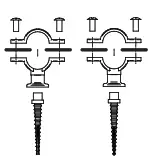 |  |  |
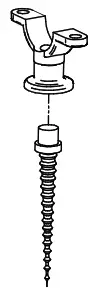
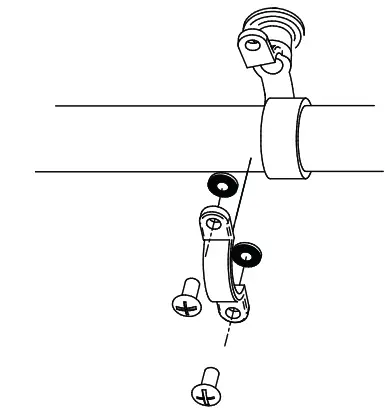
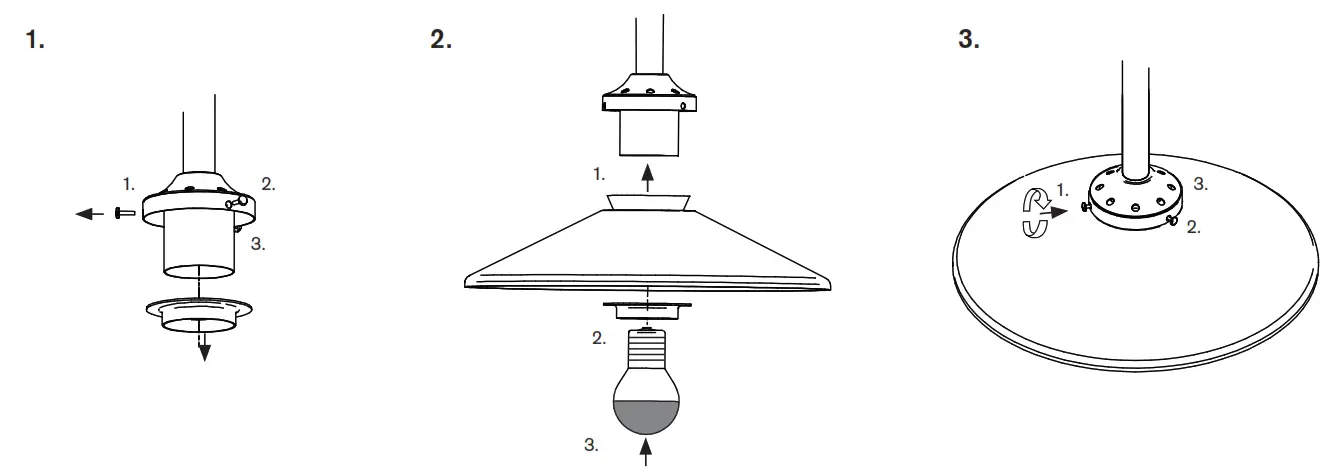
- assemble these two parts of the back part

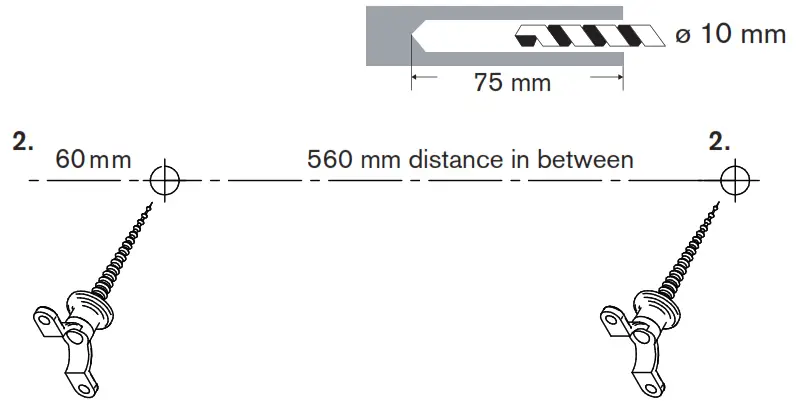
- drill two holes with the requested diameter (ø 10 mm) for the appropriate wall plugs according to your type of ceiling

- screw the back part of the wall bracket into (by hand) the wall plug
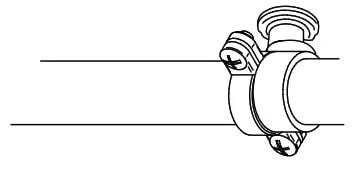
- screw carefully the front part of the wall bracket on the back part (by hand) make sure the spacers are in between

- take care:
– do not screw the wall brackets tight
– align carefully the correct vertical hanging position
– tight both brackets
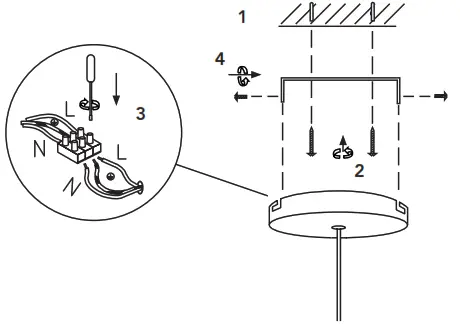
- installation of the ceiling pot