![]() The Brighter Choice
The Brighter Choice
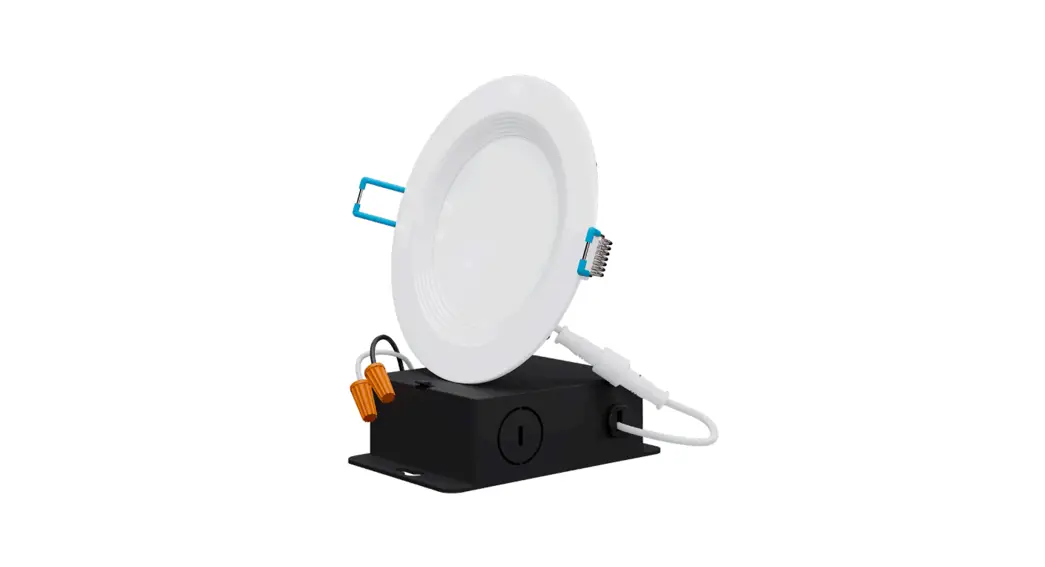
SUNCO’S 4” SLIM DOWNLIGHT
Install Guide and Manual
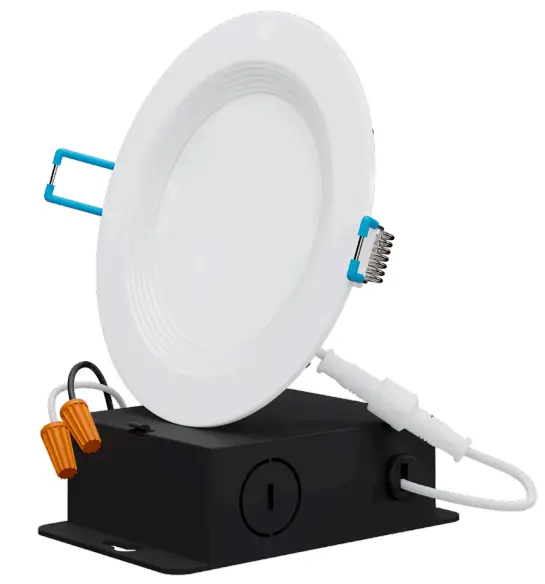
COMPONENTS
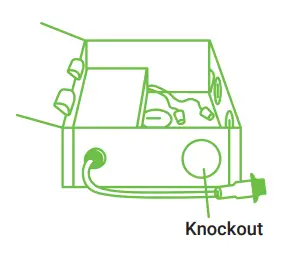
![]() IC Rated Junction Box
IC Rated Junction Box
EASY INSTALLATION
- Turn off a circuit breaker that provides power to the light switch for the recessed lights.
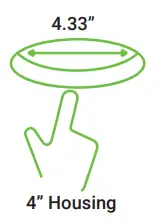
- Cut a hole in the ceiling in the desired location accordingly to the dimension indicated.

- Run an electrical wire from the power source (switch) through the mounting hole.
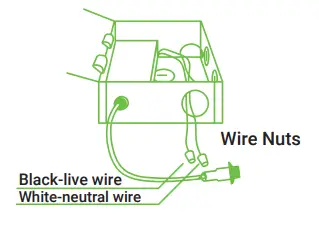
- Open the junction box and remove the appropriate knockout(s) on the side plate.

- Connect the supply wires to the junction box wires using the wire nuts provided.
• White to white
• Black to black - Tuck the connected wires inside the junction box and close the cover.

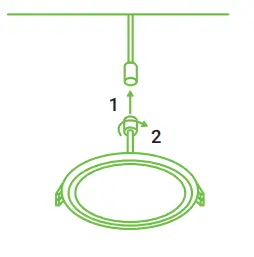
- Connect the junction box to the slim-down light.
Tighten the connector by hand.
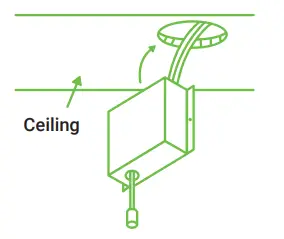
- Insert junction box through the hole in the ceiling.
• New construction applications: Hardwire box shall be secured to studs, joists, or similar fixed structural units.
• Remodel applications: Do not require the hardwire box to be firmly secured after the mounting plates studs, joists, or structural units have been concealed.
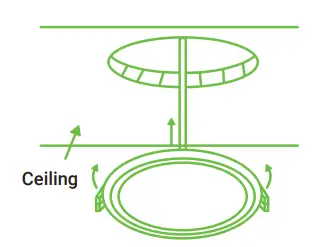
- Push up the spring clips to insert the luminaire in the opening in the ceiling.
- Turn on circuit breaker and test the light.

WARNING
All electrical connections must be in accordance with local and National Electric Code (N.E.C.) standards. Consult a qualified electrician if you are unfamiliar with proper electrical wiring connections. Please review these instructions carefully before proceeding.
WARNING: Risk of fire or electric shock. Do not alter, relocate or remove wiring during installation.
WARNING: Do not make or alter any open holes in an enclosure of wiring or electrical components during kit installation
SPECIFICATIONS
| Voltage | Indoor |
| Wattage | Polycarbonate |
| Usage | 0.68lbs |
| Housing | 7 years |
| Weight | 120V |
| Warranty | 10W |
![]()


 Installation Guide")


