
![]()
4X4 HDMI Matrix
USER MANUAL
ENJOY THE VIVID WORLD
UltraHD HDR
Features:
- Support resolution up to 3840×2160@60Hz
- HDMI input/output port support PCM, Dolby AC3, DTS5.1, DTS7.1, and DSD audio format
- Smart EDID management, make it compatible with most display devices
- Matrix status could be memorized after power down, automatically restore previous matrix status after next power on
- Support 4 configurable user preset connections
- Easy to control matrix via IR receiver, panel keypad, and PC (via LAN port or RS232 port)
- Support DVI-D single link sources and displays with the
use of HDMI-to-DVI adapters - HDCP2.2 compliant
- Support HDR
- Support L/R audio output
Packing List:
1 * 4×4 HDMI Matrix
1 * Remote control
1 * IR Receiver cable
2 * Rack-ears
1 * DC 12V Power adapter
1 * User manual
Pane Description:
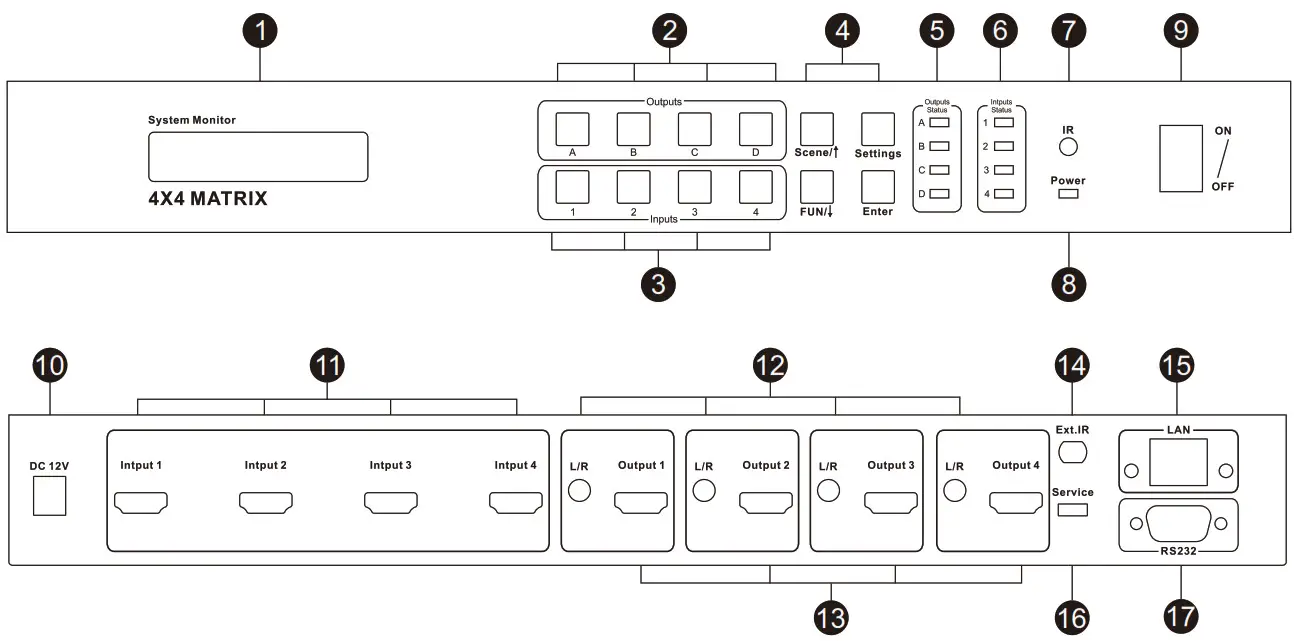
| ID | Name | Description |
1 | LCD display | Display current routing status and system setting |
2 | Output selection button | Select output channel |
3 | Input selection button | Select input port |
4 | Function select button | Scene/T: Save current routing as user preset and restore user’s preset FUN/1: Fast setting N to N mirrored routing and N to all routing Setting: Change LED time and buzzer status Enter: Enter user’s setting |
ID | Name | Description |
5 | Output status | LED indicator of output connection status |
6 | Input status | LED indicator of input connection status |
7 | IR receiver | Receive IR remote signal |
8 | Power status | LED indicator of power supply |
9 | Power switch | Power on or off the matrix |
10 | DC 12V | 12V DC power supply |
11 | HDMI input | Connect to HDMI source devices |
12 | L/R audio output | Connect to speaker |
13 | HDMI output | Connect to HDMI displays |
14 | Ext. IR | For extended IR receiver cable input |
14 | LAN port | Connect to local area network, control matrix by TCP/IP commands |
16 | Service data port | Connected to the USB port of PC for system upgrade |
17 | RS232 | Connect to RS232 connector for serial control |
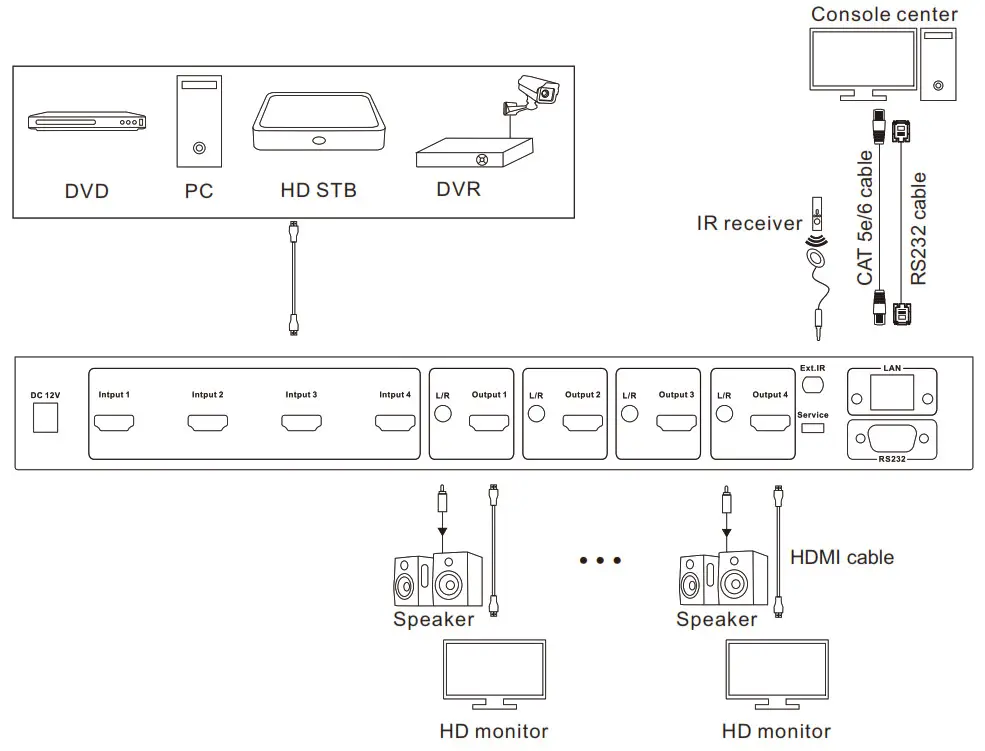
Connection Diagram:
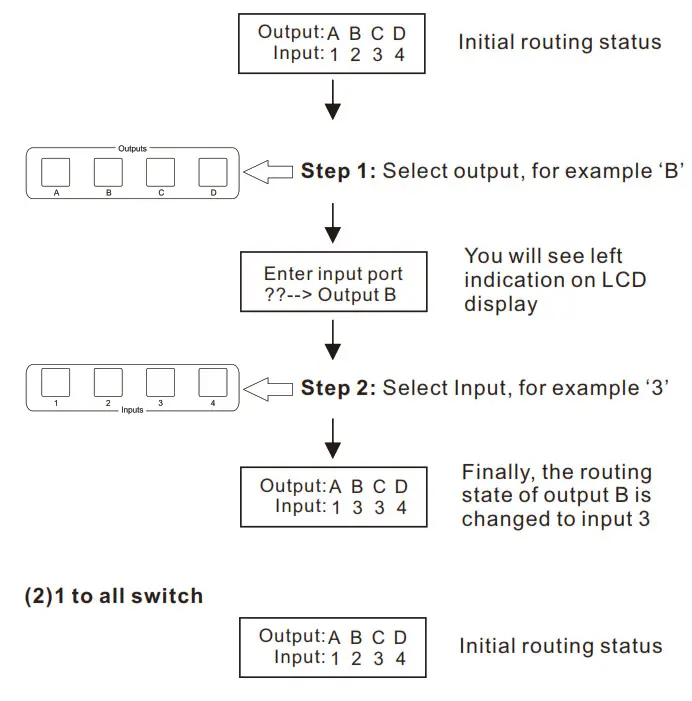
Keypad Use:
- Selecting sources and outputs by keypad
(1)1 to 1 switch


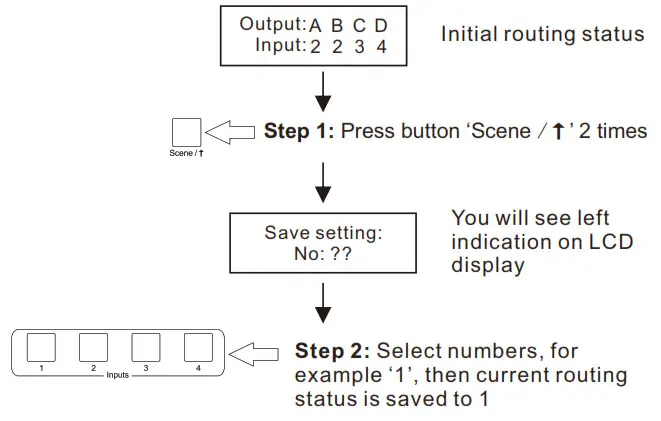
- Save preset routing status

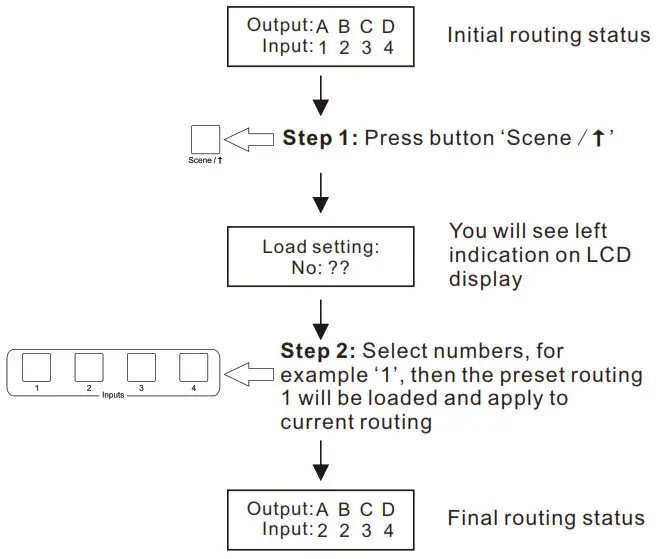
- Load preset routing status

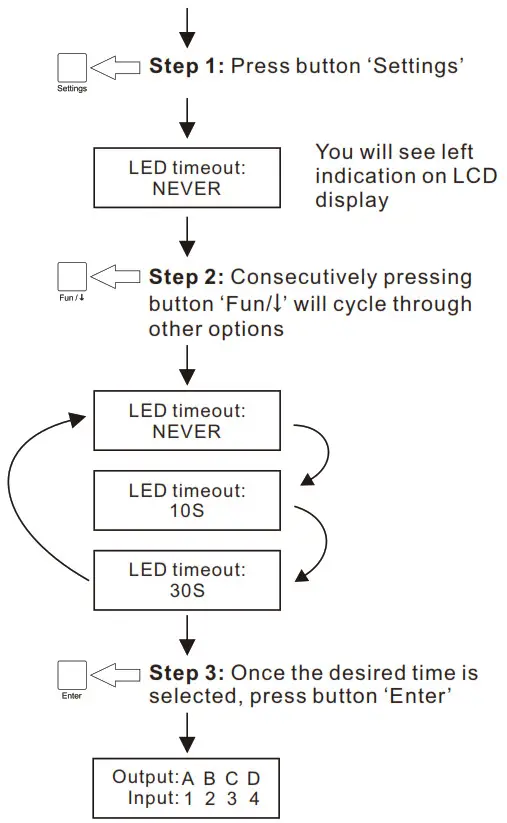
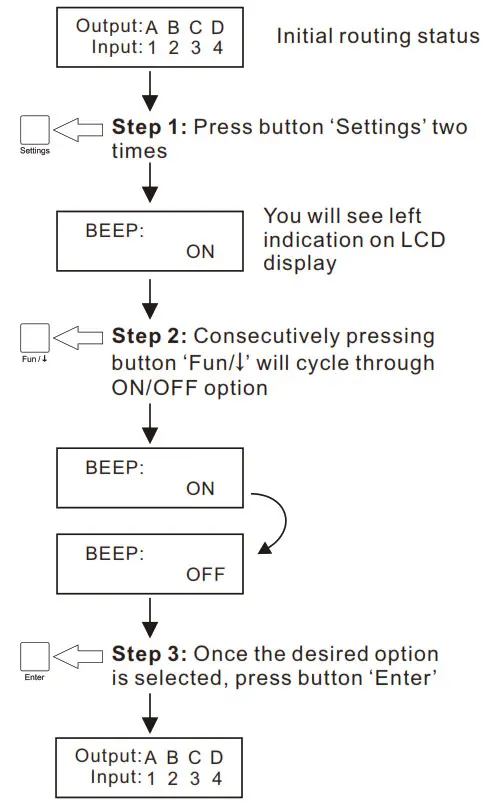
- Change LED timeout
The LED indicators on the front panel, including the backlight of the LCD display, can be turned off after seconds of inactivity. Below is how to change the settings:

- Mute/unmute buzzer


IR Remote Control:
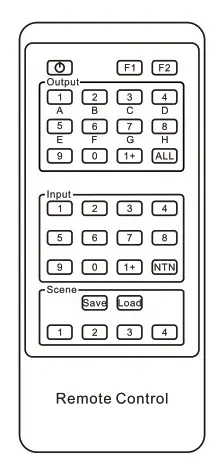
(1) 1 to 1 switch:
Step 1: Press  in the output block to select one of the output ports you are going to control
Step 2: Press![]() in the input block to select the input source which you want to be displayed on the selected output
in the input block to select the input source which you want to be displayed on the selected output
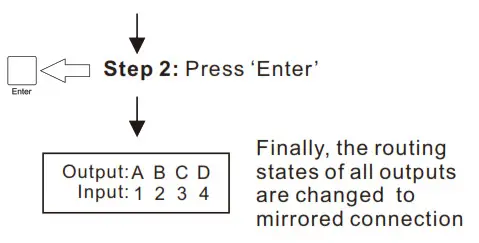
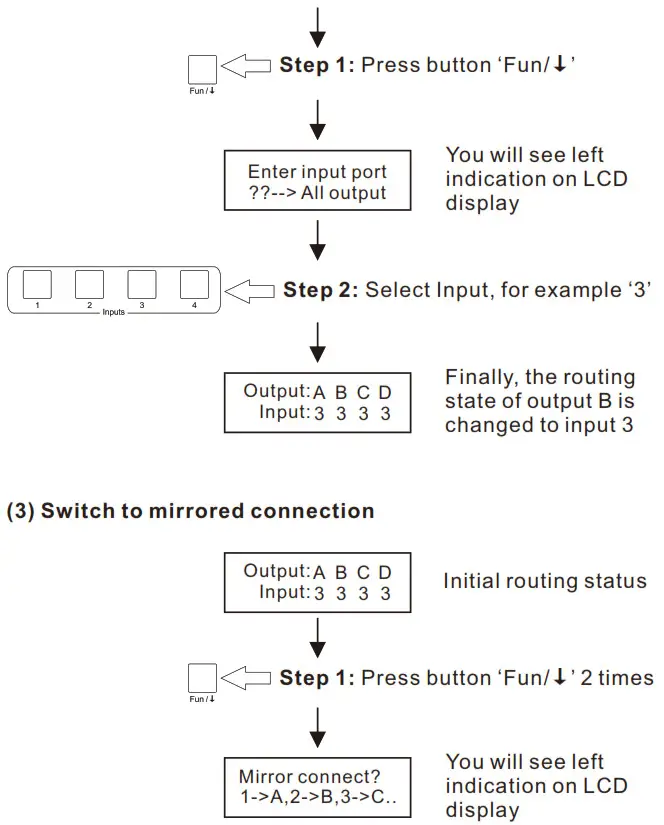
(2) Switch to mirrored connection:
Press,![]() then the routing status will be changed to Input 1 – Output A, Input 2 – Output B, Input 3 – Output C, Input 4 – Output D
then the routing status will be changed to Input 1 – Output A, Input 2 – Output B, Input 3 – Output C, Input 4 – Output D
(3) 1 to all switch:
Press![]() , then press
, then press ![]() in input block to select the input source which you want to be displayed on all outputs
in input block to select the input source which you want to be displayed on all outputs
(4) Preset routing for scenes:
Press ![]() , then press
, then press ![]() in scene block, save current routing status to user preset memory 1/2/3/4
in scene block, save current routing status to user preset memory 1/2/3/4
Press ![]() , then press
, then press ![]() in scene block, load routing status from user preset memory 1/2/3/4 and apply to current routing.
in scene block, load routing status from user preset memory 1/2/3/4 and apply to current routing.
Note: 1. For the safety request by some express company, the remote control is not equipped battery by default. Please install the button battery CR2025 before using it.
2. Unspecified buttons above are nonfunctional.
Warranty Information:
We warrant this product as free of defects in material and workmanship for a period of one (1) year from the date of shipment.
If during the period of warranty this product proves defective under normal use, we will repair or replace this product, provided that this product has not been subjected to mechanical, electrical, or other abuse or odifications. If it fails under conditions other than those covered will be repaired at the current price of parts and labor in effect at the time of repair. Such repairs are warranted for six (6) months from the day of reshipment to the buyer.


