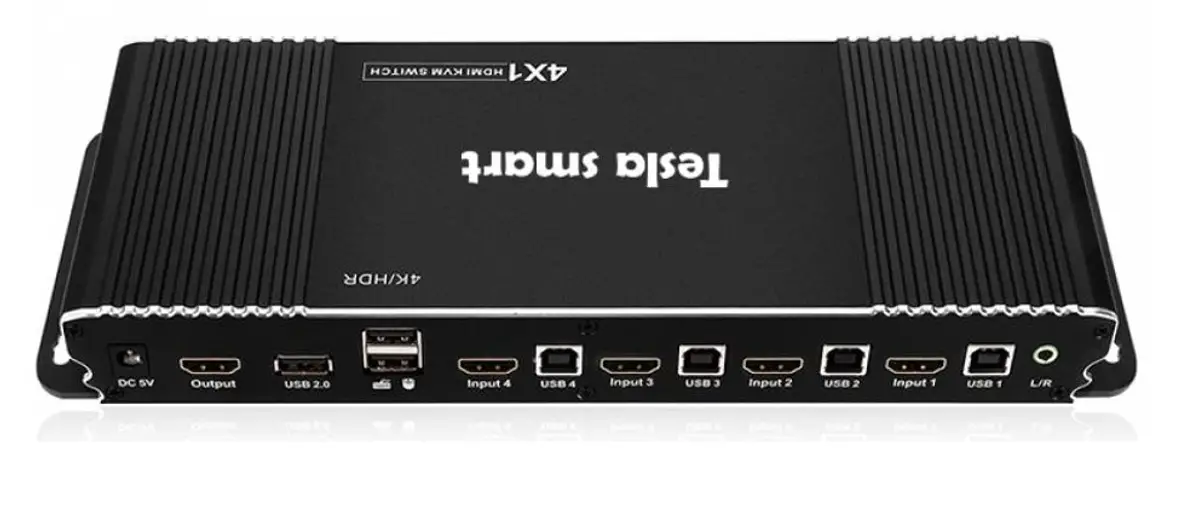
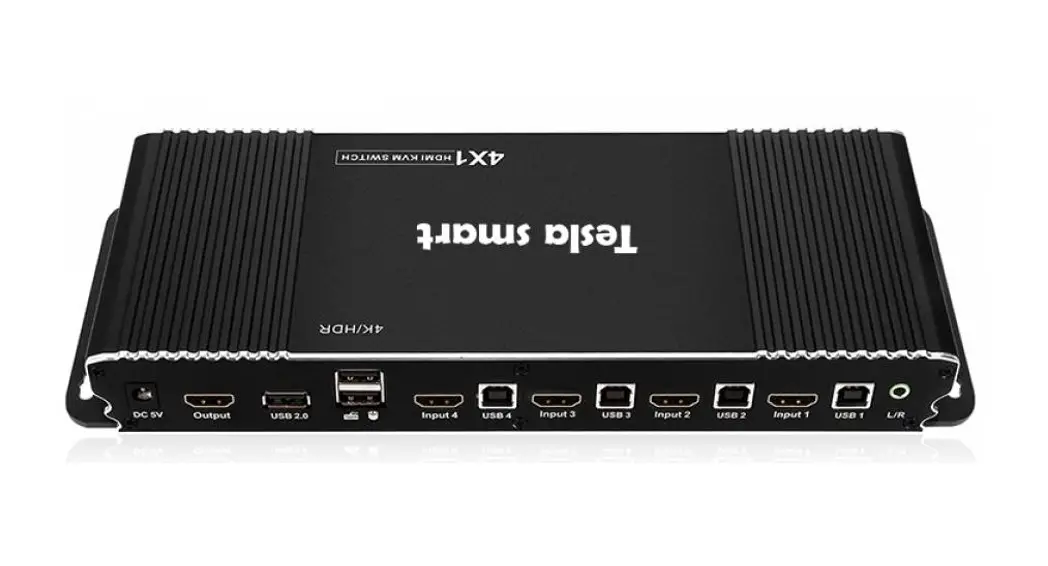
TESmart TES-HKS0401B2U-USBK 4 Port 4K@60Hz Newest HDMI KVM Switch
FEATURES
- Using only 1 set of keyboard, mouse and monitor to control 2/4
- With USB 2.0 hub port, it is possible to connect bar code scanner, USB hard drive or other USB devices to KVM
- With EDID emulators computer devices
- Support auto switching to monitor computers in a specified time interval
- Support front panel buttons, IR signals, keyboard hot keys and mouse gesture to control KVM to switch inputs
- Available to use keyboard and mouse without any delay after switch input sources
- Support resolution up to 3840*2160@60Hz 4:4:4
- HDCP 2.2 compliant
- in each input port, keep PCs always having correct display information
- Support analog L/R audio output
- Support HOR and Dolby Vision
- Support keyboard and mouse pass through mode to improve mouse and keyboard compatibility
PACKING LIST
- 1 * 2×1/4×1 HDMI KVM Switch 1 * DC 5V power adapter
- 1 * IR remote control 1 * User’s Manual
2×1 Panel Description
| ID | Name | Description |
| Power switch | Turn on or off power supply | |
| 2 | L/ROut | Analog L/R audio output |
| 3 | USB connection status | LEDs will be lit if the USB data ports are connected to the computers’ USB port |
| 4 | Input selection status | Indicate current selected input source |
| 5 | Input selection button | Select input sources |
| 6 | IR receiver | Receive IR remote signal |
2×1 Pane l Description:
| ID | Name | Description |
|
7 | Keyboard and mouse pass through mode status | LED will be lit if keyboard and mouse pass through mode is activated |
| 8 | DC 5V | 5V DC power supply |
| 9 | HDMI output | Connect to HDMI display |
| 10 | Standard USB 2.0 port | Connect to USB 2.0 device, printers, USB drives, barcode scanner |
| 11 | Keyboard and mouse input | For USB keyboard and mouse input, including wireless keyboard and mouse |
| 12 | HDMI input | Connect to HDMI source devices |
| 13 | USB data ports | Connect to PC by USB type B to type A cable |
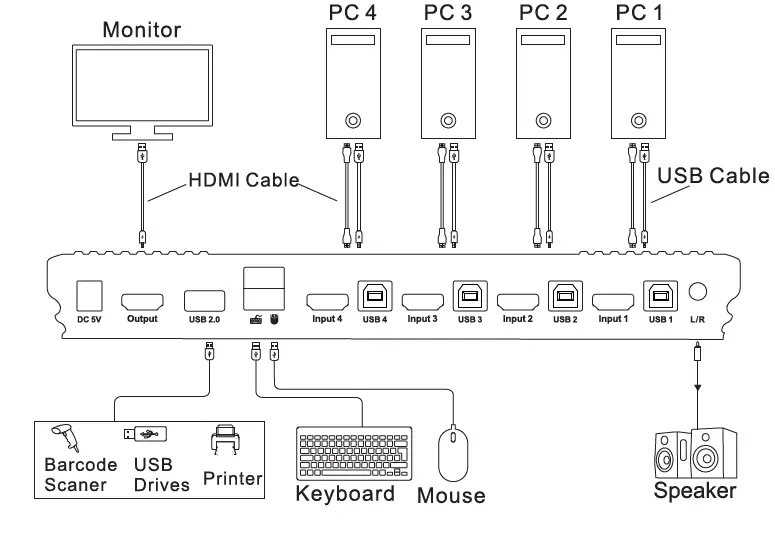
2×1 Connection Diagram
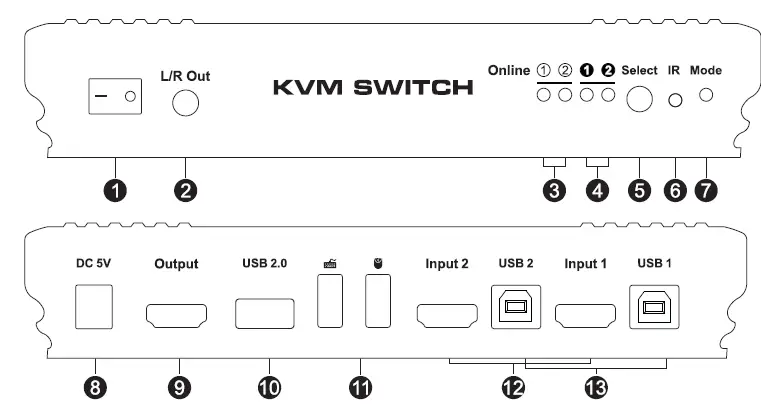
4×1 Panel Description
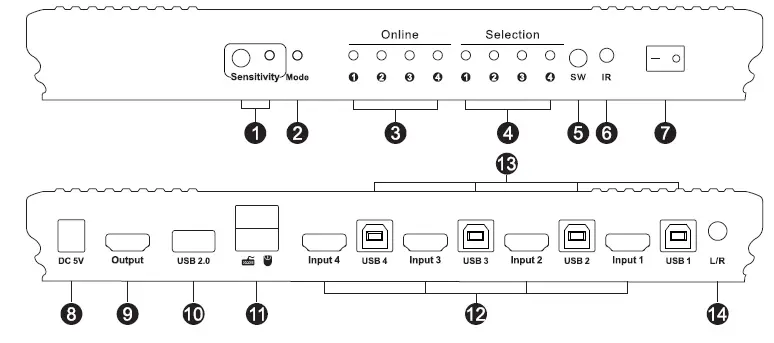
| ID | Name | Description |
| Mouse sensitivity adjust button and indicator | Press button to change the sensitivity of the mouse fast switching mode | |
| 2 | Keyboard and mouse pass through mode status | LED will be lit if keyboard and mouse pass through mode is activated |
| 3 | USB connection status | LED will be lit if the USB type B port connected to computers and computers are on |
| 4 | Input selection status | Indicate current selected input source |
4×1 Panel Description
| ID | Name | Description |
| 5 | Input selection button | Select input sources |
| 6 | IR receiver | Receive IR remote signal |
| 7 | Power switch | Turn on or off power supply |
| 8 | DC 5V input | DC 5V power supply |
| 9 | HDMI output | Connect to HDMI display |
| 10 | Standard USB 2.0 port | Connect to USS 2.0 devices, printer, barcode scanner, USS drives, etc |
| 11 | Keyboard and mouse input | For USS keyboard and mouse input, including wireless keyboard and mouse |
| 12 | HDMI input ports | Connect to HDMI source devices |
| 13 | USB data ports | Connect to PC by USS type S to type A cable |
| 14 | L/ROut | Analog L/R audio output |
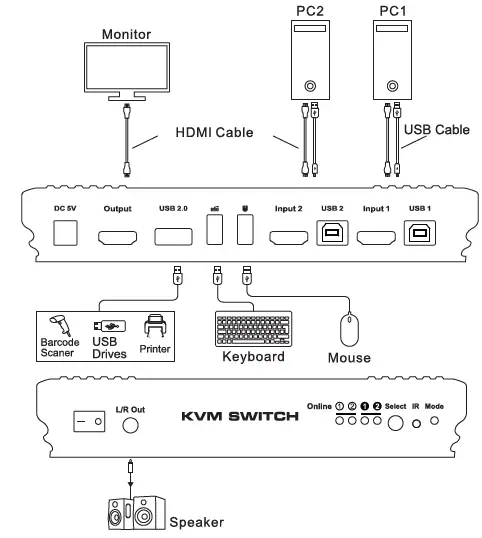
4×1 Connection Diagram:
HOW TO USE
- Setup the connection according to the connection diagram. 2.After all the PCs are started in step 1, then you can switch to any PC by keyboard hot keys, IR keys or the key pad on the KVM front panel. (For example, if you want to control the PC connected to HDMI in
- just press the [SW] button on front panel, or press digit button [2] on remote control, or the keyboard hotkey commands described following)
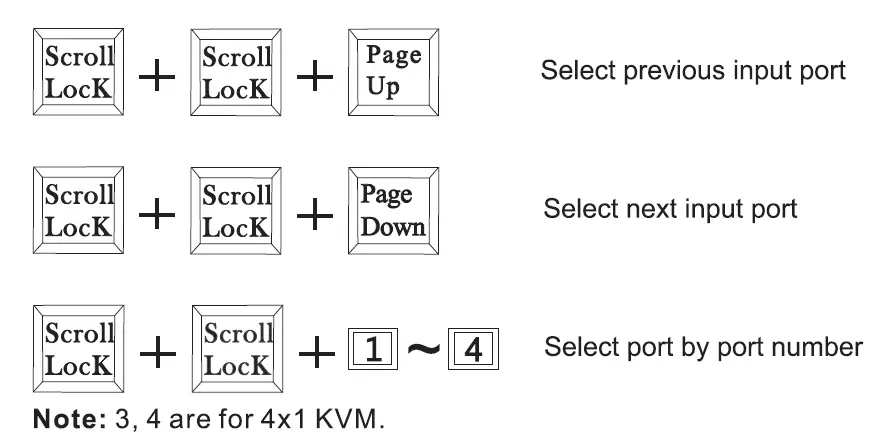
HOW TO USE KEYBOARD HOT KEYS :
- Hit [Scroll Lock] key twice within 2 seconds, the buzzer will beep once when Scrollock is pressed the second time .
- After step 1 enter following hot key commands within 3 seconds, the KVM will execute the corresponding commands.
Enable or disable buzzer sound

Enable or disable fast switching mode (Mouse gesture mode If fast switching mode is activated, then double hit left or right bound of the screen with mouse pointer in 1 second, KVM will switch to previous or next input.

Turn on auto switching mode
Note: The KVM will automatically loop among all the powered on input source within a specified time interval. Default auto switching time interval is 6 seconds, you are able to change this value by following hot key commands:
Increase or decrease auto switching time interval
Note:1 second per step, the time is up to 250 seconds.
Turn off auto switching mode
Note: Execute this hotkey command to exit auto switching mode.
Turn on/off keyboard and mouse pass through mode
Note: For the best compatibility, it is better to turn on keyboard and mouse pass through mode. In this mode, the keyboard and mouse are dynamically mapped to computer, so you are able to use special keyboard and mouse that with multimedia keys or other customized keys
HOW TO CHANGE THE HOT KEYS COMBINATION:
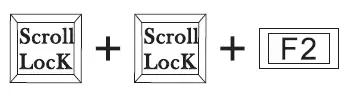
If no [Scrol ILock] key on your keyboard or the [Scroll Lock] key is used for other functionality, you can take right [Ctrl] hotkey instead of [Scroll Lock] key by below two ways:
- Press front panel button [SW] until you hear the buzzer is beeping, then restart the KVM.
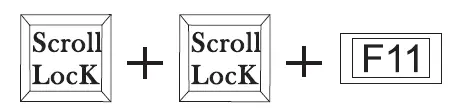
- Execute hotkey command [Scroll Lock]+[Scroll Lock]+[F1 ].
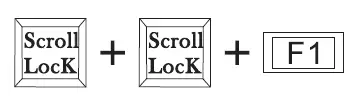
Switch the control hotkey to right [Ctrl]
After you had done either one of above, the hotkey combinations would be changed to: right [Ctrl]+right [Ctrl]+[xxx].
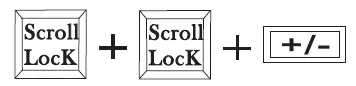
Note: xxx refers to keyboard key Page Up, Page Down, E11, F12, SPACE,+/-.
The same if you want to change the hotkey from right [Ctrl] to [Scroll Lock], you could do as follows:
- Press front panel button [SW] until the buzzer is beeping, then restart the KVM.
- Execute hotkey command: right [Ctrl]+right [Ctrl]+[F1].
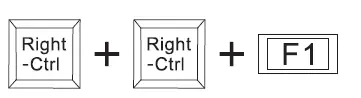
Switch the control hotkey to [Scroll Lock]
IR Remote Control
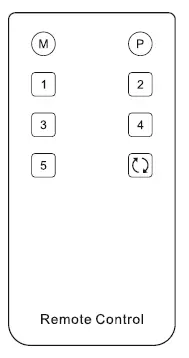
- Switch to input port 1 2
- Switch to input port 2 3
- Switch to input port 3
- Switch to input port 4
Note: 3.4 are only available for 4×1 HDMI KVM switch.
Note:
- For the safety request by some express company, the remote control is not equipped battery by default.
- Unspecified buttons at above are non-functional.
Verified keyboards and mouses
| Mouse | Model | Keyboard | Model |
| Zklli | ZM500-5 | METOO | Z5 |
| FL.SPORTS | G12 | Dareu | CK535 |
| Newmen | GX1-KEPLER | Aigo | 8362 |
| Aigo | WQ-641 | AJAZZ | AK35I |
| LDK.al | Colour ful XB00 | Acer | KB21-2X |
Note: The above list is part of the verified keyboards and mouses list with special HID protocol.
Warranty Information
We warrant this product as free of defects in material and workmanship for a period of one (1) year from the date of shipment. If during the period of warranty this product proves defective under normal use, we will repair or replace this product, provided that this product has not been subjected to mechanical, electrical, or other abuse or modifications. If it fails under conditions other than those covered will be repaired at the current price of parts and labor in effect at the time of repair. Such repairs are warranted for six (6) months from the day of reshipment to the buyer
Technical Support
We are here to help you!
Do you need assistance setting up your product? Please make sure you:
Visit https://support.tesmart.com for knowledge base and troubleshooting or scan the QR code directly with apps like Twitter.

Consult [email protected] for technical support.


