VISUAL LED 960 X 960MM Modular LED Display
Product Information
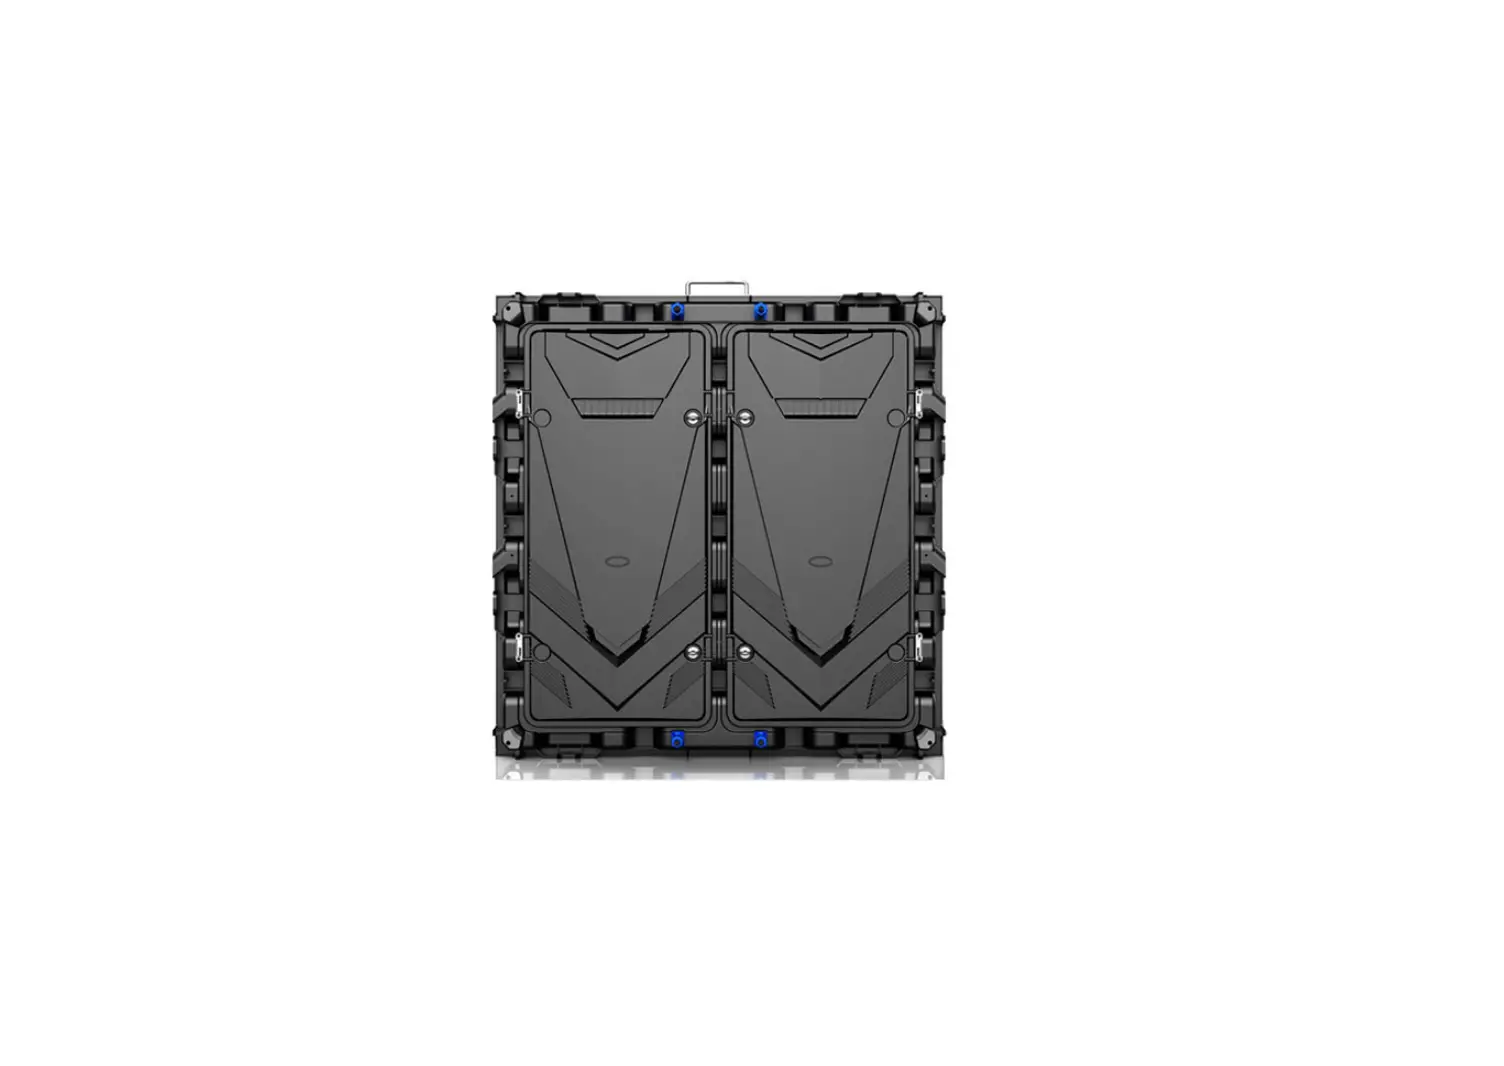
The Modular LED Display 960 X 960mm is a high-quality LED display that provides stunning visual output. It consists of multiple cabinets or frames, each containing LED modules. The display is designed to be assembled and installed easily, allowing for seamless integration into various environments.
Installation Steps:
- Step 1: Unpacking and Positioning
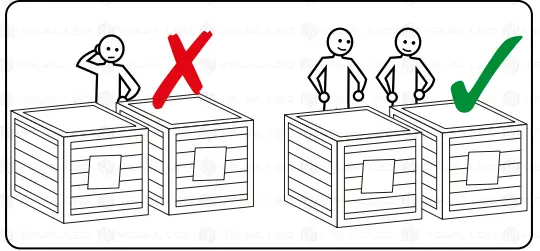
- Ensure at least 2 people are available for handling and assembly.
- Use a soft protective surface (e.g., foam, cardboard, carpet, blanket) to place the frames out of the box.
- Avoid any damage to the LEDs during unpacking and handling of the cabinets. These damages are not covered by warranty.
- Always place the back of each frame first, protecting the LEDs.
- Choose a perfectly level surface or structure to assemble the screen on.
- Make sure to orientate the cabinets correctly, with pins facing up and never facing down.
- LED panels are extremely sensitive elements, so extreme care must be taken to avoid damaging the LEDs during assembly.
- Step 2: Display Assembly
- Set one cabinet over another.
- Press levers from the upper cabinet and insert mechanisms from the lower frame.
- Release upper levers with the mechanisms inserted and lock mechanisms from the lower frame. Repeat this procedure for the side anchorages if necessary.
- Step 3: Display Wiring
- Data Wiring: LED cabinets must be interconnected in series with a network cable. Each cabinet has 2 internal network ports. Standard network cables can be used if necessary. Ensure there is a direct connection between the LED out port of the content player and the first cabinet of your display.
- Power Wiring: Interconnect the cabinets of your display with the supplied power cables. Each cabinet has an internal power strip. Do not draw more than 3000W from the same connection.
- Appendix
- The warranty does not cover damages to the perimeter LEDs of the display cabinets or LED modules.
- Visual LED tests and verifies all components of each display before delivery.
- The appendix provides instructions for changing an LED module if needed.
Once you have completed the assembly and wiring, you can proceed with the configuration of the display.
INSTALLATION STEPS
READ THIS MANUAL AND FOLLOW THE HANDLING GUIDELINES DURING THE ASSEMBLY PROCESS.
- UNPACKING AND POSITIONING OF THE DISPLAY CABINETS
- DISPLAY ASSEMBLY
- POWER & DATA WIRING
- APPENDIX
ASSEMBLY INSTRUCTIONS
- STEP 1: UNPACKING AND POSITIONING
A MINIMUM OF 2 PEOPLE FOR HANDLING AND ASSEMBLY USE A SOFT PROTECTIVE SURFACE (E.G. FOAM, CARDBOARD, CARPET, BLANKET, ETC.) TO PLACE THE FRAMES OUT OF THE BOX.
 WARNING: AVOID ANY DAMAGE TO THE LEDS DURING UNPACKING AND HANDLING OF THE CABINETS. THESE DAMAGES ARE NOT COVERED BY WARRANTY
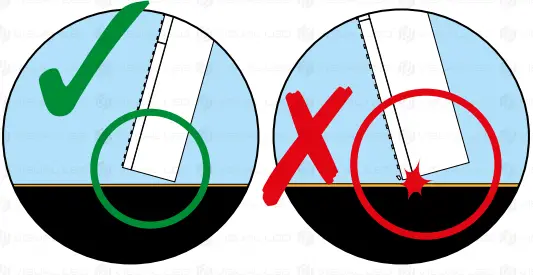
CAUTION: ALWAYS PLACE THE BACK OF EACH FRAME FIRST, PROTECTING THE LEDS.
 USE A SOFT PROTECTIVE SURFACE (E.G. FOAM, CARDBOARD, CARPET, BLANKET, ETC.) TO PLACE THE FRAMES OUT OF THE BOX.
 WARNING: AVOID ANY DAMAGE TO THE LEDS DURING UNPACKING AND HANDLING OF THE CABINETS. THESE DAMAGES ARE NOT COVERED BY WARRANTY