![]()
![]()
Mini
Maintenance Kit
Part #:
PJDI116MINI-H
D14MZ2 – 14 GPM
1-800-523-8499
www.dosatronusa.com

Kit Contents:
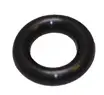
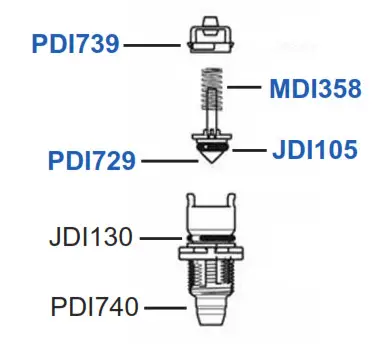
(1) J009: Plunger seal
(1) PDI729: Check Valve Cone
(1) JDI105: Check Valve Cone O-ring
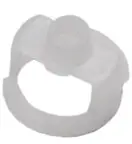
(1) PDI739: Top Guide
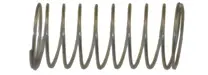
(1) MDI358: Check Valve Spring
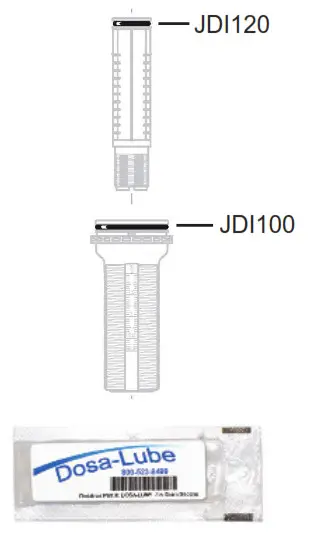
(1) DOSA-LUBE: Silicone
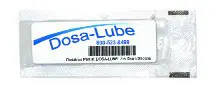
Use Dosa-Lube on specified parts only.
 CAUTION: Parts may contain concentrated chemicals. The use of Proper Protective Equipment is recommended when performing maintenance.
Instructions
(Parts included in kit noted in blue)
Disassembly
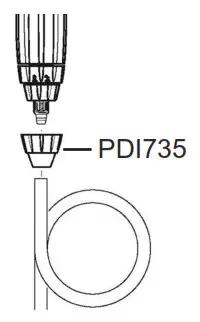
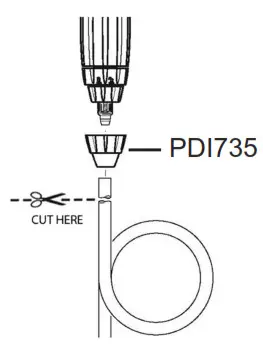
- Unscrew the hose nut (PDI735) and remove the hose.

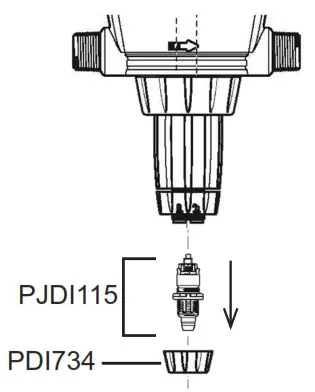
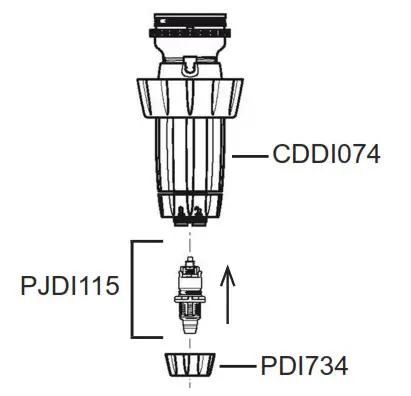
- Unscrew the check valve nut (PDI734). Remove the check valve assembly (PJDI115) by pulling it down.

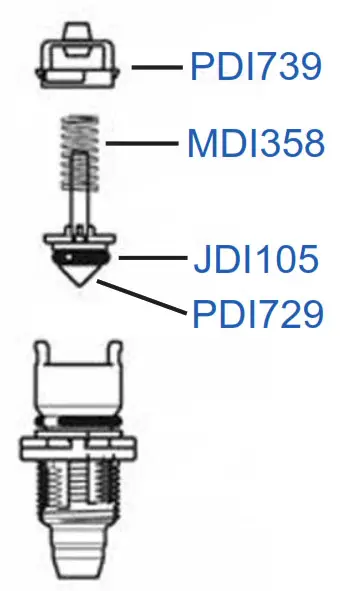
- Take off the top guide (PDI739) by giving it a 1/4 turn counterclockwise, and discard. Discard the check valve spring (MDI358), check valve cone (PDI729), and check valve cone o-ring (JDI105).

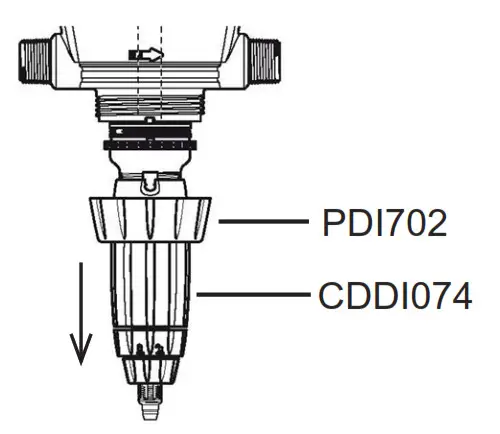
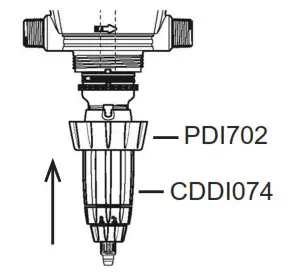
- Unscrew the injection stem assembly nut (PDI702) and pull down on the injection stem assembly (CDDI074) to detach from the body of the unit.

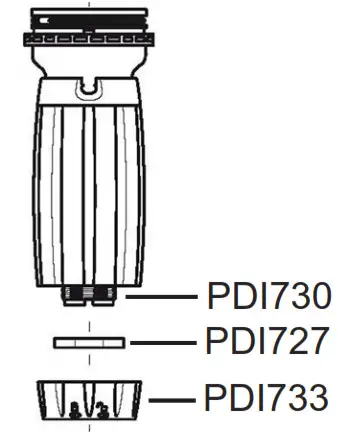
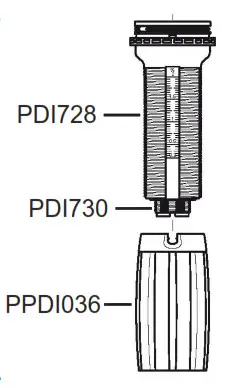
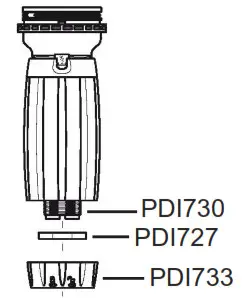
- Unscrew the locking nut (PDI733) from the injection stem assembly (CDDI074) and remove the black anti-rotation lock (PDI727) by spreading it apart, then slide it down over the threads of the injection stem (PDI730).

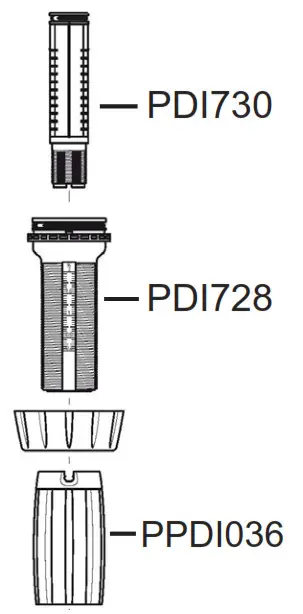
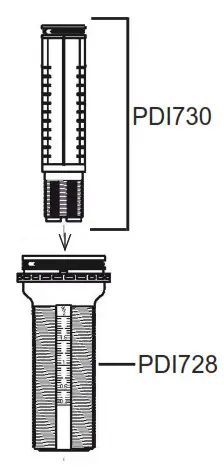
- Unscrew the adjusting sleeve (PPDI036) until it comes off. Hold the black sleeve (PDI728) and push up on the threaded part of the white injection stem (PDI730) then slide it out of the black sleeve (PDI728) from the top.

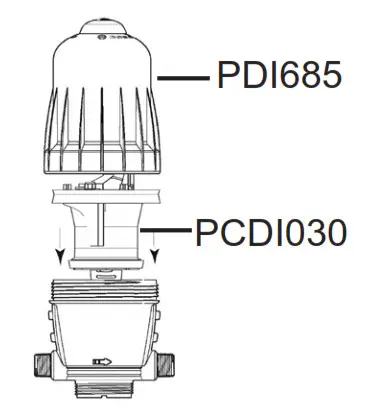
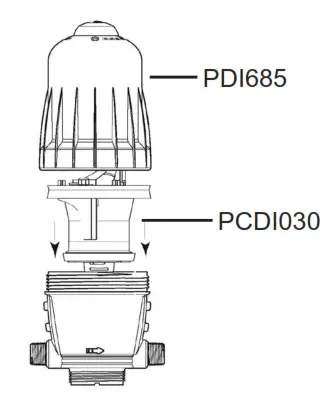
- Unscrew the upper bell housing (PDI685) and remove the piston assembly (PCDI030) out of the unit.

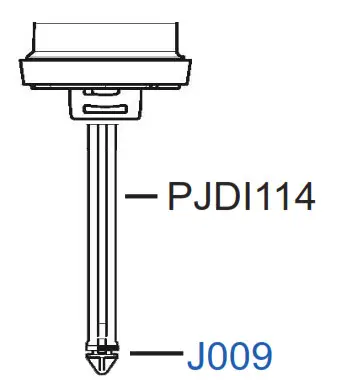
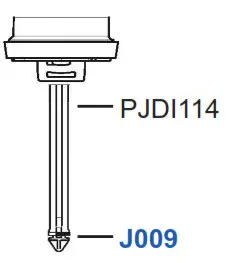
- From the tip of the plunger (PJDI114), remove the plunger seal (J009), pinch the seal, roll it off, then discard.

NOTE: Reassembly instructions on the back.
Reassembly - Using the Dosa-Lube provided in the kit, rub a small amount onto the injection stem o-ring (JDI120) and the black stem o-ring (JDI100).

- Slide the white injection stem (PDI730) down into the black sleeve (PDI728), making sure the small key located inside the sleeve is properly aligned with the longest groove on the white injection stem (PDI730)

- Pull down on the white injection stem (PDI730) as far as it will go. Screw the adjusting sleeve (PPDI036) back onto the black injection sleeve (PDI728).

- Reinstall the “C” clamp (PDI727) by gently sliding it over the threads at the bottom of the white injection stem (PDI730). Rotate the clamp until it locks in place. Screw back the locking nut (PDI733).

- Take the new check valve cone (PDI729) and install the new check valve cone o-ring (JDI105). Place the cone part going down into the check valve barb (PDI740). Insert the new check valve spring (MDI358 onto the rod of the check valve cone (PDI729), place the new top guide (PDI739) on top, and push down, then turn 1/4 clockwise until the top guide locks into the check valve housing (PDI740). Apply Dosa-Lube on the check valve o-ring (JDI130). Do not apply Dosa-Lube inside the check valve.

- Insert the new check valve assembly (PJDI115) back into the bottom of the injection stem assembly (CDDI074) and screw the check valve nut (PDI734) back on.

- Take the new plunger seal (J009) and place it on the groove of the plunger (PJDI114) at the bottom of the piston.

- Insert the piston assembly (PCDI030) into the lower housing, then screw the upper bell housing back in place.

- Attach the injection stem assembly(CDDI074) to the bottom of the blue body by sliding the injection stem nut (PDI702) up the sleeve and screwing it back on.

- Cut 1” off from the top of the suction hose to ensure a tight fit, make sure to cut in a straight line. Attach the hose and the hose nut (PDI735) back to the unit.

 Don’t forget to reset your injection rate to the proper ratio.


