![]() LiQuRIZER
LiQuRIZER
Installation Manual
Component List
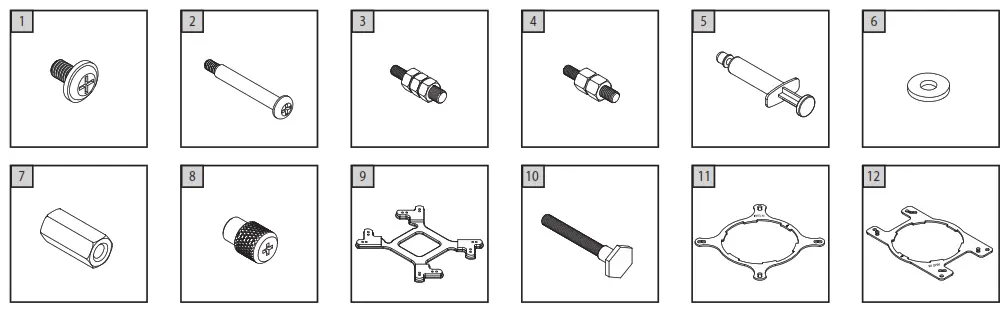
| 1) Radiator Mounting Screws 2) Fan Mounting Screws 3) Intel LGA2066/11 Standoff 4) AMD TR4 Standoff | 5) Thermal Grease 6) Insulatative Washer 7) Thread Nut 8) Knurled Tightening Nut | 9) Backplate 10) Long Screw 11) Intel Bracket 12) AMD Bracket |
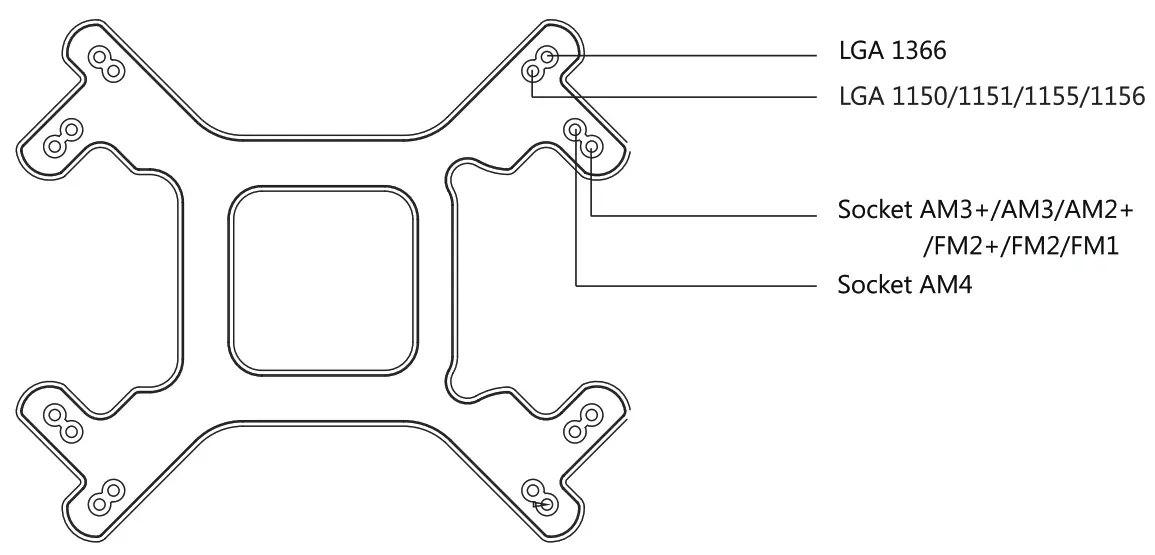
Mounting options on backplate
INTEL MOUNTING
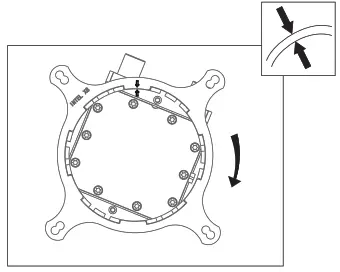
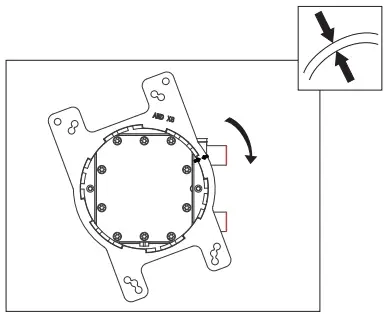
Intel Bracket Mounting
Align the arrows on the bracket and the pump base, turn the bracket clockwise to secure it to the pump base.
* The Intel bracket is universal for LGA2066/2011/1150/1151/1155/1156/1366.
- LGA1150/1151/1155/1156/1366 Installation
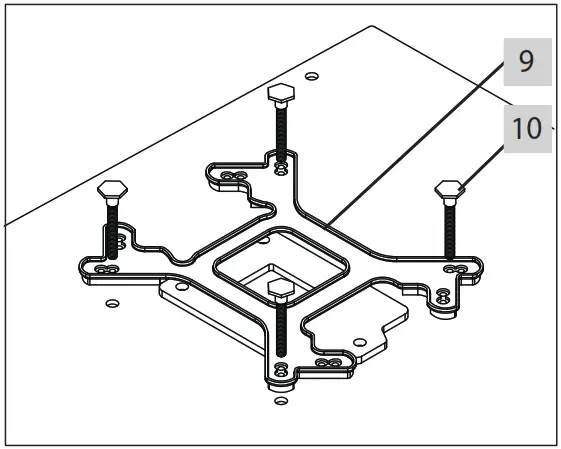
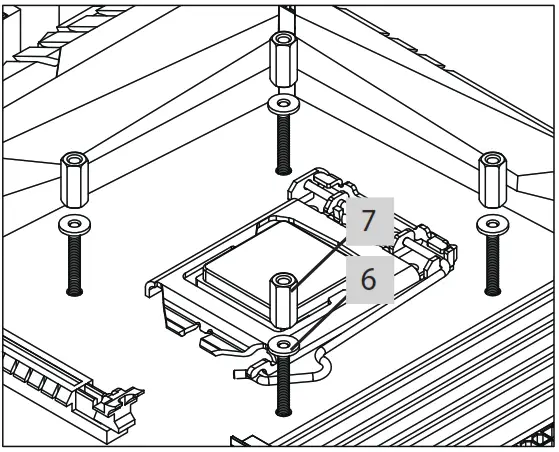
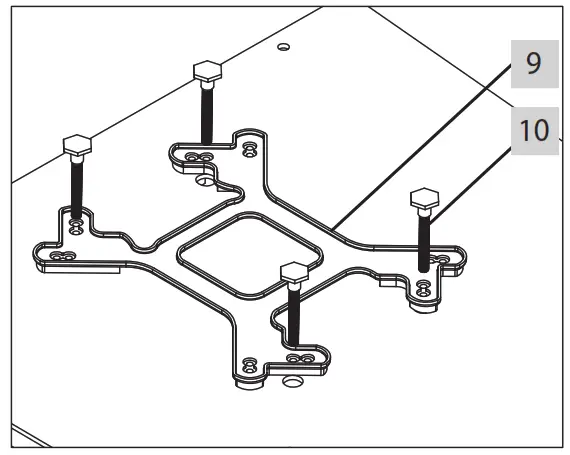
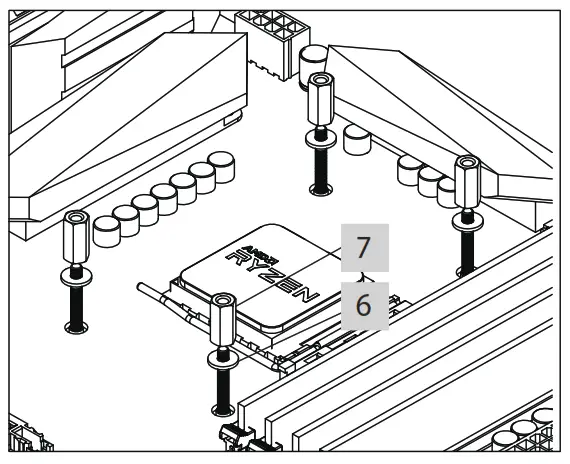
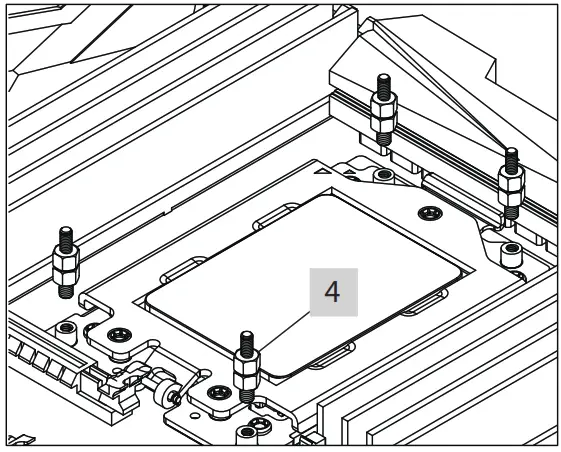
| Choose the right mounting holes accordingto CPU Socket. Insert the long screws through the backplate and then through the mainboard. | Put the washer onto the long screws first, and then fasten the thread nuts onto the screws. |
 |  |
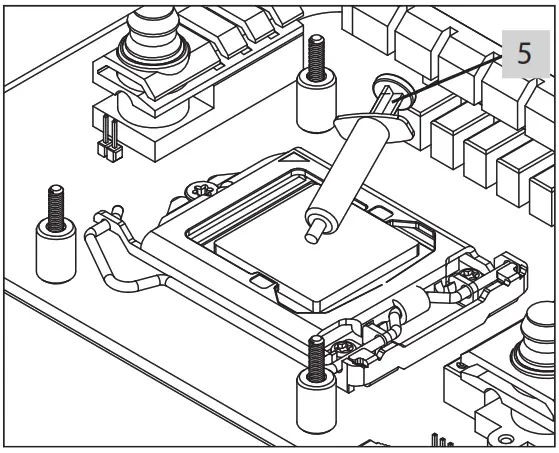
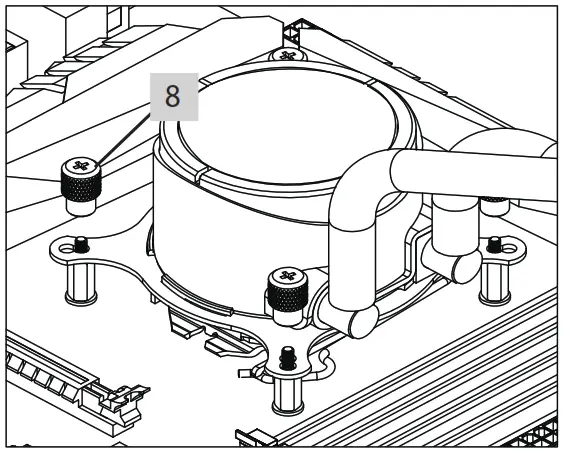
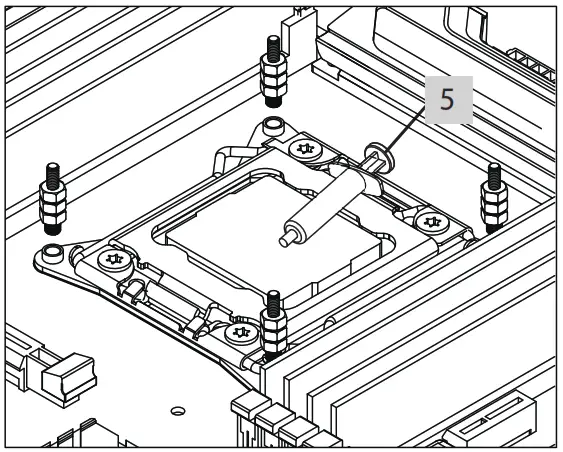
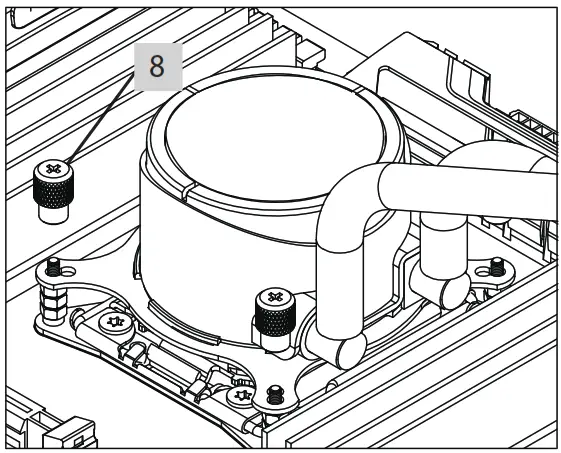
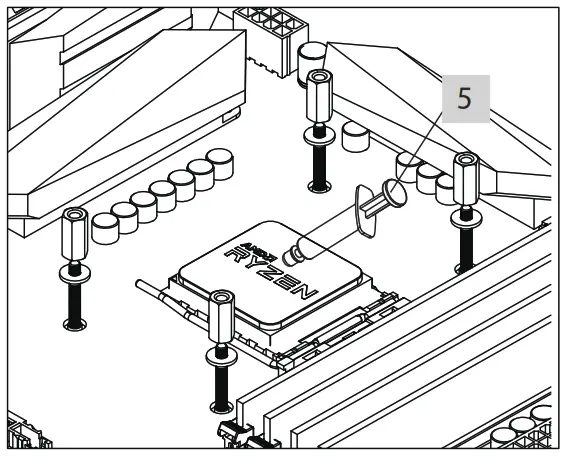
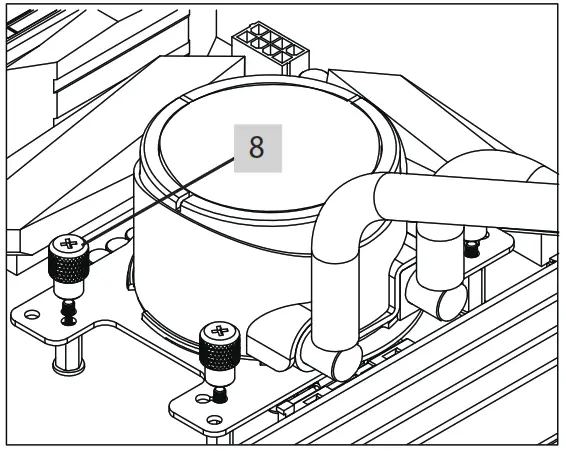
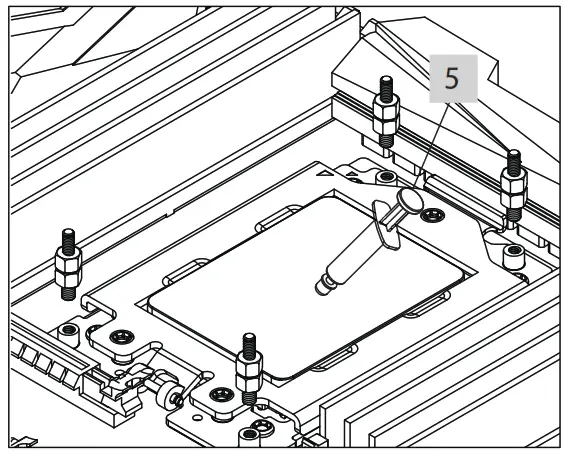
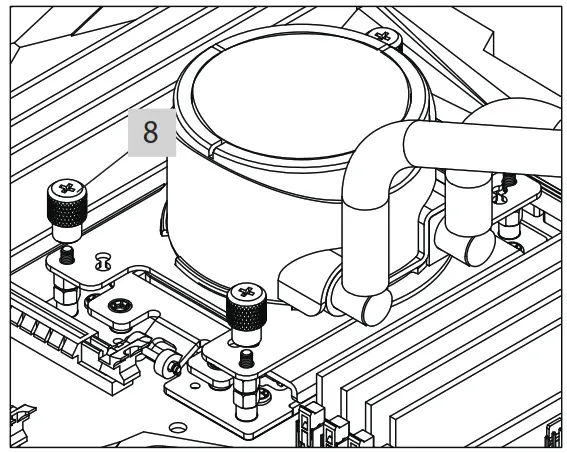
| Clean the CPU surface and apply a thin layer of thermal grease onto the surface. | Put the pump onto the CPU. Secure the block using the knurled tightening nuts. |
 |  |
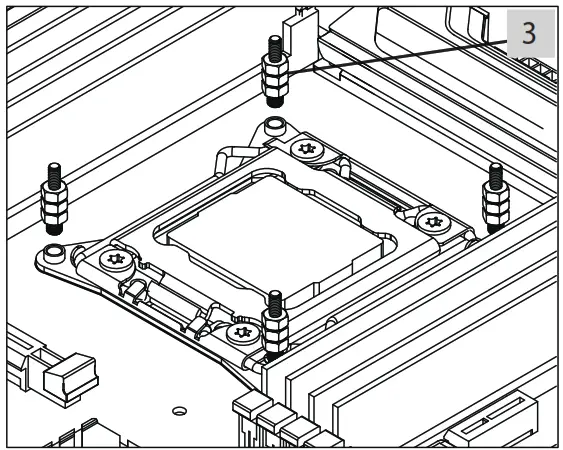
- LGA2066/2011 Installation
| Thread the LGA2066/2011 standoff into the mounting holes on the mainboard. | Clean the CPU surface and apply a thin layer of thermal grease onto the surface. | Put the pump onto the CPU. Secure the block using the knurled tightening nuts. |
 |  |  |
AMD MOUNTING
- AMD Bracket Mounting
Align the arrows on the bracket and the pump base, turn the bracket clockwise to secure it to the pump base.
* The AMD bracket is universal for TR4/AM4/FM2(+)/FM1/AM3(+)/AM2(+). - AM4/FM2(+)/FM1/AM3(+)/AM2(+) Installation
| Choose the right mounting holes accordingto CPU Socket. Insert the long screws through the backplate and then through the mainboard. | Put the washer onto the long screws first, and then fasten the thread nuts onto the screws. |
 |  |
| Clean the CPU surface and apply a thin layer of thermal grease onto the surface. | Put the pump onto the CPU. Secure the block using the knurled tightening nuts. |
 |  |
AMD MOUNTING
- TR4 Installation
| Thread the TR4 standoff into the mounting holes on the mainboard. | Clean the CPU surface and apply a thin layer of thermal grease onto the surface. | Put the pump onto the CPU. Secure the block using the knurled tightening nuts. |
 |  |  |
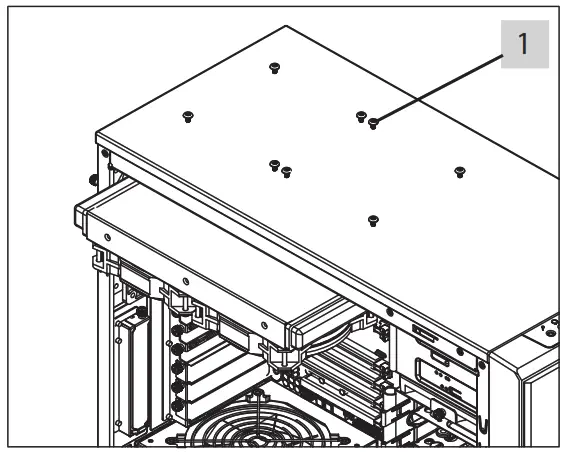
Fan & Radiator Mounting
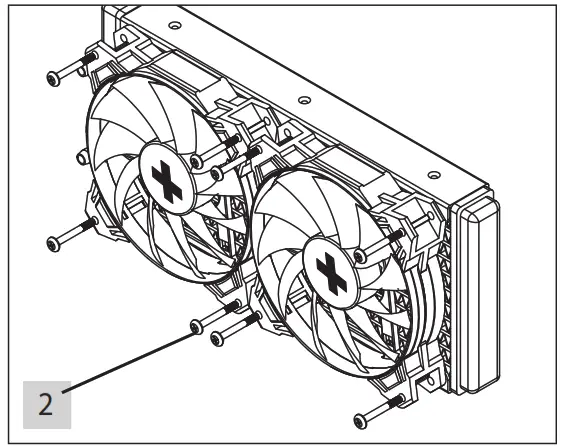
| Using the fan mounting screws to secure the fan(s) onto the radiator. | Using the radiator mounting screws to secure the radiator to the case panel. |
 |  |
Installation of RGB lightning
* Note: RGB function is not available on FROSTFLOW X Series.
- by using mainboard RGB control

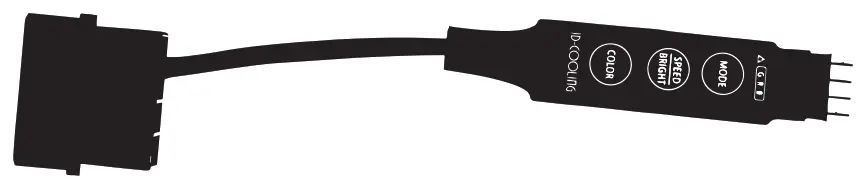
- By using internal RGB controller
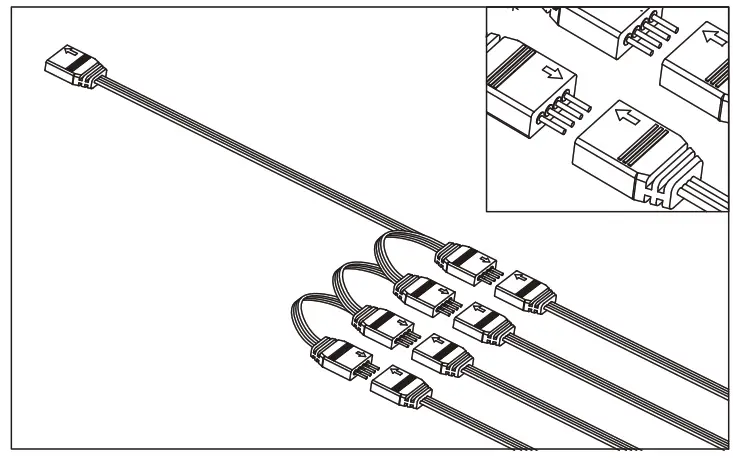
- By using RGB Splitter to connect pump/fans’ RGB cables
CAUTION
Wrong connection will damage the device and cause mal-function!
| Press this button to switch the fan into dynamic modes: Blinking mode (on/o ): 7 di erent colors in turn -> one of these colors Changing mode: 7 colors in trun -> 7 colors in turn backward -> RGB in turn Breathing mode: 7 colors in trun -> 7 colors in trun backward -> RGB in turn | |
 | Press this button to switch the fan int xed single color mode: There’re up to 20 di erent colors for choice including green, blue, red, orange, purple, white, etc. 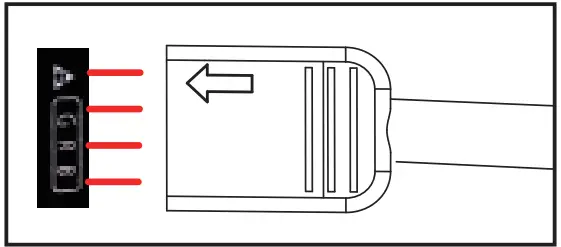 |
 | 1) In dynamic mode, this button will change the color switching speed; 2) In static mode, this button will control the brightness of the lighting; 3) Long press this button trt press to turn on the lighting. |
XILENCE GmbH
Lavesstraße 4
31137 Hildesheim
Germany


