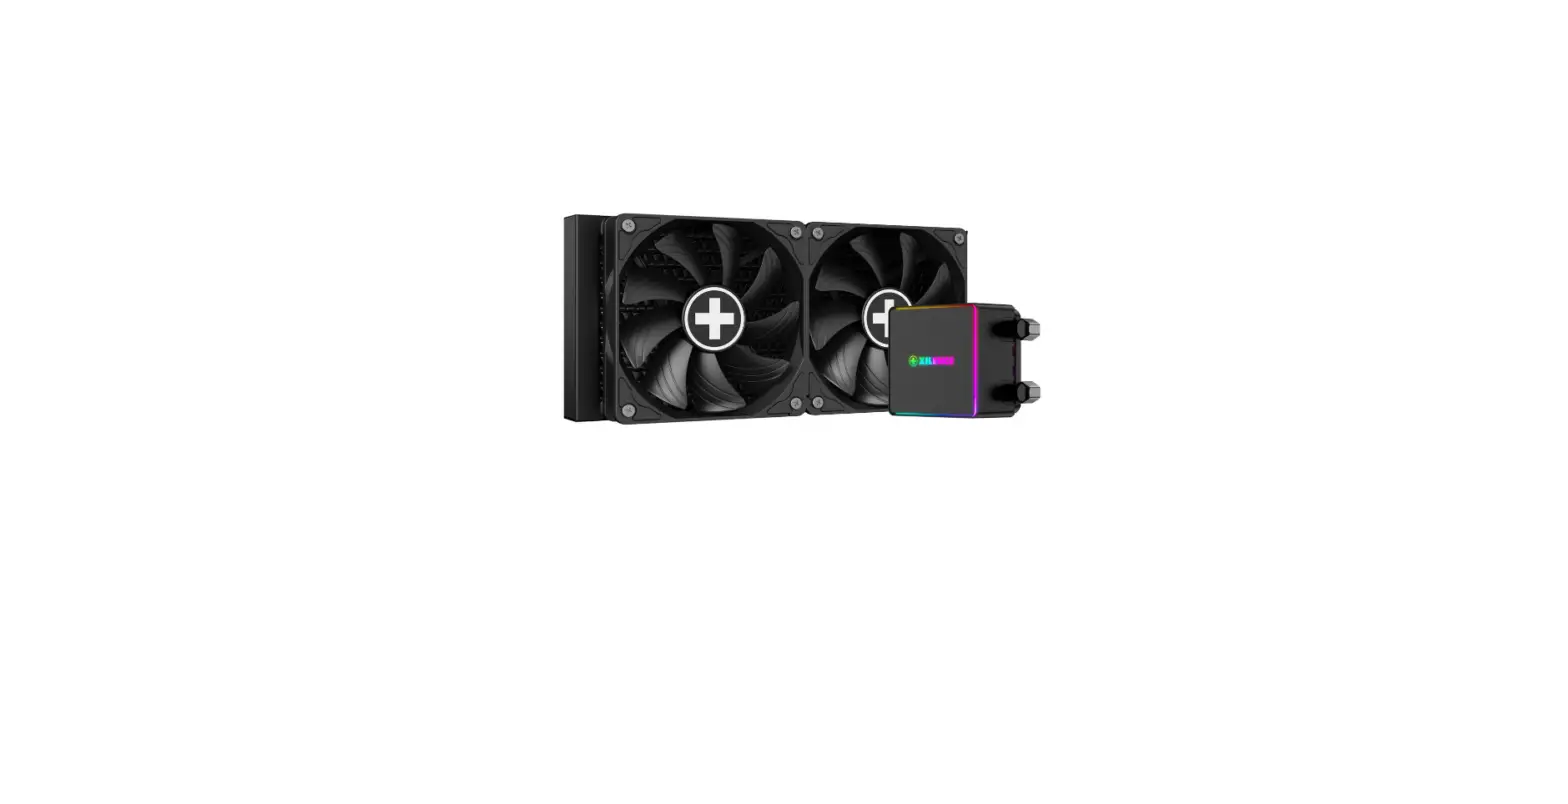
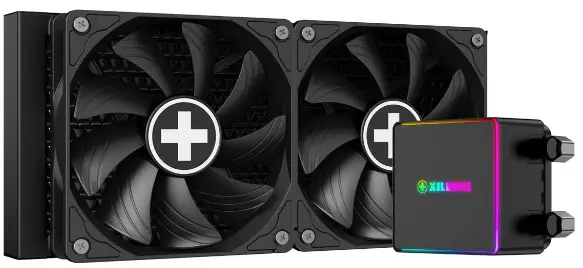
Xilence LQ240PRO LiQuRIZER Water Coolers
Components List

- LGA1700 Backplate x1
- Intel Bracket x1
- AMD Bracket x1
- Tightening Nut x4
- LGA1700 Standoff x4
- LGA1200/115X Standoff x4
- AMD Standoff x4
- Insulation Washer x4
- Intel LGA2066/11 Standoff x4
- Thermal Grease x1
- Radiator Mounting Screws x8
- Fan Mounting Screws x8
AMD Bracket Mounting
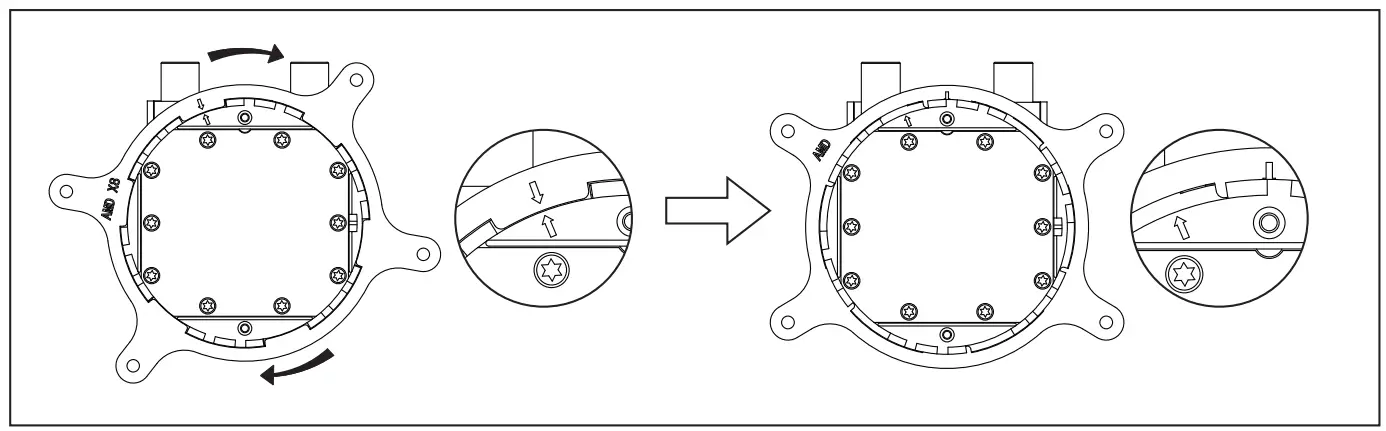
Align the arrows on the bracket and the pump base, turn the bracket clockwise to secure it to the pump base.
AMD AM4/AMS
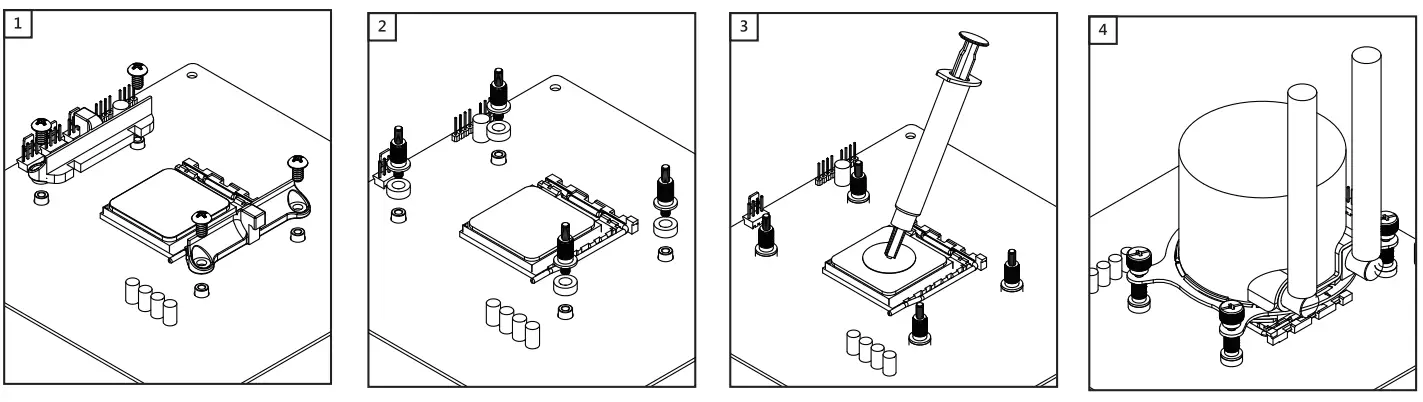
- Remove the original retention frame from the motherboard, but keep the backplate.
- Thread the AM4 standoffs onto the backplate. (Put the plastic insulator if you have between motherboard and the metal standoffs.)
- Clean the CPU surface and apply a thin layer of thermal grease onto the CPU.
- Put the pump onto the CPU. Secure the block using the tightening nuts.
INTEL Bracket & Backplate
INTEL Bracket Mounting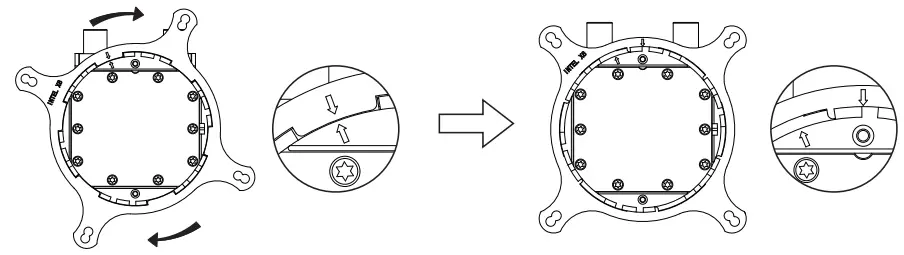
Align the arrows on the bracket and the pump base, turn the bracket clockwise to secure it to the pump base.
The INTEL bracket is universal for LGA2066/2011/1700/1200/115X.
INTEL LGA2066/2011
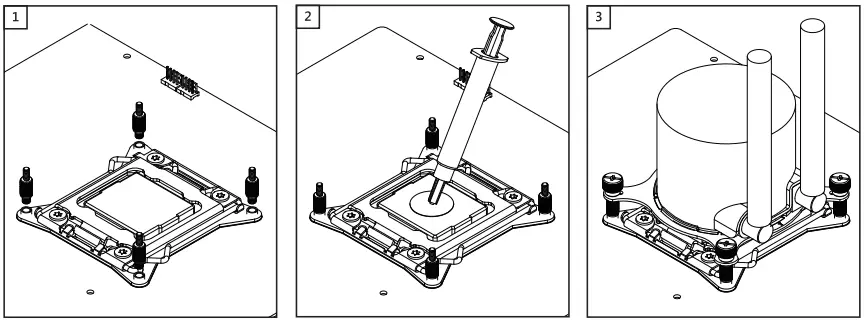
- Thread the LGA2066/2011 standoff into the mounting holes on the mainboard.
- Clean the CPU surface and apply a thin layer of thermal grease onto the surface.
- Put the pump onto the CPU. Secure the block using the tightening nuts.
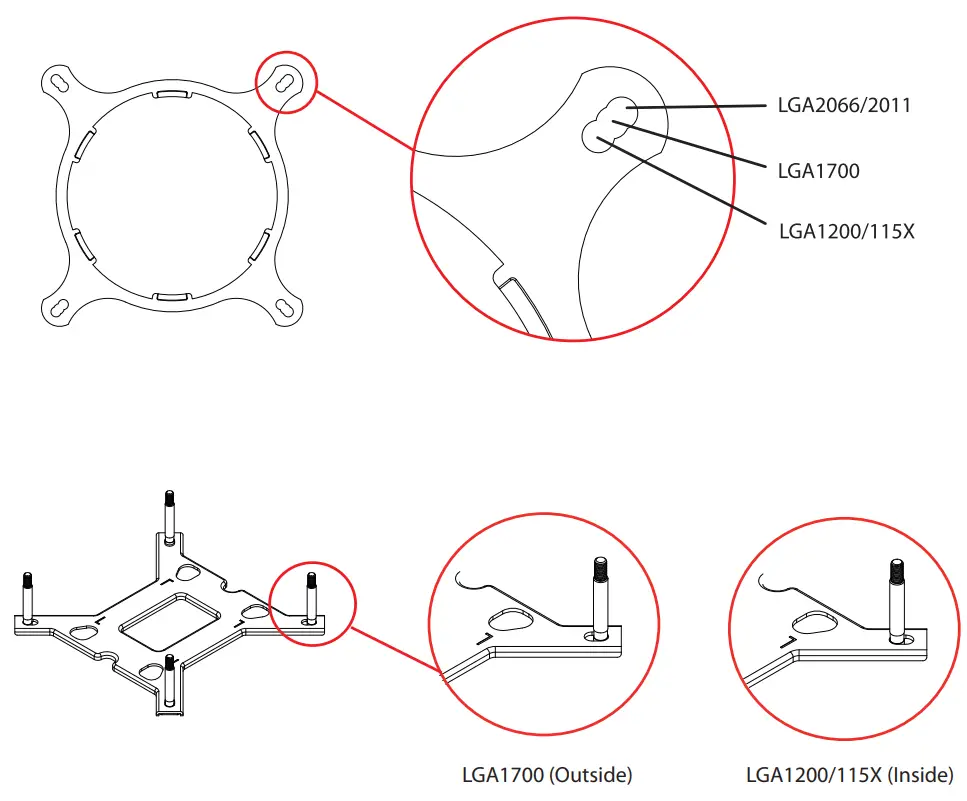
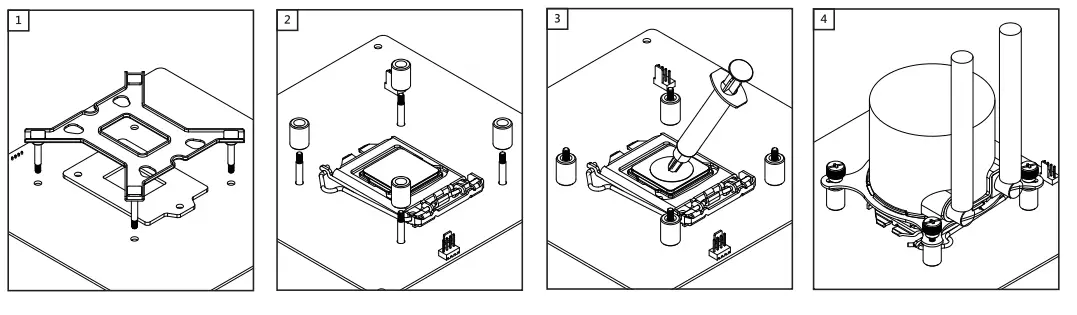
INTEL LGA1700
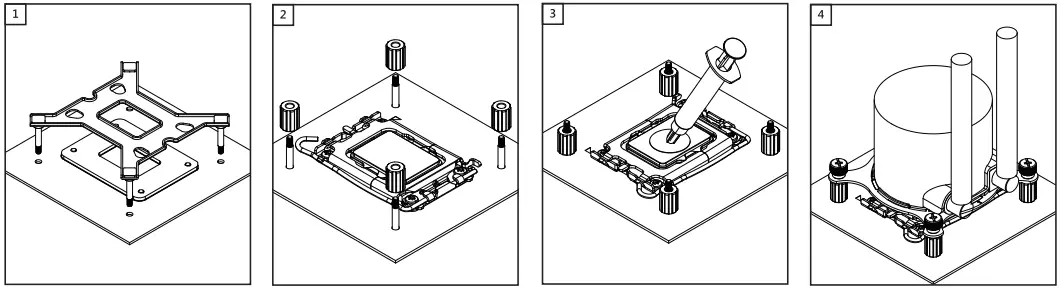
- Push the screws on the backplate to the outside and then put the backplate from the back of the motherboard and insert the long screws through the motherboard.
- Put the LGA1700 standoff onto the long screws of the backplate.
- Clean the CPU surface and apply a thin layer of thermal grease onto the CPU.
- Put the pump onto the CPU. Secure the block using the tightening nuts.
INTEL LGA1200/115X
- Push the screws on the backplate to the inside and then put the backplate from the back of the motherboard and insert the long screws through the motherboard.
- Put the LGA1200/115X standoff onto the long screws of the backplate.
- Clean the CPU Surface and apply a thin layer of thermal grease onto the CPU
- Put the pump onto the CPU. Secure the bloack using the tightening nuts.
Radiator/Fan Mounting

- Using the fan mounting screws to secure the fan(s) onto the radiator.
- Using the radiator mounting screws to secure the radiator to the case panel.
ARGB Version | RGB Connection
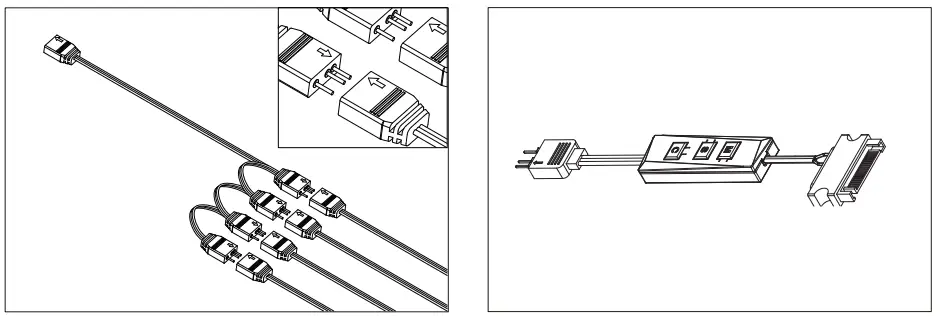
- Connect the fans’ RGB header to the RGB splitter wire.
- Please make sure the pin with arrow connects to the one with arrow too.
- Set RGB Lighting with Controller: Switch the lighting modes with ‘M button.
- Change the speed of the color changing with ‘S’ button. Switch the color modes with’C button.

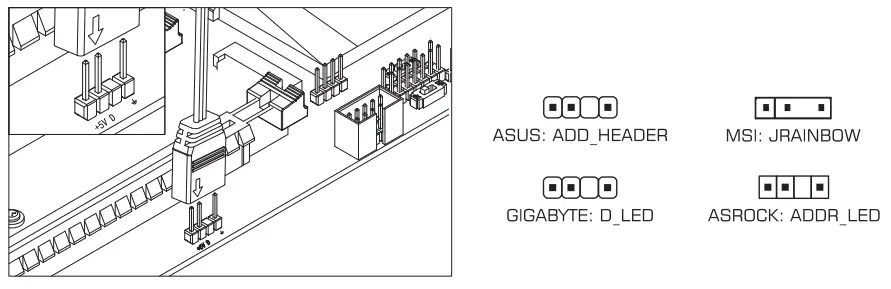
(For motherboard ARGB control): plug fan ARGB 3pin cable to 5V ARGB header on the motherboard. Then download correct software from motherboard’s official website and use the software to control the ARGB lighting.
XILENCE GmbH
Lavesstraße 4
31137 Hildesheim
Germany
www.xilence.net
[email protected]


