Lumens CL511 4K Ceiling Camera Installation Guide
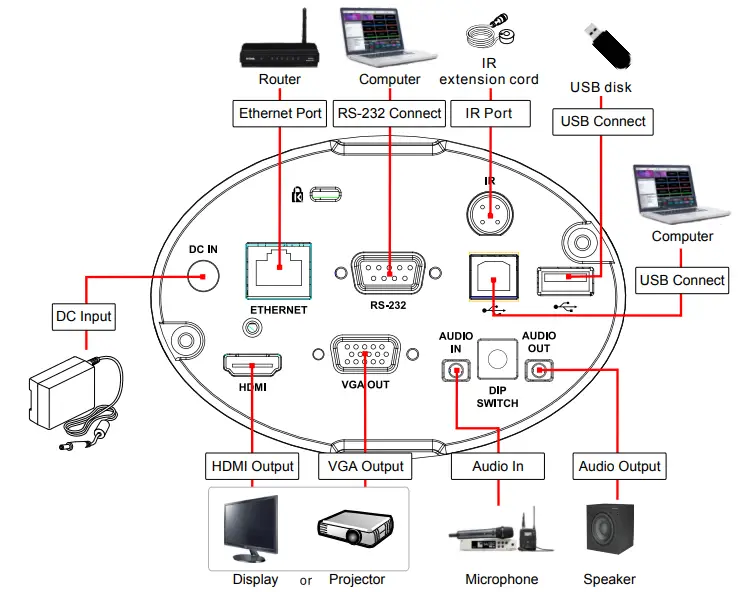
Product connection
CL511 Installation
Mount on the tripod
Supported 1/4” 20 UNC lock hole and can be used with the tripod
Mount on the ceiling
Supported installation distance: 1.5-6m,
recommended installation distance: 2m
- .Assemble the U-hanger and the
device using screws supplied. - Please follow the instruction for the screw hanger to install it on the ceiling.
- The installation personnel should prepare the screw hanger in compliance with the size of the hole used for securing the hanger. (The screw hanger should be bought separately.)
- Screw the device onto the screw hanger and complete the installation.

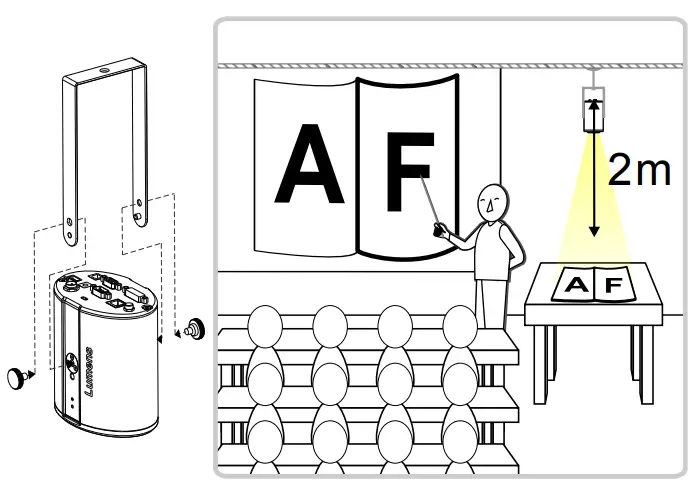
Install the camera on the ceiling
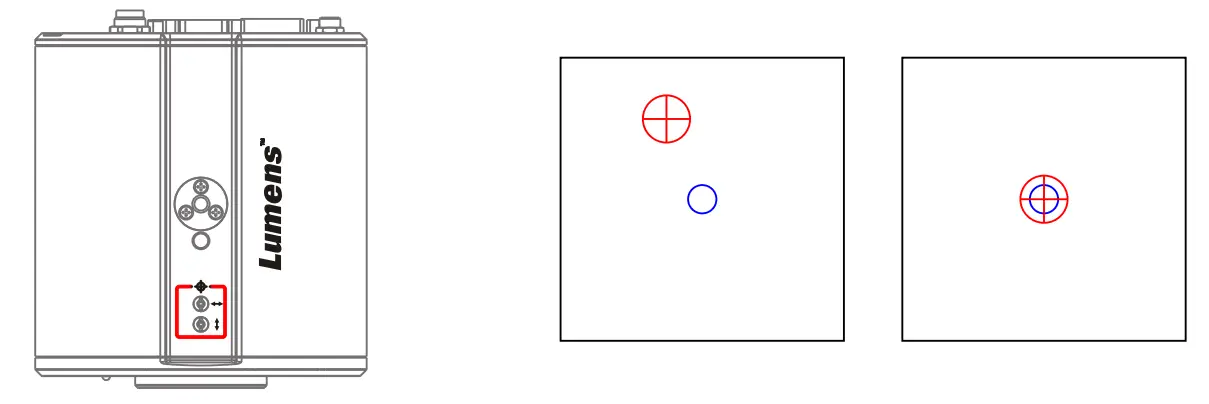
Set the center location of the image
- Enable the laser mark
 : Press [LASER]
  on the remote control.
 - Open the central positioning marker
 : Press [FREEZE]
  > [DEL]>
  [LEFT]
  in order on the remote control.
 - Adjust the cross laser mark deviated on the screen to the center point of the blue positioning mark with a hex screwdriver.

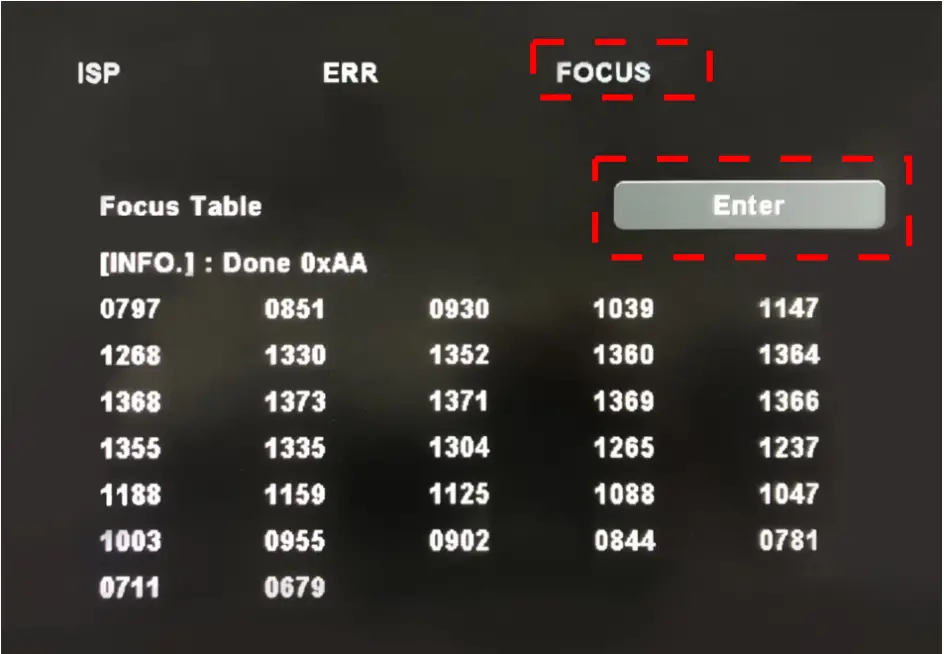
Set up AF Table
This setting can speed up the AF operation.
- Enter the Service setting menu: Press [FREEZE] > [DEL] > [ENTER]
 in order on the remote control
 - Click [FOCUS] > [ENTER] for execution
- The execution time is about 3 – 5 minutes depending on the scene.

- The execution time is about 3 – 5 minutes depending on the scene.
View the Images
HDMI/ VGA Image Output
Connect a HDMI or VGA cable to the display to output CL511 images .
- The default resolution of CL511 is 1920 x 1080 30 fps
USB Image Output
Connect to computer with a USB 2.0 Type-B cable, and use Ladibug software to view images and control CL511. You can also view images with video software, such as, Skype, Zoom, Microsoft Teams, and others
- Please visit Lumens’ website and go to Support > Download to download Ladibug software(https://www.MyLumens.com/Support)
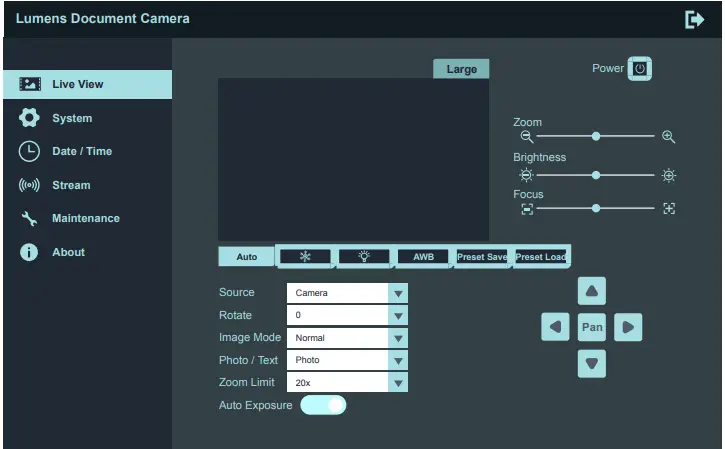
Network Image Output
Use a Cat5e cable to connect to the router to view CL511 video and control it through the web browser
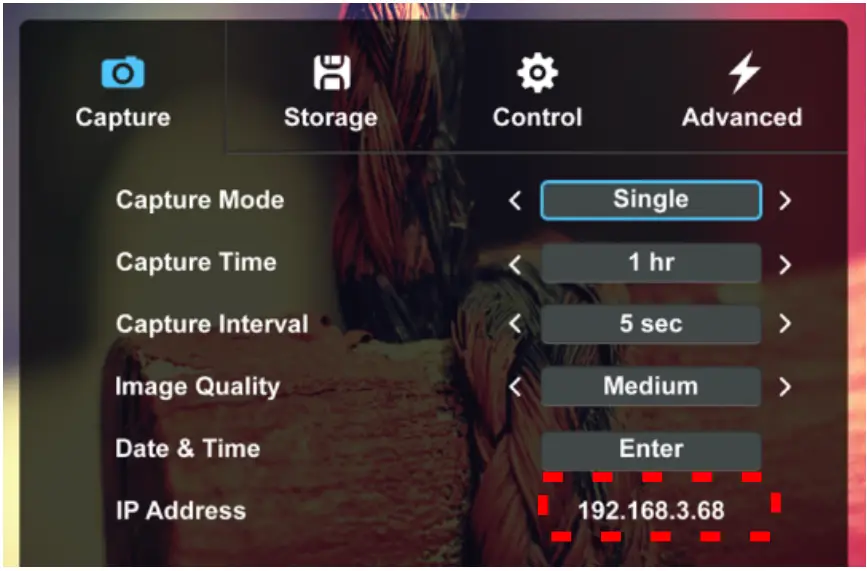
- Confirm the IP address of the camera
DHCP is on by default. You can use the remote control to open
OSD Menu > [Network], Check the IP address- If you connect directly with your computer, the default IP of CL511 is 192.168.100.100. Please set your computer to the same network segment.

Open the browser, and enter the IP address in the address bar
- If you connect directly with your computer, the default IP of CL511 is 192.168.100.100. Please set your computer to the same network segment.
- Enter the account and password to view the images and control CL511 through the web page.

- Account: admin
Password: 9999
Output Switch Information
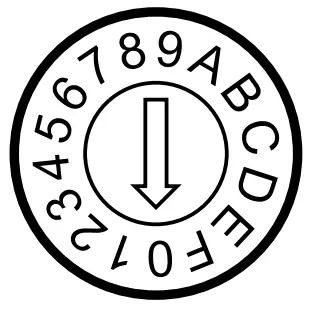
Resolution output
| Setting | Resolution | HDMI | Fps | Remark |
| 0 | 1080P | 60Hz | 30 | 4K IP Mode(Note1) |
| 1 | 50Hz | 25 | ||
| 2 | 60Hz | 60 | High-speed Mode(Note2) | |
| 3 | 50Hz | 50 | ||
| 4 | 4K | 30Hz | 30 | VGA does not support 4K |
| 5 | 25Hz | 25 | ||
| 6 | 1080P | 60Hz | 60 | High-speed Mode(Note2) |
| 7 | 50Hz | 50 | ||
| 8 | 720P | 60Hz | 30 | 4K IP Mode(Note1) |
| 9 | 50Hz | 25 | ||
| A | 60Hz | 60 | High-speed Mode(Note2) | |
| B | 50Hz | 50 | ||
| C | 768P | 60Hz | 30 | |
| D | 60Hz | 25 | ||
| E | 60Hz | 60 | High-speed Mode(Note2) | |
| F | 60Hz | 50 |
Note 1:
4K IP mode: IP streaming can support 4K resolution
Note 2: High-speed mode: applicable to support rapidly changing scene
![]()


