![]() P450-0802GN 4K Dome Ai-Based Camera
P450-0802GN 4K Dome Ai-Based Camera
Installation Guide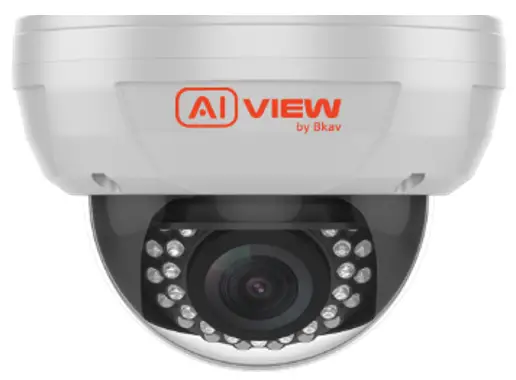 Model: P450-0802GN/P450-0802N/P450-0803FG/P450-0803F
P450-0802GN 4K Dome Ai-Based Camera
 | Qualcomm products contained here in are products of Qualcomm Technologies, Inc. and/or its subsidiaries. Qualcomm is a trademark of Qualcomm Incorporated, registered in the United States and other countries. The Made with Qualcomm Technologies logo is a trademark of Qualcomm Incorporated. |
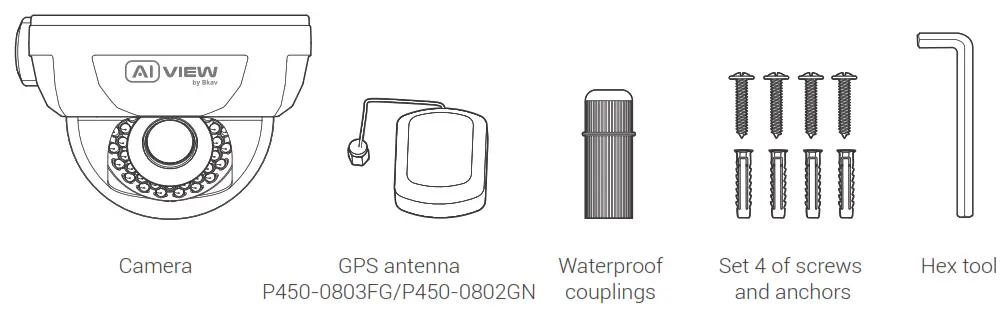
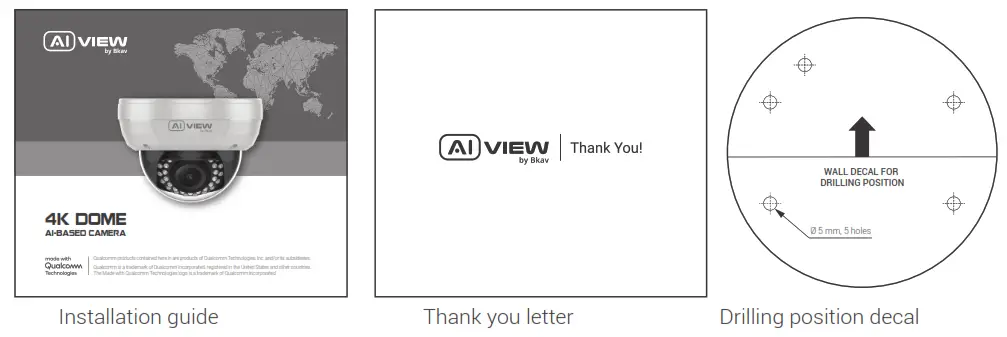
PRODUCT KIT
TECHNICAL SPECIFICATION
| Power | DC12V -±10%/ PoE (IEEE802.3at) |
| Power consumption | DC12V: Max 15W |
| DoE: Max 16.5W | |
| Protection standards | IP66, IK10 |
| Resolution, frame rate | UHD 3840 x 2160, Max 60fps |
| Digital zoom | P450-0802GN/P450-0802N/P450-0803FG/P450-0803F :8x |
| Optical zoom | P450-0803FG / P450-0803F 3x |
| P450-0802GN / P450-0802N: 2x | |
| Focal length | P450-0803FG / P450-0803F 10.9 – 29mm |
| P450-0802GN / P450-0802N: 4.36 – 9.33mm | |
| Field of view (horizontal – vertical) | P450-0803FG / P450-0803F Near 42° – 22.8° / Far 15° – 8.4° |
| P450-0802GN / P450-0802N: Near 111.96° – 58.11° / Far 47.23° – 26.53° | |
| Micro SD card | External, up to 256GB |
| Operating temperature | -40°C – 50°C (-40°F – 122°F) |
| Humidity 10 – 100% | |
| Dimentions (L x W x H) | L142 x W142 x H101.6mm |
| Weight | 1.1kg |
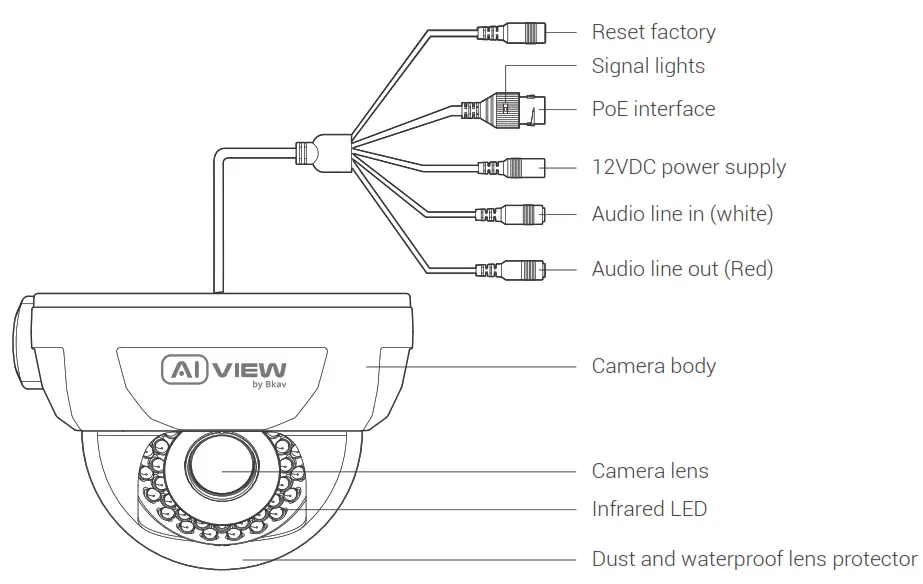
PRODUCT OVERVIEW
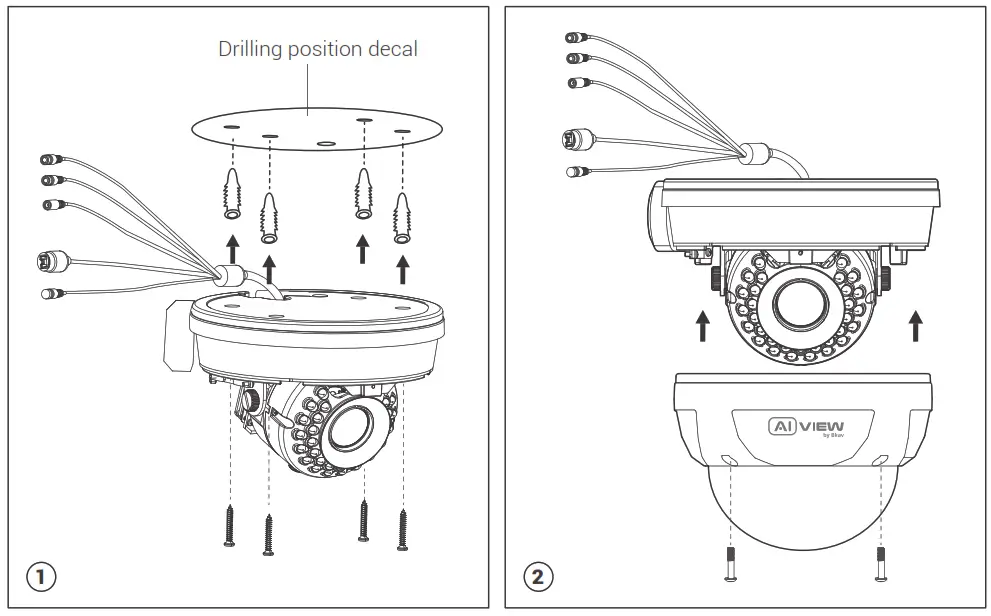
INSTALLATION GUIDE
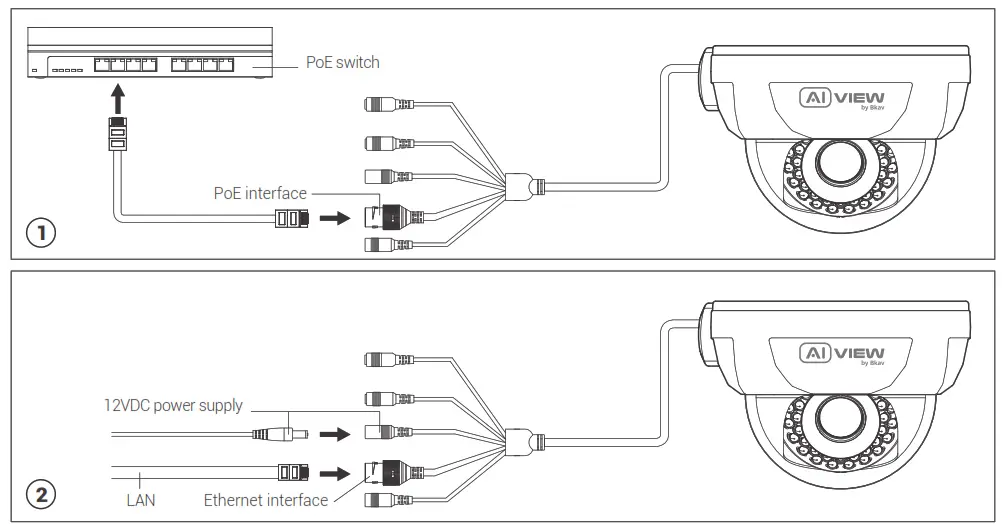
CONNECTING THE SIGNAL WIRE
Connect the PoE cable. Insert the cable into the waterproof coupling before connecting the wires into the terminal.

Two options to connect devices:
Option 1: Use the network cable connected from the PoE switch to the waiting PoE interface, no need to use 12VDC power supply (Figure 1).
Option 2: Use 12VDC power supply and the network cable connected from the switch (Figure 2).
NOTES ON WATERPROOF FOR CAMERA
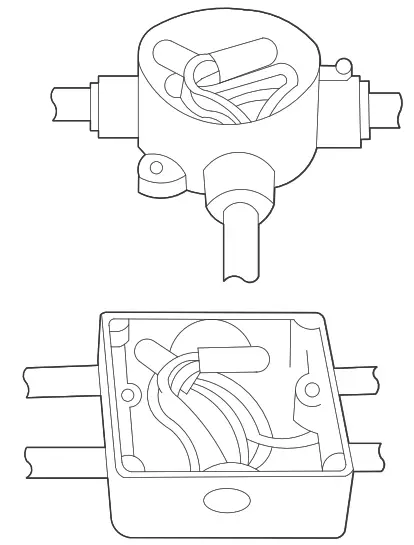
All wiring connections when installed must be placed in a technical box, protected from the effects of weather and human factors.
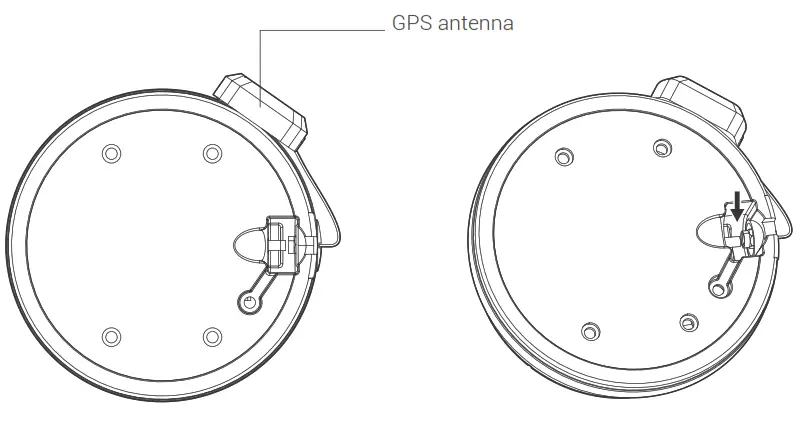
GPS ANTENNA INSTALLATION
Step 1: Use the screw unscrew tool in the position, as in the figure below.
Step 2: Use sharp-pointed pliers to insert the GPS antenna connector into the waiting cable terminal (tighten enough screw thread).
Step 3: Fix the GPS antenna onto the camera body using silicone glue, as in the figure below.
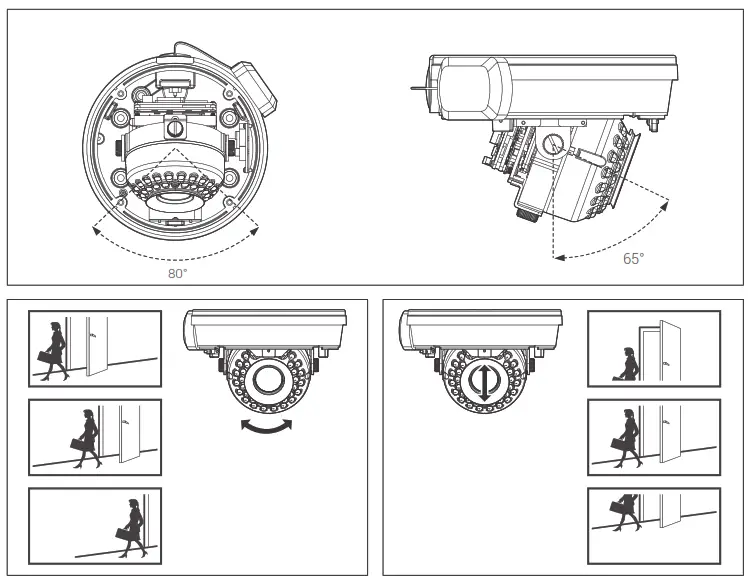
ADJUSTING THE CAMERA VIEWING ANGLE
Note: Don’t need to loose the screw on camera to adjust the camera’s angle.
THE MEMORY CARD AND RESET INSTALLATION
Memory card: Open the protective cover, you can find the location of Micro SD card.
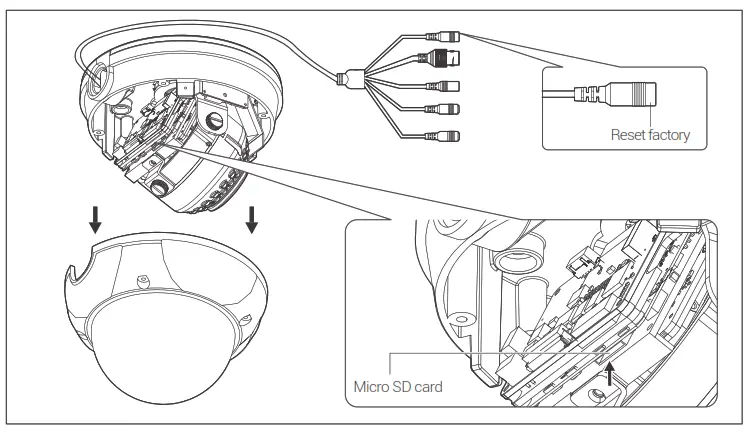
Note:
- Power off the camera, press and hold the factory reset button. Continue to hold the factory reset button for another 10 seconds while powering the camera, the camera will be restored to factory settings.
ACCESSING THE CAMERA
Password setting
The IP address of camera is set to DHCP mode by default. For the camera enables the DHCP by default, you need to use the AI View Scanner App to scan IP.
Note: To complete the installation steps for the camera, refer to the User Manual.
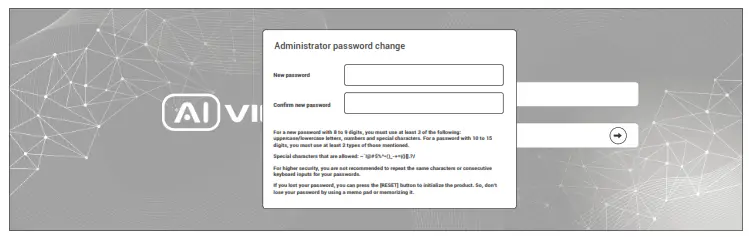
The system will ask you to reset the password on your initial access.
When the “Administrator password change” window appears, enter a new password.
- For passwords using eight or nine characters, you need to use at least three of the following types of characters: uppercase and lowercase letters, numbers, and special characters.
- For passwords using 10 to 15 characters, you need to use at least two of the character types.
Special characters include: ~ ` ! @ # $ % ^ & * ( ) _ – = + | { } [ ] . ? /
Note:
- For additional security, please do not repeat any characters in your password.
- If you forget your password, you can hold the [RESET] button to return the product to its factory settings.
SOFTWARE INSTALLATION
Login screen
When accessing the camera, a login window will appear. Enter your user name and password to access the camera.
- Enter “admin” in the <User name> box.
- Enter your chosen password in <Password> box.
- Click

SAFETY INFORMATION
Be sure to follow this advice to ensure the device works properly.
Precautions
- Installation instruction: Concrete, brick, column, wood… are all suitable. Make sure the wall is strong enough.
- The torque forces of screws securing IP enclosure: 1.3 – 1.4Nm.
- It is recommended to use shielded network cables (STP) during set-up.
- It is recommended to use CAT5e or higher network cables.
- Store the camera in a cool and dry environment.
- Shield the camera from potential impact from heavy objects.
- Do not install the camera on unstable pillars, brackets, surfaces, or walls.
- Do not use chemicals or detergents to clean the camera or housing.
- To clean, use a damp cloth.
- Only use standard tools and accessories when installing the camera equipment. The manufacturer recommends using the manufacturer’s power supply equipment or a corresponding source for the camera. Improper installation may cause damage to the product.
- Contact Bkav’s customer support or authorized Bkav agents if you experience any problems.
- This equipment has been tested and found to comply with the limits for a Class A digital device, pursuant to part 15 of the FCC rules. These limit are designed to provide reasonable protection against harmful interference when the equipment is operated in a commercial environment.
- This equipment generates, uses, and can radiate radio frequency energy and, if not installed and used in a accordance with the instruction manual, may cause harmful interference to radio communications. Operations of this equipment in a residential area is likely to cause harmful interference in which case the user will be required to correct the interference at his own expense.
Transportation:
- Use the original packaging, or equivalent, to avoid damaging the product during transportation.
WARRANTY INFORMATION
For information about AI View product warranty and thereto related information, go to aiview.ai/warranty.
![]() BKAV CORPORATION
BKAV CORPORATION
Address: 2nd Floor, HH1 Building, Yen Hoa Urban Area, Yen Hoa Ward, Cau Giay District, Hanoi City, Vietnam
Website: www.aiview.ai
Email: [email protected]


