INSTRUCTIONAL GUIDE
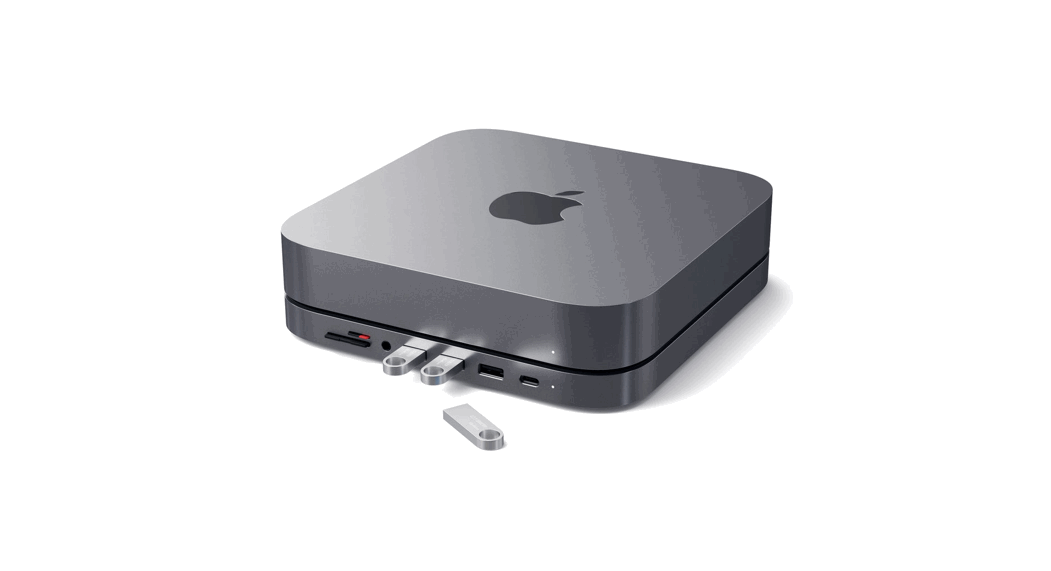
STAND & HUB FOR MAC MINI WITH SSD ENCLOSURE
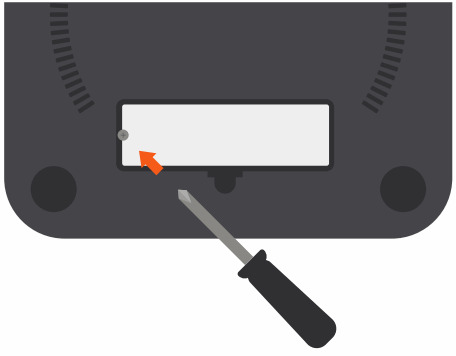
| 1. Remove SSD enclosure cover on the bottom of the stand. | 2. To install, insert the SSD at a slight angle and it should click into place. Important: Compatible with only M.2 SATA SSD drives. Does not work with NVMe. |
 |  |
| 3. Use the included screwdriver and screw to secure the SSD. To avoid stripping the screw, please do not overtighten. | 4. Put the enclosure cover back on and flip stand back over. |
 |  |
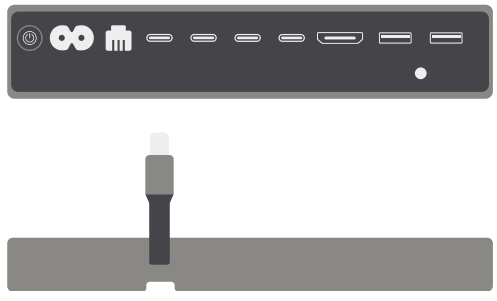
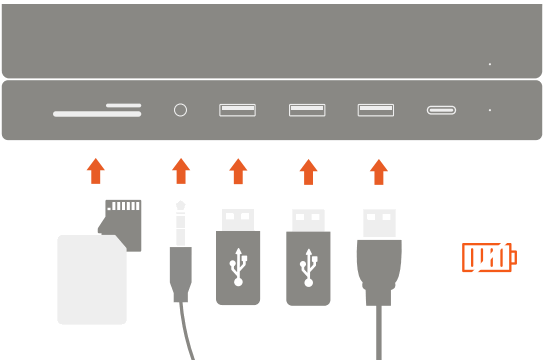
| 5. Place the stand on a flat surface and use its USB-C cable to connect to your Mac mini. Supports Mac mini (2018 & newer) | 6. Connect USB peripherals, SD cards, and headphones. USB-A ports do not support charging or CD drives, including Apple SuperDrive. |
 |  |
![]() Note: If the SSD is new and not discovered, it may need to be formatted to be read by macOS. To reformat, open Disk Utility > Select the SSD installed > Erase > then select APFS > and then reformat the drive-by erasing it.
Note: If the SSD is new and not discovered, it may need to be formatted to be read by macOS. To reformat, open Disk Utility > Select the SSD installed > Erase > then select APFS > and then reformat the drive-by erasing it.


