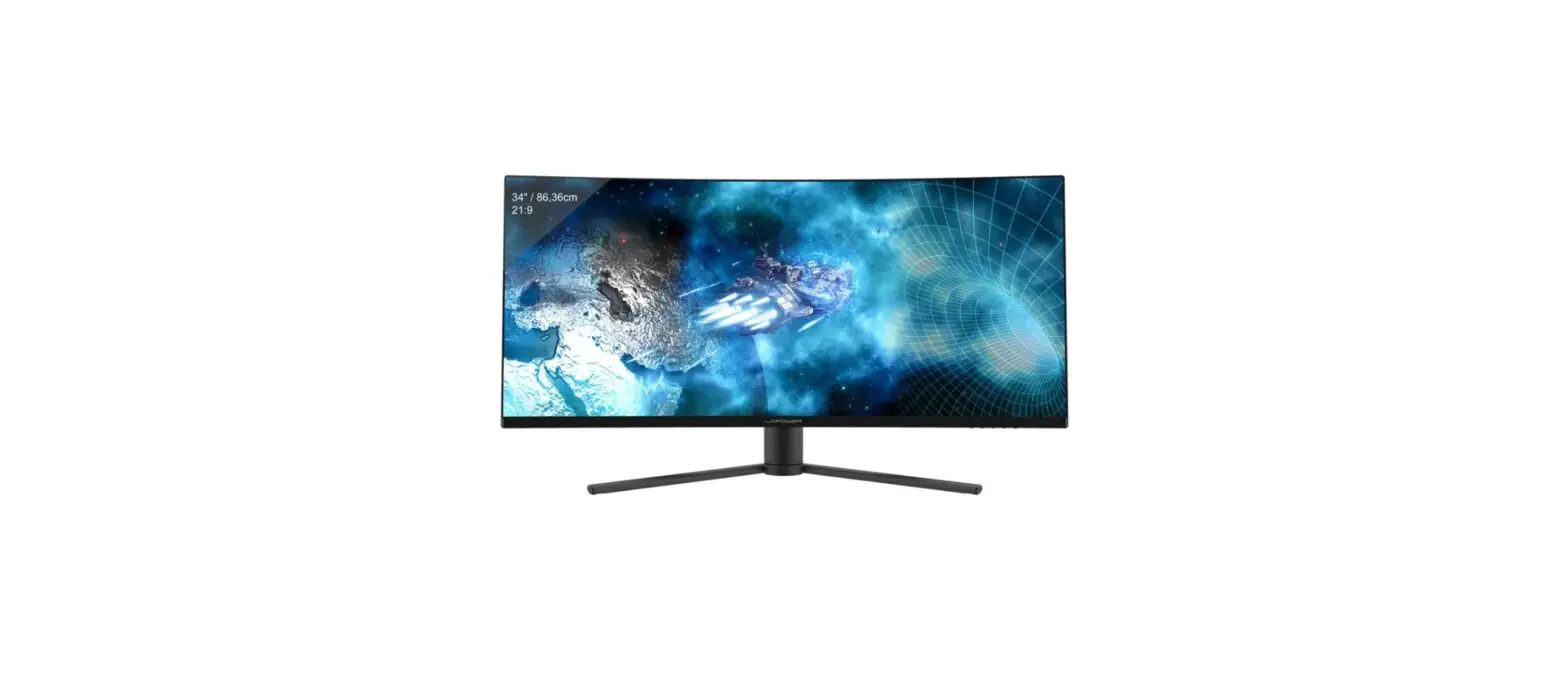
LC-POWER LC-M34-UWQHD-144-C-Q Gaming Monitor User Manual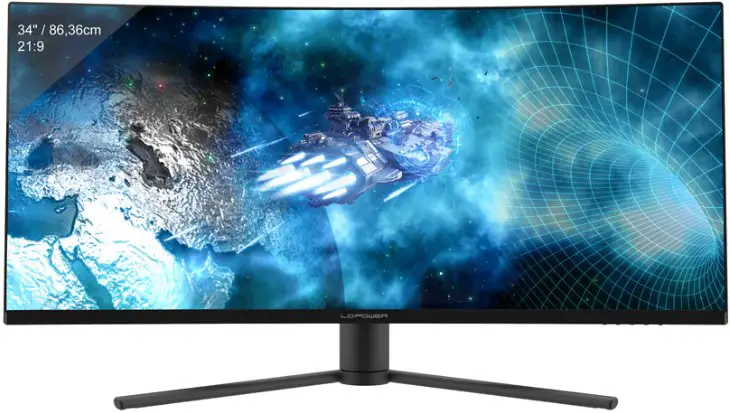
SAFETY PRECAUTIONS
Do not expose the monitor to a humid environment, rain or other liquids. Do not open the monitor housing to avoid any shock due to electrical or mechanical hazards.
Operation:
- Keep the monitor out of direct sunlight or other heat sources like stoves.
- Keep the monitor away from any liquid.
- Remove any object that could fall into the ventilation holes.
- Do not block the ventilation holes to avoid overheating.
- Do not knock or drop the monitor.
MAINTENANCE
CAUTION: Unplug the power cable from the outlet before cleaning the monitor.
- To clean your screen, slightly moisten a soft, clean cloth with water.
- Please use a special screen-cleaning tissue if possible.
- Do not use benzene, thinner, ammonia, abrasive cleaners or compressed air.
- Inappropriate cleaning solutions may damage the monitor or leave a milky film on screen or housing.
- Unplug the monitor if you are not going to use it for a longer time period.
- Do not expose the monitor to dust, liquids or a humid environment.
- In case the monitor gets in touch with any liquid, wipe it down immediately using a dry cloth.
- In case any liquid gets spilled into the ventilation holes, do not use the monitor anymore. Please contact a professional service technician.
Legal notice:

The terms HDMI and HDMI High Definition Multimedia Interface, and the HDMI logo are trademarks or registered trademarks of HDMI Licensing Administrator, Inc. in the USA and other countries.
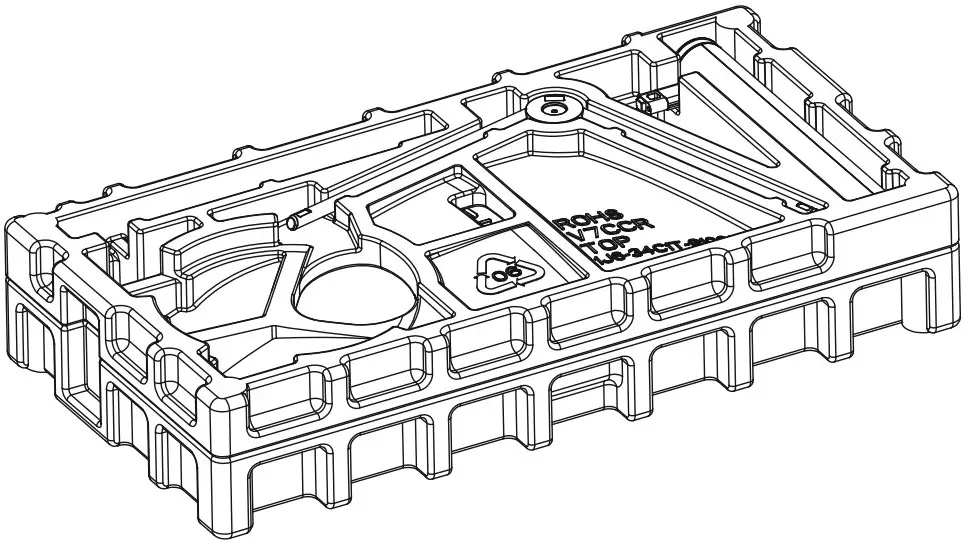
Box Contents
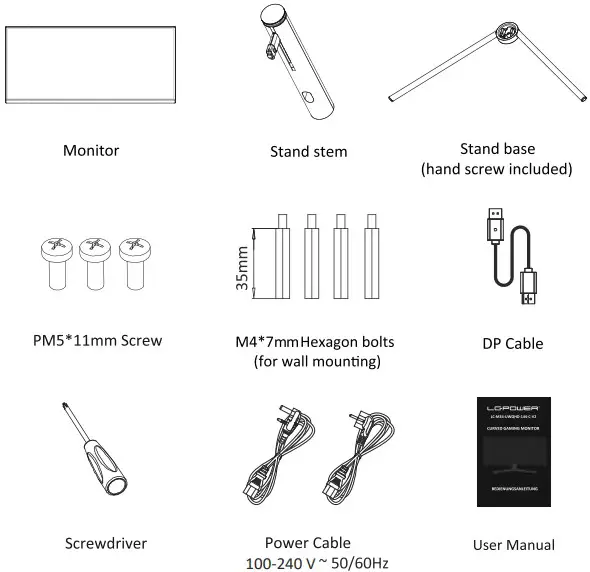
![]() Extra screws may be included as backup.
Extra screws may be included as backup.
Product Overview
Monitor Buttons
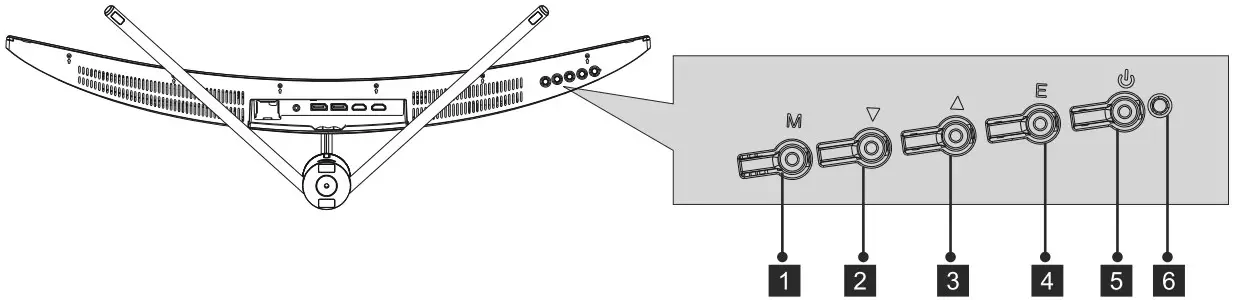
- M Menu Button: Press to view the OSD menu or access the sub-menus.
 Down Button: Press to go down in the menus.
 UP Button: Press up in the menu.
- E Exit Button: Press to exit.
 On / Off Button: Press to turn on / off the monitor.
- LED indicator: Changes color to indicate the status.
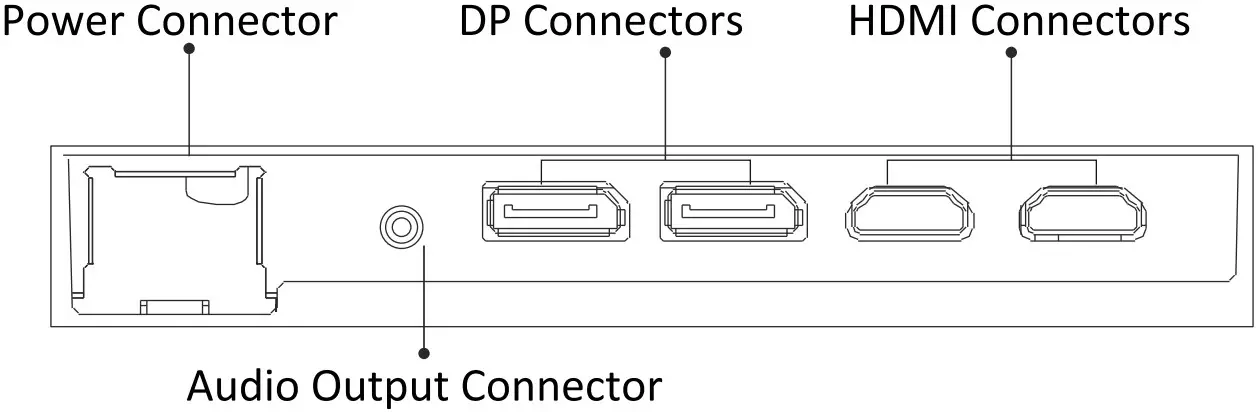
Monitor Ports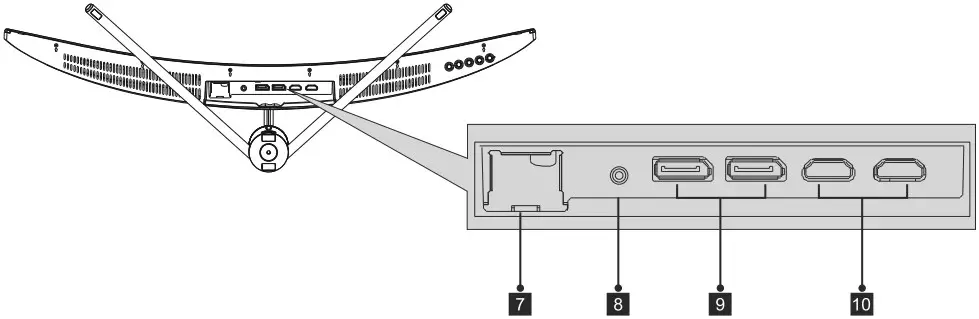
- Power Connector: Insert the power cable to supply power to the monitor.
- Audio output: Insert the audio cable for outputting audio signals.
- DP Connectors: Insert one end of the DP cable into the computer’s DP output and connect the other end to the monitor’s DP port.
- HDMI Connectors: Insert one end of the HDMI cable into the computer’s HDMI output and connect the other end to the monitor’s HDMI port.
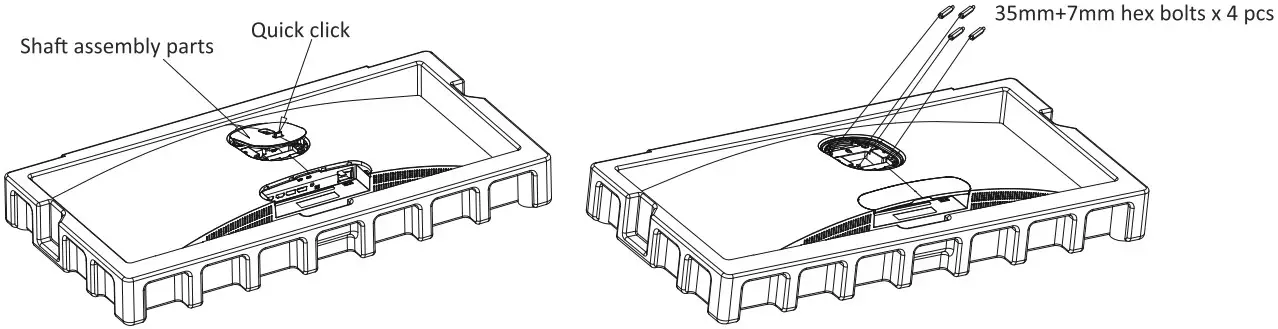
Stand Installation
- Open the package and take out the product with Styrofoam still attached. Gently place it on a table.
- Take out the upper Styrofoam and the inner package bag, lower Styrofoam place on a table, keep the lower foam underneath the monitor.
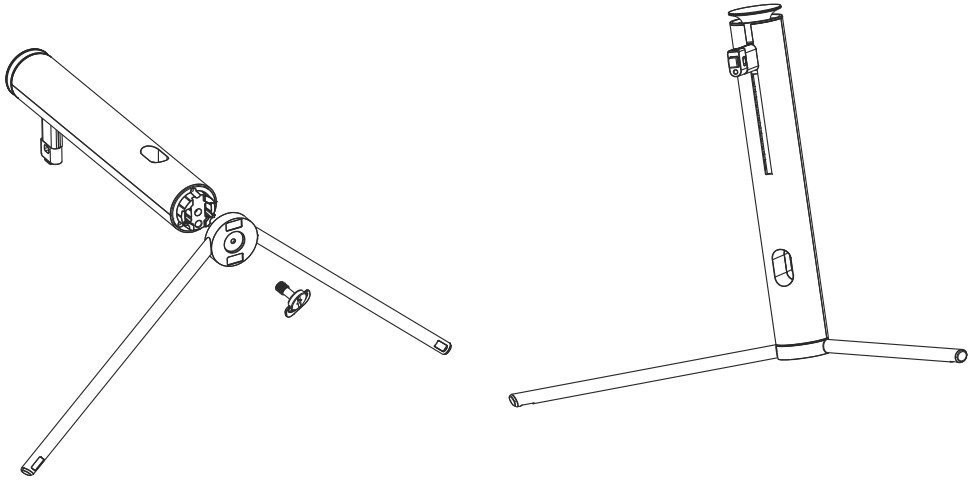
- See picture, fasten the stand stem and base with a screw.
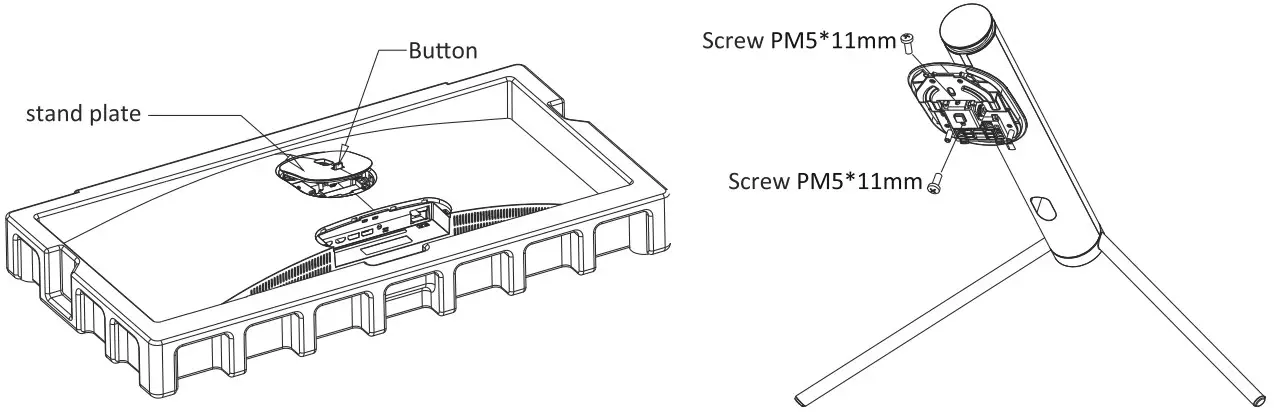
- Press the button to remove the stand plate. Fix the stand plate into the stand stem with the screw PM5*11mm.
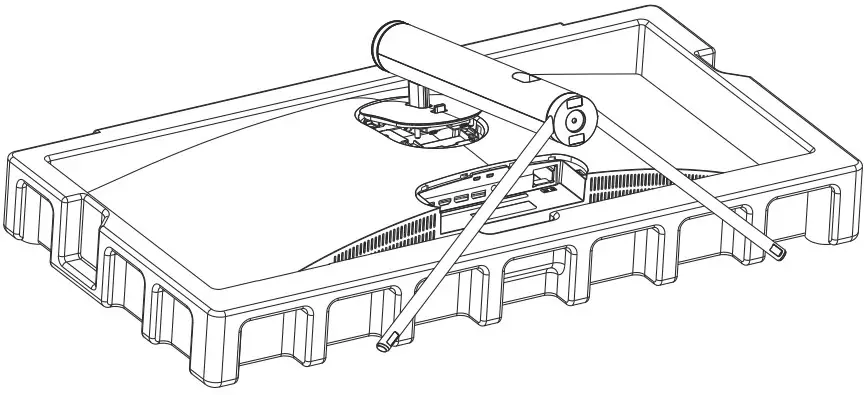
- Fix the whole assembled stand into the monitor,and check carefully to make sure it is fasten.
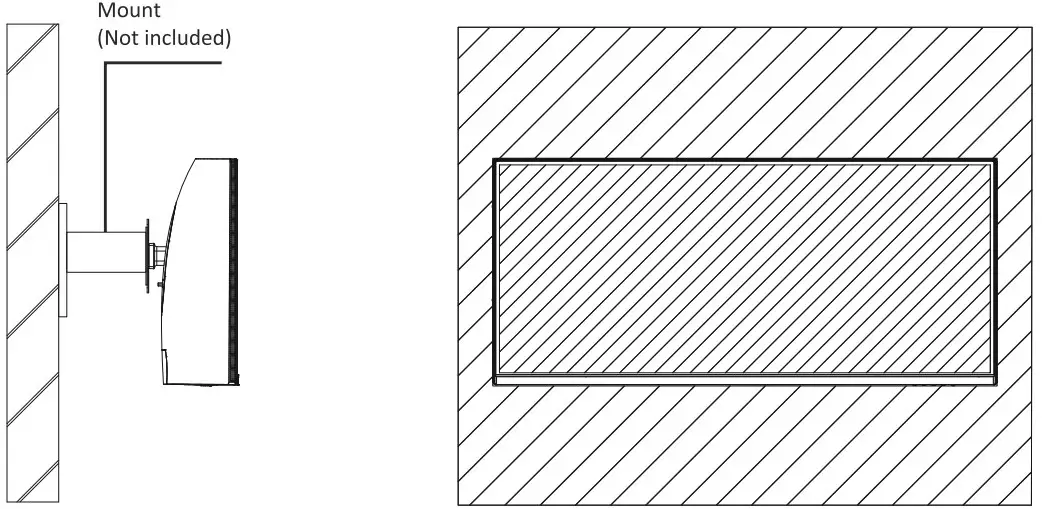
Wall Mounting
![]() This monitor only includes screws which may be used when attaching the monitor to a VESA 75*75mm type mount. No VESA mount or mounting accessory is included.
This monitor only includes screws which may be used when attaching the monitor to a VESA 75*75mm type mount. No VESA mount or mounting accessory is included.
- Open the package and take out the product with Styrofoam still attached. Gently place it on a table. Remove the extra parts and the Styrofoam covering the monitor. If the monitor is already attached to the stand, please remove the stand.
- Press the button to remove the adapter from the back of the monitor, and then tighten the supplied four screws into the mounting holes on the back of the monitor.
- Install the monitor on the wall by following the instructions of your wall mount.
Basic Operation
- Plug one end of the supplied DP cable into the DP port of your PC. Other types of connection can be used. additional cables not included.
- Connect the other end of the cable into the monitor corresponding connector. See the image below.
- Connect the power cable to your monitor and to an outlet. In case you cannot reach a wall outlet directly, we recommend to use a surge protectc with adequate voltage.cessible.
- Press the power button on the monitor to turn it on.
Indicator Light
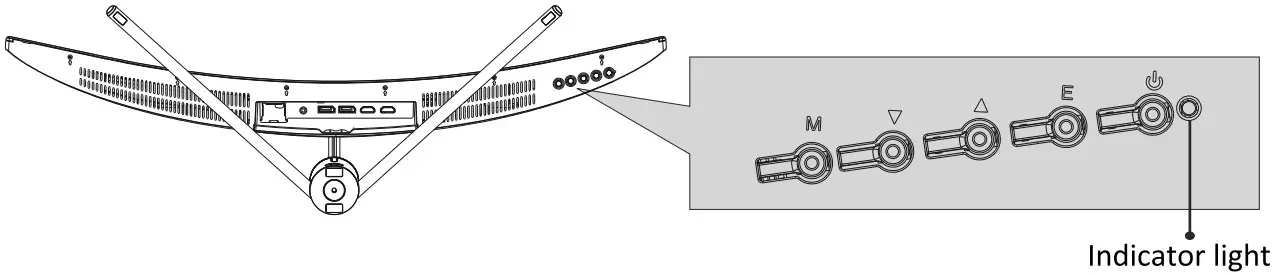
Blue light indicates that the monitor is powered and working normally. Red light indicates that no video source (no horizontal or vertical signal) has been detected or that the voltage is too low. Make sure your computer is turned on and the video cables are properly connected and fully plugged in.
The On-Screen Display (OSD) Menu may be used to adjust your monitor’s settings and appears on screen after turning on the monitor and pressing the M button.
 When using the monitor for the first time, settings will automatically adjust to optimal settings according to your computer’s configuration and parts etc.
The on-screen display (OSD) menu can be used to adjust settings of the monitor and is shown on the screen after the monitor is powered on and the M button is pressed.
- Press the button M to activate the browser screen.
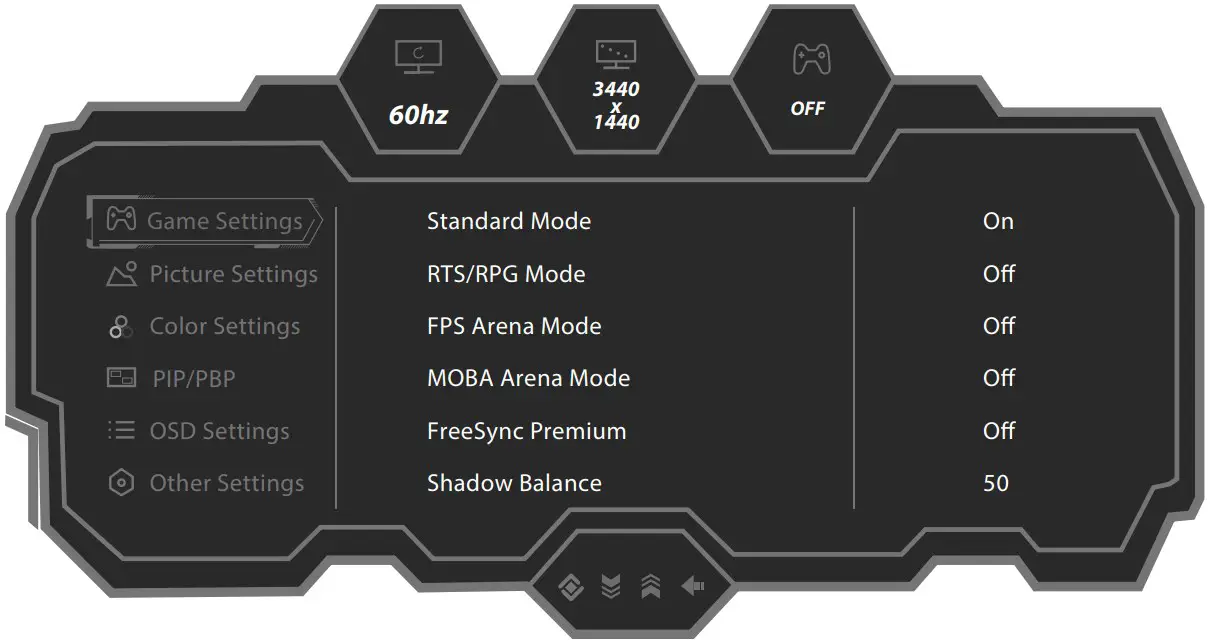
- Press or to scroll through the functions.
- Select the desired function, and press M to enter the sub-menu.
- Press or to scroll through sub-menus, and press M to select and confirm the desired function.
- Press or to select one option, and press M to confirm settings and exit from the current menu.
- Press E to exit from the menu screen.
| Game Settings | Standard Mode | Off/On |
| RTS/RPG Mode | Off/On | |
| FPS Arena Mode | Off/On | |
| MOBA Arena Mode | Off/On | |
| FreeSync Premium | Off/On | |
| Shadow Balance | 0-100 | |
| Response Time | Off/Normal/Fast/Ultrafast | |
| Refresh Rate | Off/On | |
| Position: TopRight/TopLeft/BottomRight/BottomLeft | ||
| Game Crosshair | Off | |
| On: Crosshair 1/Crosshair 2/Crosshair 3/ Crosshair 4/Crosshair 5/Crosshair 6 | ||
| Game Time | Off | |
| On: 15:00/30:00/45:00/60:00 | ||
| Dynamic Brightness | Off/Normal/Expert/Elaboration | |
| HDR | Off/HDR Standard | |
| MPRT | Off/On | |
| Ambient Lighting | Off/On | |
| icture Settings | Brightness | 0-100 |
| Contrast | 0-100 | |
| DCR | Off/On | |
| Contextual Model | Off | |
| On: Movie Mode/Reading Mode/Night Mode | ||
| Low Blue Light | 0-100 | |
| Sharpness | 0-5 | |
| Gamma | 1.8/2.0/2.2/2.4/2.6/ S.curve | |
| Aspect Ratio | Wide Screen/4:3/1:1/Auto | |
| Color Settings | Warm | Off/On |
| Natural | Off/On | |
| Cool | Off/On |
| Color Settings | User1 | Off/On: Red, Green, Blue |
| User2 | Off/On: Red, Green, Blue | |
| User3 | Off/On: Red, Green, Blue | |
| Hue | Red/Green/Blue/Cyan/Magenta/Yellow: 0 -100 | |
| Saturation | ||
| PIP/PBP | PIP/PBP Mode | Off/PIP Mode/PBP 2Win 1:1 |
| Sub-Signal Source | DP1/DP2/HDMI1/HDMI2 | |
| Audio Source | Auto/DP1/DP2/HDMI1/HDMI2 | |
| PIP Position | TopRight/TopLeft/BottomRight/BottomLeft | |
| PIP Size | Small/Medium/Large | |
| Window Swap | Off/On | |
| OSD Settings | Language | 简体中文/English/한국어/عربى/Portugues do Brasilazil/Deutsch/Nederland/Suomi/Français/ Ελληνικά/Indonesia/Italiano/日本語/Malaysia/ Polskie/Português/Pусский/Españo/ไทย/Українська/Tiếng Việt/繁體中文/Türkçe |
| OSD Time Out | 5-60 | |
| OSD H-position | 0-100 | |
| OSD V-position | 0-100 | |
| OSD Transparency | 0-5 | |
| Hotkey1 Setting | Brightness/Contrast/Volume/Mute/Shadow Balance/Game Crosshair/Refresh Rate/Game Time/Contextual Model/ PIP/PBP Mode/Input Signal/Dynamic Brightness/ HDR | |
| Hotkey2 Setting | ||
| Hotkey3 Setting | ||
| OSD Rotation | Normal/90/180/270 | |
| OSD Lock | Off/On | |
| Other Settings | Input Signal | Auto/DP1/DP2/HDMI1/HDMI2 |
| Volume | 0-100 | |
| Mute | Off/On | |
| Auto Power | Off/On | |
| Eyeshield Remind | Off/On | |
| Reset | No/Yes | |
| Information | Input Source/Resolution/Mode/HDR Ver. |
Technical Specifications
| Model | LC-M34-UWQHD-165 -C |
| Screen Size | 34 inch |
| Aspect Ratio | 21:9 |
| Backlight | LED |
| Brightness | 350cd/m2 |
| Panel | VA |
| Resolution | DP 1.4:3440 x 1440 Pixel@165 Hz HDMI 2.0:3440 x 1440 Pixel@100 Hz |
| Refresh Rate | 165 Hz |
| Response Time | OD 4ms |
| Viewing Angle | :178°(H) / ….178°(V) |
| Contrast Ratio | 3000:1 |
| VESA Mounting | 75 x 75mm |
| Colours | 16.7m |
| FreeSync Premium | Yes |
| Signal Input | 2x DP 1.4, 2x HDMI 2.0, lx Audio out |
| Power Input | 100-240 v-,50/60Hz,2,0A |
| Audio | |
| Speakers | NO |
| Audio Out | Yes |
| Accessories | |
| Power Cable | Yes |
| Additional Functions | |
| Low Blue Light | Yes |
| Physical Dimensions | |
| Dimensions (w/ Stand) | 808,65 x 510,66 x 256,08 mm |
| Dimensions (w/o Stand) | 808,65 x 363,33 x 123,22mm |
| Net Weight | 7.86kg |
| Gross Weight | 10,06kg |
![]()


