![]() Wall plate 750/1400 manual
Wall plate 750/1400 manual
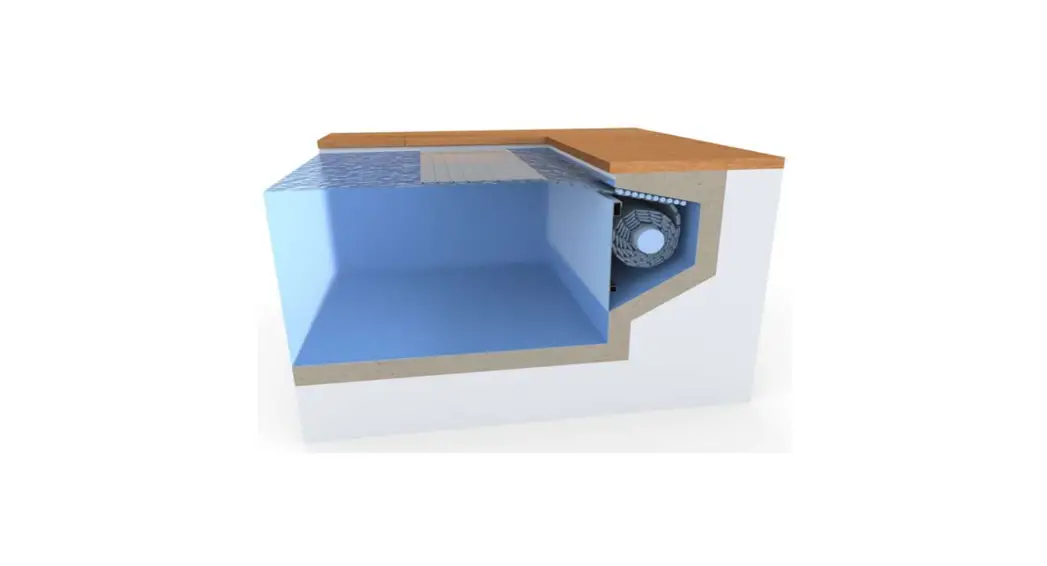
Wall plate
Wall plate with Pre-assembled elements

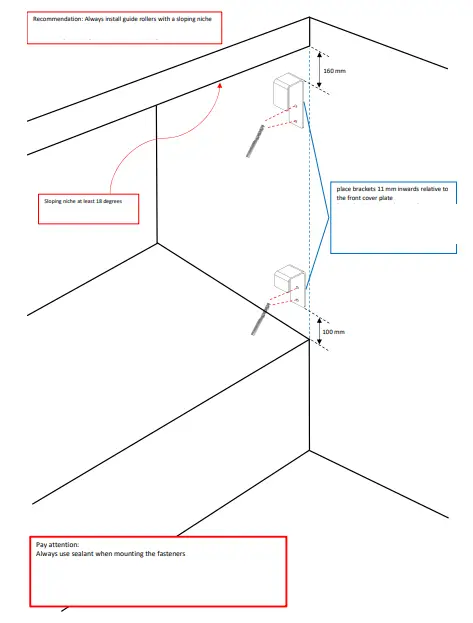
Wall plate 750
Wall plate 1400

Pay attention:
Always use sealant when mounting the fasteners
Wall plate 750 with Pre-assembled elements
Pay attention:
Always use sealant when mounting the fasteners
Wall plate 1400 with Pre-assembled elements
Pay attention:
Always use sealant when mounting the fasteners
Mounting the brackets and tubes
Wall plate 750
Mark the mounting holes according to drawing H-A-02
Drill the mounting holes with drill 11 mm (80 mm deep)
Mount the suspension brackets with the gaskets (8x DIN933, 8x CI13.0840.1620, 8x Weco M8)
Slide the tubes over the suspension brackets and secure the bottom one (1x DIN912)
| 1x 11 mm | |
| 8x DIN933 | 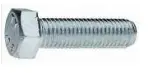 |
| 8x CI13.0840.1620 |  |
| 8x Weco M8 | 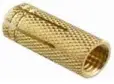 |
| 1x DIN912 | 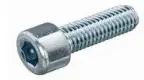 |
Mounting the brackets and tubes
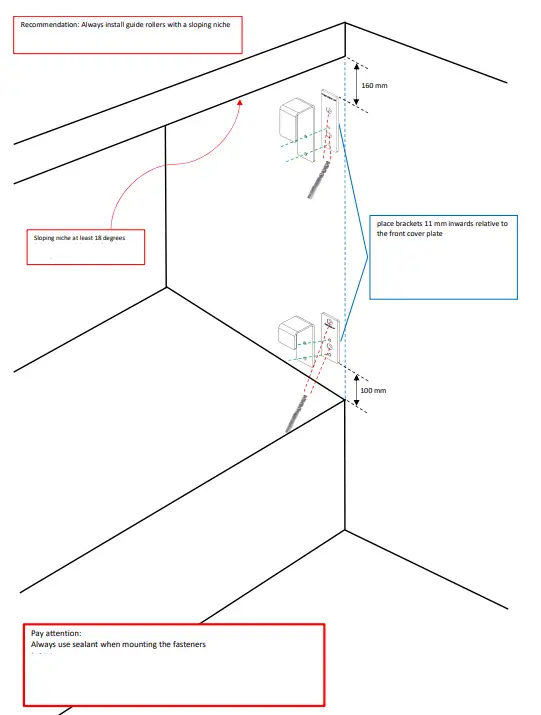
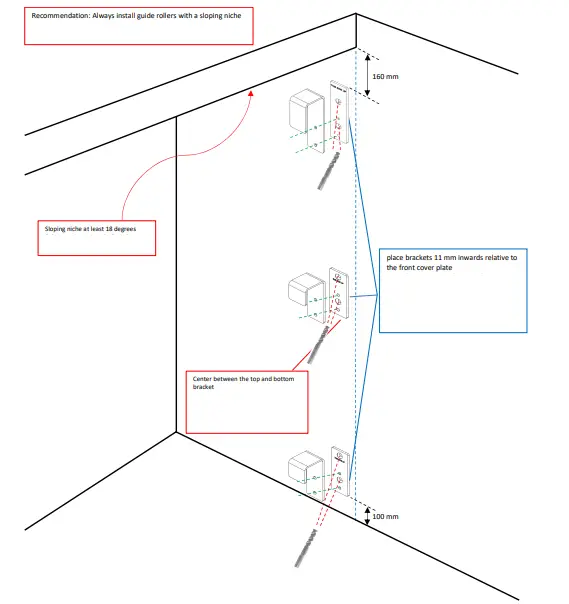
Wall plate 1400
Mark the mounting holes according to drawing H-A-03
Drill the mounting holes with drill 11 mm (80 mm deep)
Mount the suspension brackets with the gaskets (8x DIN933, 8x CI13.0840.1620, 8x Weco M8)
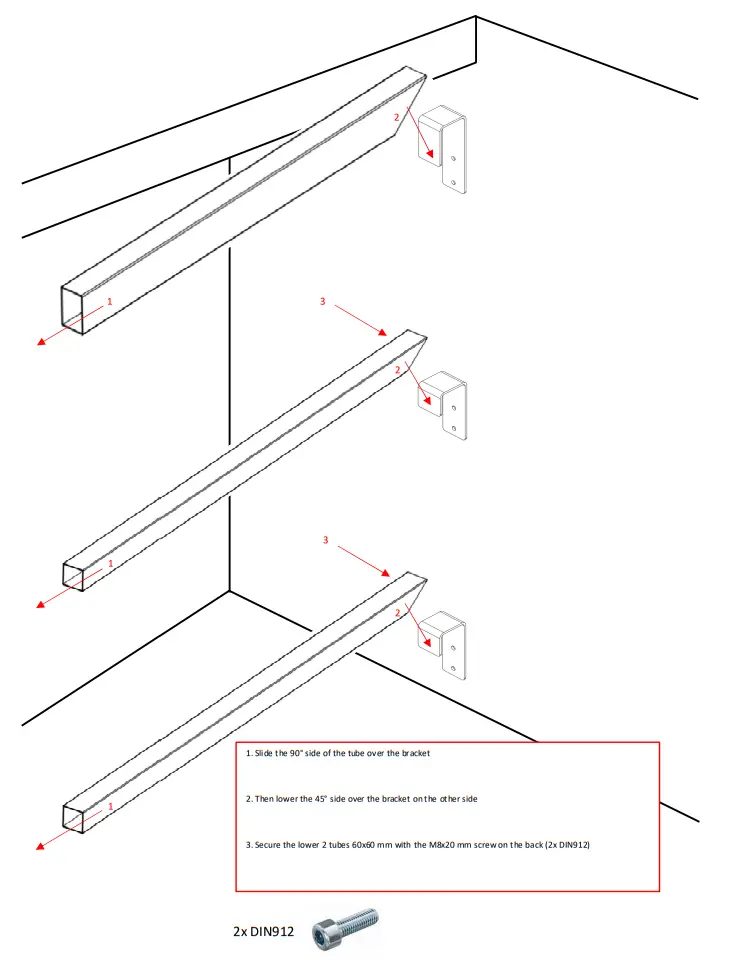
Slide the tubes over the suspension brackets and secure the bottom 2 (1x DIN912)
| 1x 11 mm | |
| 12x DIN933 | |
| 12x CI13.0840.1620 | |
| 12x Weco M8 | |
| 2x DIN912 | |
Assembling the Pre-assembled elements, brackets and the constuction
Wall plate 750 with Pre-assembled elements
Mark the mounting holes from the Pre assembled elements according to drawing H-A-04
Drill the mounting holes with drill 11 mm (80 mm deep)
After placement foil
Find the holes according to drawing H-A-04 and pierce it
Mount the suspension brackets with the gaskets (8x DIN912, 8x CI13.0840.1620)
Slide the tubes over the suspension brackets and secure the bottom one (1x DIN912)
| 8x DIN7991 | 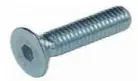 |
| 8x Weco M8 | |
| 9x DIN912 | |
| 8x CI13.0840.1620 | |
Pay attention:
In the case of concrete and masonry pools, take over the tapped holes, remove the plate and countersink the marked holes 1 cm deep into the wall
Assembling the Pre-assembled elements, brackets and the constuction
Wall plate 1400 with Pre-assembled elements
Mark the mounting holes from the Pre assembled elements according to drawing H-A-05
Drill the mounting holes with drill 11 mm (80 mm deep)
After placement foil
Find the holes according to drawing H-A-05 and pierce it
Mount the suspension brackets with the gaskets (12x DIN912, 12x CI13.0840.1620)
Slide the tubes over the suspension brackets and secure the bottom 2 (2x DIN912)
| 12x DIN7991 | |
| 12x Weco M8 | |
| 14x DIN912 | |
| 12x CI13.0840.1620 | |
Pay attention:
In the case of concrete and masonry pools, take over the tapped holes, remove the plate and countersink the marked holes 1 cm deep into the wall
Tubes Wall plate 750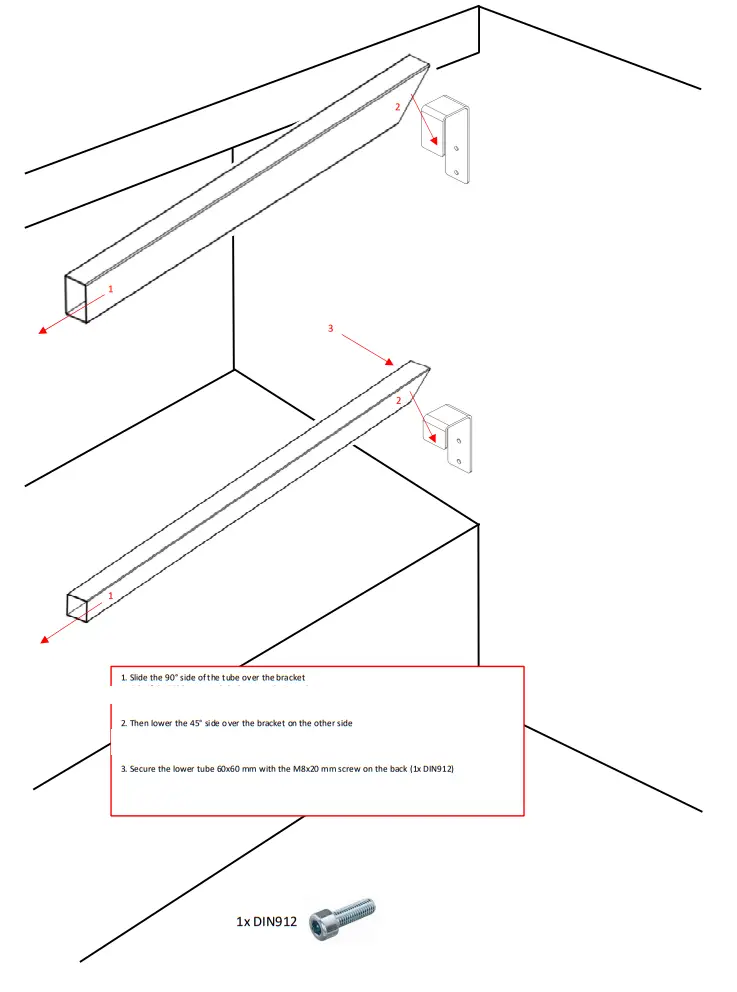
Tubes Wall plate 1400
 Wall plate PVC 750
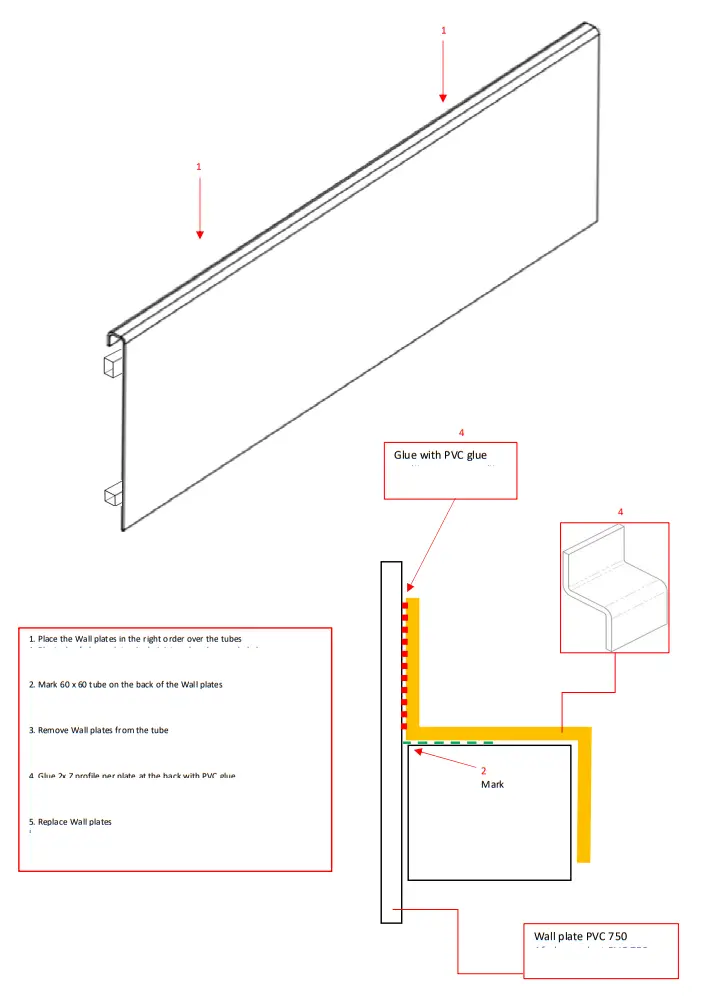 Wall plate PVC 1400
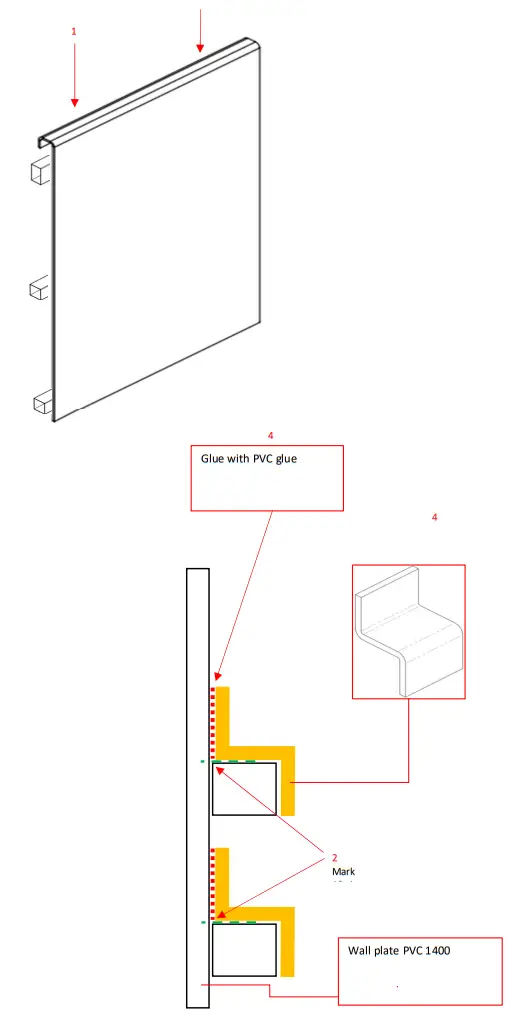
- Place the Wall plates in the right order over the tubes
- Mark both 60 x 60 tubes on the back of the Wall plates
- Remove Wall plates from the tube
- Glue 4x Z profile per plate at the back off the plate with PVC glue (2x top, 2x bottom)
- Replace Wall plates


