![]() Lounger manual
Lounger manual
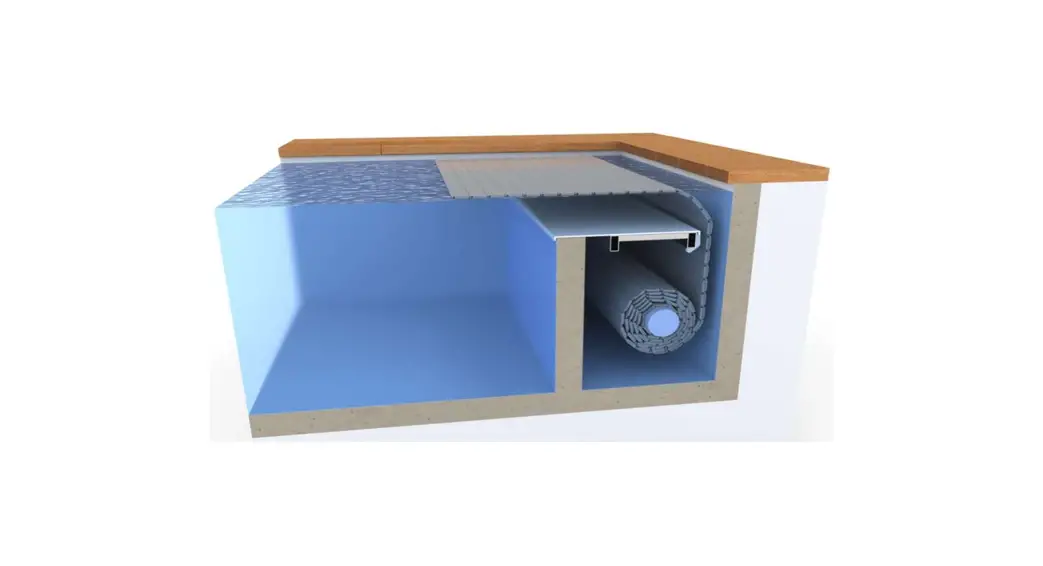
Lounger
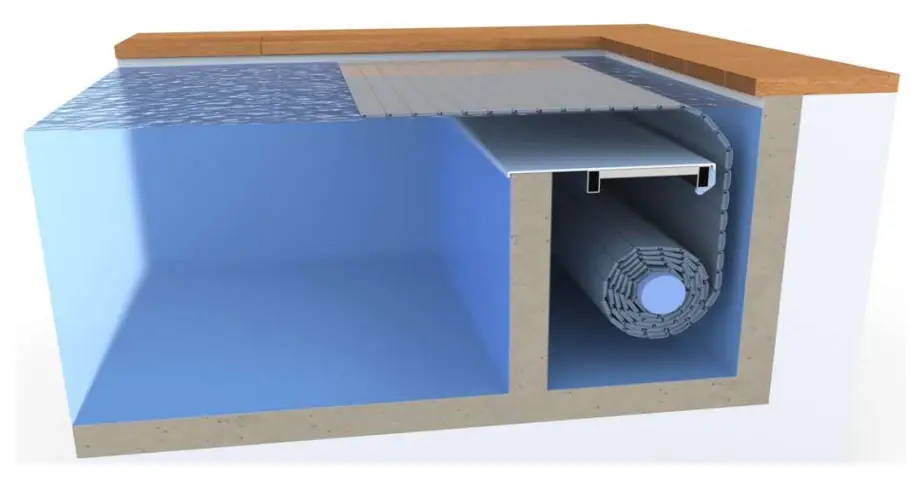
Lounger with Pre-assembled plates
Lounger
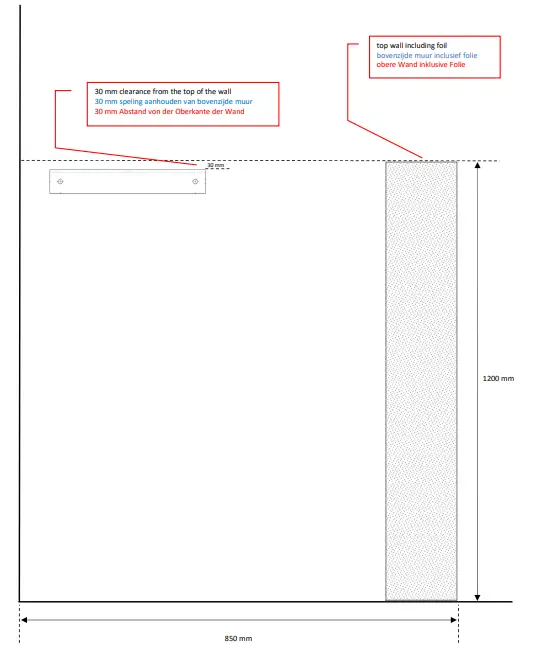
Pay attention:
Always use sealant when mounting the fasteners Take more distance at round corners and skimmers entering the bath Minimal 30 mm)
Lounger with Pre-assembled plates
Pay attention:
Always use sealant when mounting the fasteners Take more distance at round corners and skimmers entering the bath Minimal 30 mm)
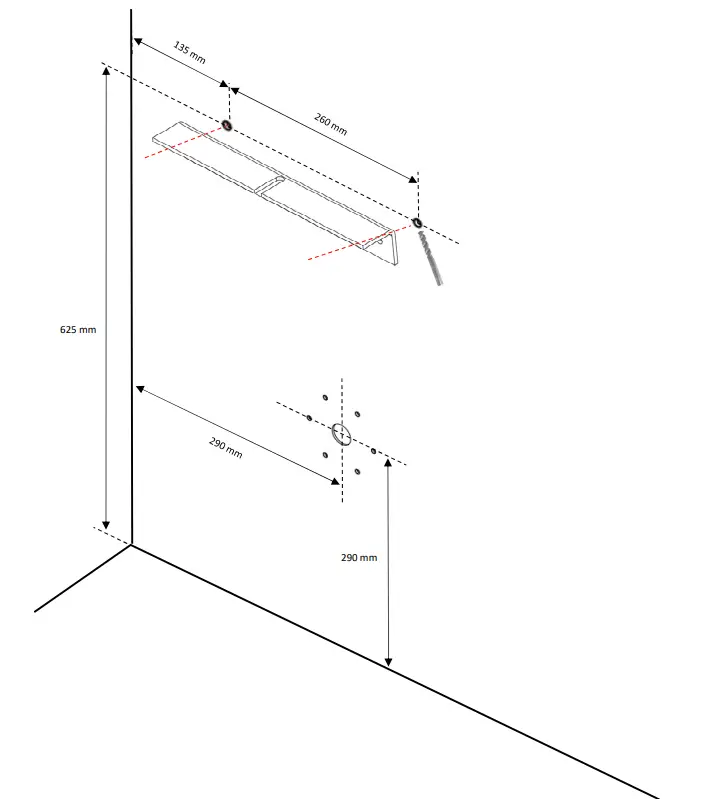
Assembling the angles and the constuction
Mark the mounting holes according to drawing H-L-02
Drill the mounting holes (drill 11 mm)
Mount the angles with the gaskets (4x DIN933, 4x CI13.0840.1620, 4x Weco M8)
Place the construction on the corner lines and secure it (2x DIN912, 2x DIN9021)
| 1x 11 mm | |
| 4x DIN933 |  |
| 4x CI13.0840.1620 |  |
| 4x Weco M8 | 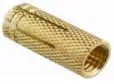 |
| 2x DIN912 | 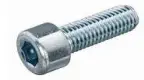 |
| 2x DIN9021 |  |
Assembling the angles and the constuction
Lounger with Pre-assembled plates
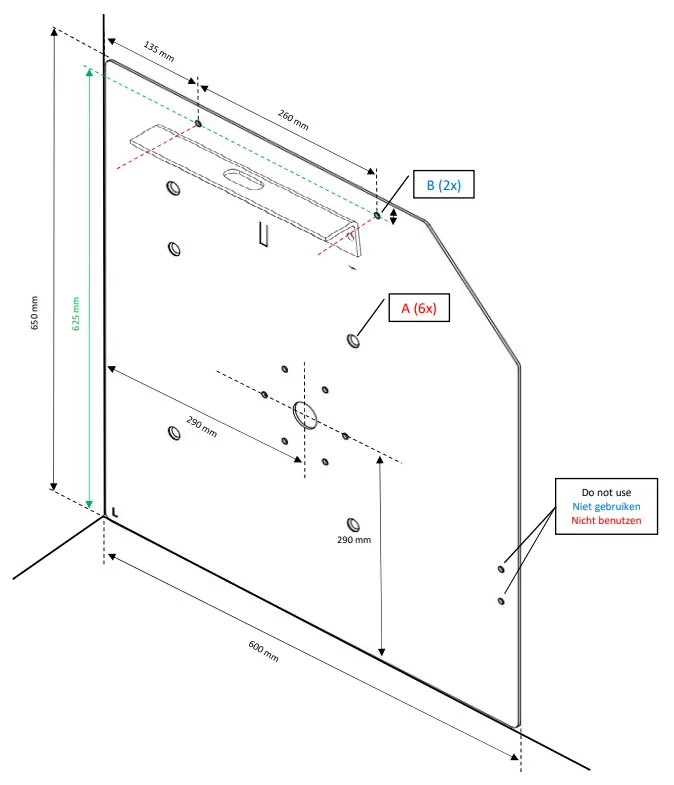
Find the holes according to drawing H-L-03 and pierce it (A)
Mount the angles with the gaskets (4x DIN912, 4x CI13.0840.1620)
Place the construction on the corner lines and secure it (2x DIN912, 2x DIN9021)
| 6x DIN912 | |
| 4x CI13.0840.1620 | |
| 2x DIN9021 | |
Mounting the lounger on the click system
Place the lounger and click it on the click system (note position left, right and middle)
Before fitting the lounger, stick the ribbons to the side of the bath and check the direction of rotation of the motor
When the cover is adjusted for the first time, attach a rope to the last slat to prevent too deep adjustment
Disassemble lounger
Remove the lounger of the click system by moving it from the bottom up
Pre-assembled plates
Pay attention:
Always use sealant when mounting the fasteners Take more distance at round corners and skimmers entering the bath Minimal 30 mm)
Assembly of the Pre-assembled plates
concrete
Determine the motor side and drill a recess of 35 mm
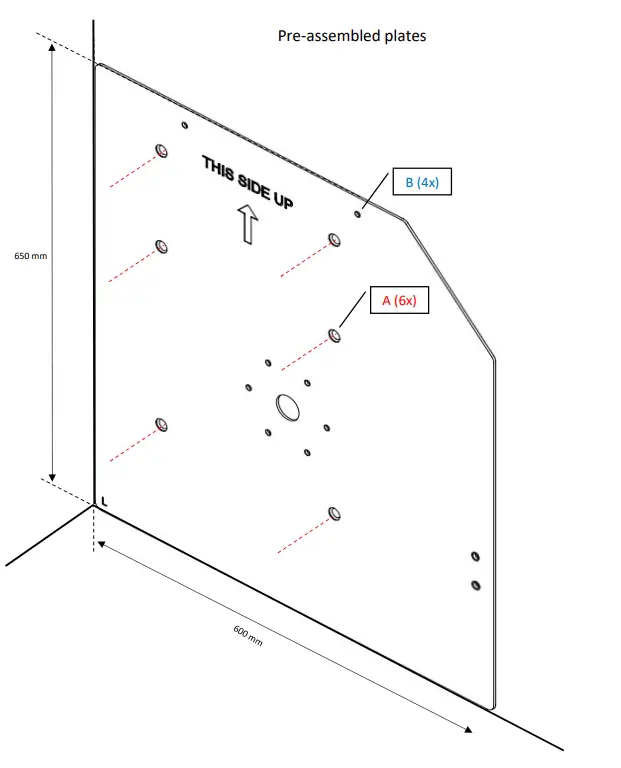
Place the Pre-assembled plates in both corners and mark the 6 recessed holes (A)
Drill the 6 mounting holes with drill 11 mm (80 mm deep)
Insert the screws through the plates and then lightly tighten the weco plugs (12x DIN7991, 12x Weco M8)
Place the plates and carefully tap the screws with the weco into the wall with a hammer
Then tighten the screws well
| 12x DIN7991 | |
| 12x Weco M8 | |
Pay attention:
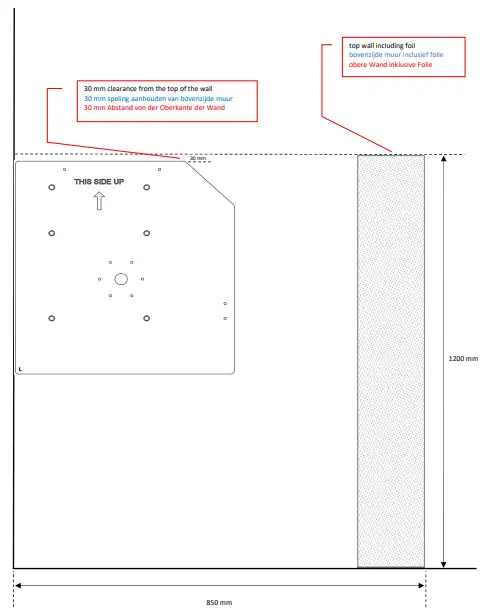
In the case of concrete and masonry pools, take over the tapped holes (B), remove the plate and countersink the marked holes 1 cm deep into the wall
Assembly of the Pre-assembled plates
styropole
Determine the motor side and drill a recess of 35 mm
Place the Pre-assembled plates in both corners and mark the 6 recessed holes (A)
Drill the 6 mounting holes with drill 11 mm (80 mm deep)
Insert the screws through the plates so that they end up in the hollow space of the styropole (12x DIN7991)
Install and tighten revet and hex nut (12x DIN9021, 12x DIN934)
Place the Weco and tighten it well so that it opens wide (12x Weco M8)
| 12x DIN7991 | |
| 2x DIN9021 | |
| 12x DIN934 |  |
| 12x Weco M8 | |
![]() H-H-PRE-03
H-H-PRE-03


