![]()
![]() MuxStream Pro Multi-Camera
MuxStream Pro Multi-Camera
Live Streaming Kit, 30X Zoom, PoE 500785-PoE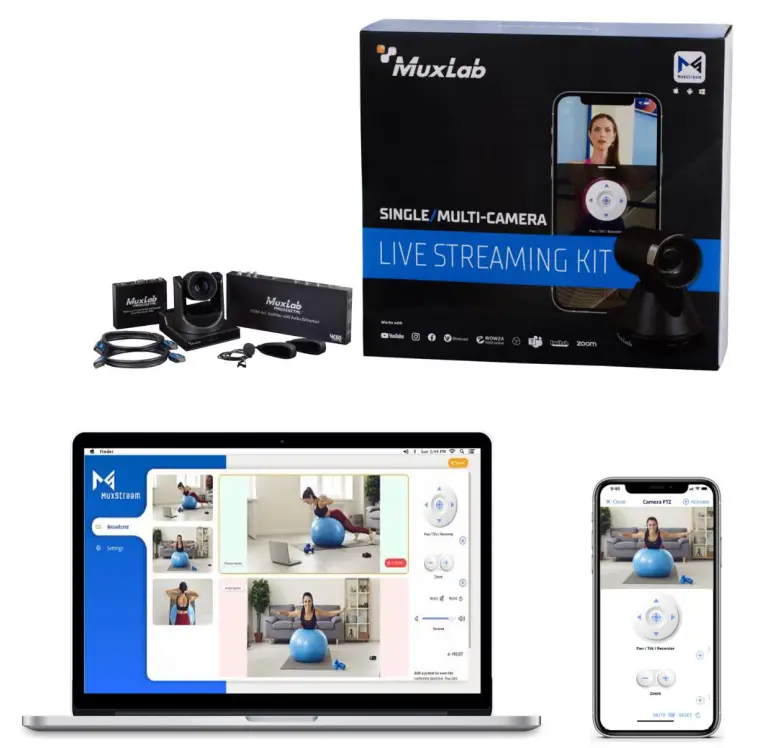
User Manual
94-000950-B / SE-000950-B
Product Overview
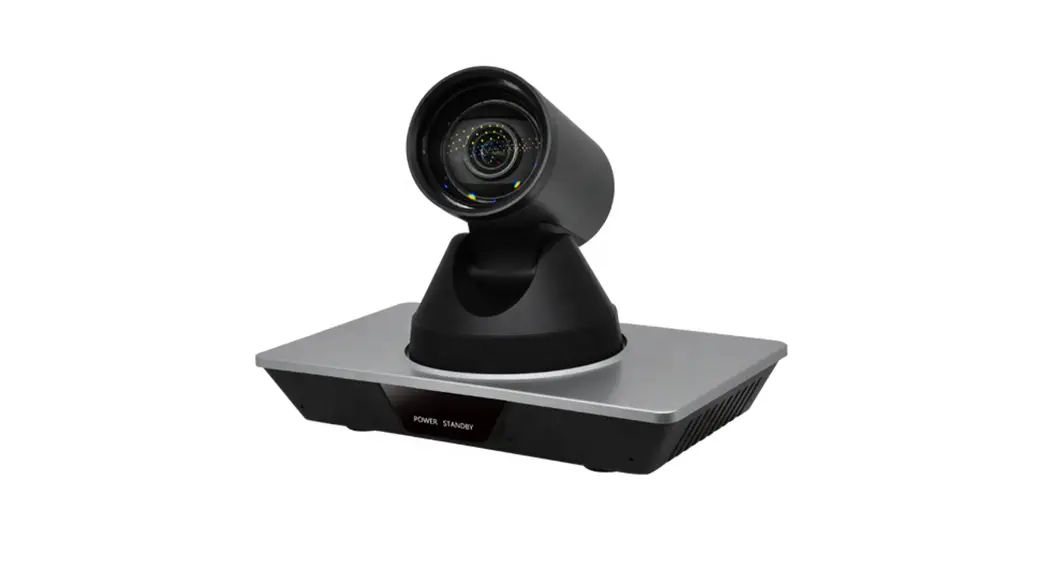
The MuxLab “MuxStream Pro Multi-Camera Live Streaming Kit 30X Zoom, PoE” (model 500785-PoE) includes the main components needed to broadcast live content to mass recipients spread out across the globe. The solution allows live presentations to effectively be streamed over the Internet up to 1080p/60 and can work with industry-standard broadcast streaming services such as YouTube, Facebook, and Wowza, to name a few, and also works with popular Audio/Video content production software tools such as OBS, Wirecast, and others.
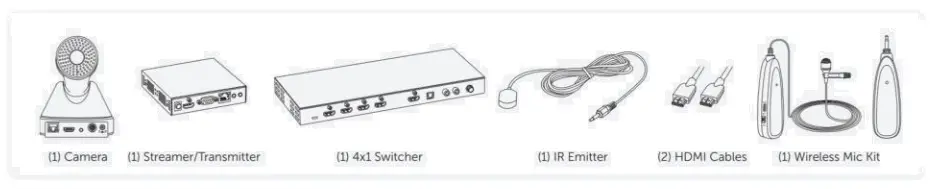
The kit comes complete with an AV over IP H.264/H.265 4K Streamer/Transmitter to stream content to Broadcasting Services, an HDMI 4×1 Switcher, a MuxStream PTZ, 30X Zoom, PoE Camera @ 1080p/60, an IR Emitter, a Wireless Lavalier Microphone, an intuitive control application (MuxStream App) to manage the system, and two 6.6ft (2m) Premium Certified HDMI 2.0 cables.
The MuxLab MuxStream Control App is free to download from the MuxLab website (for Windows PC), and the iOS and Android App Stores (for tablets and smartphones).
The Control App manages the system setup, configures the Transmitter to stream to various broadcast services such as YouTube, Facebook, and Wowza, manages the camera switching, camera settings including pan/tilt/zoom (PTZ), and the Stream/Transmitter volume. The AV over IP H.264/H.265 4K Streamer/Transmitter supports up to 4K video @ 30Hz and may be located up to 330ft (100m) from an Ethernet network switch and supports PoE (but a PSU is included) and supports low bandwidth for streaming the HDMI switcher video and mic audio over the Internet. Transmitter and Camera support PoE (but Power Supplies are included)
Installation
- Please validate that you received all contents listed below.

- Download the MuxStream App.
Download the MuxStream Desktop
App to manage the above devices at: www.muxlab.com/muxstream or at the Apple App Store for iOS and Google Play Store for Android, available for tablets and Smartphones.
- Make sure you have an internet connection.

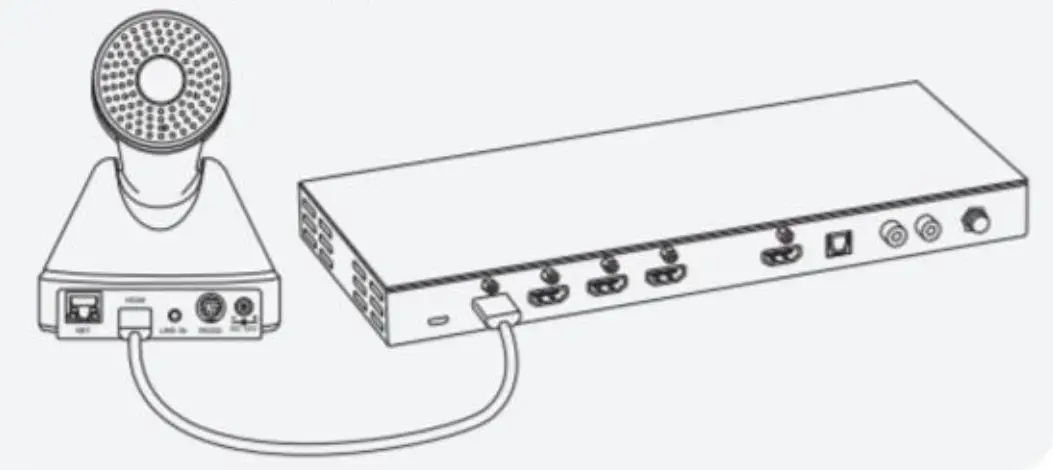
- Connect the Camera to the HDMI 4×1 Switcher. Connect the 1* HDMI cable to the Camera HDMI port and to the HDMI input port 1 of the 4×1 Switcher.
Additional cameras (sold separately) may be similarly connected in sequence to the 4×1 switcher.
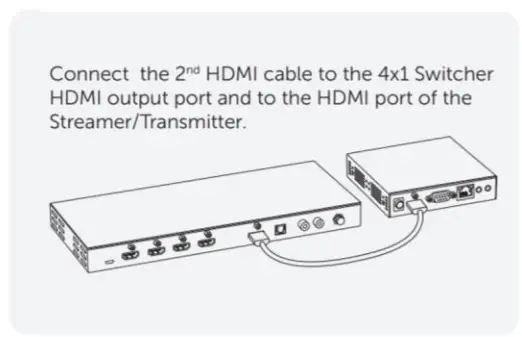
- Connect the HDMI 4×1 Switcher to the Streamer/Transmitter.

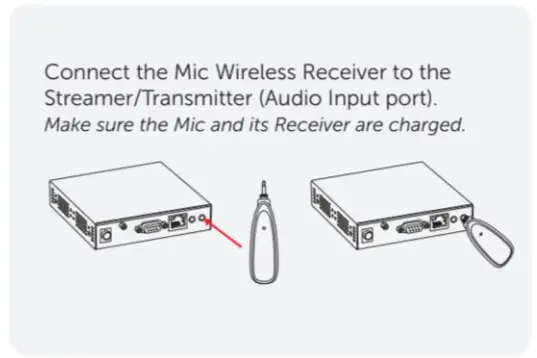
- Connect the Mic Wireless Receiver to the Streamer/Transmitter.

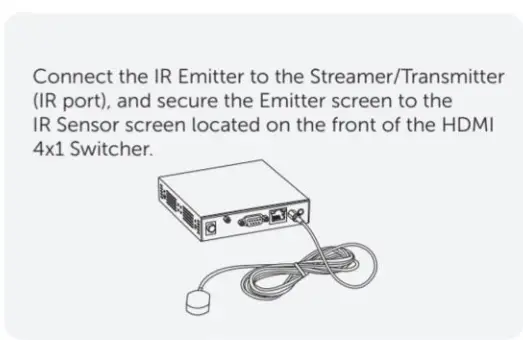
- Connect the IR Emitter to the Streamer/Transmitter.

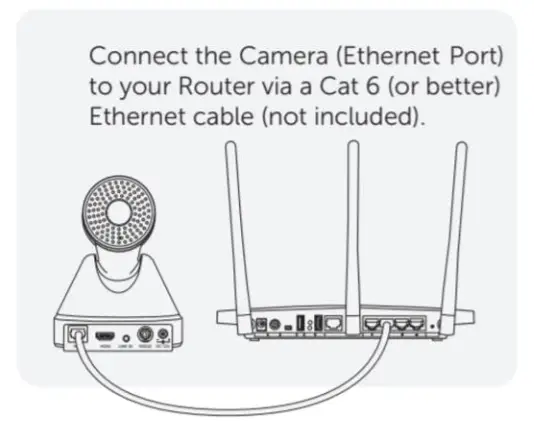
- Connect the Cameras to your Router.

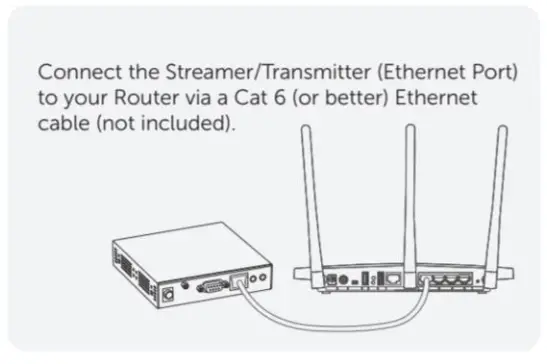
- Connect the Streamer/Transmitter to your Router.

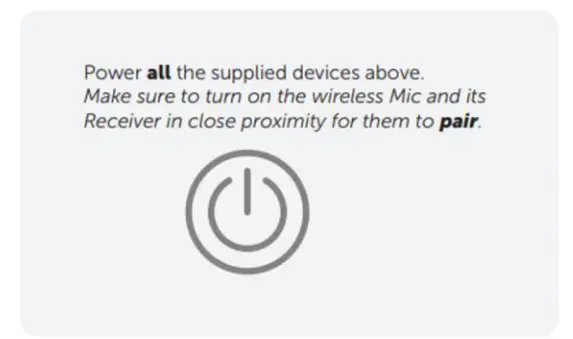
- Power On all devices.

- Open the MuxStream App.

Using the MuxStream App
3.1 Configuring the App.
3.1.1 Creating an account.
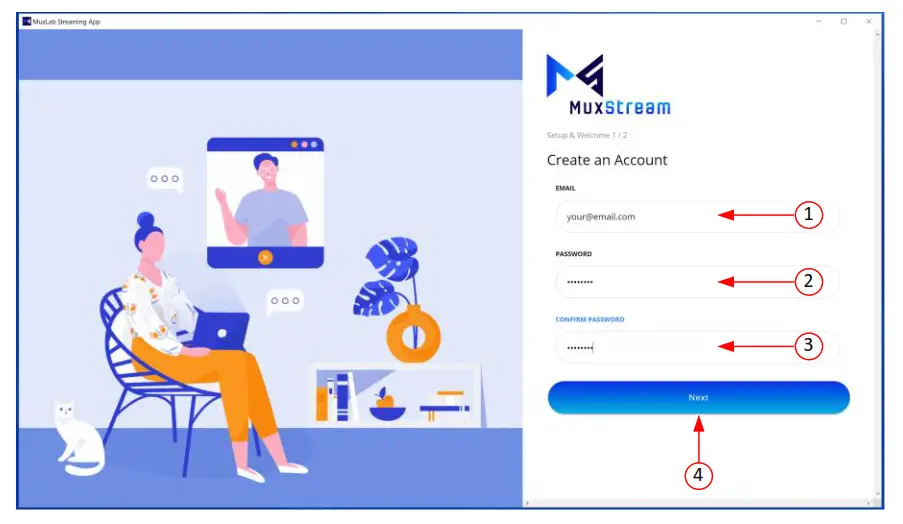
If this is the first time you are running the MuxStream App, a new user
must be created, see the figure below.
To create a new user, follow these steps:
- Enter your email address.
- Enter your password.
- Confirm your password.
- Press the “Next” button.
 3.1.2 Auto discover and configure your kit.
After creating an account, the application will search for and discover the devices on the network (PTZ Cameras and Streamer/Transmitter) and will configure them automatically.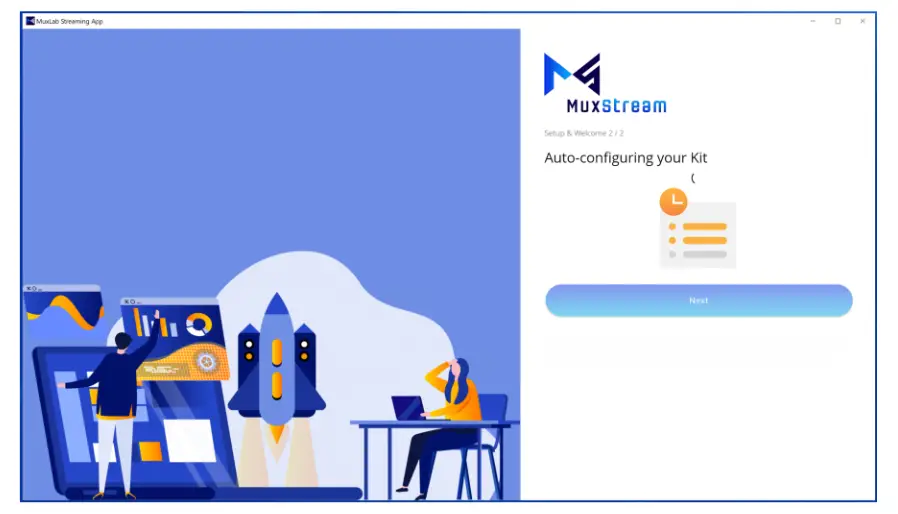 Once the application has configured the devices, it will display the previews of the found cameras (see figure below).
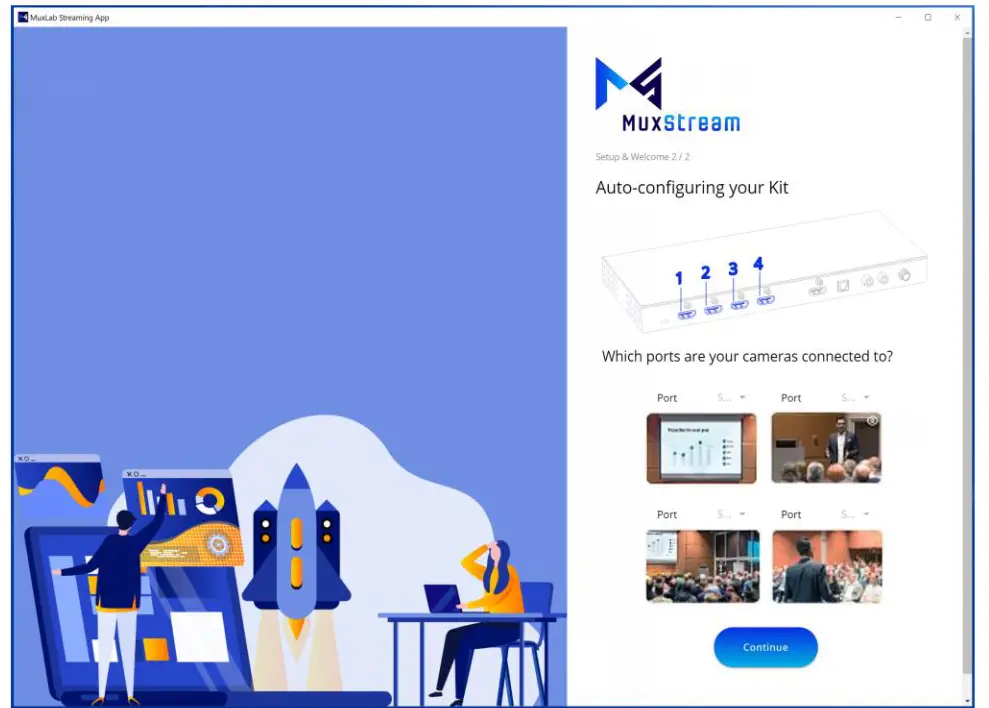
Select the ports on the HDMI 4×1 Switch that your cameras are connected to and then press the “Continue” button (see figure below). 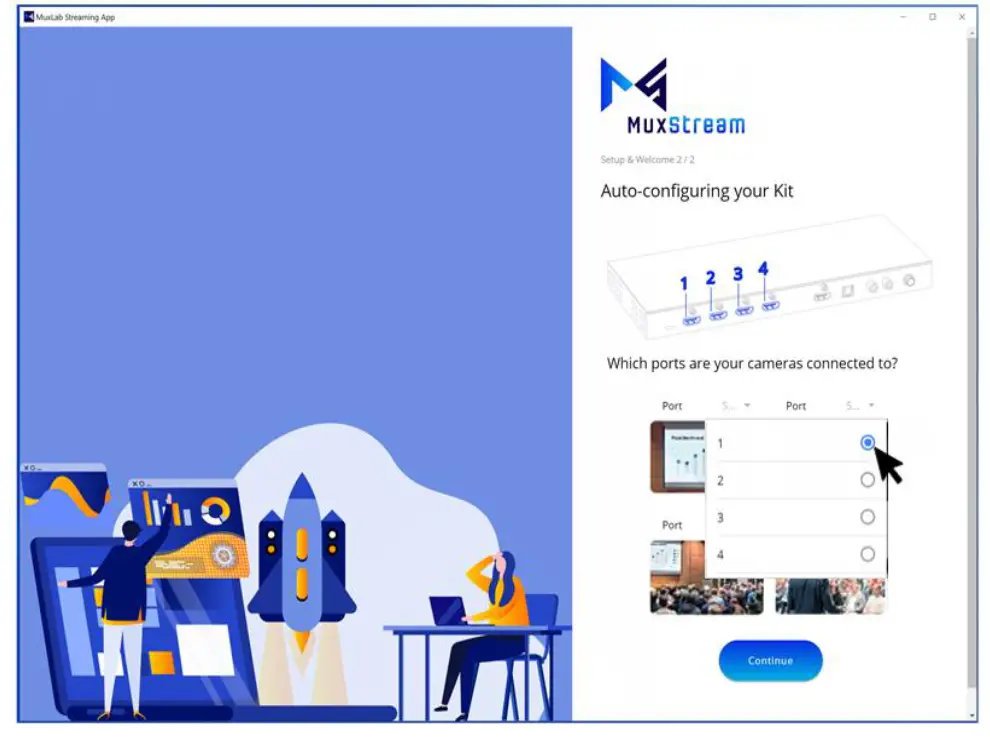 After select the ports on the HDMI 4×1 Switch, click the “Next” button to begin (see figure below).
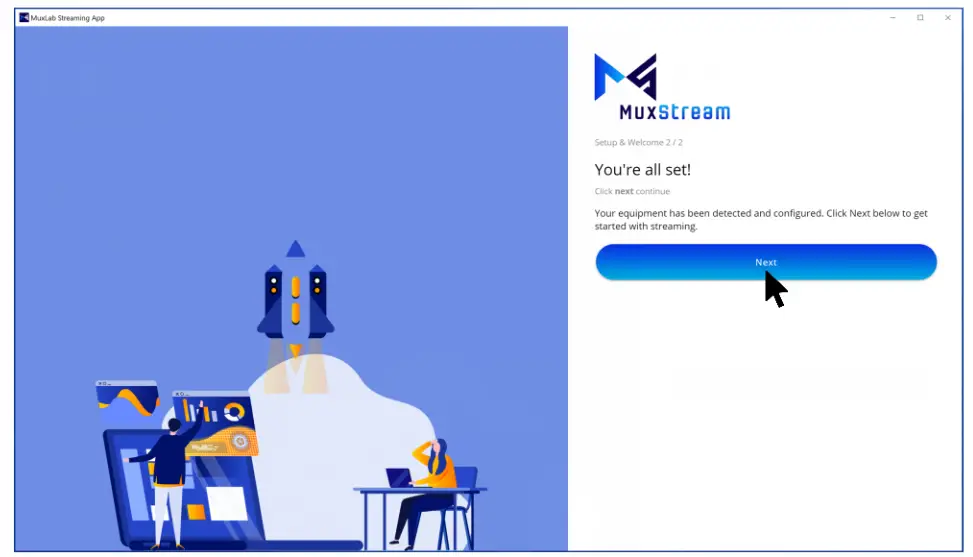
To start using the application, the user must re-enter their email address and password and then press the “Sign in” button.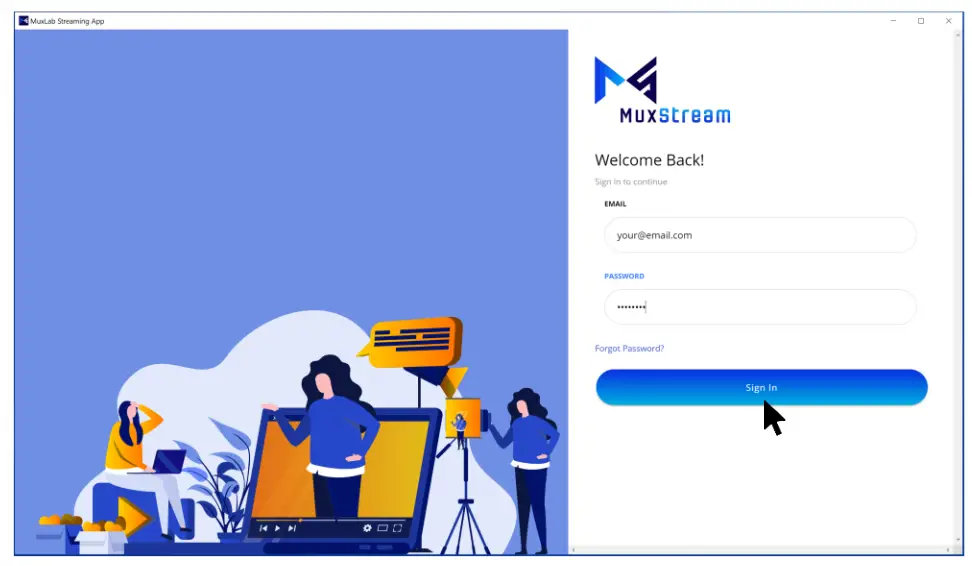
By pressing the “Sign in” button, the system control interface will start automatically.
3.2 Control interface
Once logged in, the User can see three main tabs: Broadcast, Settings and Create Stream (+Stream), see figure below. 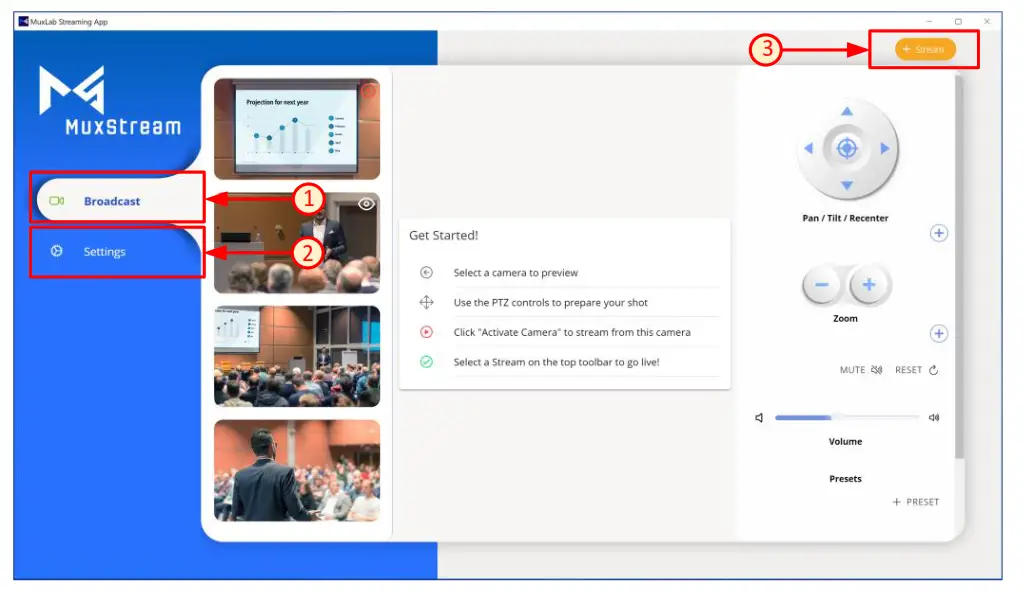
3.2.1 Broadcast tab
If you are logging in for the first time, when the “Broadcast” tab is selected, in the middle of the window the application displays a table with the basic instructions, please read them carefully. On the left side, the application will show the small-format previews of configured cameras and on the right side, the application will show all the buttons to control the PTZ options for the cameras, mic volume, and pre-sets (see figure below).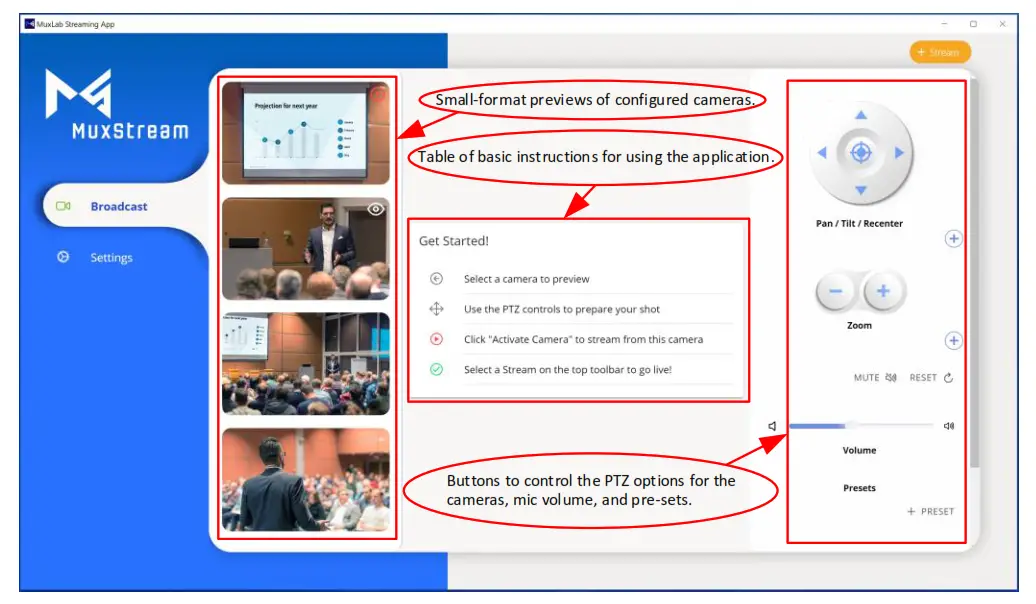
When the mouse pointer is positioned over any of these small-format previews, the “PREVIEW” and “ACTIVATE” buttons will appear.
The “PREVIEW” button will allow the User to see the selected preview in a large-format preview in the middle of the window and the “ACTIVATE” button will allow the user to activate (select) the given camera view.
Click the “PREVIEW” button in the small-format preview of the camera you want to start streaming with, now the User can see the selected preview in a larger-format preview window, then click the “ACTIVATE” button to activate the camera (see figure below).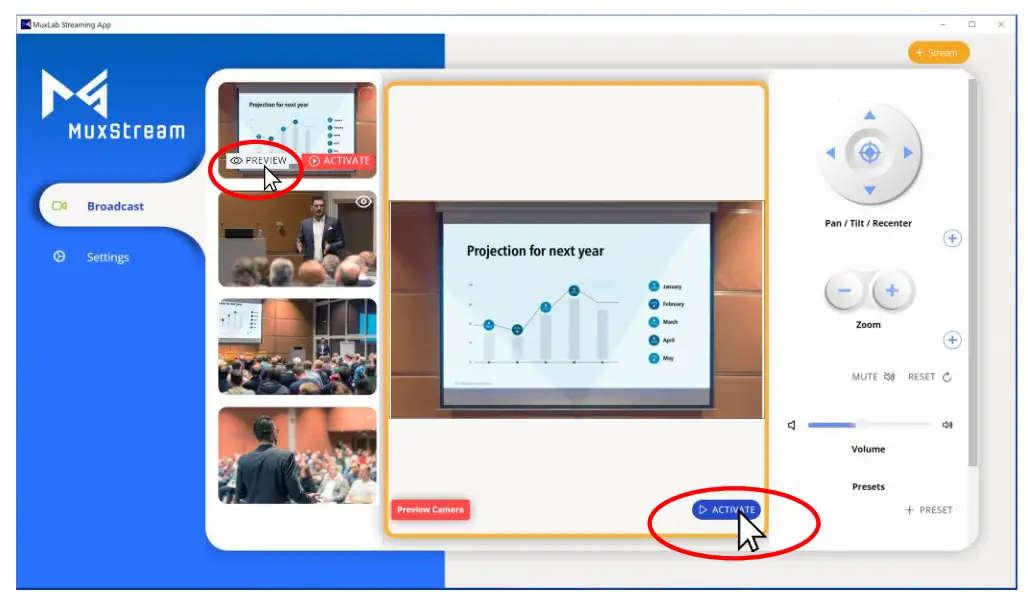
After clicking the “ACTIVATE” button, a green button will appear indicating that the camera is active (see figure below).
Only the video from the active camera will be streamed. 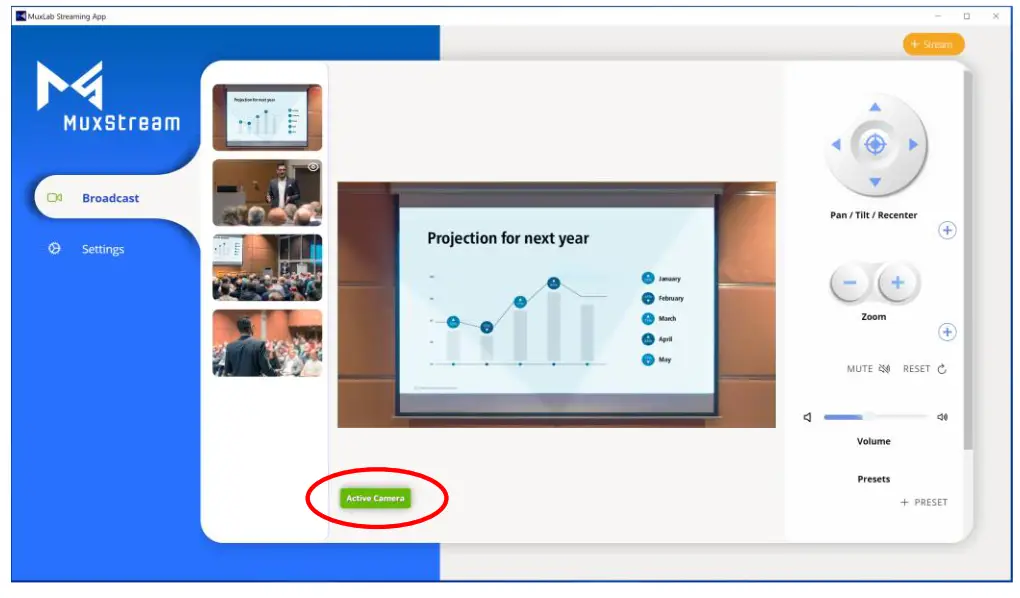
Now by clicking the “PREVIEW” button on a small-format preview of a different camera, the User can have another large-format preview that will be displayed above the active camera preview (see figure below). This second large-format preview will allow the user to make any necessary Pan/Tilt/Zoom/Center/Preset adjustments to the image of this camera view before activating it for transmission.
Keep in mind that it is possible to activate a camera by clicking on the “ACTIVATE” button either from any small-format preview or from the large format preview.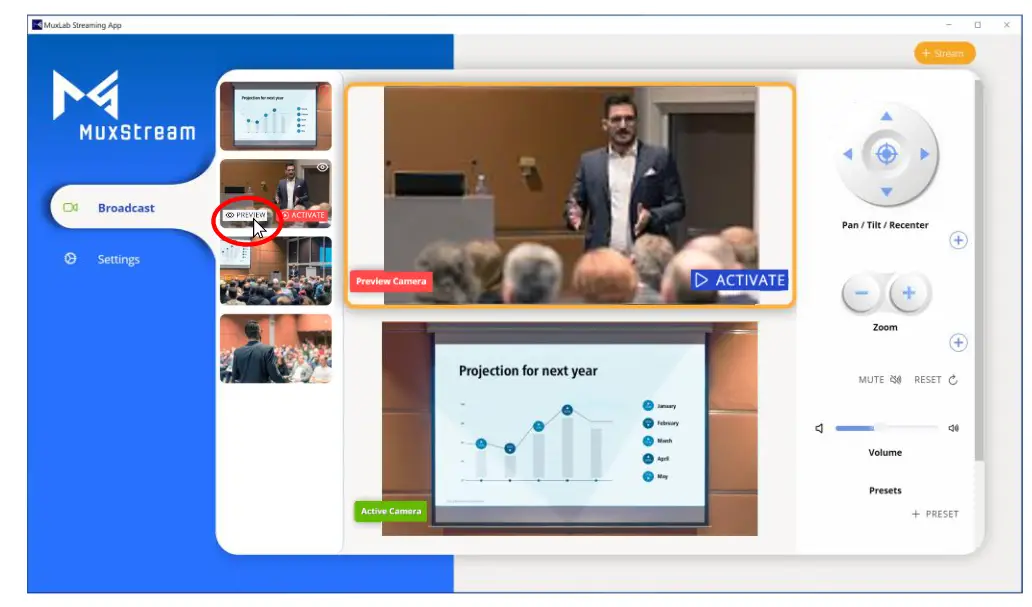
To control all the functions of a camera (Pan/Tilt/Center/Zoom/Preset, etc.) click on the large-format preview of the camera you want to control, after clicking an orange border will appear around the image indicating that the camera can be controlled, all control options can be adjusted using the mouse or keyboard (see figure below).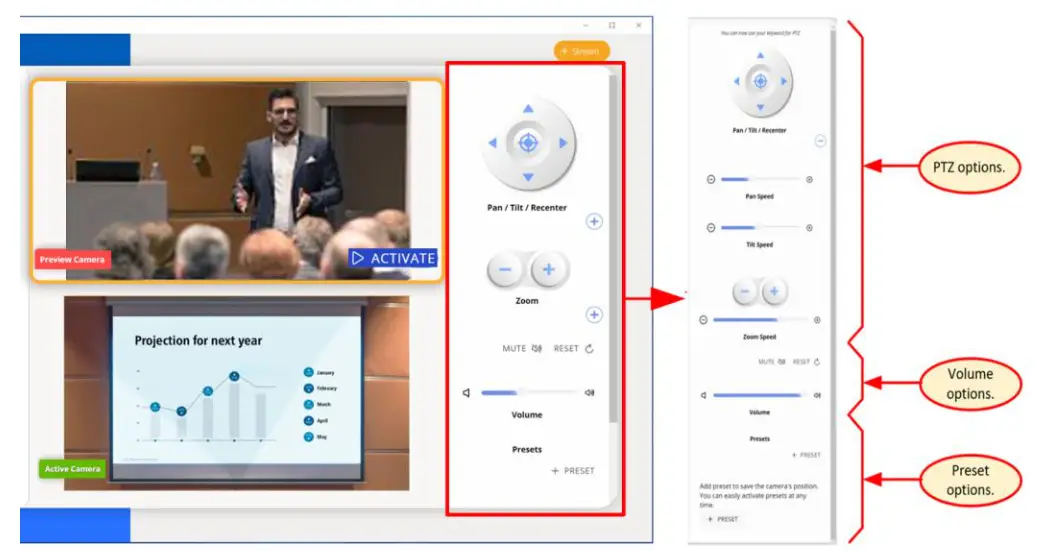
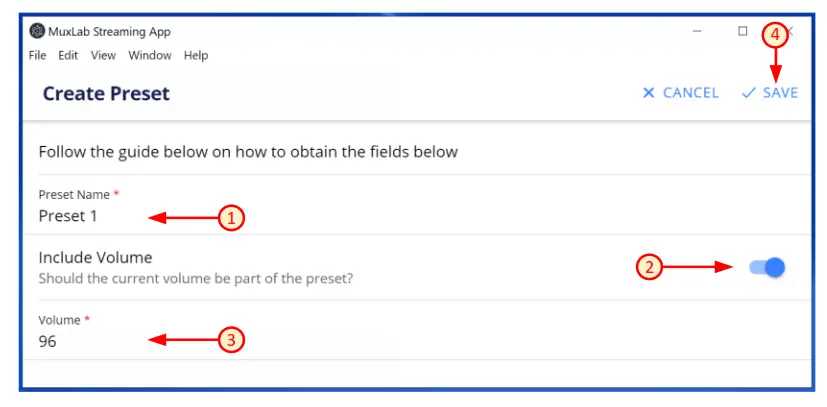
Multiple Presets can be created for each of the cameras, each of which records the current Pan/Tilt/Zoom and microphone volume settings. Saved Presets can be recalled simply by pressing the button created for each Preset. To create a Preset, press the “+ PRESET” button, a new pop-up window will appear that allows the user to enter the necessary data.
To create a new Preset, follow these steps:
- Enter the name of the new Preset. Any unique name may be given.
- To include the mic volume level in the Preset, enable this option.
- Input the mic volume level desired (if this option was enabled).
- Press the “SAVE” button to confirm.
 Saved Presets will show up as Preset buttons with their assigned name. To activate a Preset, simply press on its button.
3.2.2 Settings tab
In the “Settings” tab, the application shows two options: App version and Auto-Discover. 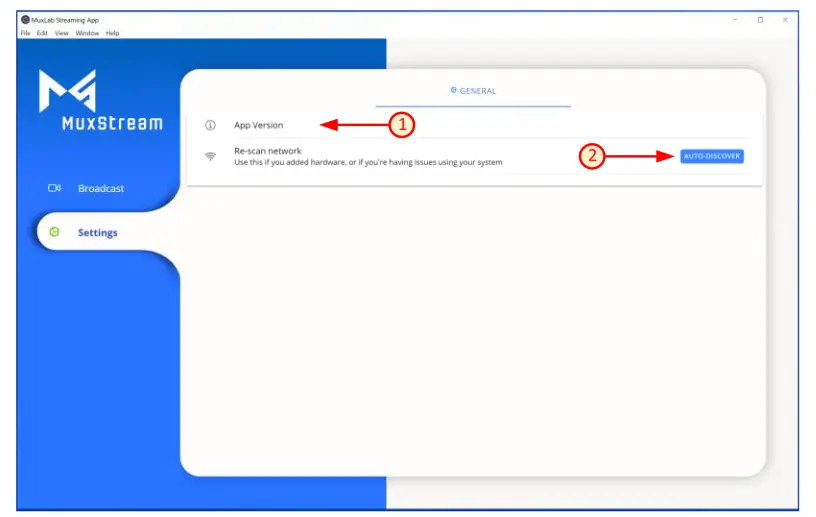
- App Version: The User can see the current MuxStream App version.
- Auto-Discover: By pressing the “AUTO-DISCOVER” button the App will automatically re-detect the Streamer/Transmitter and Cameras that are connected in the network, the user will be requested to select the ports on the HDMI 4×1 Switch that your cameras are connected to. Follow the steps in section 3.1.2 (“Auto discover and configure your kit”) of this manual.
3.2.3 Create Stream tab
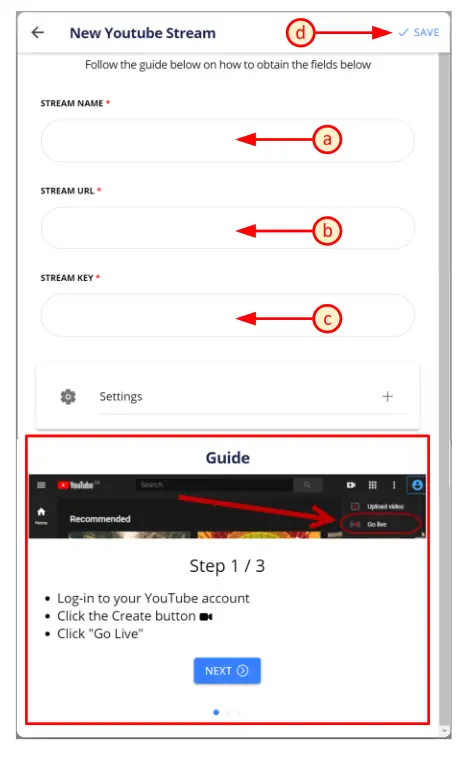
To create a new stream, the User must press the “Create Stream” button. Once selected, a new pop-up window will appear in which we can see two main options: RTMP Streams and RTSP Streams (see figure below). 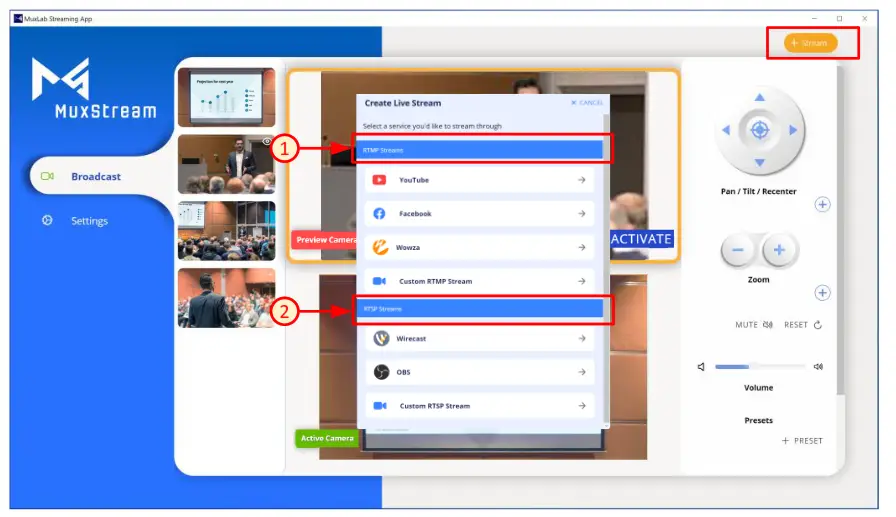
- Creating an RTMP Stream; To do this, select the service from the list provided. If the service is not listed, select the “Custom RTMP Streaming” button.
To create a new RTMP Stream, follow these steps:
a. Input a user-defined new Stream name.
b. Input the Stream URL (from your streaming provider).
c. Input the Stream Key (from your streaming provider).
d. Press the “SAVE” button to confirm.
Note: For each RTMP Streaming service that is listed, the App displays a guide on how to find the “Stream URL” and the “Stream Key” (see figure below). In the “Settings” section the user can modify different parameters such as: Resolution, Bitrate, FPS, GOP, and Encoding method.
It should be noted that the App for each service shown in the list will give default values for these parameters, these defaults are recommended values for the Streaming service selected, but the user can change them at any time according to their needs. If the user is not familiar with these parameters, they should keep the recommended default values. When the creation of an RTMP Stream is complete, a pop-up window will appear to confirm whether you want to start streaming now or later.
 Once the creation of at least one RTMP Stream is complete, a “StartStream” tab will appear.
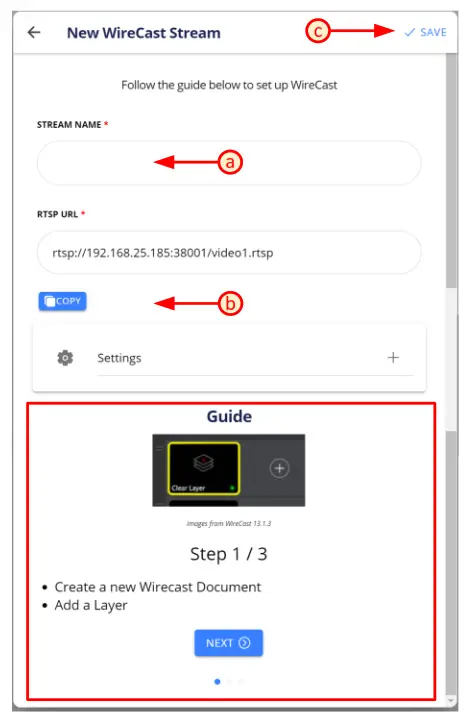
- Creating an RTSP Stream; To do this, select the service from the list provided. If the service is not listed, select the “Custom RTSP Streaming” button.
To create a new RTSP Stream, follow these steps:
a. Input a user-defined new Stream name.
b. Copy the RTSP URL. This URL should be pasted into the appropriate box on your RTSP streaming service.
c. Press the “SAVE” button to confirm.
Note: For each RTSP Streaming service that is listed, the App displays a guide on how to enter the “RTSP URL” In the “Settings” section the user can modify different parameters such as: Resolution, Bitrate, FPS, GOP and Encoding method.
It should be noted that the App for each service shown in the list will give default values for these parameters, these defaults are
recommended values for the Streaming service selected, but the user can change them at any time according to their needs. If the user is not familiar with these parameters, they should keep the recommended default values. When the creation of an RTSP Stream is complete, a pop-up window will appear to confirm whether you want to start streaming now or later.
 Once the creation of at least one RTSP Stream is complete, a “Start Stream” tab will appear.
 3.2.4 Start Streaming tab
By clicking on the ‘Start Streaming’ button, the application shows the list of streams created and allows the user to edit, delete or start a transmission. To start streaming, simply click on the arrow to the right of the Stream Name (see figure below). After clicking the arrow, a popup window reminds you to check if the broadcast service is transmitting. Click the “GOT IT” button if the transmission works fine.
 To end a transmission just click on the “Stop Streaming” button in this App and in your broadcasting service.
 In the “Settings” section the user can modify different parameters such as: Resolution, Bitrate, FPS, GOP, and Encoding method.
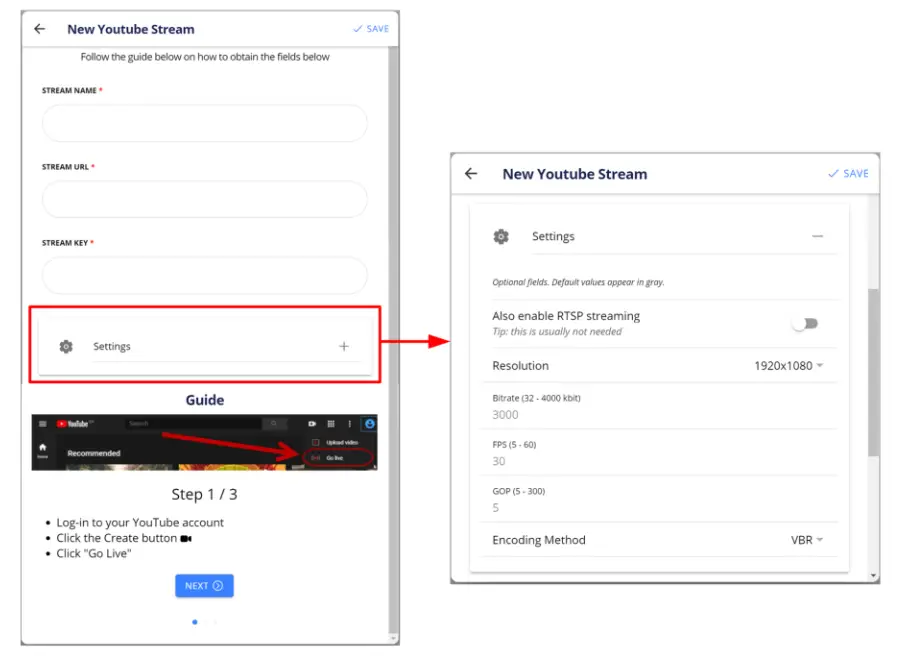 When the creation of an RTMP Stream is complete, a pop-up window will appear to confirm whether you want to start streaming now or later.
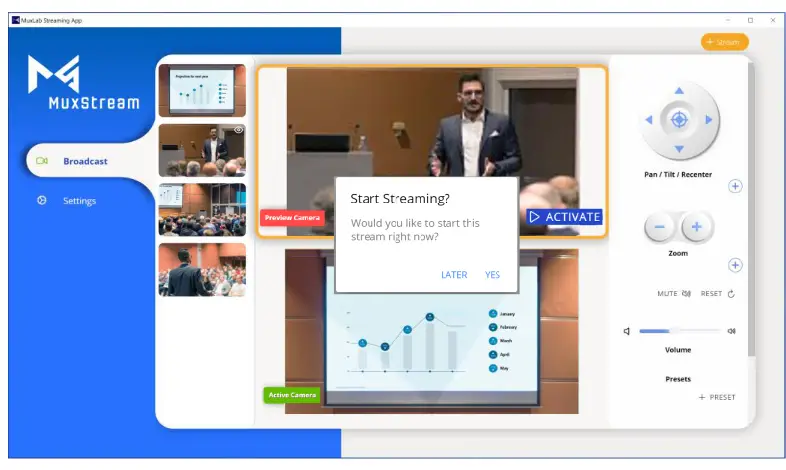 Once the creation of at least one RTMP Stream is complete, a “StartStream” tab will appear.
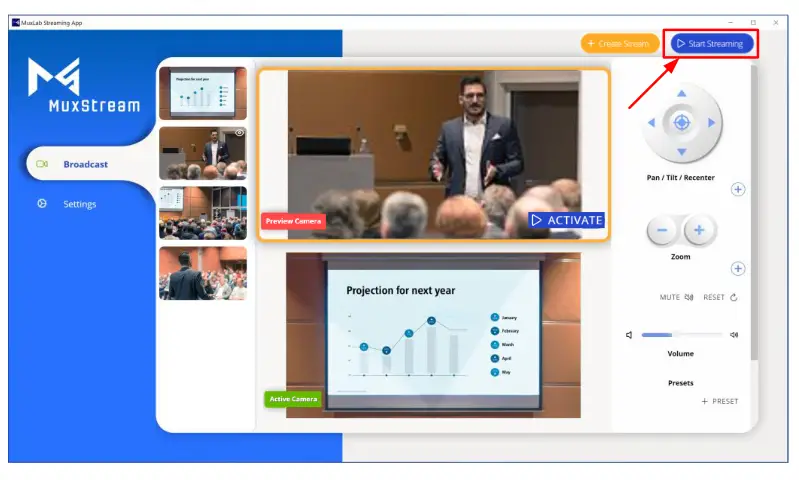
 In the “Settings” section the user can modify different parameters such as: Resolution, Bitrate, FPS, GOP and Encoding method.
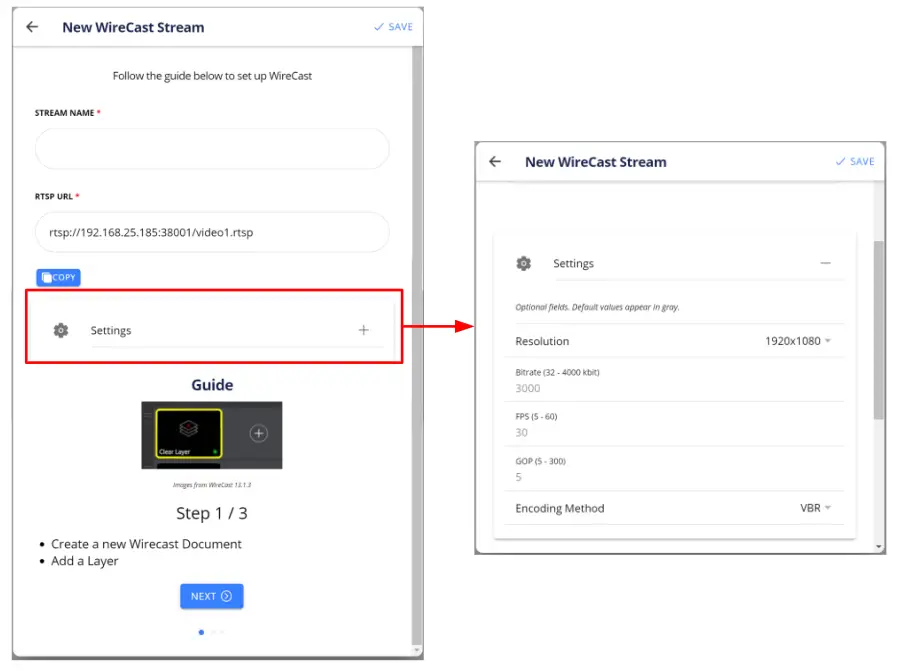 When the creation of an RTSP Stream is complete, a pop-up window will appear to confirm whether you want to start streaming now or later.
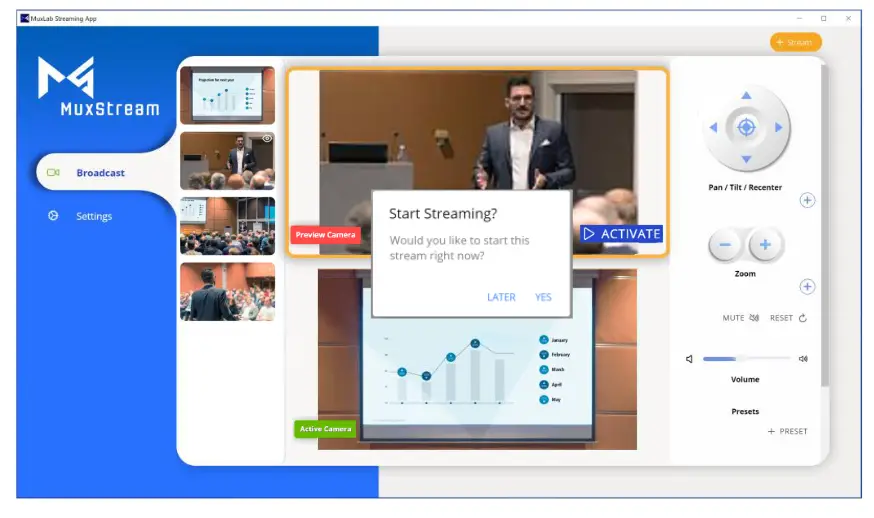 Once the creation of at least one RTSP Stream is complete, a “Start Stream” tab will appear.
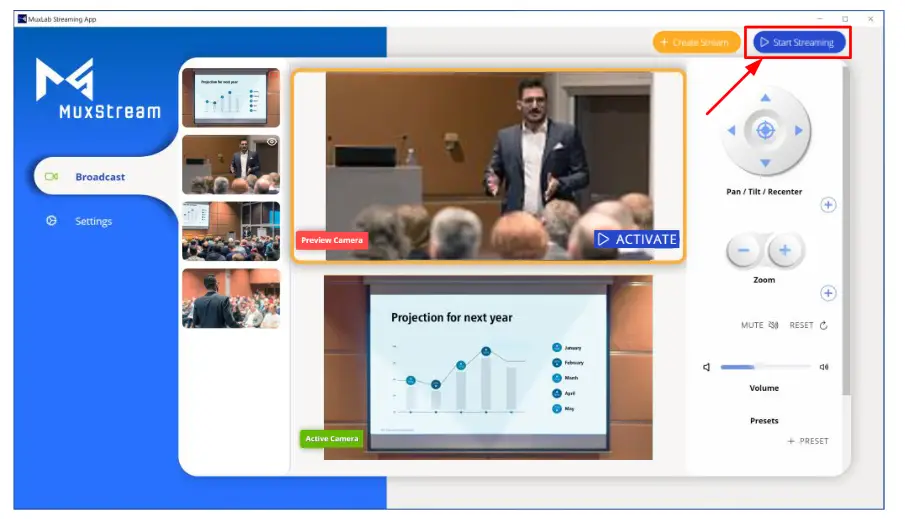 3.2.4 Start Streaming tab
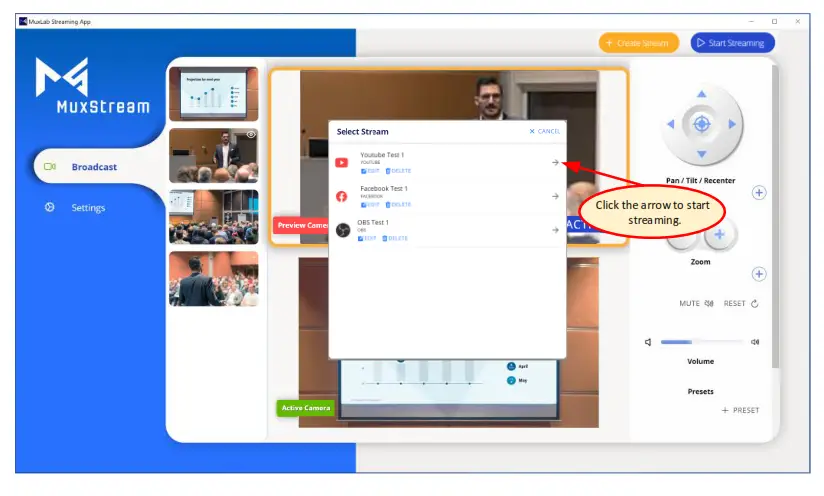 After clicking the arrow, a popup window reminds you to check if the broadcast service is transmitting. Click the “GOT IT” button if the transmission works fine.
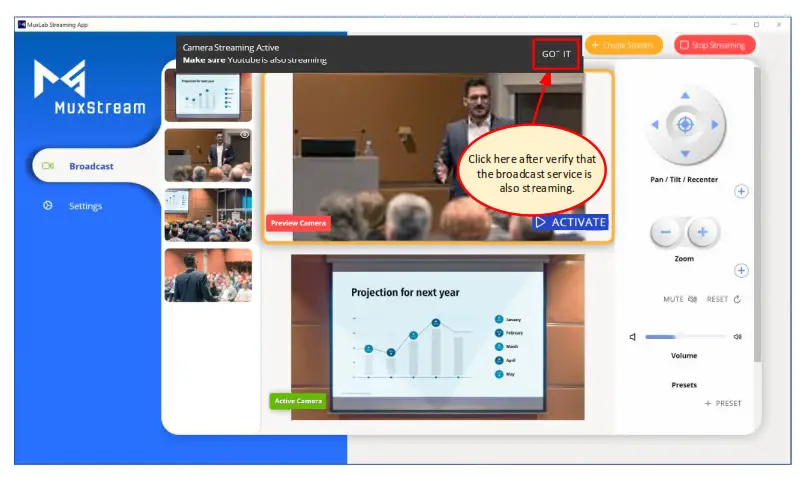 To end a transmission just click on the “Stop Streaming” button in this App and in your broadcasting service.
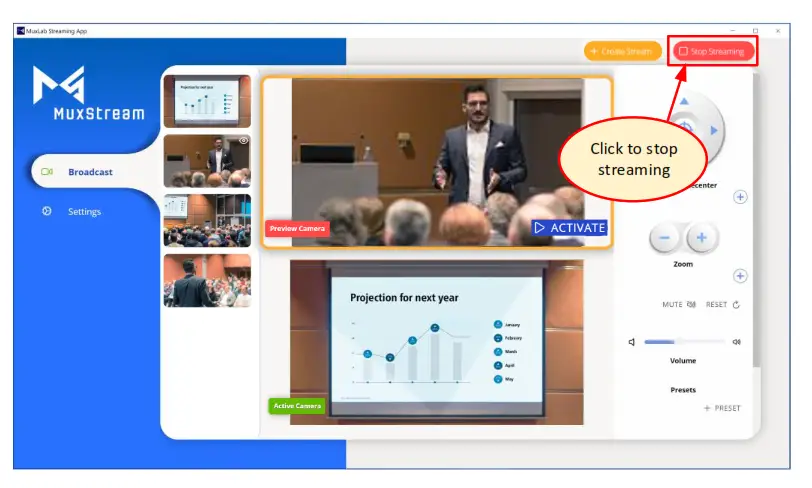
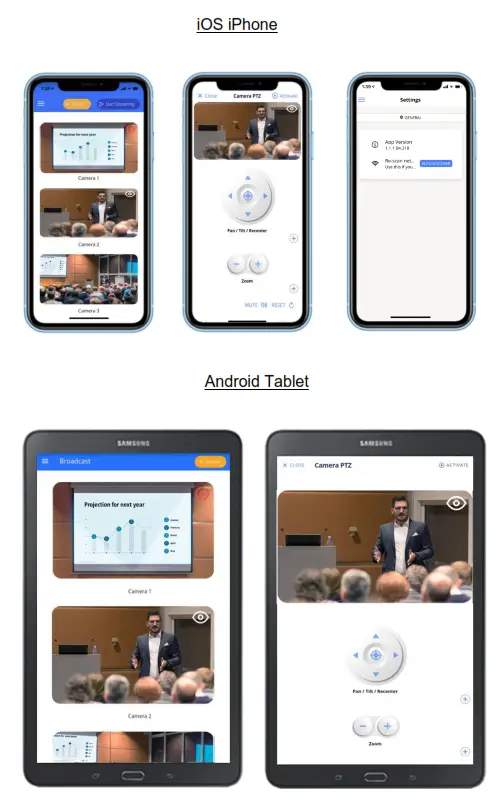
3.2.5 Control interface for iOS and Android.
For iOS and Android devices, for both tablets and smartphones, the MuxStream application will present the same options found in the Windows version for PC, changing only the arrangement of the tabs. See section 3.2 for a description of each option.
Below are screenshots of iOS and Android devices for reference only.
 |  |
Troubleshooting
The following table describes some of the symptoms and possible solutions regarding the MuxStream App.
| symptom | Probable cause | Possible Solution |
| No Streamer/Transmitter found. | • The Transmitter is not connected to the network. • The Transmitter is not turned on. • The Transmitter is connected to a different Subnet. | Check that the network cable is properly connected to the Transmitter. Verify that the Transmitter is powered on. Make sure you are in the same subnet as your Transmitter and make sure DHCP mode is active. |
| No Camera found | • The Camera is not connected to the network. • The Camera is not turned on. • The Camera is connected to a different Subnet | Check that the network cable is properly connected to the Camera. Verify that the Camera is powered on. Make sure you are in the same subnet as your Camera and make sure DHCP mode is active. |
| Not able to Stream | • There is no internet connection. • The Streaming URL is not correct. • The Streaming key is not correct. • No Audio being sent. | Verify that you have a good quality Internet connection. Verify that you pasted the correct Streaming URL. Verify that you pasted the correct Streaming key. Some streaming services like YouTube and others require both audio and video signals to be present. Make sure the wireless mic is paired and connected, charged and working correctly. |
| The HDMI 4×1 Switcher does not switch cameras | • The IR Emitter is not connected to the IR port of the Streamer/Transmitter. • The HDMI 4×1 Switcher does not receive control commands. | Verify that the IR Emitter is properly connected in the IR port of the Streamer/Transmitter. Make sure the Emitter the screen is positioned correctly over the infrared sensor screen located on the front of the HDMI 4×1 Switcher. |
MuxLab Inc.
2321 Rue Cohen Montreal, Quebec
Canada H4R 2N7
Tel.: +1 (514) 905-0588
Fax: +1 (514) 905-0589
Toll-Free (North America): 877 689-5228
URL: www.muxlab.com
E-mail: [email protected]
94-000950-B / SE-000950-B


