![]()
Door Kit 4594, 4595, 4611, 4613 Door Kit
Instruction Manual
INSTALLATION INSTRUCTIONS
BEFORE BEGINNING
- Please read all instructions carefully.
- Follow all safety precautions (see “SAFETY PRECAUTIONS”).
- Familiarize yourself with all parts (see “CONTENTS”) and check quantities.
What you will need:
STOP
FOLLOW INSTRUCTIONS CAREFULLY
Please do not return product to the retail store. For product assistance and warranty information please call Consumer Affairs at 1-800-874-0008.
Manufacturer Warranty
Manufacturer will replace any missing or damaged part due to manufacturer defect.
Please have proof of purchase.
SAFETY PRECAUTIONS
![]() WARNING
WARNING
- This unit contains small parts which could be a choking hazard for small children. Children should always be under adult supervision or serious bodily injury could occur.
- Always unload unit prior to moving the unit.
The weight of personal belongings can cause the unit to become unstable and either tip or collapse. Serious bodily injury and / or damage to personal belongings may occur. - Do not overload unit. If any shelf, top, or bottom of unit bows or bends, it is overloaded. The shelf, top, or bottom could collapse and cause serious bodily injury and / or damage to personal belongings.
- Do not climb or step on the unit. The unit may become unstable and either tip or collapse. Serious bodily injury and / or damage to personal belongings may occur.
- Do not use this unit as a television stand. Serious bodily injury and / or damage to personal belongings may occur.
- Do not mount or attach anything to the sides, rear or front of the unit as this can create a force which can cause the unit to tip. Serious bodily injury and/or damage to personal belongings may occur.
- Unless unit is specifically built for, DO NOT STACK. Only stack units that have been designed for stacking, and only after reading the instructions provided. Stacking of units can cause an unsafe tip-over hazard which may cause serious bodily injury. And / or damage personal property.
- Do not hang this unit on the wall.
The product structure is not designed for wall hanging. Serious bodily injury, damage to personal belongings, and / or damage to the wall may occur. - Follow proper safety procedures when using power tools and ladders.
- We recommend you protect your work surface during assembly to prevent scratching or damage to table tops, wood floors, etc.
- All units must be secured individually to wall stud using hardware provided. If wall stud is not accessible, consult your local hardware store for appropriate mounting hardware. Failure to do so may create an unsafe tipping hazard that could lead to serious bodily injury and / or damage to personal belongings.
Serious or fatal injuries can occur from furniture tip-over. To help prevent tip-over:
- Install tip-over restraint provided.
- Unless specifically designed to accommodate, do not set TVs or other heavy objects on top of this product.
- Never allow children to climb or hang on drawers, doors, or shelves.
Use of tip-over restraints may only reduce, but not eliminate, the risk of tip-over.
CONTENTS
HARDWARE
Clear Adhesive Bumper x 4
PRODUCT
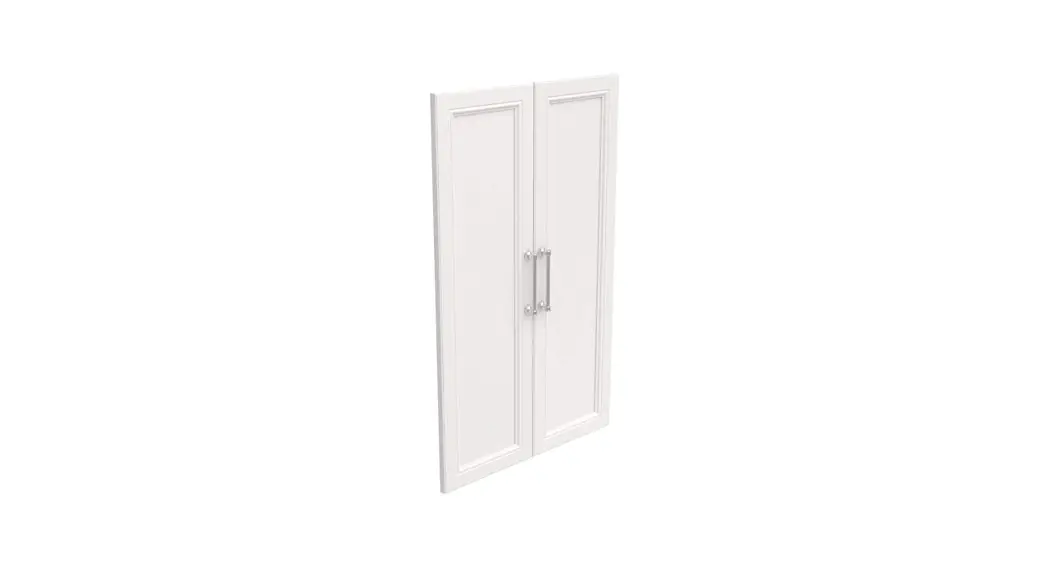
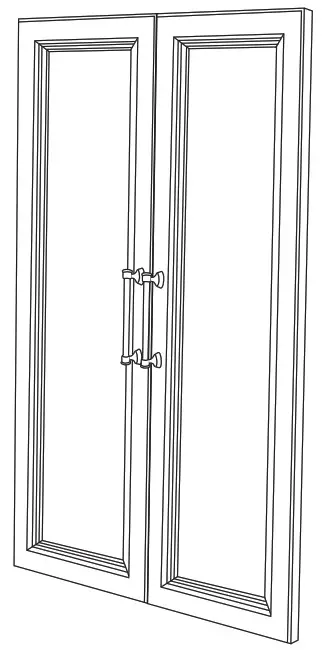
A Door Panel x 2
B 2-Piece Hinge x 4
C Handle x 2
D Screws x 4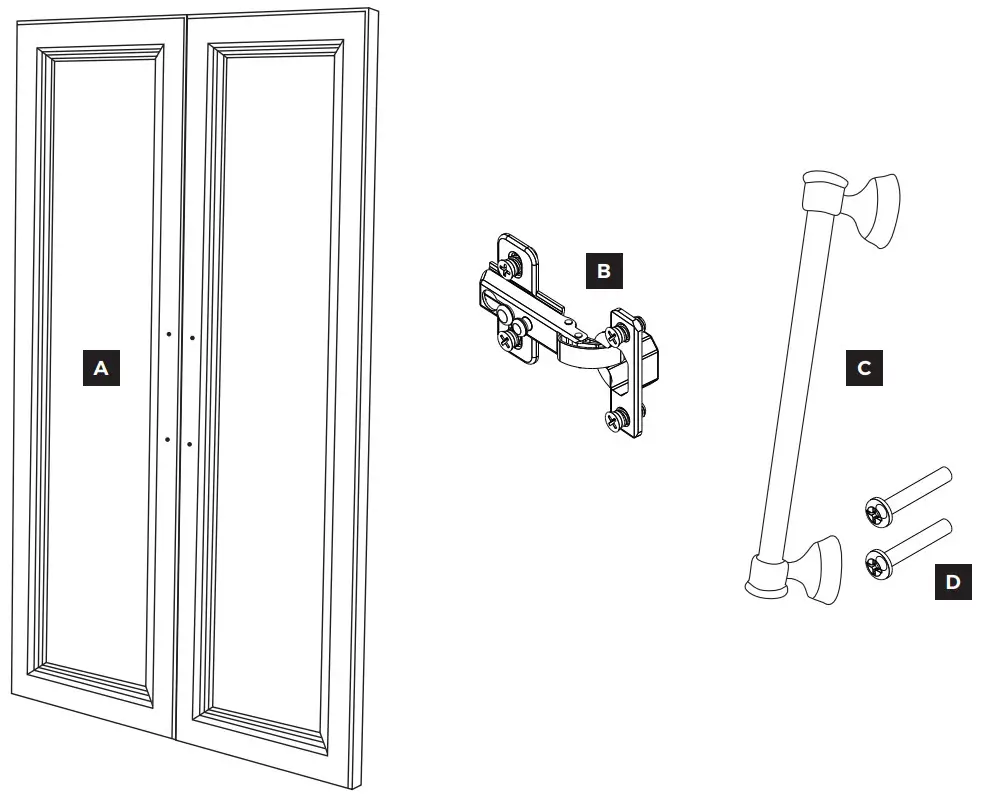 STEP 1
Attach hinges and handles.
- Locate hinges. Loosen two screws (as indicated below) to separate the hinges into two parts.
- Place a door hinge into each large hole on back of door panel as shown. Align screw holes and tighten screws to secure. Repeat for both door panels.
- Attach a handle to each door panel with handle screws.
Loosen this screw to separate hinge into two parts; door hinge and base.
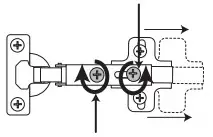
Turn this screw clockwise to loosen.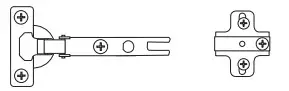
Base / Tower Hinge
Door Hinge
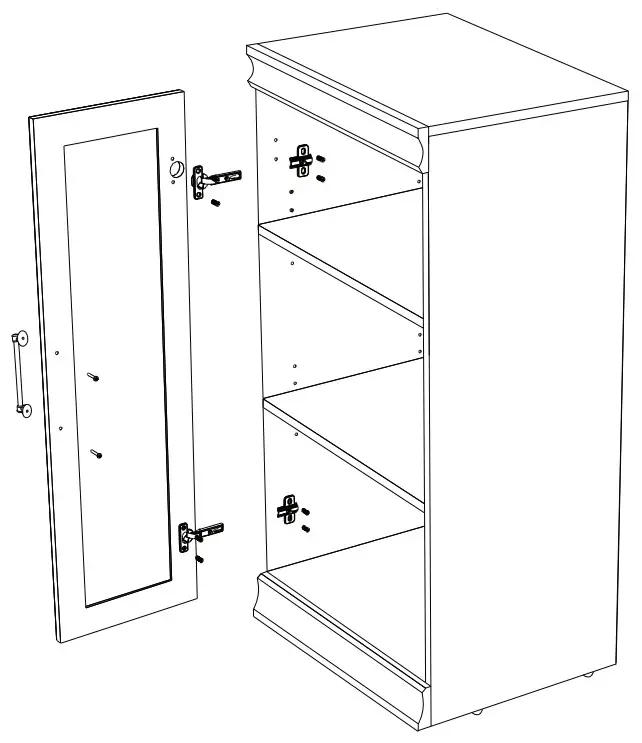
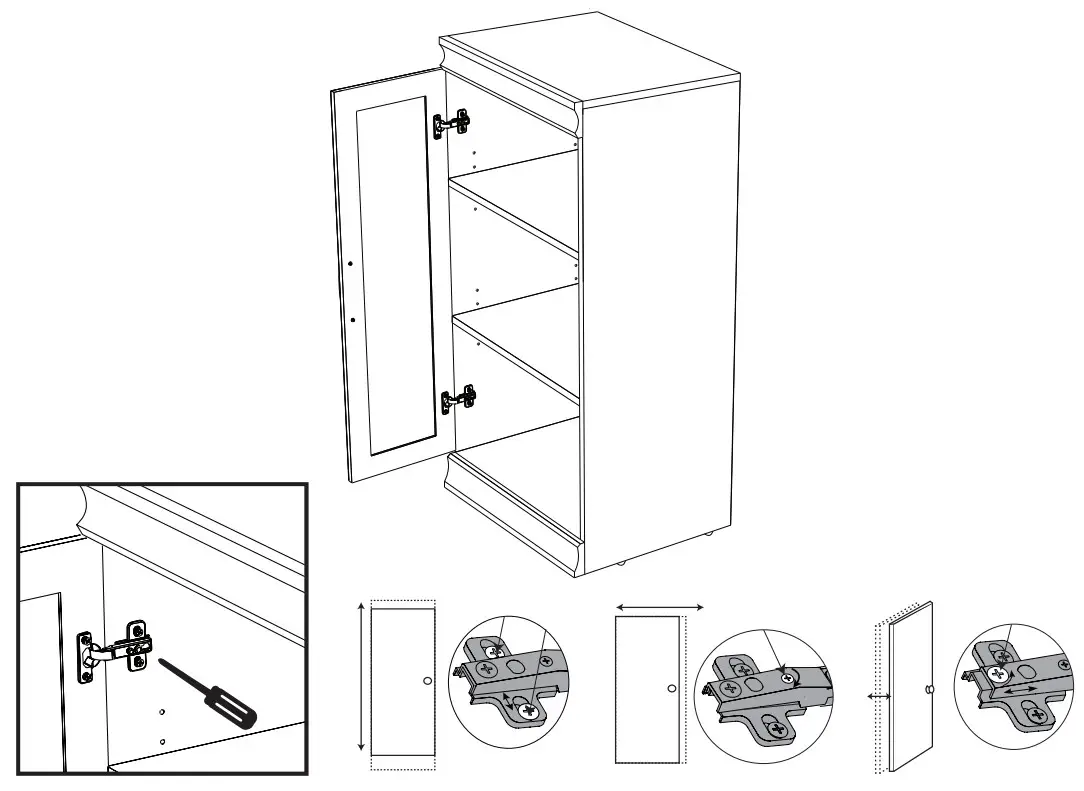
STEP 2
Secure and adjust to hang evenly.
- Attach each base hinge to small holes a the top and bottom closest to the open end of the cabinet. Be sure open end of hinge faces front.
- Slide door hinge over center of base cabinet hinge and tighten screw.
- Adjust doors to hang evenly by turning various hinge screws as shown.
STEP 3
Add adhesive bumpers.

![]() Call 1-800-874-0008 for parts and service.
Call 1-800-874-0008 for parts and service.
© 2018 ClosetMaid LLC | Ocala, FL 34471
1-800-874-0008 | www.closetmaid.com


