![]()
NVA-A6WG
WIFI+GSM Security Alarm System
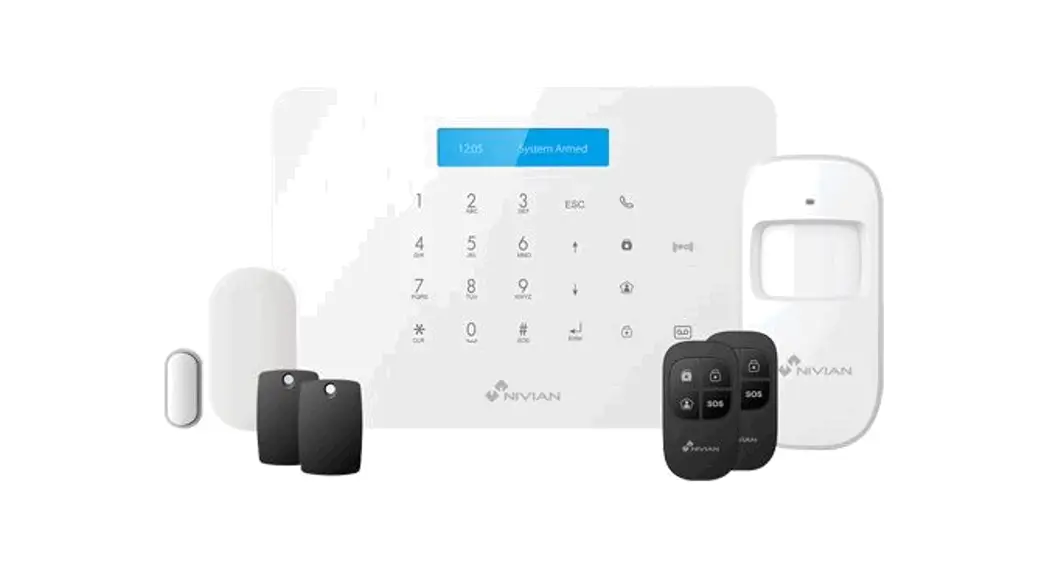
Box contents
– NVS-A6WG x1
– NVS-D1A (PIR motion sensor) x1
– NVS-D3C (Door/Window contact) x1
– NVS-RC2 (Remote controls) x2
– AC Adapter x1
– Crews and anchors
– Documentation
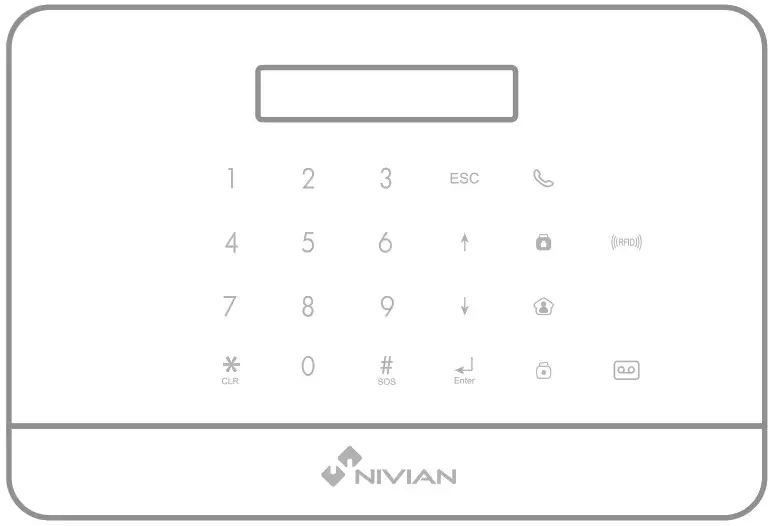
Design
TOP View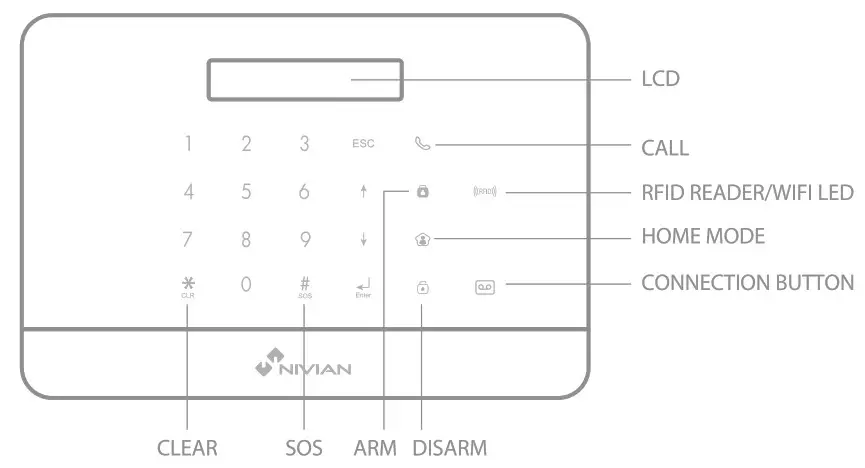
Bottom View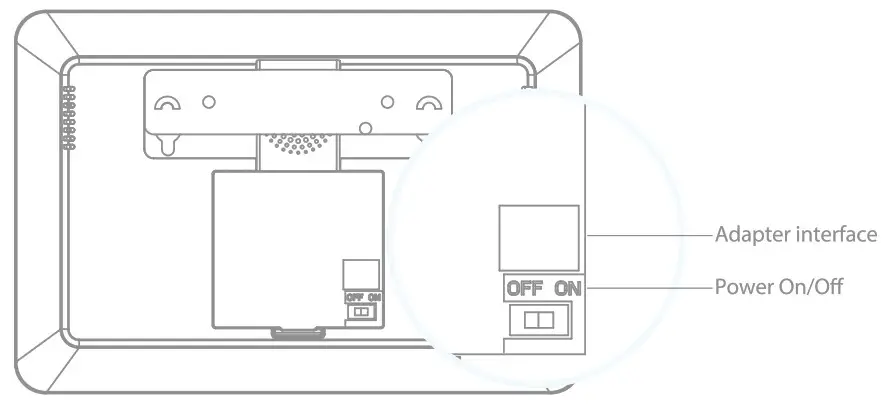
Features
– Works with GSM and Internet Connection (Wi-Fi Connection)
– Supports up to 10 remote controls, 60 wireless accessories and 30 RFID tags
– Can store up to 5 phone numbers, 5 SMS numbers.
– Arm/ disarm the system by SMS, phone call, or App (on iOS or Android)
– SIM card slot: stay connected even where you don’t have an Internet connection or when your home Wi-Fi network is down (SIM card not included)
– Audio surveillance of the site from a distance
– Can be disarmed by RFID tag- Built-in siren (95dB)
– 600mAh lithium batteries included for more than 8hours standby mode.
Specifications
| Product name NVS-A6WG | Transmission distance < 80M in open space |
| SKU NVS-A6 GSM+WIFI WHITE | Backup batteries Lithium Batteries: 7.4V /600 mAh |
| Power Supply Input: AC 110-240V / 50-60 Hz Output: DC 12V/1A | Internal siren 95dB |
| Wi-Fi 2.4GHz 802.11 b/g/n | Housing material ABS plastic |
| GSM- frequency GSM:850 / 900 / 1800 / 1900 MHz | Operating conditions Temperature: -10°C~55°C Humidity: < 80% (non-condensing) |
| Radio-frequency 433/868MHz | Control panel dimensions (L x W x H) 188 x 125 x 25mm |
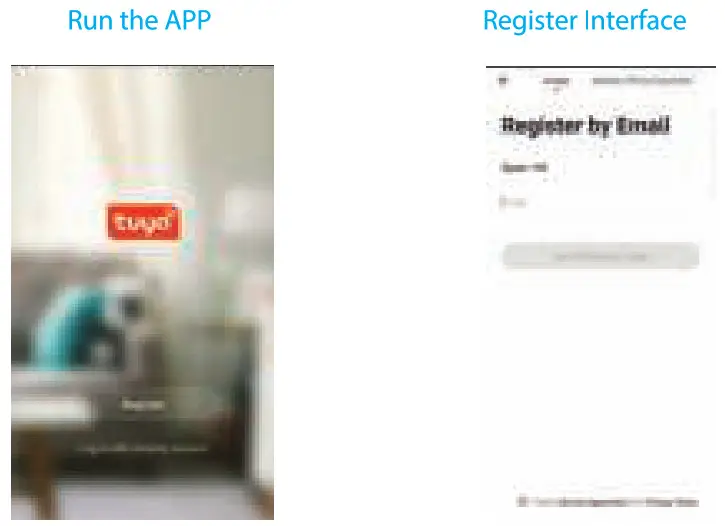
Get your APP ready
- Download APP “TuyaSmart” on your smartphone. The app is available on the App Store and Google Play.
- Run and install the APP on your smartphone.
- Register by your Mobile number/e-mail address.
- Login and create a family.


Connect the Alarm to APP
There are two way to connect the alarm to APP: EZ and AP mode, please use AP mode when can not connect the alarm in EZ mode.
- To connect in EZ mode
Step 1. Enter Wi-Fi EZ Mode: Admin code123456 + connection button
Ensure the system is disarmed before this operation, after enter Wi-Fi EZ mode, the LCD display “WIFI Config”, now your alarm is ready for network setting.
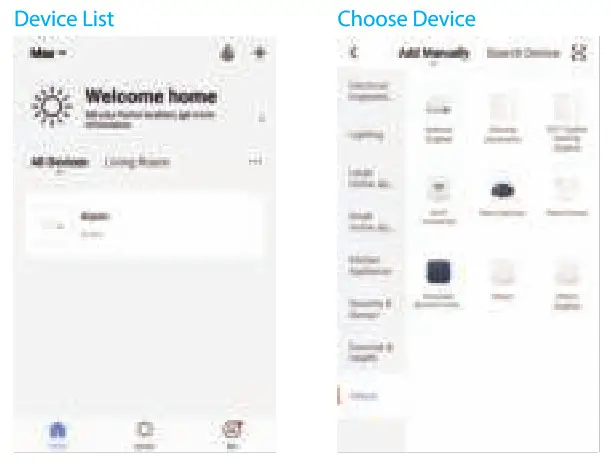
Step 2. Choose the device which will be add
choose “Add +”—>”Others”>”Wi-Fi Connector’ in the APP.
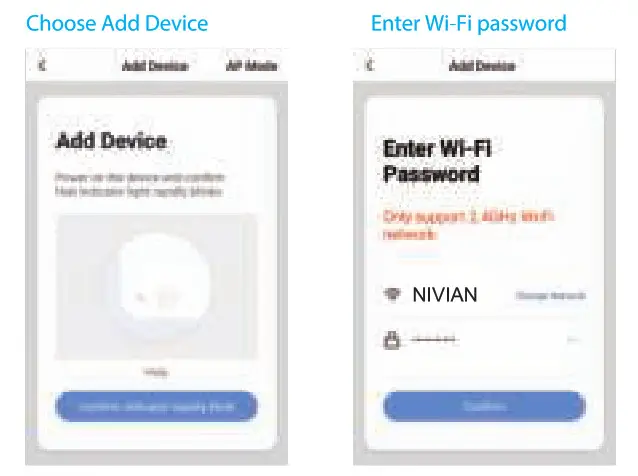
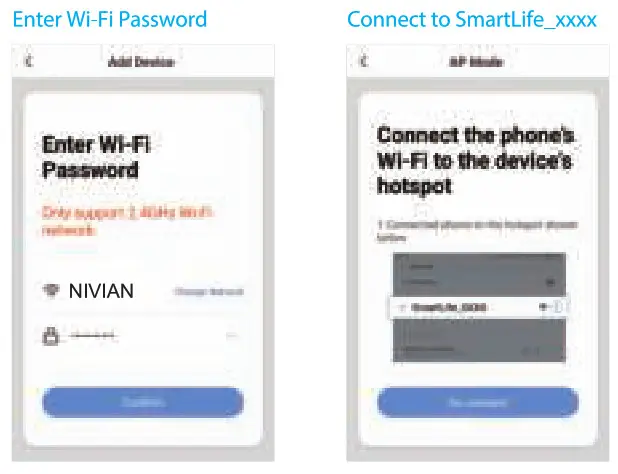
Step 3. Set the Wi-Fi network which will be connect
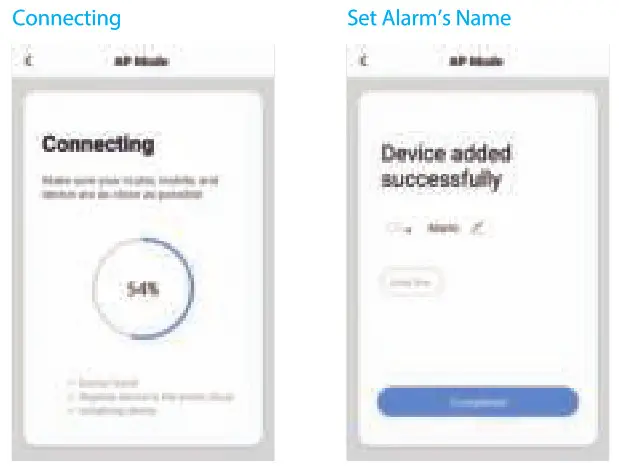
Enter Wi-Fi password of the router which the alarm will be connect to, waiting for about 20 seconds to get a response.
Step 4. Now you can set the alarm name to complete the connection


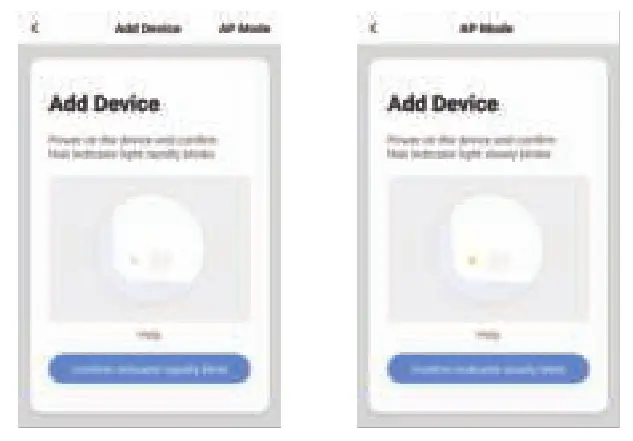
To connect in AP mode
Step 1. Enter Wi-Fi AP Mode: In setup menu, choose “WIFI Config”
Ensure the system is disarmed, type admin code:123456 + Enter button to system setup mode, choose “WIFI Config” to enter Wi-Fi AP mode, the LCD display “ WIFI AP config”, now your alarm is ready for network setting.
Step 2. Choose the device which will be add choose “Add Manually”—>”Others” “Wi-Fi Connector’ in the APP.
Step 3. Choose ‘AP Mode’
Step 4. Set the Wi-Fi network which will be connect
Enter Wi-Fi password of the router which the alarrn will be connected to.
Step 5. Connect the phone’s Wi-Fi to the device’s hotspot
In phone’s WLAN list, choose ‘SmartLife-xxxx’ and connect. After connected, return back to the APP, waiting for about 20 seconds to get a response.
Step 6. Now you can set the alarm name to complete the connection


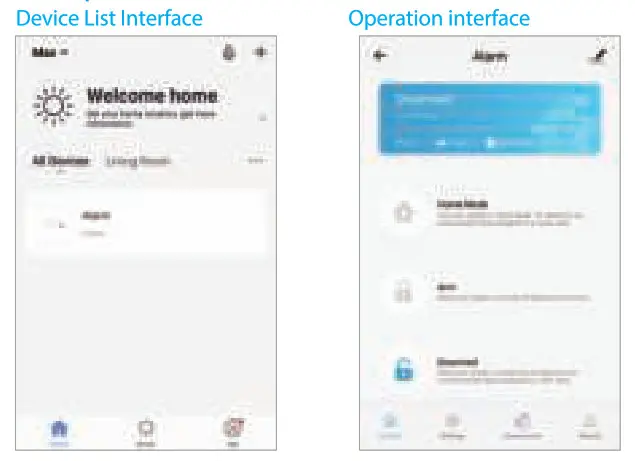
App Operation Interface
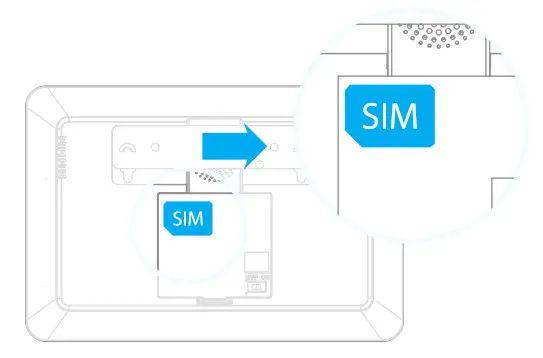
Use Alarm system with SIM card
You will need a SIM card if you wish to interact with your Alarm system by SMS and phone calls.
- Insert the SIM card in the control panel.
- Plug the AC adapter to the DC Jack.
- Turn on the Power switch.
 Important
– Make sure the SIM card is not protected by a PIN code.
– Insert the SIM card when your Alarm is turned off.
– We advise you to choose a plan with unlimited text and 1 or 2 hours of call. The SIM card must be compatible with the GSM network. Contact your carrier for more information.
 Important
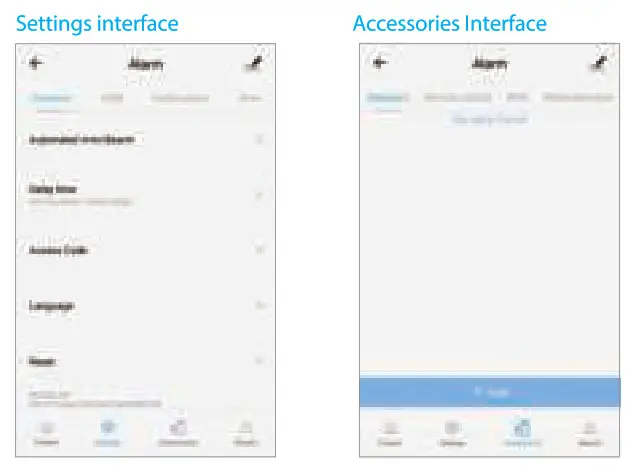
Connect wireless accessories
- By the keypad:
–Enter the settings menu, type Admin code123456+ Enter button;
–Choose “Accessories” >”RFID Tag’/”Remote control’/”Wireless sensor”—>”Add a new”; - By the APP:
Connect to the alarm, choose the wireless accessory click “+” ADD. - Trigger the accessory which will be connected, you will hear one beep: the accessory is registered. If the control panel beeps twice, the detector was already connected.
- Repeat step1 or 2, then step3 for next accessory.
Daily use
![]() Arm the system
Arm the system
When your system is armed, all detectors are active.
By app
Connect to your alarm and click on “Arm”.
By remote control
Press on the “Arm” button of the remote control .
On the control panel
Click Arm button.
By SMS
Send 1 to the phone number of the SIM card in the control panel. (Only saved SMS numbers can disarm the system by SMS.)
![]() Arm in Home mode
Arm in Home mode
When your system is armed in Home mode, all detectors are active except those assigned to the Home zone.
By app
Connect to your alarm and click on “Home mode”.
By remote control
Press on the “Home” button of the remote control .
On the control panel
click Home mode button.
By SMS
Send 2 to the phone number of the SIM card in the control panel. (Only saved SMS numbers can disarm the system by SMS.)
![]() Disarm the system
Disarm the system
When your system is disarmed, all detectors are inactive except those assigned to the 24H zone.
By app
Connect to your alarm and click on “Disarm”.
By remote control
Press on the “Home” button of the remote control .
On the control panel
click Home mode button.
By SMS
Send 2 to the phone number of the SIM card in the control panel. (Only saved SMS numbers can disarm the system by SMS.)
![]() SOS function
SOS function
The SOS function enables you to trigger your alarm immediately.
By remote control
Press on the “SOS” button of the remote control.
On the control panel
Press and hold the SOS(#) button on the control panel.
Setup from the control panel
To enter the settings mode, type your admin code + Enter on the control panel.
Default admin code: 123456
Read on for the complete list of settings on the control panel.
| Setup Menu | Functions |
| WIFI Config | Enter Wi-Fi AP mode |
| Phone numbers | Manage the phone numbers |
| Phone Nuberl —5 | The user phone number who will get the phone call |
| SMS Numberl —5 | The user phone number who will get the SMS |
| Accessories | Manage the wireless accessories |
| Remote & Keypad | Add/delete Remote & Keypad |
| RFID Tag | Add/delete RFID Tag |
| Wireless sensor | Add/delete Wireless sensor |
| Test Mode | In test mode, trigger the connected sensor, the system will send SMS, Push message, and 3beeps. |
| System Setting | Manage the system settings |
| Date and Time | System Date and time |
| Date Format | Set system Date Format |
| Entry Exit Delay | Set Entry and Exit delay time |
| Control by phone | Enable/Disable the control of the system by phone call. |
| Arm/Disarm Tone | Enable/Disable the tone when arm or disarm the system. |
| GSM Fail Alarm | Enable/Disable the report when GSM is Fail. |
| Keypad Tones | Enable/Disable the tones when press the button. |
| Access Code | Change Admin/user/Duress/open door code. |
| Ring Times | This function enables you to determine the number of times the control panel will ring before taking your call (for control by phone call). |
| Siren Alert Times | Siren ringing time is calculated in minutes, default setting is 3 minutes. |
| Backlight | 0-120seconds |
| Siren Setup | Enable/Disable the siren when triggered alarm. |
| Arm upload | Enable/Disable SMS report when Arm the system. |
| Disarm upload | Enable/Disable SMS report when Disarm the system. |
| Call recycle | This function enables you to define the number of times the control panel attempts to call you. |
| About | FW version |
| Language | System Language |
| Reset | Rest to the factory default settings |
| History | The control panel keeps in record the lates 100 event logs. |
Control by SMS
This function applies only if you are using the Alarm system with a SIM card.
This function enables you to control your alarm system by SMS. This can especially be helpful if you are located in an area without Wi-Fi or 3G/4G coverage.
How it works
For each setting you want to modify by SMS, it works as below:
– Send a code by SMS.
– The control panel replies you with the corresponding settings currently saved in your alarm.
– Copy this SMS and paste it as a reply to the control panel.
– Modify the SMS according to the setting you wish to change, before sending back to the control panel.
– The control panel replies “ok” as a confirmation.
Read on for the complete list of settings by SMS.
| SMS code | Function | SMS code | Function |
| ? | check SMS commands | 0001-0015 | Set system language |
| 00 | Settings inquiry | 1 | English |
| 0 | Disarm the system | 2 | French |
| 1 | Arm the system | 3 | Russian |
| 2 | Home Mode | 4 | Danish |
| 5 | Store Phone numbers | 5 | Dutch |
| 6 | Store SMS numbers | 6 | Italian |
| 91-99 | Rename zone | 7 | Swedish |
| 10 | Rename RFID-tag | 8 | German |
| 11 | Entry and exit delay time | 9 | Spanish |
| 12 | Siren volume and ringing time | 10 | Finnish |
| 13 | User code | 11 | Norwegian |
| 21 | Delete all accessories | 12 | Arabic |
| 22 | Delete remote control | 13 | Farsi |
| 23 | Delete wireless detector | 14 | Chinese |
| 24 | Delete RFID-tag | 15 | Portuguese |
| 0000 | Restore system to factory settings |
Note
– Languages available may vary depending on the version of your product.
– Only stored numbers can send the SMS to control the system.
Control by phone call
This function applies only if you are using the Alarm system with a SIM card.
This function enables you to control your alarm system by phone call. This can especially be helpful if you are located in an area without Wi-Fi or 3G/4G coverage.
How it works
- Call the phone number of the SIM card in the control panel.
- The control panel picks up: type your 4-digit passcode, followed by “#” (Default passcode: 1234).
- A voice prompt confirms if your code is correct.
- On your phone, dial the code corresponding to the command:
Table 1
| Dial | Command |
| 1 | Arms the system |
| 0 | – Disarms the system and turns the siren off – Stops monitoring without hanging up |
| * | Audio monitoring |
| 3 | Two-way talk |
| 6 | Turns the siren off |
| 9 | Turns the siren on |
| # | Disarms the system, turns the siren off and ends the phone call |
If your alarm is triggered
If the alarm is triggered, your control panel immediately starts to inform you:
At home
– The built-in siren starts ringing out.
– If you have connected additional sirens, they start ringing out too. On your smartphone(if your alarm is connected to your Wi-Fi network)
– You receive a push notification in the app (you must have an Internet access on your smartphone).
On your smartphone (with a SIM card in the control panel)
– The control panel sends an SMS notification to every SMS number saved.
– The control panel calls every Phone number saved. If you take that call, you can decide to stop the siren, disarm the system or other functions as listed below, by dialing the corresponding code in Table.
Restore Admin Code
Turn the control panel on. Press the tamper switch at the back of the control panel 5 times within 5 seconds after having turned it on.
The Admin code will be restored to the factory settings:123456.
This operation is only for user forgot his admin code, The stored phone numbers, system settings and connected accessories will not be changed.
Warning
![]() ATTENTION RISK OF ELECTRIC SHOCK DO NOT OPEN
ATTENTION RISK OF ELECTRIC SHOCK DO NOT OPEN ![]()
CAUTION: TO REDUCE THE RISK OF ELECTRIC SHOCK, DO NOT REMOVE COVER (OR BACK). NO USER SERVICEABLE PARTS INSIDE, REFER SERVICING TO QUALIFIED SERVICE PERSONNEL.
![]() This symbol is intended to alert the user to the presence of uninsulated “dangerous voltage” within the product’s enclosure that may be of sufficient magnitude to constitute a risk of electric shock to persons.
This symbol is intended to alert the user to the presence of uninsulated “dangerous voltage” within the product’s enclosure that may be of sufficient magnitude to constitute a risk of electric shock to persons.
![]() The exclamation point within an equilateral triangle is intended to alert the user to the presence of important operating and maintenance (servicing) instructions in the literature accompanying the product.
The exclamation point within an equilateral triangle is intended to alert the user to the presence of important operating and maintenance (servicing) instructions in the literature accompanying the product.
To prevent fire or shock hazards, do not expose this product to rain or moisture. Apparatus shall not be exposed to dripping or plashing and no object filled with liquids, such as vases, shall be placed on the apparatus.
Standards
![]()
This product bears the selective sorting symbol for waste electrical and electronic equipment (WEEE). This means that this product must be handled pursuant to European Directive 2012/19/EU in order to be recycled or dismantled to minimize its impact on the environment. For further information, please contact your local or regional authorities. Electronic products not included in the selective sorting process are potentially dangerous for the environment and human health due to the presence of hazardous substances.
![]()
In compliance with European laws. This product is in compliance with the essential requirements and other relevant provisions of Directive 2014/53/EU.
![]()
This product was designed and manufactured in compliance with Directive 2011/65/EU of the European Parliament and of the Council on the restriction of use of certain hazardous substances in electrical and electronic equipment (ROHS Directive – ROHS) and is deemed to comply with the maximum concentration values set by the European Technical Adaptation Committee (TAC). Manufactured in China.


