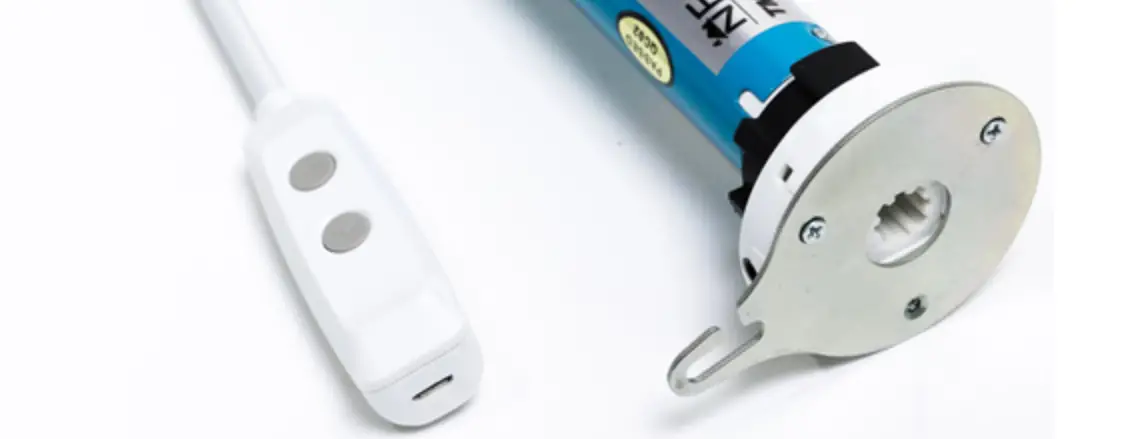
NEO RC-200 and WS-200 Series AC Tubular Motor
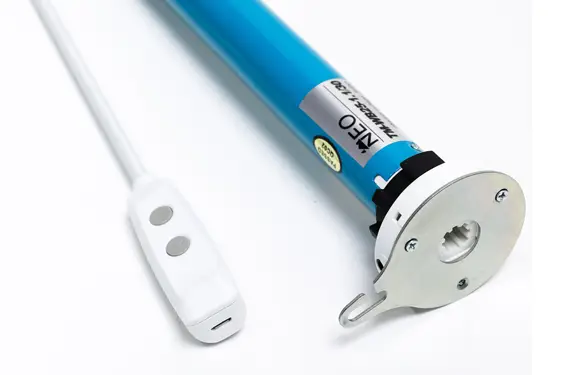
Getting to know your Neo AC Tubular Motor


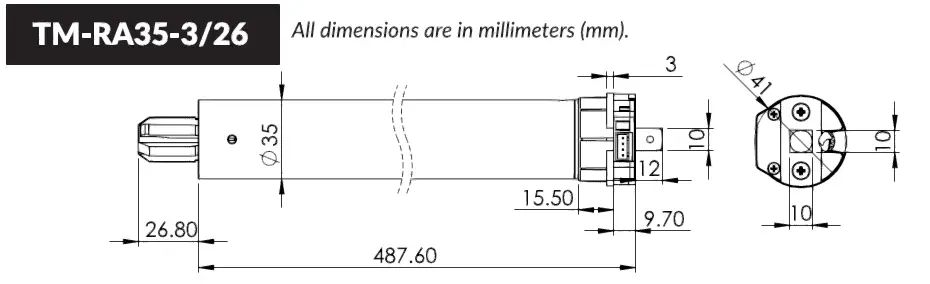
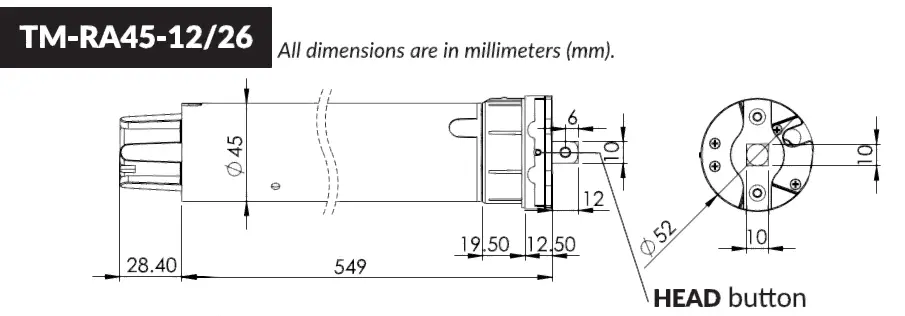
Motor specification
| TM-RA35-3/26 | 110VAC 60Hz | 110W | 3Nm 26 rpm | 6 min |
| TM-RMS-12/26 | 110VAC 60Hz | 145W | 12Nm 26 rpm | 5 min |
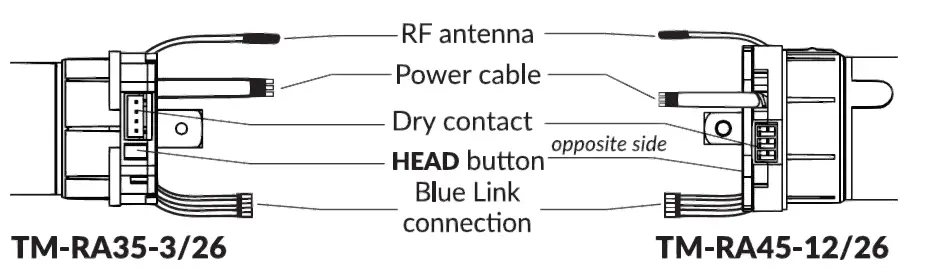
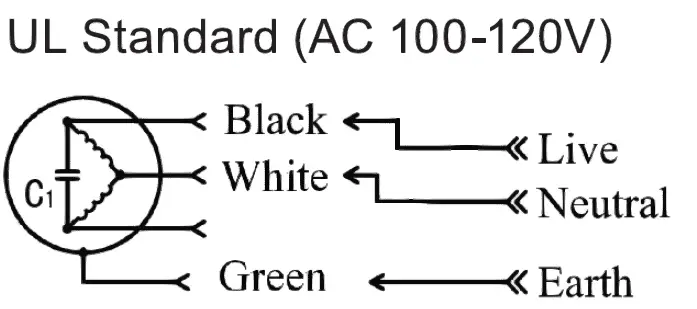
Power connection
Caution
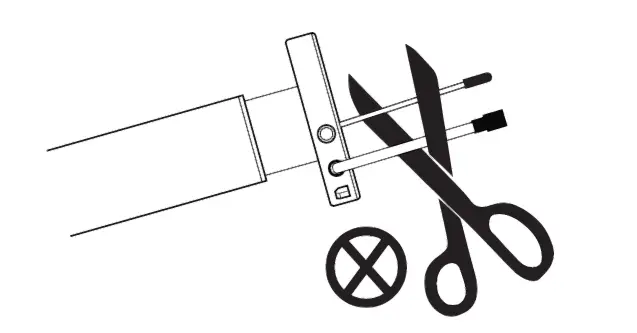
DO NOT CUT ANY CABLES OR THE ANTENNA
DO NOT DRILL OR CUT ANY PART OFTHE MOTOR
- Motor must be installed in a horizontal position and used with correct crown and drive adapters for tubular blinds.
- Keep remote controls, Smart Controller device, Blue Link device and apps away from children .
- Ensure all cables and connected devices are protected and clear from moving parts.
- An environment with multiple 433MHz devices may interfere with the normal usage of the motor.
- Misuse or any design modification will void warranty .
Neo Remote Control
Models RC201, RC202 and RC206
For other remote control models, please refer to the instructions inside the box of the remote control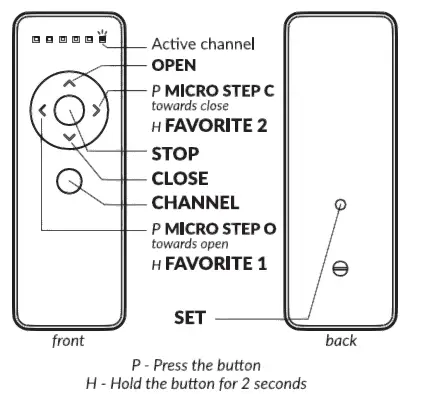
Basic operation
| Press OPEN | The motor moves all the way to the open limit. |
| Press CLOSE | The motor moves all the way to the close limit . |
| Press STOP | The motor stops any ongoing motion. |
| Press MICRO STEPO | The motor moves a small amount towards the open limit. |
| Press MICRO STEPC | The motor moves a small amount towards the close limit. |
| Hold FAVORITE 1 for 2 seconds | The motor moves to the favorite position 1. |
| Hold FAVORITE 2 for 2 seconds | The motor moves to the favorite position 2. |
| Press CHANNEL | The remote control cycles to the next channel (or group of channels), making it active 1. |
- This command is not sent to the motor, and affects only the remote control on which it is executed.
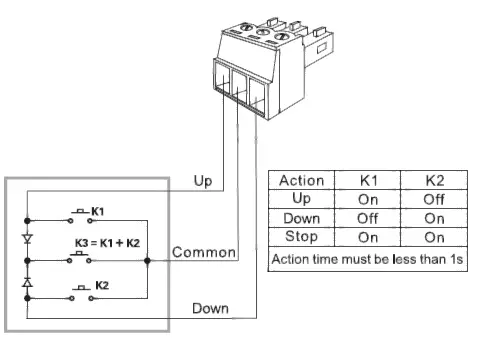
Dry contact
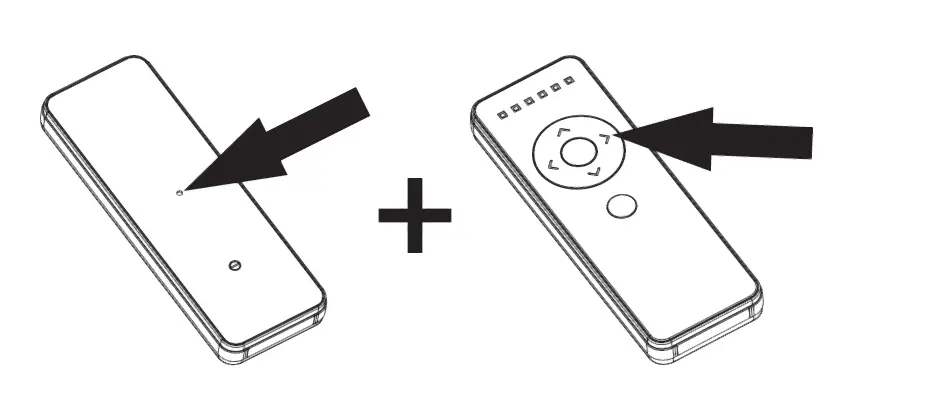
 pairing process
Up to 16 channels can be stored on the motor.
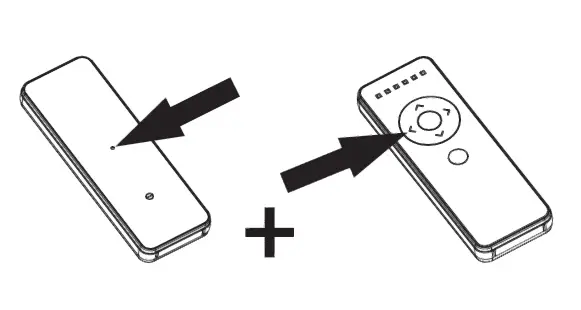
Using a Neo Remote Control
- Using the remote control, press the CHANNEL button as many times needed to select the desired channel to pair the motor. RC215 , RC230 : Press the PREVIOUS
 CHANNEL or the NEXT CHANNEL buttons
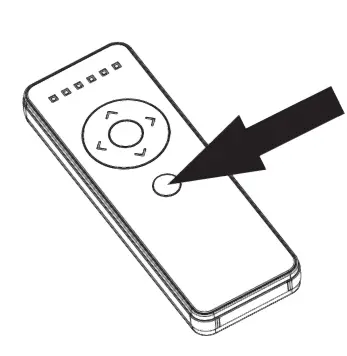
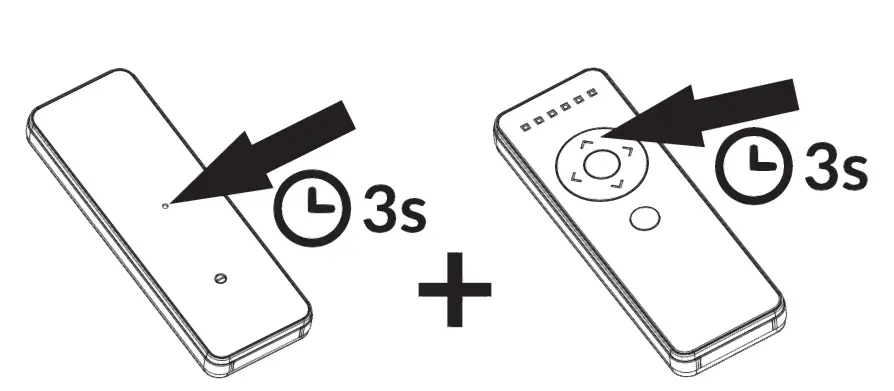
 - Hold the HEAD button for 3 seconds, until the motor moves.
- Press the SET button on the back of the remote control, the motor will move to confirm the operation.

 CHANNEL or the NEXT CHANNEL buttons
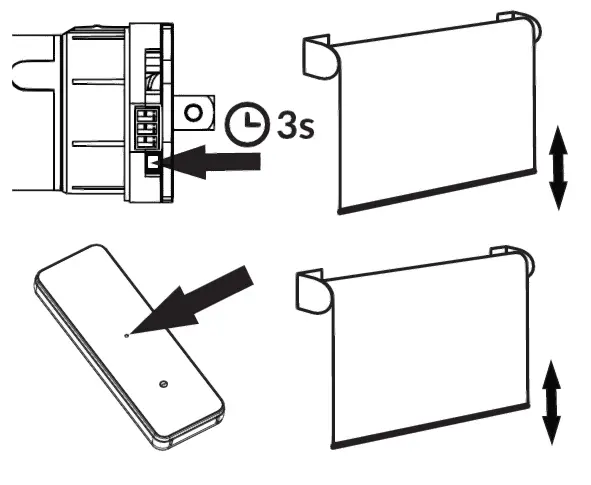
Using the mobile apps
Neo Smart Blinds: Download the app to your mobile device by searching Neo Smart Blinds on Google Play or App Store. You will need to create an account and add a Smart Controller before pairing blinds to the app.
Neo Smart Blinds Blue: Download the app to your mobile device by searching Neo Smart Blinds Blue on Google Play or App Store. You will need to connect a Blue Link to the motor before pairing it to the app.
Setting limits
The motor may come with no limits set from the factory. In this case, open and close commands will be the same as micro step o and micro step c.
Open limit
- Hold the SET + OPEN buttons at the same time for 3 seconds. The motor will move to indicate the process has started.

- Use OPEN and CLOSE buttons to go to the desired opened position.
- Press SET button on the back of the remote control. The motor will move to confirm that the open limit has been saved.
Close limit
- Hold the SET + CLOSE buttons at the same time for 3 seconds The motor will move to indicate the process has started

- Use OPEN and CLOSE buttons to go to the desired closed position.
- Press SET button on the back of the remote control. The motor will move to indicate that the close limit has been saved
 Reverse direction
 Reverse direction
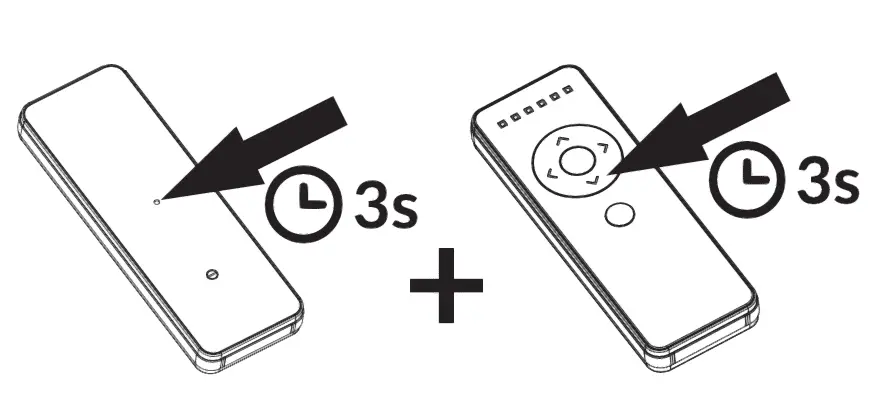
- Hold the SET button on the back of the remote control for 3 seconds . The motor will move up and down to indicate the process has started
- Press the CHANNEL + STOP buttons at the same time, the motor will move up and down to confirm the operation. RC215, RC230: Press the PREVIOUS CHANNEL+ STOP buttons at the same time.


Setting favorite positions
Setting favorite position 1
- Use OPEN, STOP and CLOSE buttons to go to the desired favorite position 1.
- Press the SET + FAVORITE 1 buttons at the same time. The motor will move to confirm that the favorite position 1 was saved.`
Setting favorite position 2
- Use OPEN, STOP and CLOSE buttons to go to the desired favorite position 2.
- Press the SET + FAVORITE 2 buttons at the same time. The motor will move to confirm that the favorite position 2 was saved.
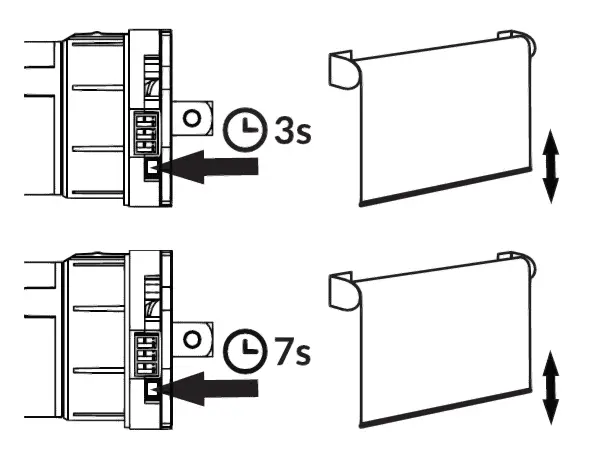
Delete all remote controls
Note: this procedure does not delete open and close limits or the favorite positions 1 and 2.
- Hold the HEAD button for 3 secondi’s, until the motor moves, then release 1t.
- Hold the HEAD button for 7 seconds, until the motor moves.
Troubleshooting
Motor is not responding
Wrong wiring connections – Make sure you have connected the wires as specified on the section Power Connection. Cannot pair with remote control
Not holding the HEAD button long enough -To enter pairing mode, you need to press the button, and keep it pressed, for 3 seconds, until the motor moves. The motor pairing mode lasts 30 seconds. Pressing the set button on the back of the remote control should be done within this period. Make sure you are using the right remote control and that it has a working battery. If the environment has too many 433MHz RF devices (RF noise), it may interfere with the pairing process.
Motor only moves inch by inch in one or both directions
This behavior means that the open and/or close limits have not been set. Please refer to the setting limits section of this document. For other remote control models, please consult our website (neosmartblinds.com/motors-accessories/). Motor moves in the opposite direction Simply follow the instruction in the topic Reverse direction.
Warranty
The Neo AC Tubular Motor (TM-RA35-3/26, TM-RA45-12/26) carries an one year warranty counting from the invoice date. Normal wear and tear are excluded from the warranty.
Disposal
Please recycle damaged electric products according to local regulations.
Smart Controller Integrations
For information about third party systems such as Control4, Google Assistant and Siri Shortcuts, please visit our website neosmartblinds.com/smartcontroller-integrations/
Instructions for other products
To download instructions for other Neo Smart Blinds products, please visit neosmartblinds.com/motors-accessories/


