
JL AUDIO SB-F-EXPED4G Stealthbox Compatible with 2019-Up Ford Ranger Important

- Installation requires appropriate tools and safety equipment. Professional installation is recommended.
- If you prefer to perform your own installation, please read this installation guide completely before beginning.
- Before cutting or drilling, check for potential obstacles behind mounting surfaces.
- Mount this product securely to prevent damage or injury in severe cond ltions.
INCLUDED HARDWARE 
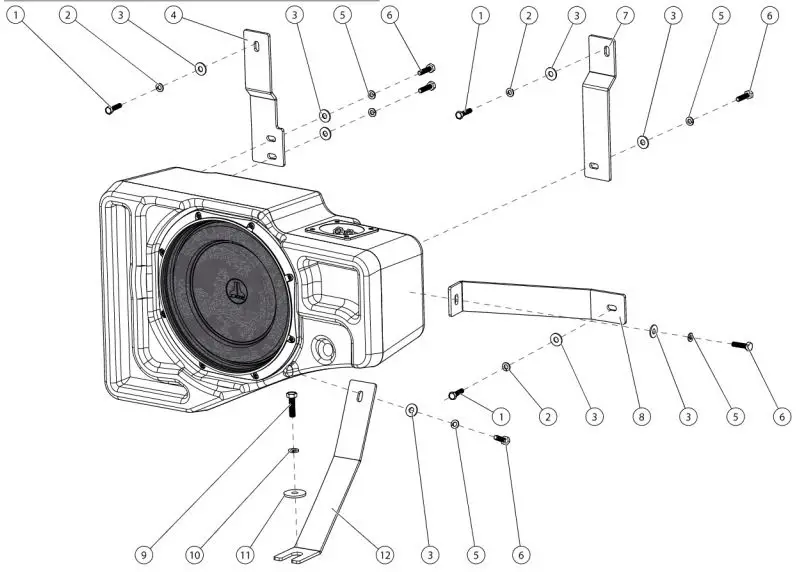
| l | Qty 3 | 154090 l5409L l5l746- 154199 1- 151098 150042 | M6 x 1mm, 20mm Hex Head Screw | |||
| 2 3 4 5 6 | – | – | 3 8 I 5 5 | – – | M6 Solit Lock Washer -1/4″ Flat Washer Too Rear Bracket 1/4″ Split Lock Washer | |
| l/4 – 20 x l” Hex Head Screw | ||||||
| 7 | I | 154198 154197 154233 154234 – 153997 I— 154196 | Top Front Bracket | |||
| 8 9 10 11 12 | I I – I -1 – I – I | Front Bracket _MS x 1.25mm, 25mm Hex Head Screw MS Split Lock Washer 5/l6″ ID, l-1/4″ OD Flat Washer Bottom Bracket | ||||
| 13* | l | 150249 | Foam Tape (not shown) | |||
POWER RECOMMENDATION
JL Audio recommends high quality amplifiers such as the JL Audio XD300/lv2. The diagram below shows the recommended crossover settings for the XD300/lv2. For a detailed description of the amplifier settings, consult the owner’s manual for the amplifier. If another amplifier is being used, please reference this illustration and use similar settings on that amplifier. 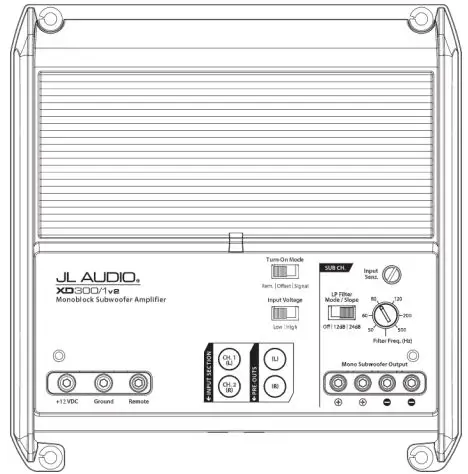
CONNECTIONS
Using quality power, signal, and speaker wire is essential in ensuring the performance of your Stealth box. JL Audio recommends using a 4 AWG power kit such as the XD-PCS4-1 B for your Stealthbox amplifier. Other kits are available should you be using more than one amplifier. Signal wire such as the JL Audio Premium Audio Interconnect Cables should be used to provide signal for both channels of the amplifier. JL Audio recommends using 12 AWG speaker wire for subwoofers such as our XC-BCS72-25.
STEP 1
Empty the cargo area and the rear seat on the driver’s side. 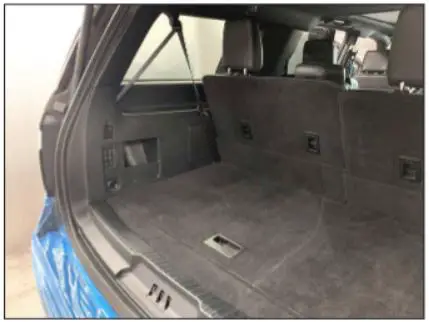
STEP 2
Carefully unclip and remove the upper cargo trim panel. 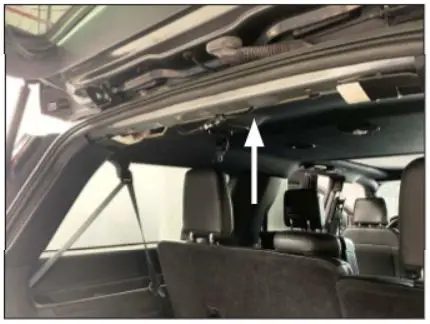
STEP 3
Carefully unclip and remove the lower cargo sill panel. 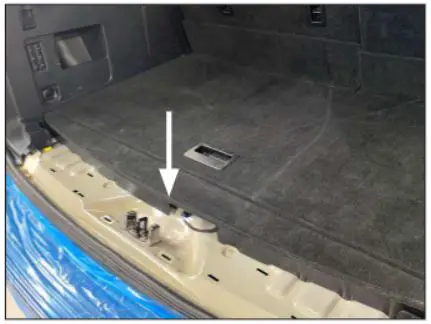
STEP 4
Fold up the cargo floor to access the storage pocket retaining screws, and remove the screws. Remove the jack mounting screw, and remove the jack from the vehicle. 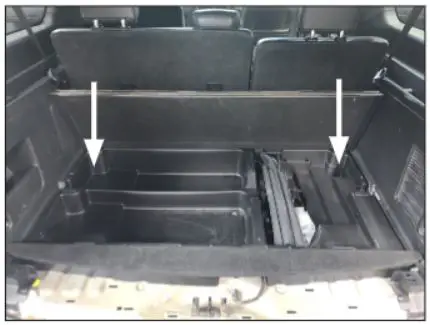
STEP 5
Disconnect the wiring harness from the front of the storage pocket, then remove the pocket from the vehicle. 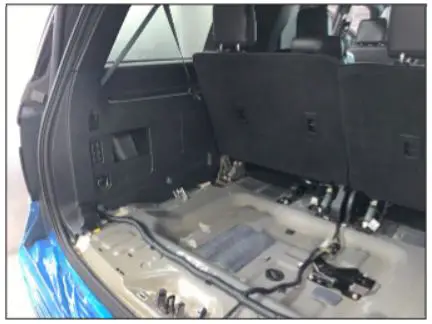
STEP 6
Remove the rear seat bolts from the driver’s side rear seat. 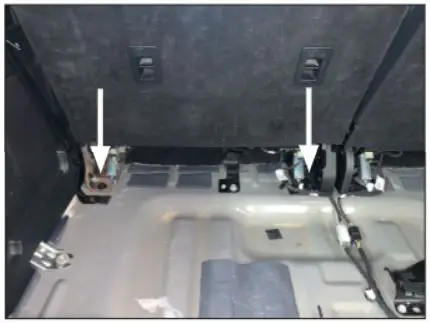
STEP 7
From inside the vehicle, carefully unclip the screw covers from the rear seat brackets. 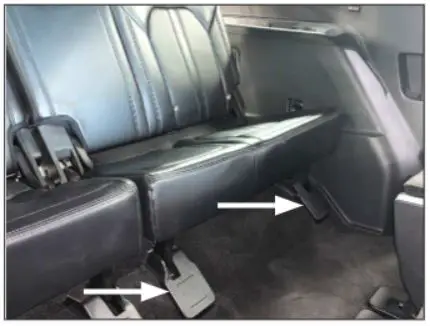
STEP 8
Remove the front seat bolts from the driver’s side rear seat. Tilt the rear seat backward. Remove the two center seat bolts and the one seat belt bolt. Disconnect the seat belt harness, then remove the rear seat from the vehicle. 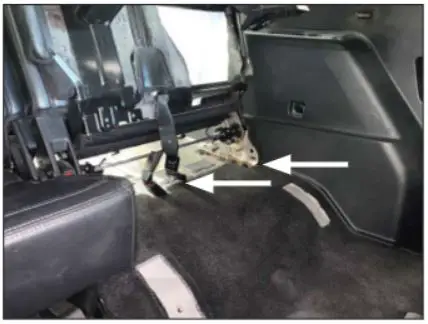
STEP 9
Open the upper seat belt bolt cover, then remove the seat belt bolt. 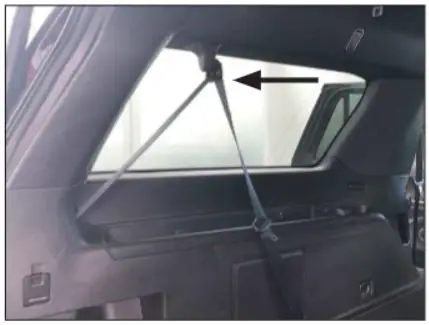
STEP 10
Carefully unclip and remove the rear door sill panel and the seat belt trim panel on the driver’s side. Remove the seat belt bolt. 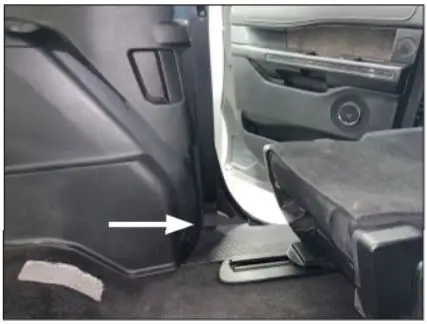
STEP 11
Remove the screws from the side panel on the driver’s side. 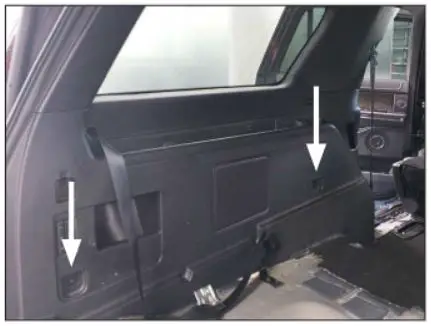
STEP 12
Carefully unclip and remove the (-pillar and D-pillar, then unclip and remove the side panel from the vehicle. 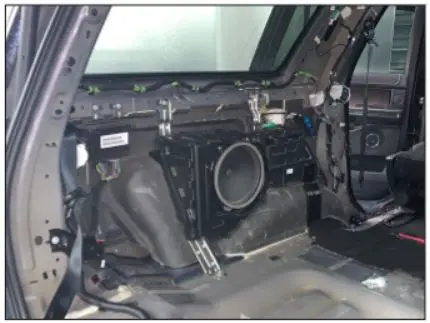
STEP 13
Remove the factory subwoofer enclosure mounting screws. 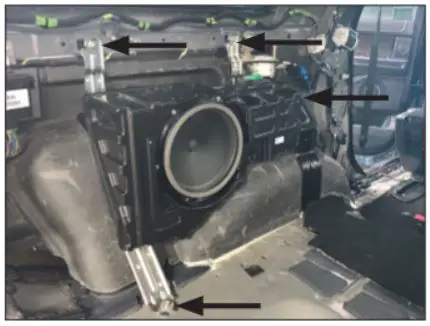
STEP 14
Disconnect and remove the factory subwoofer. 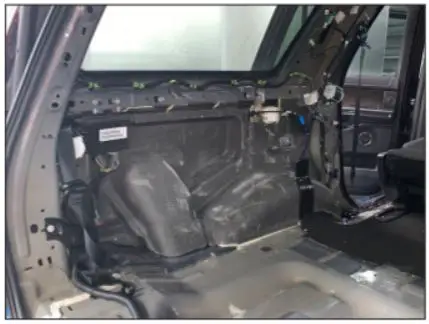 STEP 15
Slide a 1/4″ Split Lock Washer and a 1/4″ Flat Washer over a 1/4 – 20 x 1″ Hex Head Screw. Pass the assembly through the slot in the Bottom Bracket, into the threaded insert on the back of the enclosure, as shown, and hand tighten. 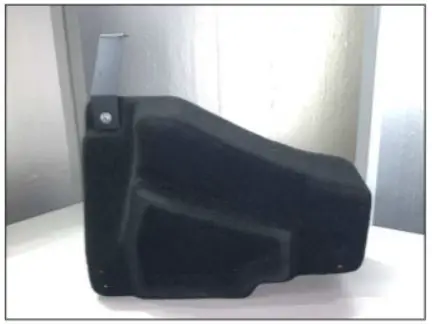 STEP 16
Repeat the process from STEP 15 for the Top Front Bracket and Top Rear Bracket, as shown. 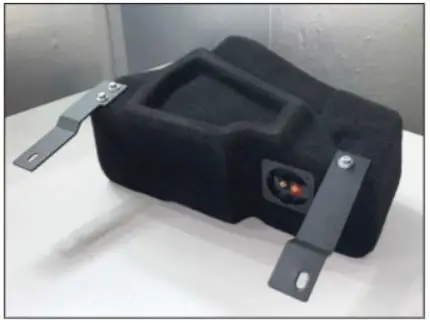
STEP 17
Place the Stealth box into position, as shown. Slide an MS Split Lock Washer and a 5/16″ ID, 1-1/4″ OD Flat Washer over an MS x 1.25 mm, 2 5 mm Hex Head Screw, then loosely thread the assembly into into the indicated factory hole to help hold the enclosure in place. Align the Top Front Bracket and Top Rear Bracket to the factory holes in the vehicle, then carefully remove the enclosure to fully tighten all four 1/4 – 20 x 1″ Hex Head Screws. 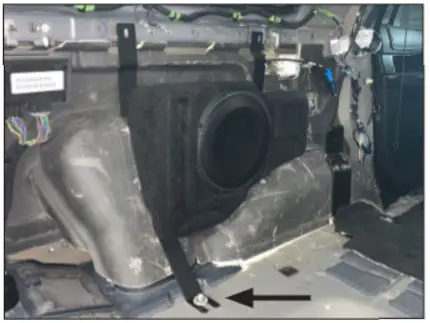 STEP 18
Apply Foam Tape to the landings of the Top Front Bracket, Top Rear Bracket, and Bottom Bracket where they will contact the vehicle, then reinstall the enclosure and the MS assembly. Slide an M6 Split Lock Washer and a 1/4″ Flat Washer over an M6 x 1 mm, 20 mm Hex Head Screw, pass the assembly through the slot in the Top Front Bracket, and into the factory hole. Repeat the process for the Top Rear Bracket. 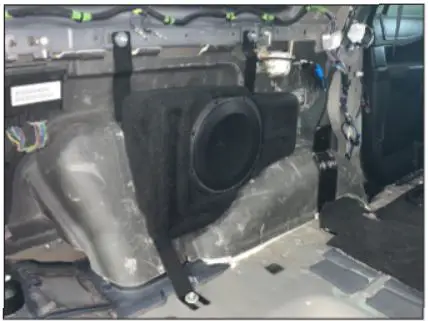 STEP 19
Apply Foam Tape to the slotted end of the Front Bracket where it will contact the vehicle. Slide a 1/4″ Split Lock Washer and a 1/4″ Flat Washer over a 1/4 – 20 x 1″ Hex Head Screw. Pass the assembly through the slot in the opposite end of the Front Bracket and into the threaded insert in the front of the enclosure. Repeat the M6 assembly process to secure the Front Bracket to the vehicle. 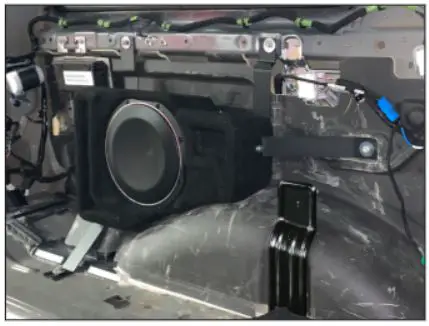 STEP 20
Align the Stealthbox. as shown, then fully tighten the three M6 x 1 mm, 20 mm Hex Head Screws and the MS x 1.25 mm, 25 mm Hex Head Screw.
Connect speaker cable to the terminal cup on the top of the enclosure, and route the cable as necessary. 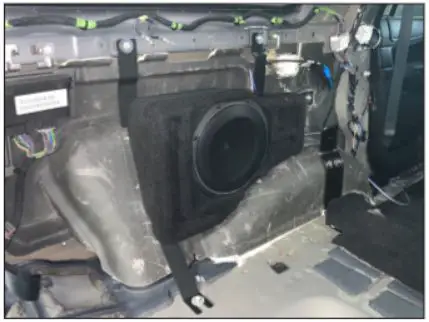 STEP 21
Reinstall the side panel, side panel screws, D-pillar, and (-pillar. 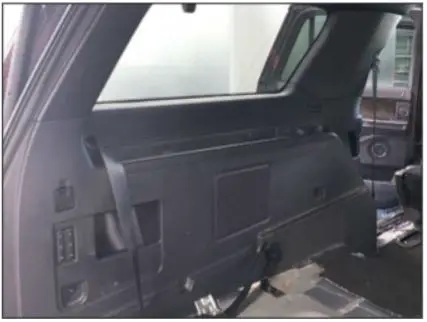
STEP 22
Reinstall the seat belt bolt, seat belt trim panel, and rear door sill panel. 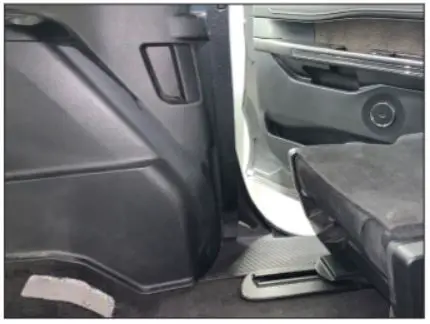
STEP 23
Reinstall the rear seat belt bolt and cover.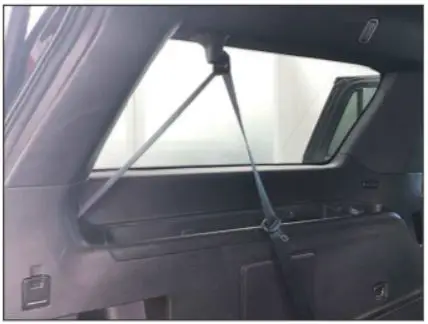
STEP 24
Reinstall the rear seat, seat belt harness, seat belt bolt, seat bolts, and covers. 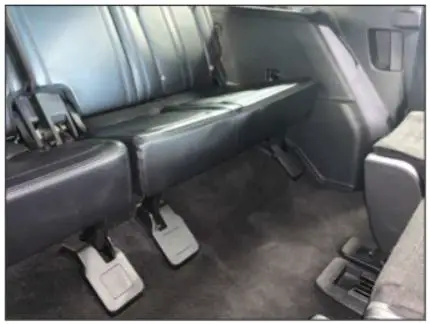
STEP 25
Reinstall the storage pocket and screws. Reinstall the jack. 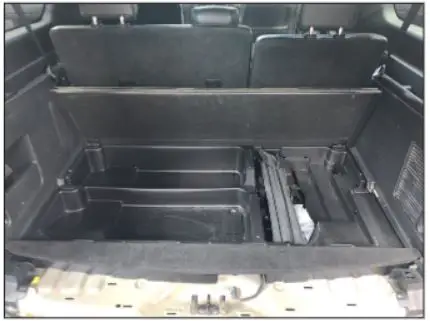
STEP 26
Reinstall the cargo sill panel and the upper cargo door trim panel. 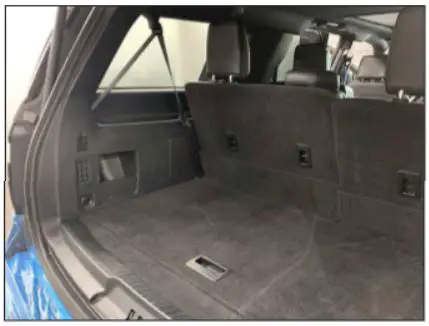
CONGRATULATIONS
You have completed the installation for this model! Enjoy your new Stealth box! 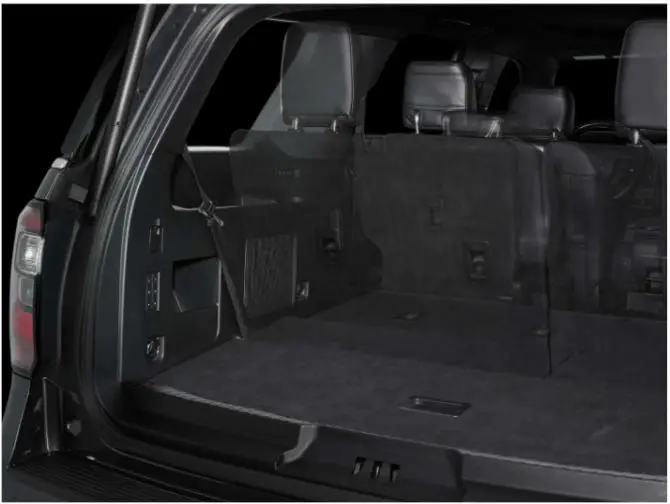
MID/HIGH-FREQUENCY DRIVER FITMENT
A variety of JL Audio coaxial and component systems will fit in the factory speaker locations of your vehicle. 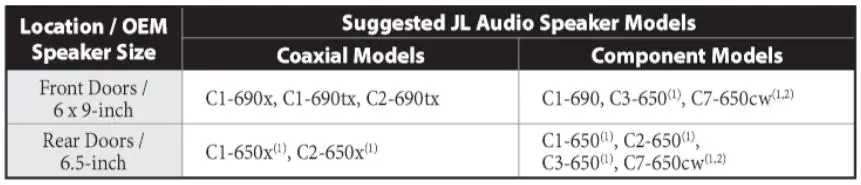
LIMITED WARRANTY
STEALTHBOX & ENCLOSED SPEAKER SYSTEMS (USA)
JL AUDIO warrants the enclo ure and the speaker to be free of defects in materials and
workman hip for a period of two (2) years from the original date of purchase.
This warranty is not transferable and applies only to the original purchaser from an authorized JL AUDIO dealer. Should service be necc sary under this warranty for any reason due to manufacturing defect or malfunction, JL AUDIO will (at it discretion), repair or replace the defective product with new or remanufactured product at no charge. Damage caused by the following is not covered under warranty: accident, mi u e, abu e, product modification or neglect, failure to follow installation in tructions, unauthorized repair attempts, mi representations by the seller. This warranty does not cover incidental or con equential damage and does not cover the cost of removing or reinstalling the unit(s). osmetic damage due to accident or normal wear and tear is not covered under warranty.
Any applicable implied warrantie are limited in duration to the period of the express warranty as provided herein beginning with the date of the original purchase at retail, and no warrantie whether express or implied, shall apply to this product thereafter. Some states do not allow limitation on implied warranlie , therefore these exclusion may not apply to you. This warranty gives you specific legal rights, and you may also have other rights which vary from state to state.
If you need service on your JL AUDIO product:
All warranty returns should be ent to JL AUDIO freight prepaid through an authorized JL AUDIO dealer and must be accompanied by proof of purchase (a copy of the original sales receipt.) Direct returns from consumers or non-authorized dealers will be refu ed unle specifically authorized by JL AUDIO with a valid return authorization number. Warranty expiration on products returned without proof of purchase will be determined from the manufacturing date code. Coverage may be invalidated a this date is previous to purchase date. Return only defective components. If the speaker fails in your Stealthbox or Enclosure, return only the speaker component, not the entire enclosure. Non-defective items received will be returned freight-collect. Cu tomer i responsible for hipping charges and in urance in ending the product to JL AUDIO. Freight damage on returns is not covered under warranty. For Service Information in the U.S.A. please call:
JL Audio Customer Service: (954) 443-1100
9:00 AM – 5:30 PM (Eastern Time Zone)
JL Audio, Inc 10369 North Commerce Pkwy.
Miramar, FL 33025 (do not send product for repair to this address)
International Warranties:
Products purchased outside the United States of America are covered only by that country’s distributor and not by JL Audio, Inc.


