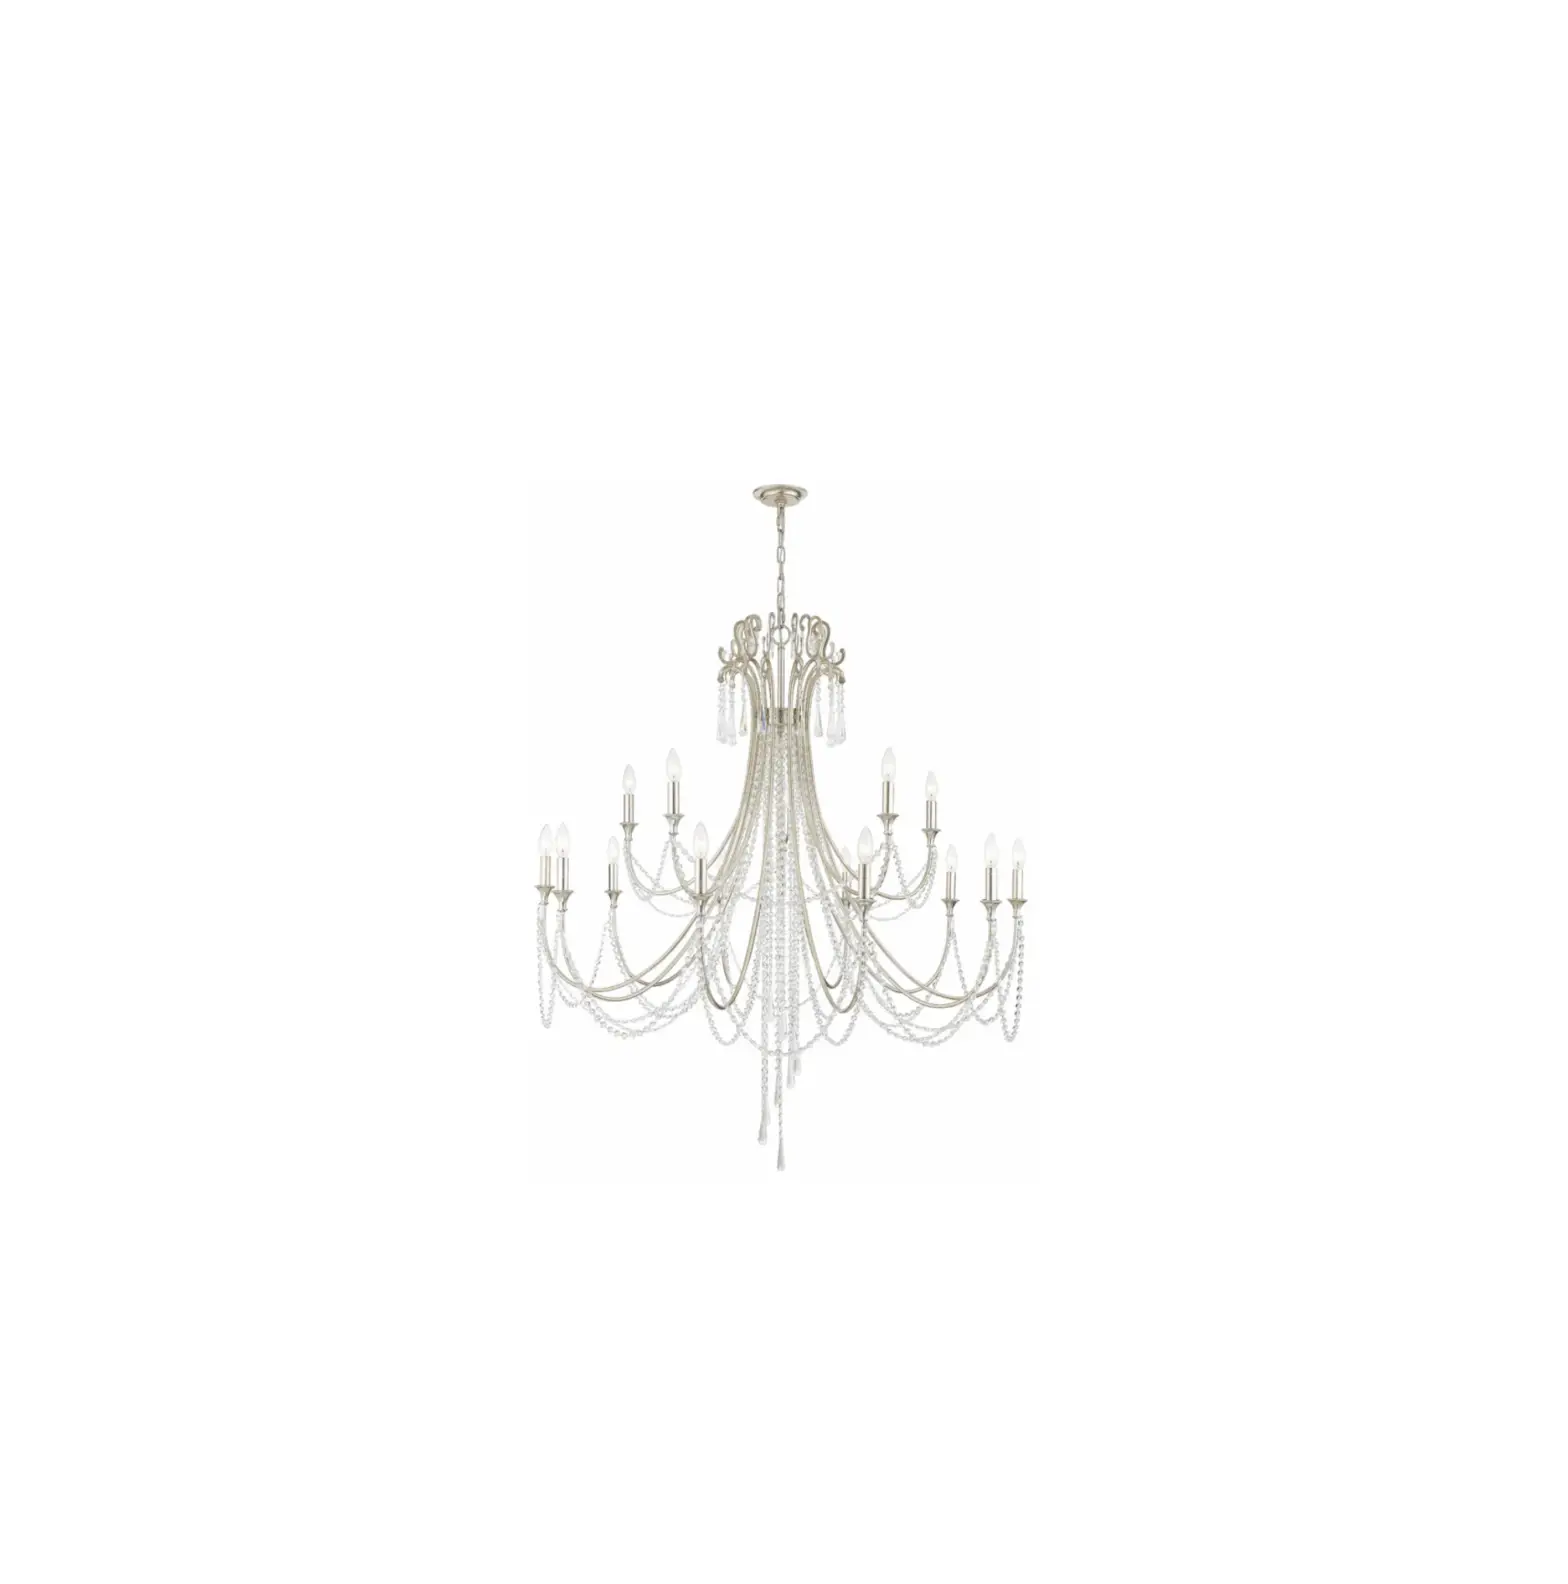
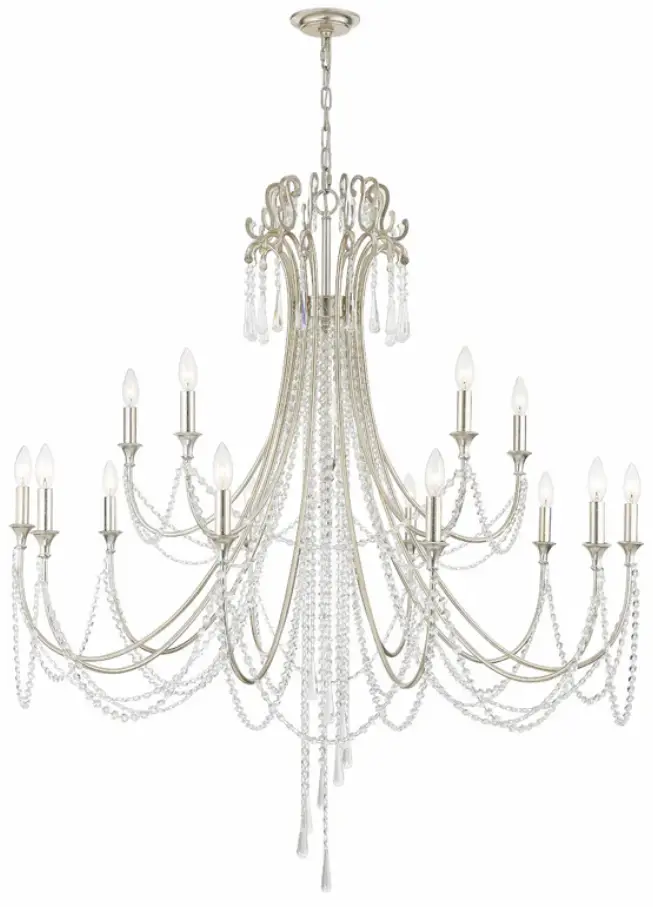
CRYSTORAMA ARC-1919-SA-CL-MWP Arcadia 15-Light Antique Silver Chandelier
ASSEMBLY INSTRUCTIONS
All electrical components must be installed by a licensed electrician in accordance with the National Electric Code and the appropriate local electrical codes
You will need 15 Candelabra Base Bulb 40 Watts Recommended 60 Watts Max.
USE LED BULBS FOR EXTENDED USE( This fixture is Dry rated)
How to Install
- Please place the fixture parts on a soft-cloth covered platform before installation. Do not remove the packaging on the arms until after installation is completed.
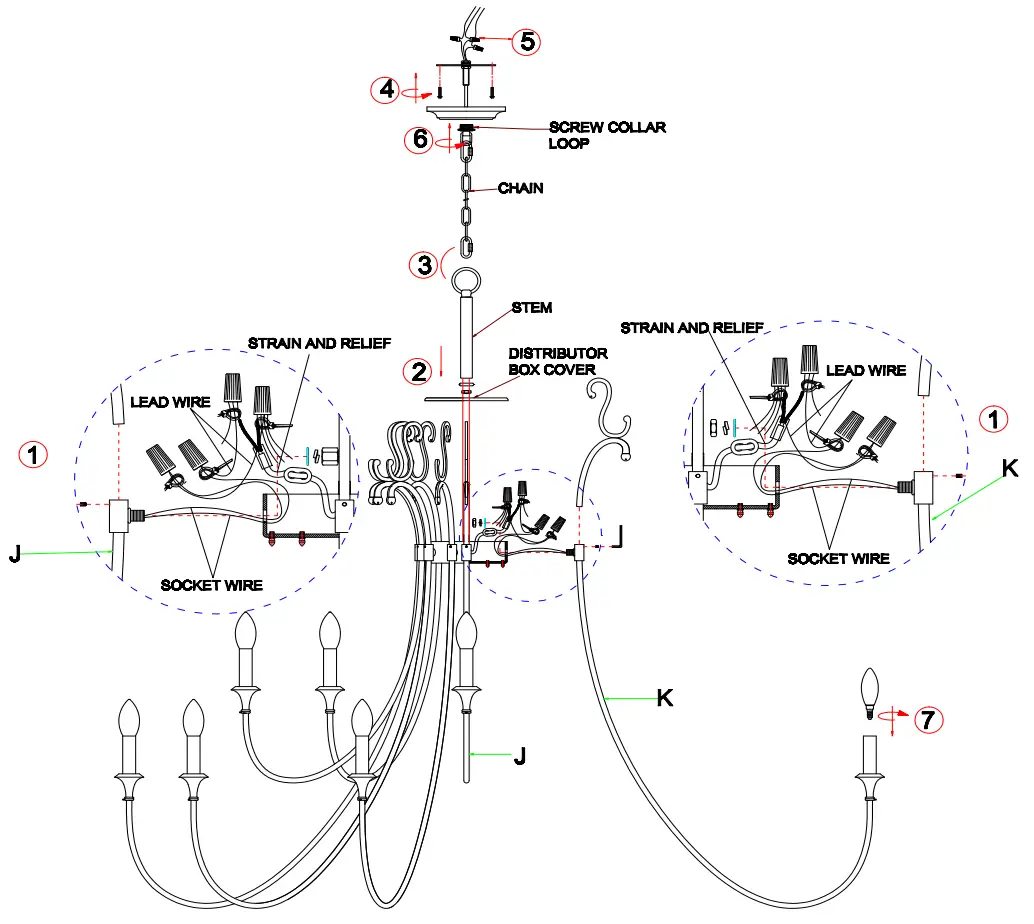
- Assemble the Top and Bottom arms on the top distributor box. When assembling top arms, please use the thicker nut. Use the thin nut for the bottom arms only
- For the hot socket wires, connect 5pcs of socket wires and 1 pc of lead wire together and cap them with wire nuts. Repeat this step for the rest of the socket wires. Connect the 5pcs of lead wire with the hot fixture wire and cap them with a wire nut.
- Follow step #3 for connecting the neutral socket wires.
- Carefully push all wires and wire nuts into distributor box. Place the top cover over the top distributor box and secure with the nut. Screw the stem onto the cover and loop onto the stem.
- Insert a scroll onto the top of each arm and secure using the provided screw and wrench.
- Attach one end of the chain to the fixture loop by opening the quick link. Slide the screw collar ring over the upper end of the chain and through the canopy. Open the opposite quick link and lift the fixture to attach the screw collar loop to the quick link. Secure the link.
- Feed the fixture wires and ground wires through the chain and screw collar loop, exiting through the stem.
- Fasten mounting hardware to junction box with machine screws. After wires are connected, thread the screw collar loop onto the nipple. Place the canopy up against the ceiling and lock by tightening the screw collar loop ring.
- After safely attaching the fixture into junction box ,install
- When you begin to dress the fixture, start with package labeled (A).
- IMPORTANT: Apply crystal sets in alphabetical order.
![]() WARNING: This product can expose you to Lead, which is known to the State of California to cause cancer and/or birth defects or reproductive harm. For more information go to www.P65Warnings.ca.gov
WARNING: This product can expose you to Lead, which is known to the State of California to cause cancer and/or birth defects or reproductive harm. For more information go to www.P65Warnings.ca.gov
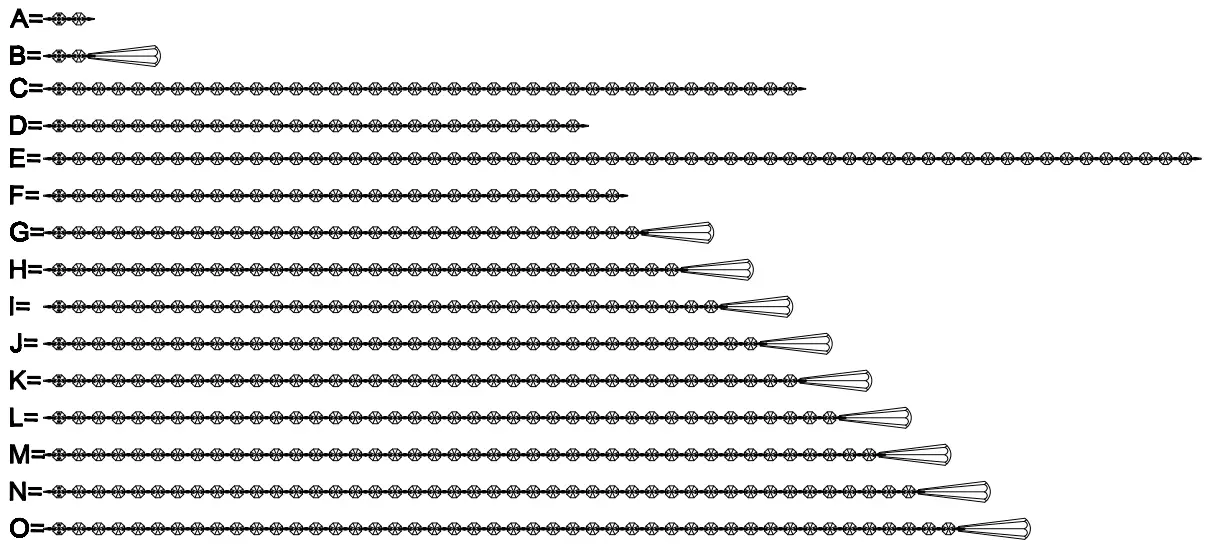
Crystal Sets
A. 8sets 2 *14mm
B. 8sets 2 *14mm + 1 *76mm drop
C. 5sets 38*14mm
D. 5sets 27*14mm
E. 10sets 59*14mm
F. 1 0sets 29* 14mm
G. 1 set 30*14mm+ 1 *76mm drop
H. 1 set 32*14mm+ 1 *76mm drop
I. 1 set 34*14mm+ 1 *76mm drop
J. 1 set 36*14mm+ 1 *76mm drop
K. 1set 38*14mm+1*76mm drop
L. 1 set 40*14mm+ 1 *76mm drop
M. 1 set 42*14mm+ 1 *76mm drop
N. 1set 44*14mm+1*76mm drop
0. 1 set 46*14mm+ 1 *76mm drop
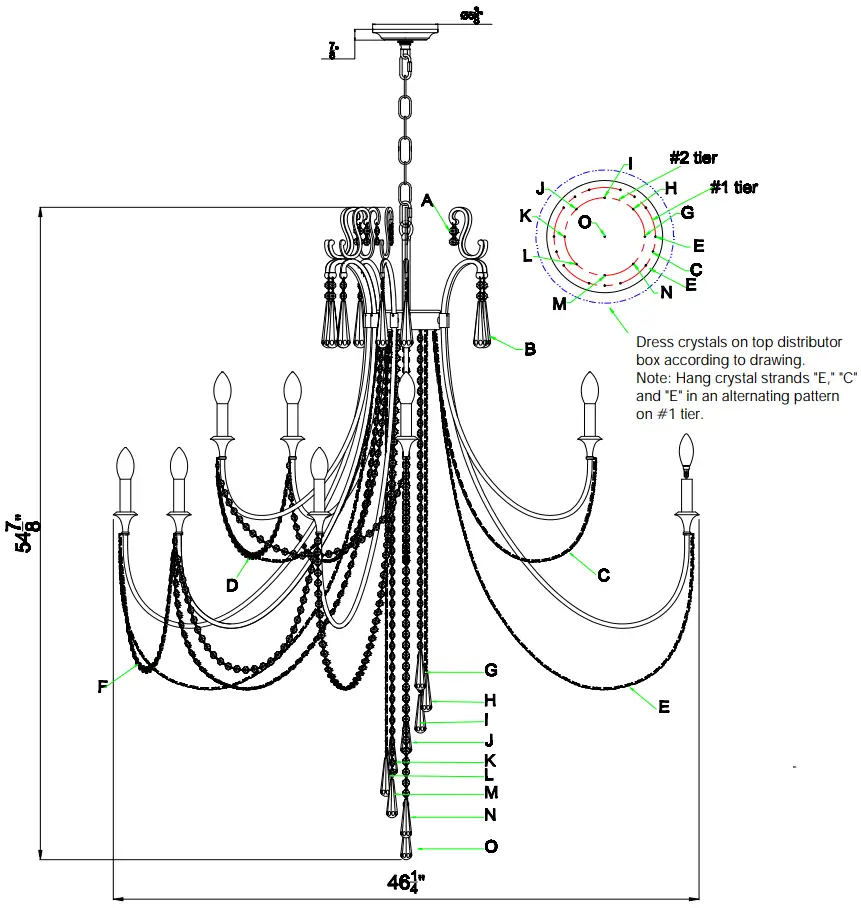
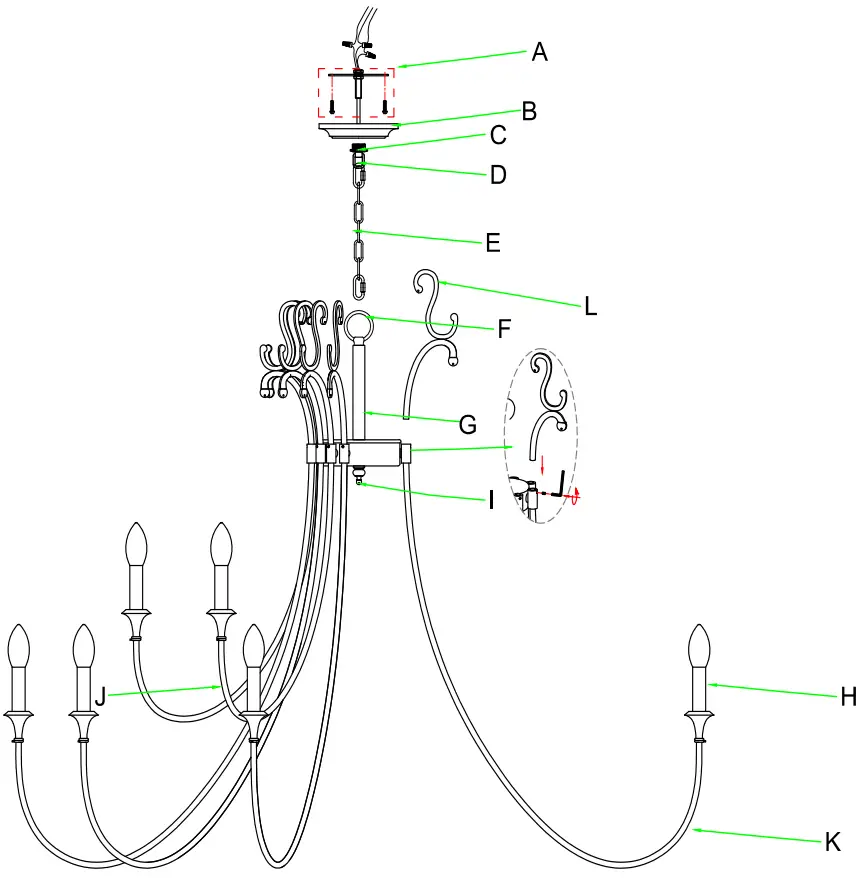
PART NUMBER
A. (1 )-Mounting Hardware
B. (1 )-Canopy;05*H1 ” (XBN1917SACAN51N)
C.(1 )-Screw Collar Loop Ring
D.(1 )-Screw Collar Loop
E. (1 )-Chain;01/5*72″ (XBN1917SACHA5MM)
F.(1)-Fixture Loop;02″
G.(1)-Top Stem;L6″
H. (12)-Candle Sleeve;L2 4/5″ (XBN1919SACDL2.8IN)
I. (1)-Finial;H11/5″ (XBN1917SAFIN)
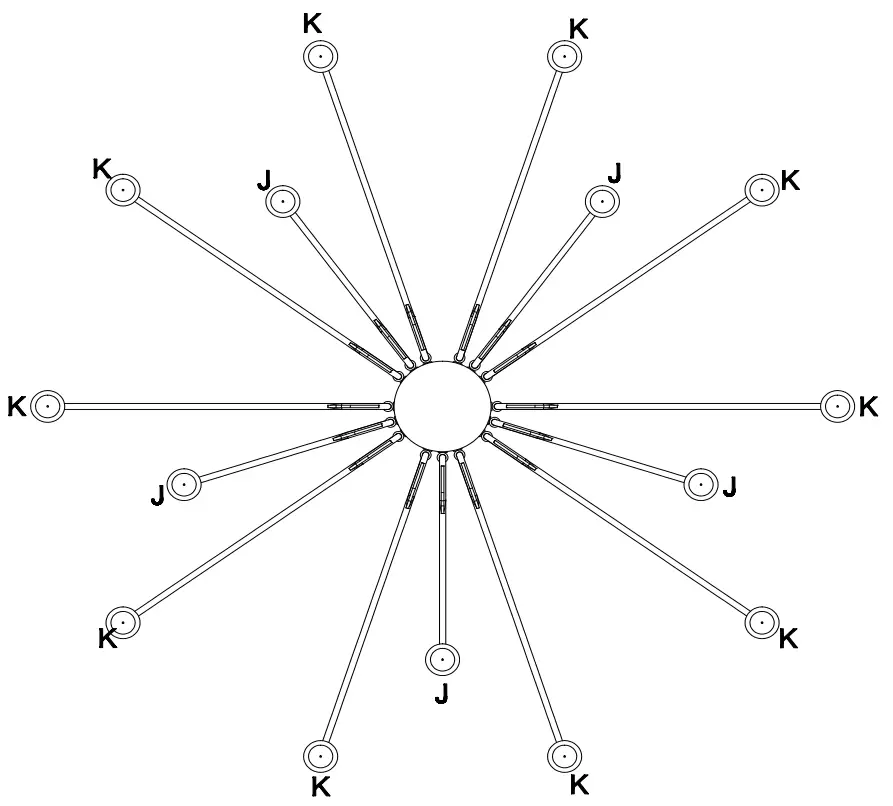
J.(5)-Top arm
K. (10)-Bottom arm
L.(15)-Scroll