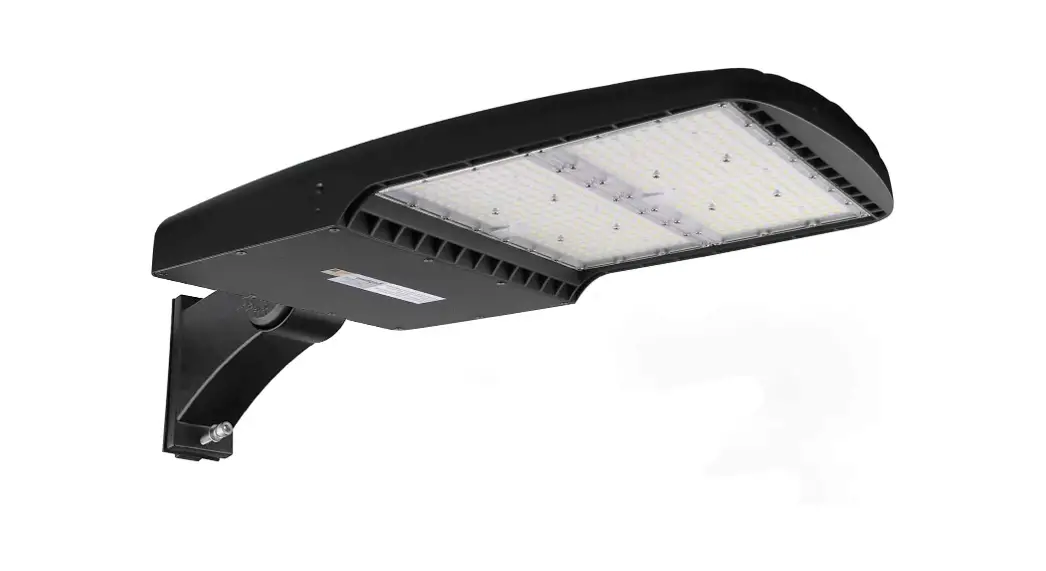
![]() 9492 LED Compact Area Light
9492 LED Compact Area Light
Installation Guide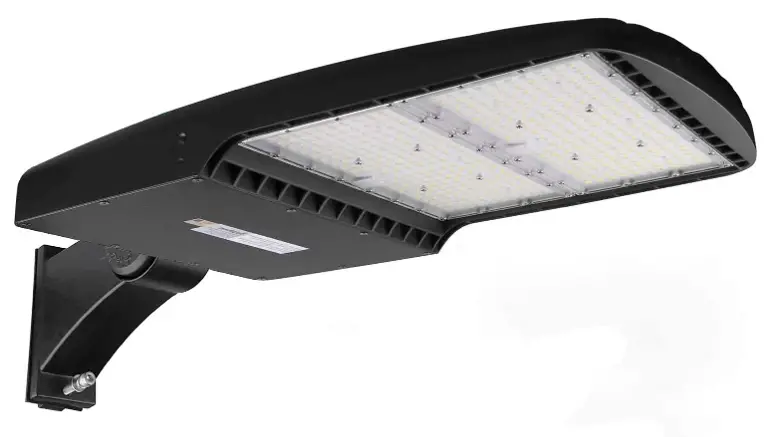
9492 LED Compact Area Light
LED Compact Area Light (120-277V)![]() WARNING,
WARNING,
To reduce the risk of electrical shock, fire, or injury to persons; read and follow all warnings and installation instructions before installing. All installations should be performed by a qualified electrician.
Risk of Electric Shock
Ensure power is off before installation or inspection. All wirings are performed in accordance with Electrical Code and local electrical code.
Risk of Fire
Fixtures are rated for use in 120-277V, 50-60Hz protected circuits, and 90°C rated supply wire.
FOR YOUR SAFETY
While performing installations described, gloves, safety glasses or goggles should be worn.
Any alteration or modification of this product is expressly forbidden as it may cause serious personal injury, death, property damage, and/or product malfunction. To prevent product malfunction and/or electrical shock, this product must be properly grounded To prevent wiring damage or abrasion, do not expose wiring to edges of sheet metal or other sharp objects. Do not alter, relocate, or remove the wiring, lamp holders, power supply, or any other electrical component.
SUITABLE FOR WET LOCATIONS.
INSIDE THE BOX
LED Compact Area Light
INSTALLATION.
Disconnect the power before installation. Exploded view of the completed assembly with component call out. 1, 2, 3, etc.
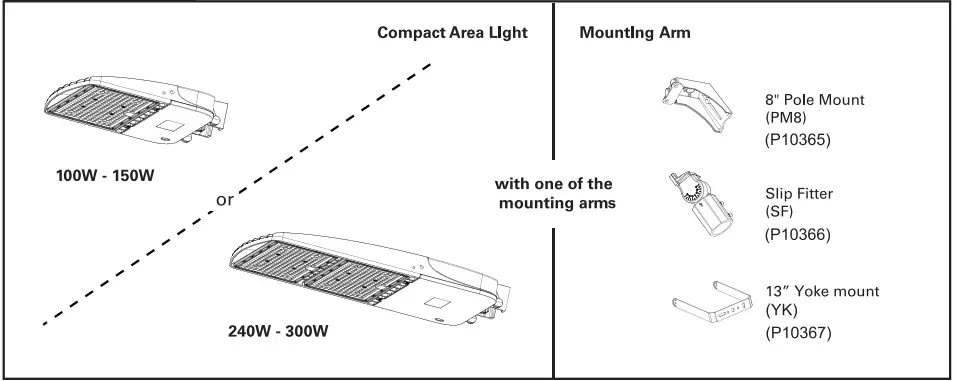
8-inch Pole Mount (P10365)
Step1: Unscrew the screws with a screwdriver, remove the iron bar, and press the junction box cover of the Pole Mount bracket to open it.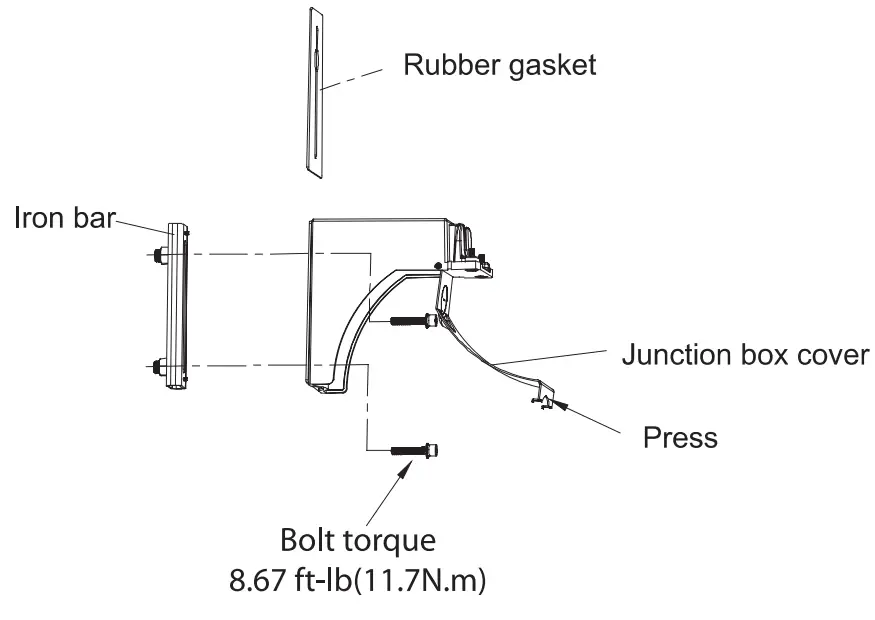 Step 2: Put the iron bar Inside of pole, fix it with a screw, but reserve gaps of 32mm. pass the Pole Mount bracket through the screw and hang it on the screw, tighten this screw, pass the 2nd screw through the holes of Pole Mount bracket, pole, and an iron bar, then tighten it with a wrench.
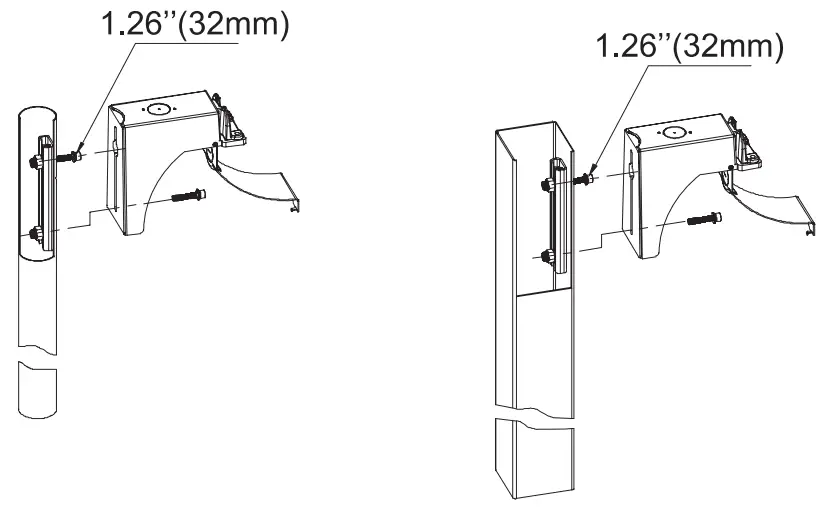 Note: When installing on a round pole, please remove the rubber gasket.
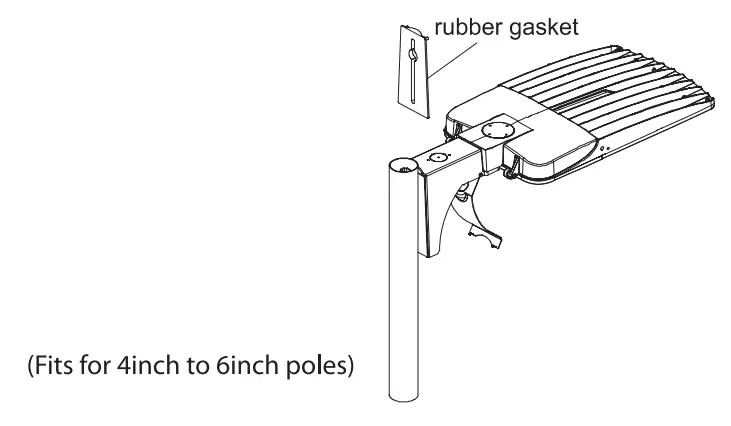 Step3: Run the fixture’s input wire through the Pole Mount bracket.
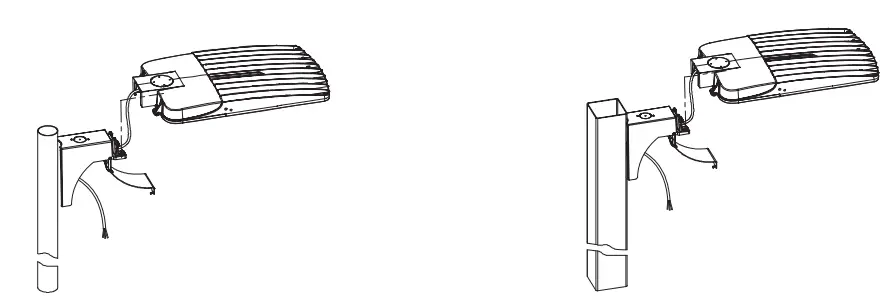
Step 4: Hang the fixture on the Pole Mount bracket, and lock the fixture by tightening screws through the bracket with an alien wrench.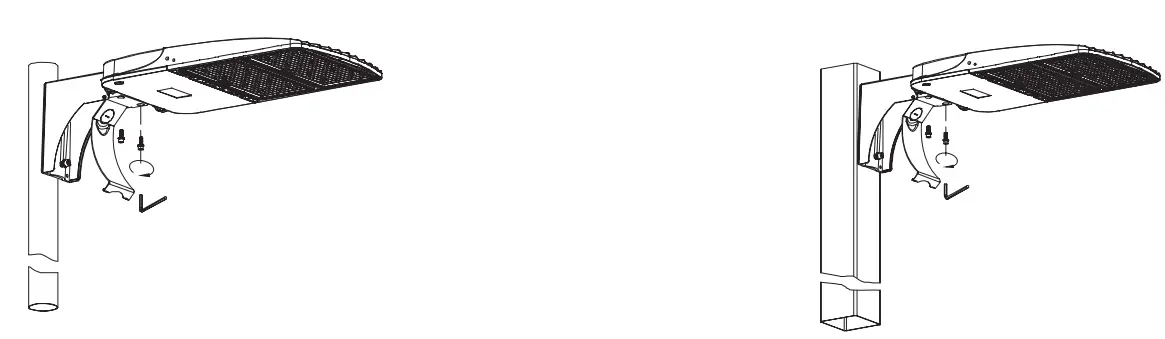 Step 5: Get the fixture’s input wire through the wiring hole into a pole, connect wires inside the pole, or the wires out from the pole pass through the wiring hole into the junction box for connection. Close the pole’s top cover, as well as the junction box cover.
Connect wire inside the square pole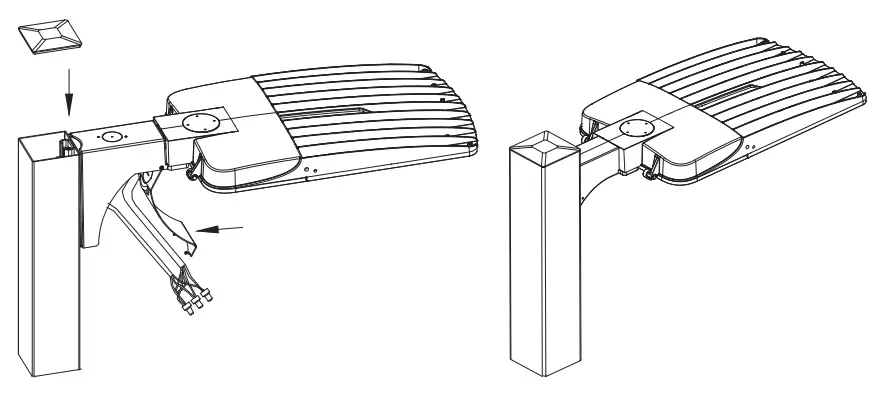 Connect wire inside the round pole
 Connect wire inside mounting bracket
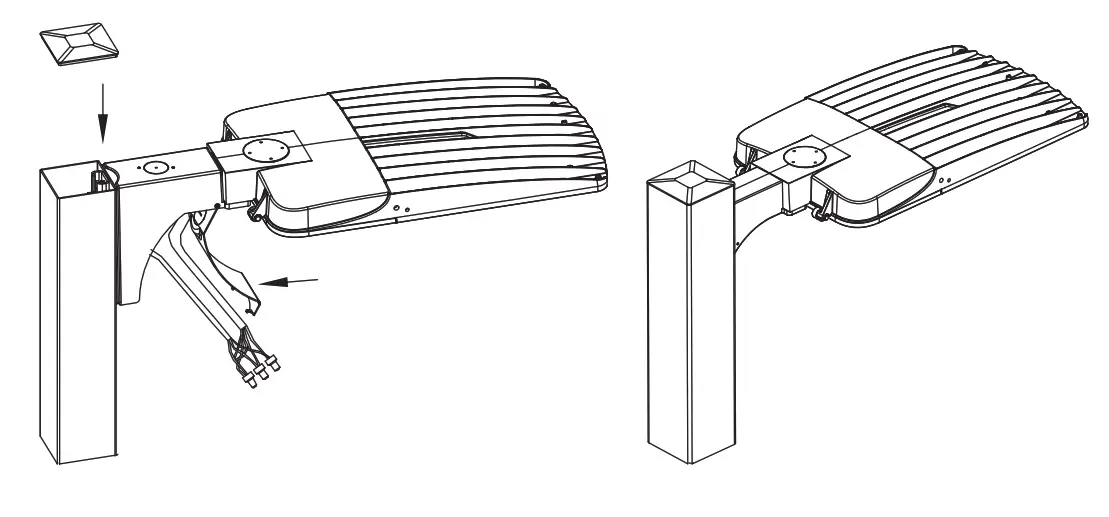 Connect wire inside mounting bracket
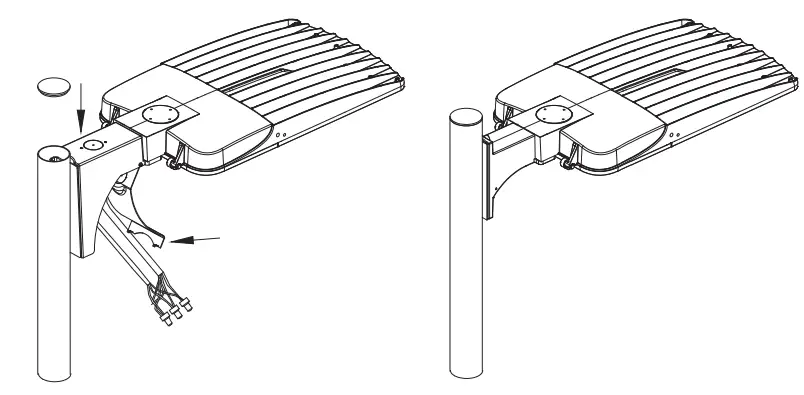
Slip Fitter (P10366) 2.5″ inner Diameter
Step 1: Disassemble the Slip Fitter with a wrench.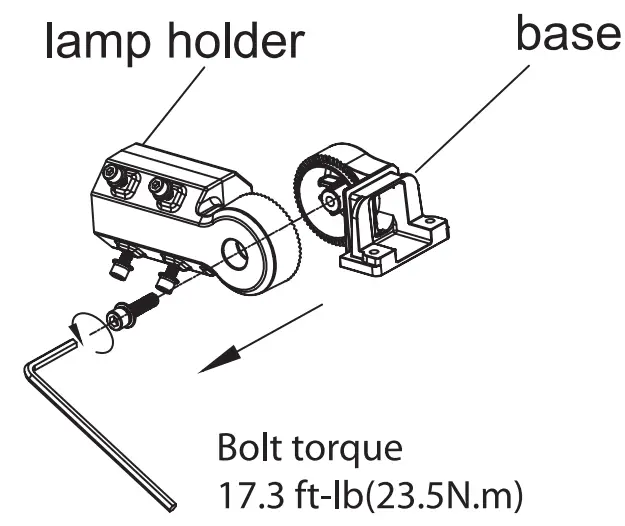 Step 2: Run the fixture’s AC input wire through the base, then tighten the screws to assemble the fixing the base to the fixture body.
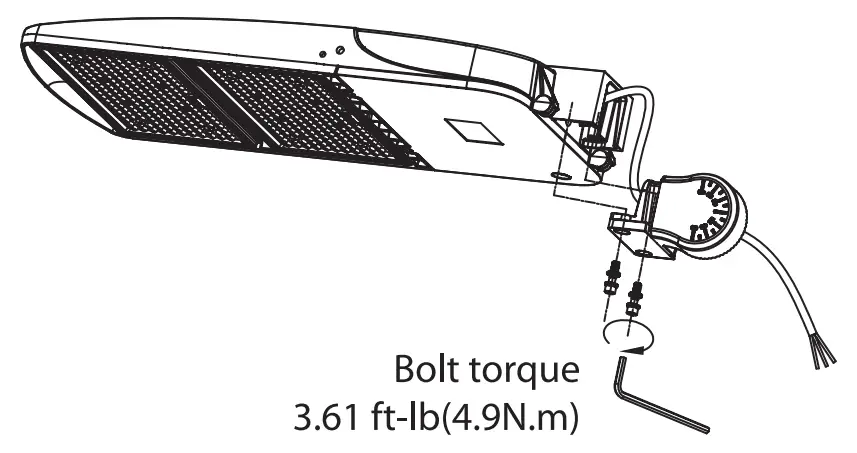 Step 3: Run the fixture’s Input wire through the lamp holder and lock it.
 Step 4: Loosen the 4 locking bolts on the Slip Fitter by a wrench.
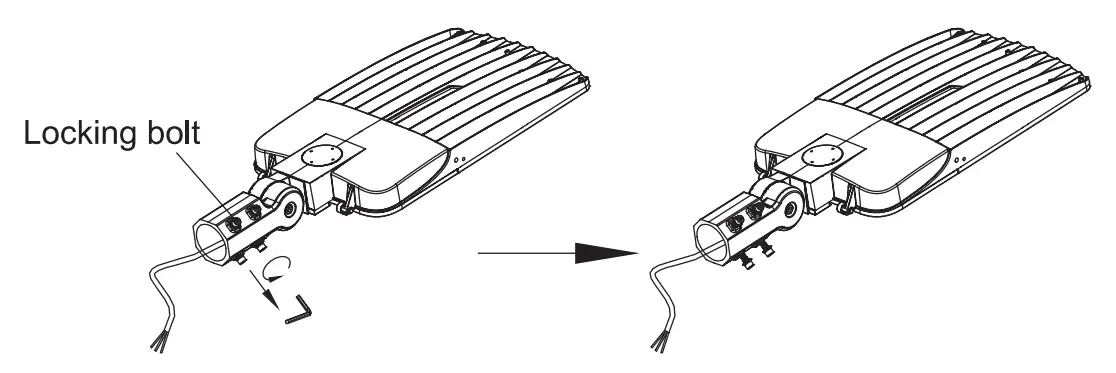 Step 5: Connect the fixture’s AC input wire to the pole wire with connectors, L to L (black), N to N (White), and G to G (Green); If need to connect dimming wires, please also use the connector to connect “Dim +”(purple) to “Dim +”(purple), “Dim -“(gray) to “Dim -“(gray).
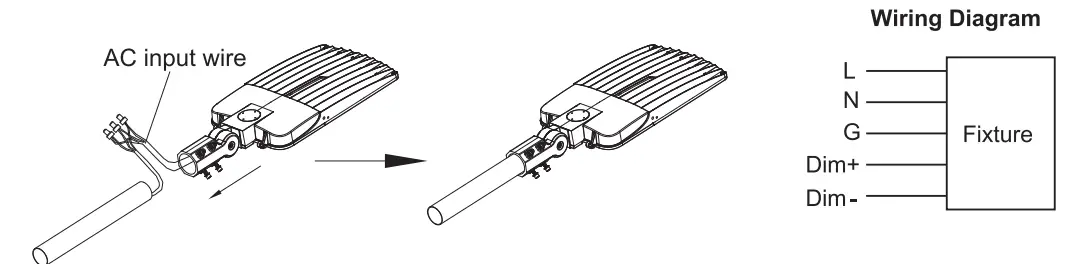 Step 6: Tighten the 4 locking bolts.
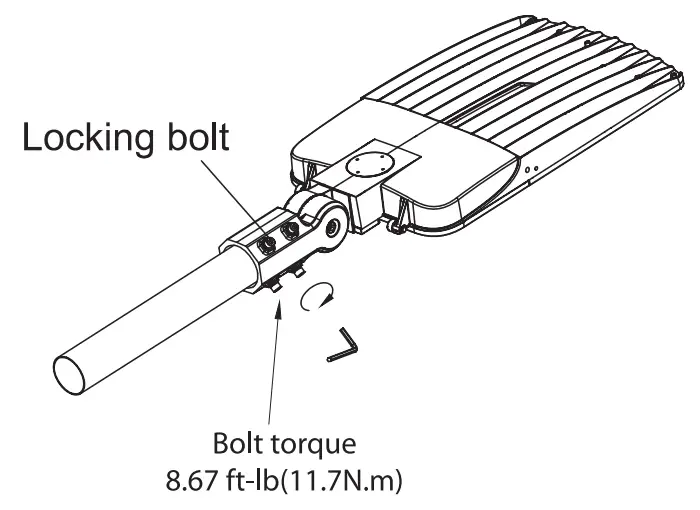 Step 7: Loosen the locking bolt in the Slip Fitter by a wrench to adjust the fixture to an appropriate angle, an adjustable angle range t 90°, then tighten this locking bolt.
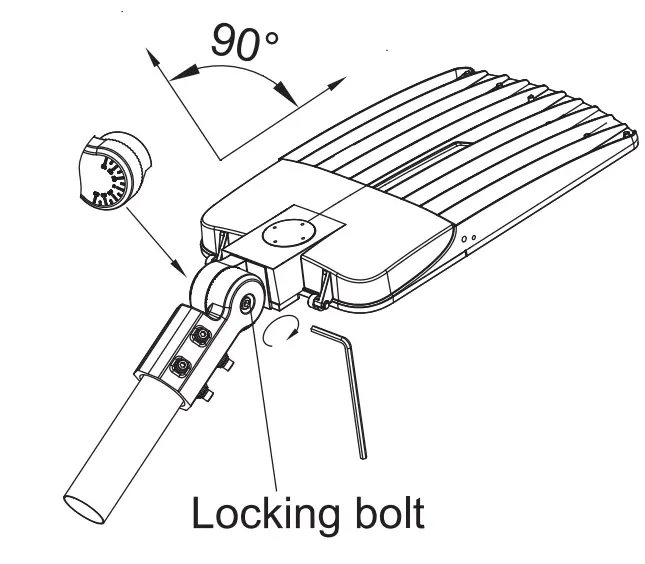
Yoke (P10367) 13″
Step 1 . Loosen the screws on both sides of the bracket with a wrench, and adjust the Yoke bracket angle to keep parallel with its installation surface.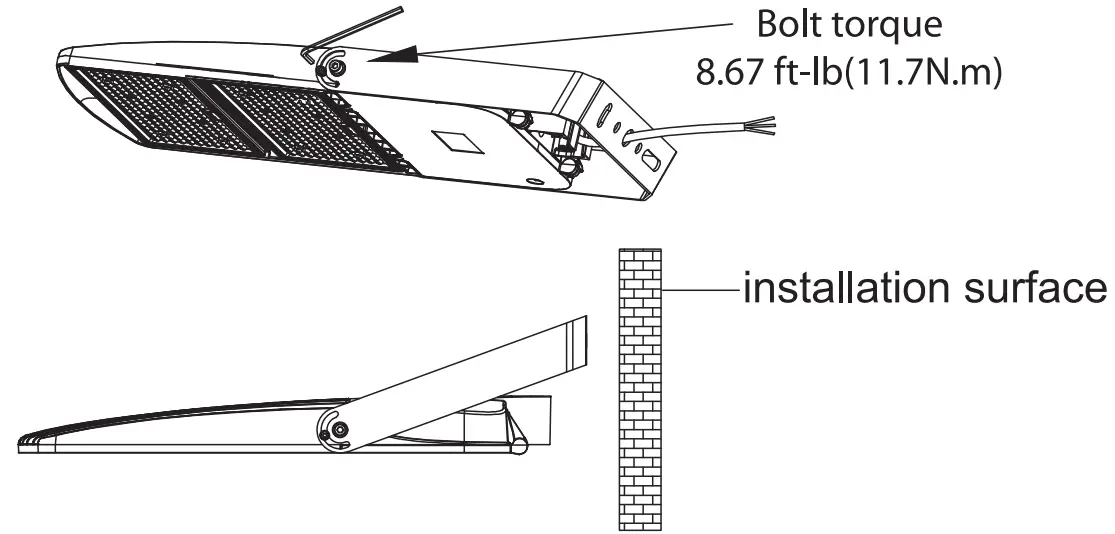 Step 3: Knock the two expansion bolts(not included) into the wall with a hammer.
 Step 2 . Mark the fixing holes locations on the wall with a Yoke bracket, then drill the hole in 10mm diameter with an electric drill.
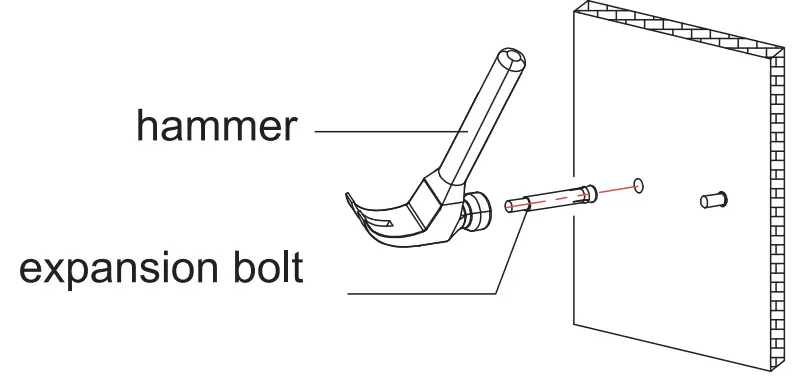 Step 4: Install the Yoke bracket to the wall with an expansion screw by tightening the nut with a wrench. Connecting fixture AC input wire to L N G, then make waterproof processing to joints, put wires into the junction box.
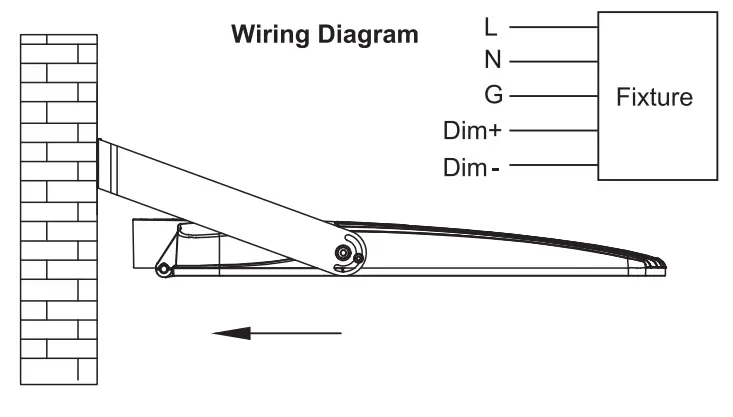 Note: The adjustable angel range is 0-180 °
![]() The plus rite USA
The plus rite USA
2000 S Grove Ave, Bldg B
Ontario CA 91761
T909-930-6868
T888-758 7443
F:909-930-9988
www.naturaled.com


