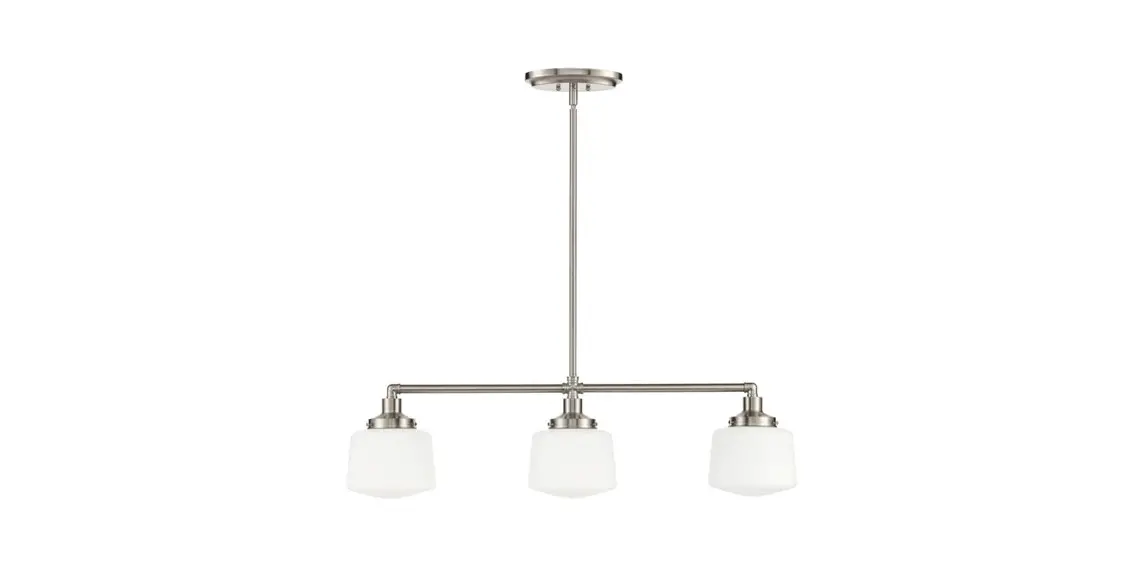
![]() BAY 65146 3-Light Chandelier
BAY 65146 3-Light Chandelier
User Guide
THANK YOU
We appreciate the trust and confidence you have placed in Hampton Bay through the purchase of this light fixture. We strive to continually create quality products designed to enhance your home. Visit us online to see our full line of products available for your home improvement needs. Thank you for choosing Hampton Bay!
Safety Information
IMPORTANT SAFETY INSTRUCTIONS
Review these basic electrical guidelines before you begin this installation.
- Use tools with insulated handles and ladders made of wood or fiberglass.
- Keep dry-chemical fire extinguishers in the kitchen, basement, and workshop.
- Never disable grounding devices. Ensure all appliances that require grounding are properly grounded.
- Meet or exceed all electrical code requirements that cover the work you are doing.
- Always work with enough light to see what you are doing. It is easy to make a mistake when you work in dim light.
- When in doubt about the safety of any electrical repair or test, call in a professional.
![]() WARNING: Before touching any wire, use a voltage tester to ensure it is not live.
WARNING: Before touching any wire, use a voltage tester to ensure it is not live.![]() WARNING: When you check for voltage in a receptacle, check both outlets as each may be controlled by a separate wiring circuit.
WARNING: When you check for voltage in a receptacle, check both outlets as each may be controlled by a separate wiring circuit.![]() WARNING: Before working on a circuit, go to the main service panel and remove the fuse or trip the breaker that controls the circuit.
WARNING: Before working on a circuit, go to the main service panel and remove the fuse or trip the breaker that controls the circuit.![]() WARNING: When replacing fuses, turn off the main power first. Make sure your hands and feet are dry and place one hand behind your back to prevent electricity from making a complete circuit through your chest. Touch a plug fuse only by its insulated rim. Remove cartridge fuses with a fuse impeller.
WARNING: When replacing fuses, turn off the main power first. Make sure your hands and feet are dry and place one hand behind your back to prevent electricity from making a complete circuit through your chest. Touch a plug fuse only by its insulated rim. Remove cartridge fuses with a fuse impeller.![]() WARNING: correct branch circuit conductor. Consult a qualified electrician to ensure
WARNING: correct branch circuit conductor. Consult a qualified electrician to ensure![]() CAUTION: expressly approved by the party responsible for compliance could void the user’s authority to operate the equipment. Changes or modifications to this unit not
CAUTION: expressly approved by the party responsible for compliance could void the user’s authority to operate the equipment. Changes or modifications to this unit not
Warranty
3-YEAR LIMITED WARRANTY
The manufacturer warrants this lighting fixture against defects in materials and workmanship for a period of three years from the date of purchase. If within this period the product is found to be defective in material or workmanship, the product must be returned, with a copy of the bill of sale as proof of purchase, to the original place of purchase. The manufacturer will, at its option, repair, replace, or refund the purchase price to the original purchaser or consumer. This warranty does not cover light bulbs or the fixture becoming damaged due to misuse, accidental damage, improper handling, and/or installation, and specially excludes liability for direct, incidental, or consequential damages. As some states do not allow exclusions or limitations on an implied warranty, the above exclusions and limitations may not apply. This warranty gives you specific rights and you may also have other rights that vary from state to state.
Contact the Customer Service Team at 1-855-HD-HAMPTON or visit www.HAMPTONBAY.com.
Pre-Installation
PLANNING INSTALLATION
Compare all parts with the Hardware Included and Package Contents sections. If any part appears missing or damaged, do not install this product and contact the Customer Service team at 1-855-HD-HAMPTON.
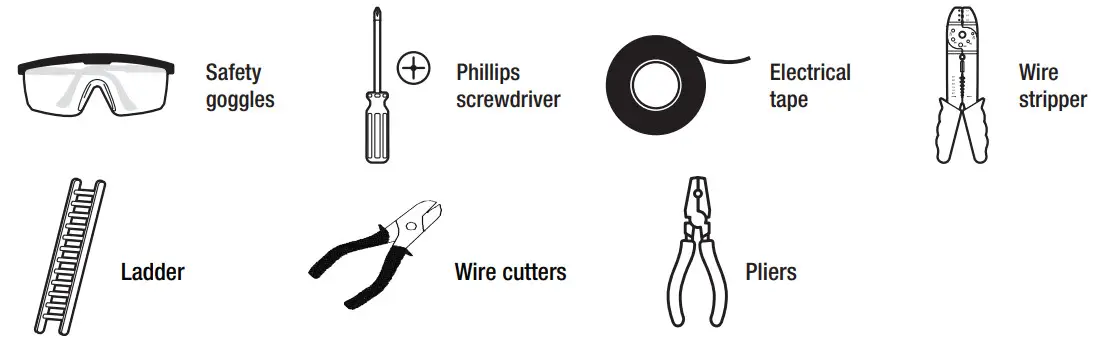
TOOLS REQUIRED
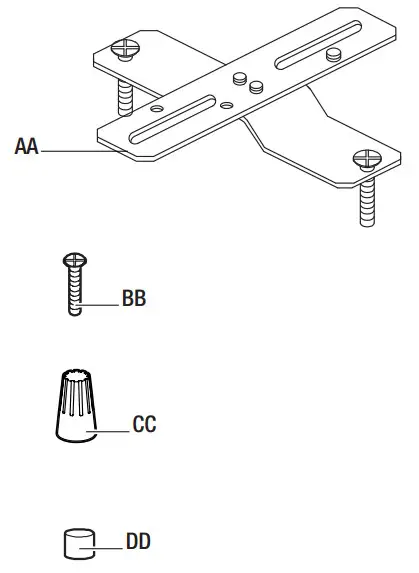
HARDWARE INCLUDED
![]() NOTE: Hardware not shown to actual size.
NOTE: Hardware not shown to actual size.
| Part | Description | Quantity |
| AA | Mounting crossbar | 1 |
| BB | Outlet box screw | 2 |
| CC | Wire connector | 3 |
| DD | Decorative nut | 2 |
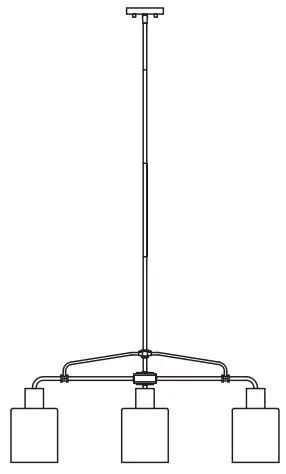
PACKAGE CONTENTS
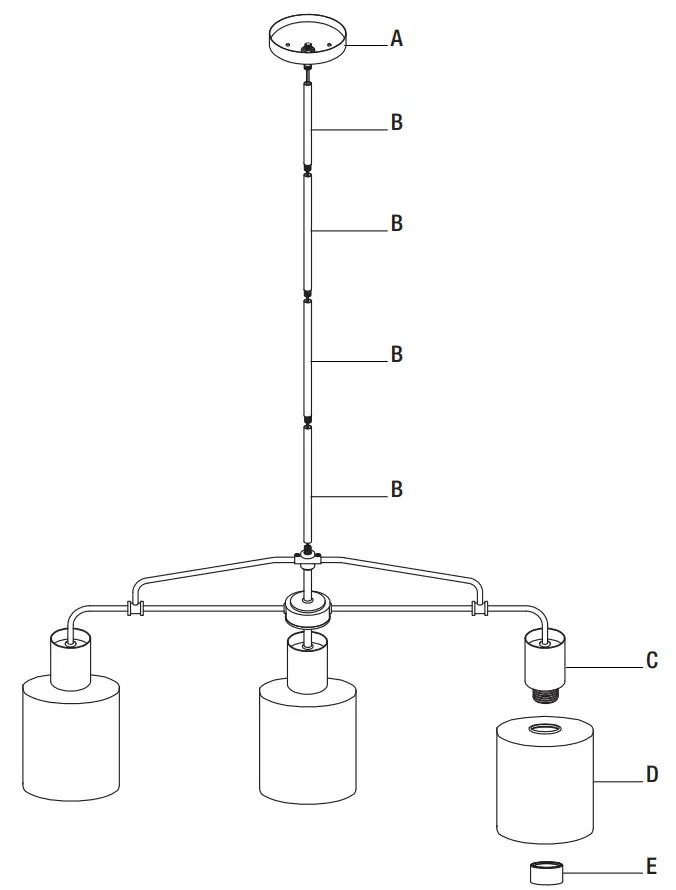
| Part | Description | Quantity |
| A | Canopy | 1 |
| B | Rod | 4 |
| C | Socket | 3 |
| D | Shade | 3 |
| E | Socket ring | 3 |
Installation
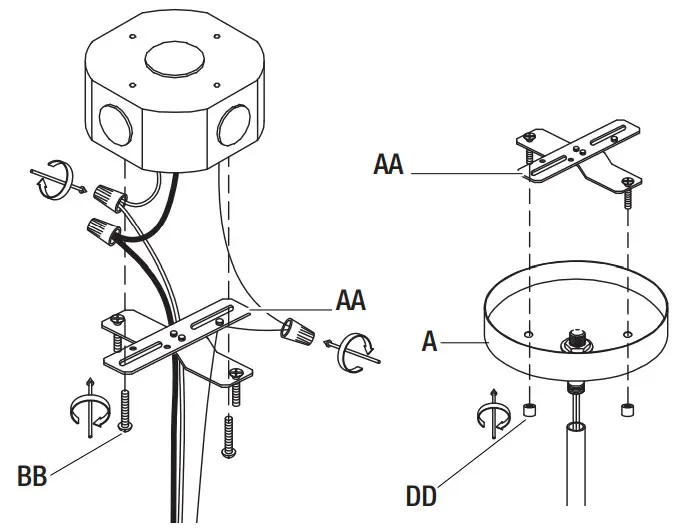
1 Installing the mounting crossbar
- Make sure the power is off.
- Pull the supply wires out of the outlet box.
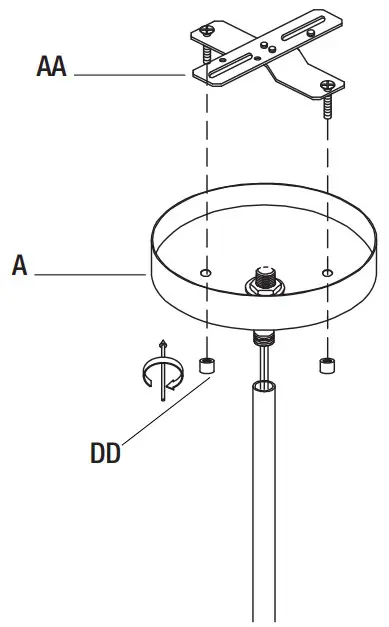
- Unscrew the decorative nut (DD) from the canopy (A) and detach the mounting bracket (AA).
- Fasten the mounting crossbar (AA) to the outlet box with the outlet box screws (BB).
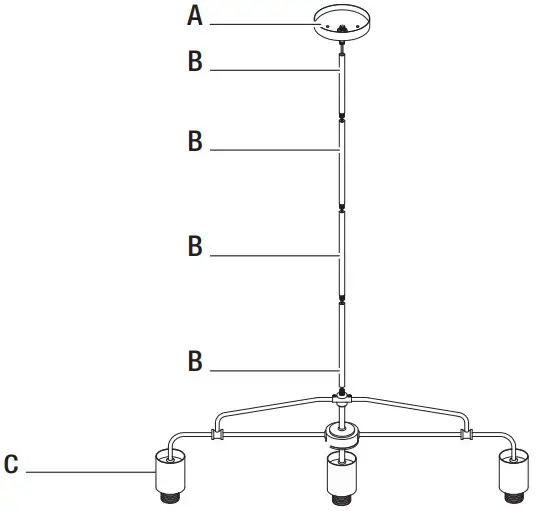
2 Installing the light fixture
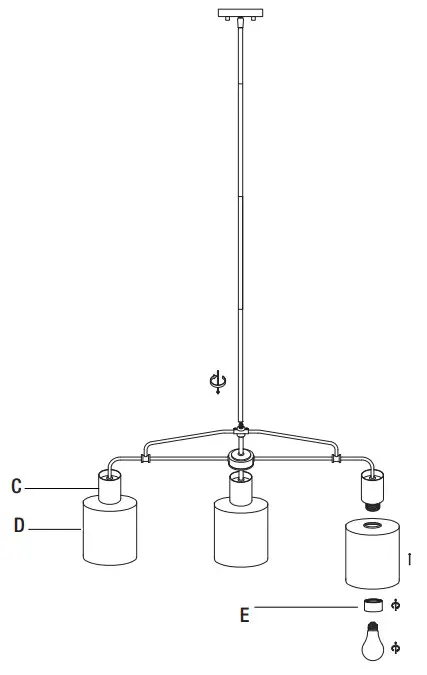
- Insert 6″ rod (B) into the canopy (A) by turning the rod (B) clockwise until it locks in place. Once the height is determined, continue with an additional 12″ rod (B) one by one starting from the top downwards.
- Thread rod (B) into the socket (C).
![]() NOTE: Do not twist the power cord.
NOTE: Do not twist the power cord.
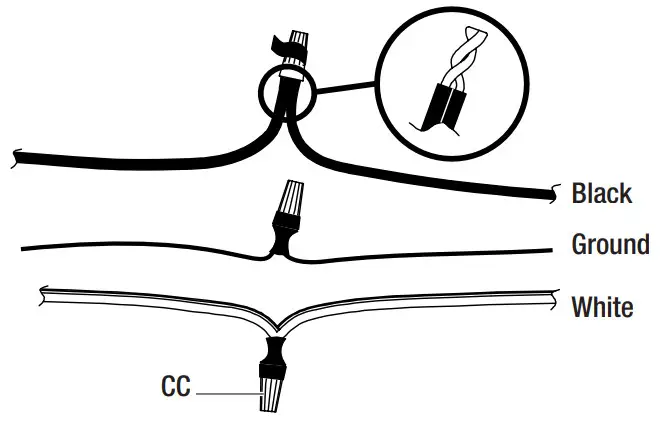
3 Making the electrical connections
- Connect the negative wire (black) from the fixture to the positive wires from the outlet box, and connect the bare copper from the fixture around the green screw on the mounting bracket, then connect it to the grounding conductor of the supply circuit together.
- Secure all connections together with the wire connectors (CC) and wrap the electrical tape (not included) around the wire connectors (CC).
- Push all excess wire and wire connections back into the outlet box.
4 Installing the canopy
- Align the mounting holes on the canopy (A) with the mounting screws on the mounting crossbar (AA).
- Secure the canopy (A) to the mounting screws using the decorative nuts (DD).
5 Installing the shade and light bulb
- Secure the shade (D) to the socket (C) using the socket ring (E).
- Install a medium base, 60 Watt maximum each, light bulb (not provided) into each socket (C).
Care and Cleaning
WARNING: Before cleaning the fixture, disconnect the electrical power to the fixture by turning off the circuit breaker or removing the fuse at the fuse box.
- Use a dry or damp, clean cloth to wipe the surface of the fixture. Do not use abrasive cleaners or chemical solvents.
- Allow the fixture to dry completely before power is restored.
Troubleshooting
| Problem | Problem | Solution |
| The light will not illuminate. | The power is off. | Ensure the power supply is on. |
| There is a faulty wire connection. | Check the wiring. Contact a qualified and licensed electrician if you are not comfortable troubleshooting wiring issues. | |
| There is a faulty switch. | Test or replace the switch. | |
| The bulb is burned out. | Replace the bulb. | |
| The fuse blows or the circuit breaker trips when the light is illuminated. | There are crossed wires, or the power wire is not properly grounded. | Check the wire connections. |
HAMPTONBAY.COM
Please contact 1-855-HD-HAMPTON for further assistance.
Questions, problems, missing parts? Before returning to the store, call Hampton Bay Customer Service
8 a.m. – 7 p.m., EST, Monday – Friday, 9 a.m. – 6 p.m., EST, Saturday
1-855-HD-HAMPTON
HAMPTONBAY.COM
Retain this manual for future use.


