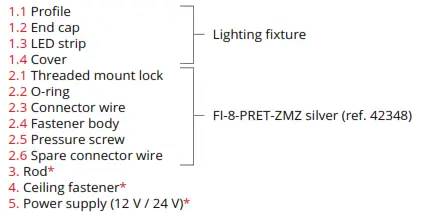
![]() FI-8-PRET-ZMZ Fastener
FI-8-PRET-ZMZ Fastener
Instruction Manual
FI-8-PRET-ZMZ Fastener – mounting instructions

 *The full range of accessories and electronics is available at www.KlusDesign.eu
NOTE! All LED tapes must be connected to a 12 V or 24 V power supply.
IMPORTANT: Not all possible mounting procedures are presented here.
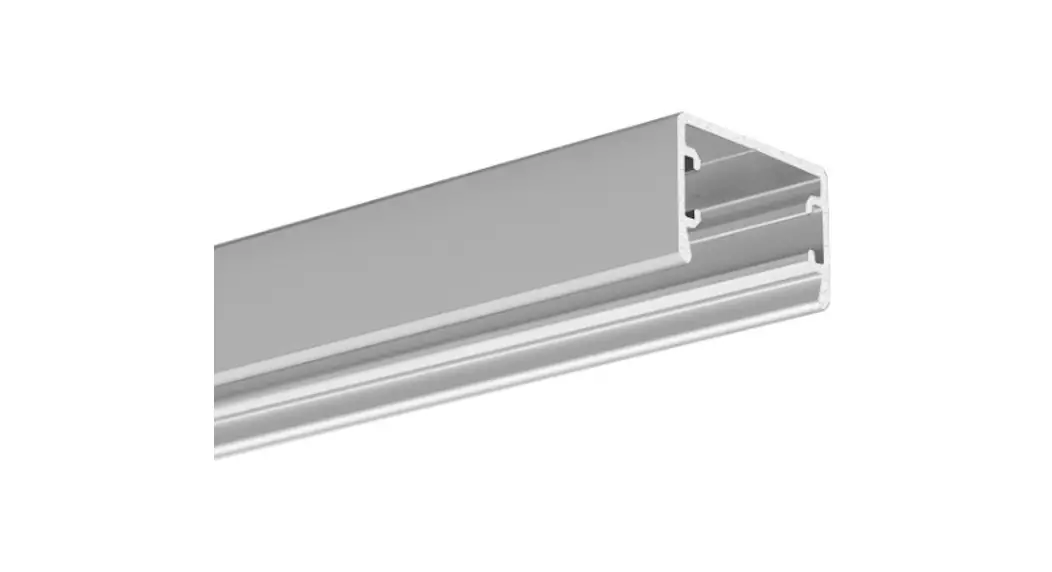
More mounting procedures and related accessories can be found at www.KlusDesign.eu. Drawings of extrusions and accessories in these instructions are simplified and only approximate the actual shapes.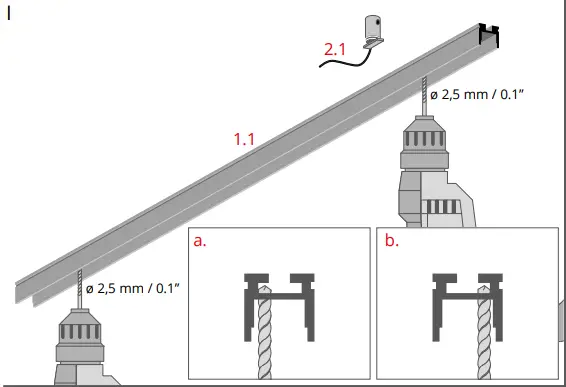 Drill wire holes (2.1) in the profile (1.1).
Drill the holes right next to the profile wall so as not to damage the upper edges of the channel on the profile’s back (figures a, b).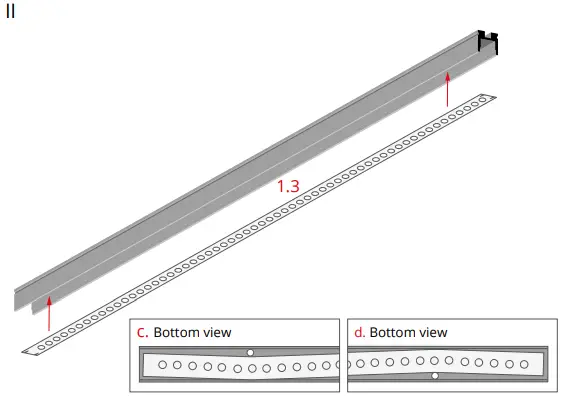 Adhere the LED tape (1.3) in the profile so as not to cover the holes (figures c, d).
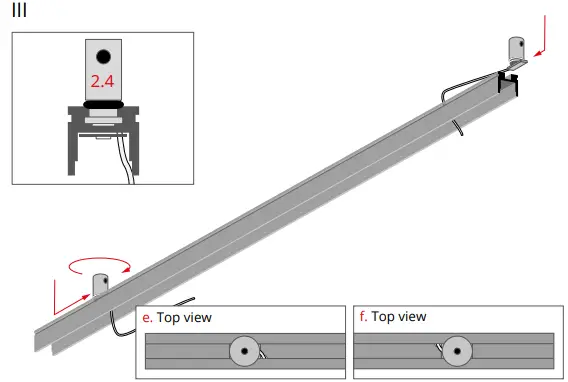 Run the connector wires through the holes and slide the fasteners into the channel on the back of the profile. Move them as close as possible to the holes and lock them by tightening the heads (2.4, figures e, f).
 Cut the wires to a length that is convenient for you and solder to the LED tapes (figures g, h).
 Mount the end caps (1.2) and the cover (1.4).
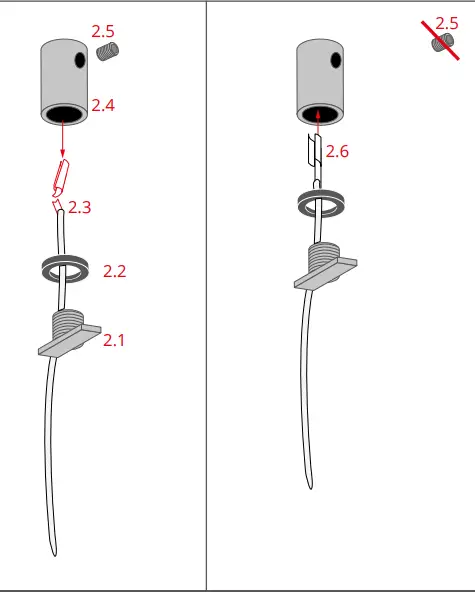
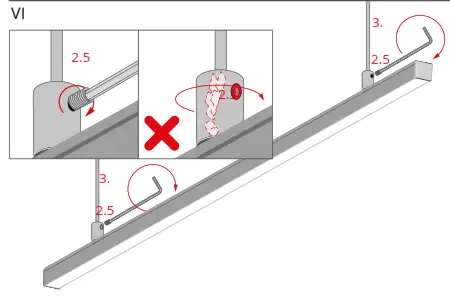 Insert the rods (3) into the holes in the heads of the fasteners. Lock them by tightening the pressure screws (2.5) with an Allen key.
NOTE! After tightening the pressure screw (2.5), do not turn the head! This will damage the conductor (2.3).
If the conductor is damaged, go to the REPLACEMENT OF A DAMAGED CONNECTOR WIRE below.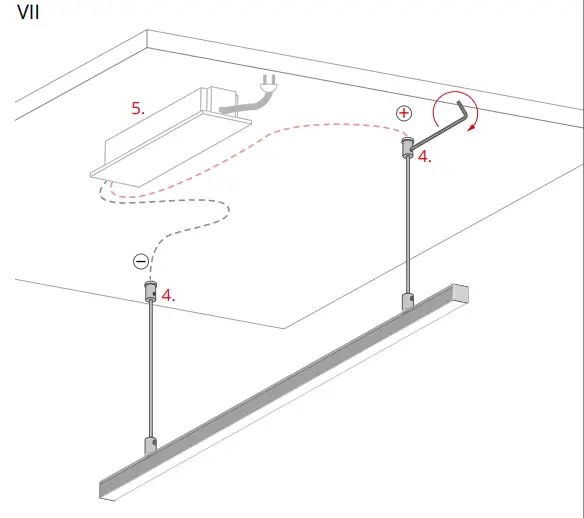
Suspend the lighting fixture from the ceiling fasteners (4), connected to the power supply (12 V / 24 V) (5).
REPLACEMENT OF A DAMAGED CONNECTOR WIRE