![]()
EH3108W Smart Ceramic Core Radiator
User Guide
| Wi-Fi Radiator Quick Set-Up Steps | ||
| Stage: | Description: | Image: |
| 1 | Make sure the unit is powered on | 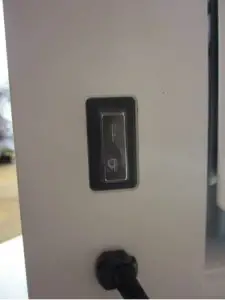 |
| 2 | When powered on put in standby (by clicking  on the touch screen) the unit will display a time, something like this: on the touch screen) the unit will display a time, something like this: | 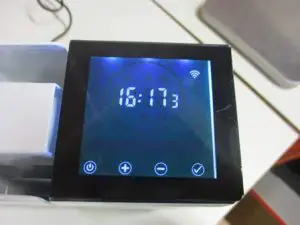 |
| 3 | Press and hold the | 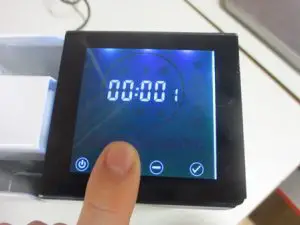 |
| 4 | There are 5 options in this menu. We want to make sure Wi-Fi is enabled. This is setting four (F4). To scroll through the settings click | 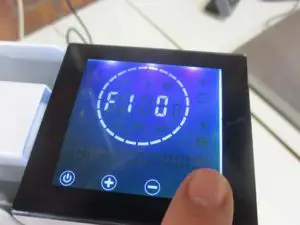 |
| 5 | When F4 (Wi-Fi menu) is selected, if it is off the unit will state: ‘F4 OF’ – to change this, click the | 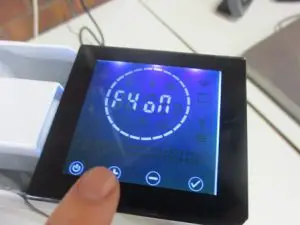 |
| 6 | To confirm the setting. Once ‘F4 ON’ is showing, click the | 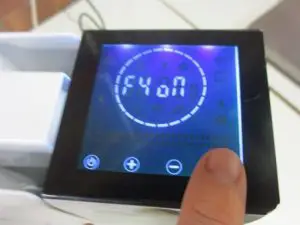 |
| Once you have turned the Wi-Fi on, you need to ensure that the Tuya app is set up and ready to connect. | ||
| 7 | Open the TUYA smart app. once signed in to the app, select ‘add device’. | 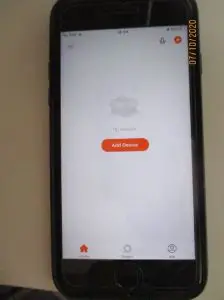 |
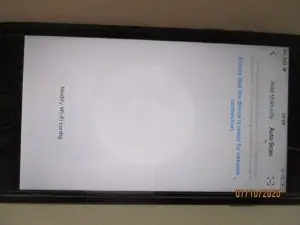
| 8 | Once ‘add device’ has been selected, you will be taken to a screen where you should select ‘Auto Scan’ on the selection pane at the top of the app. A circle should begin to flash to signal the app is looking for a device to pair with. | 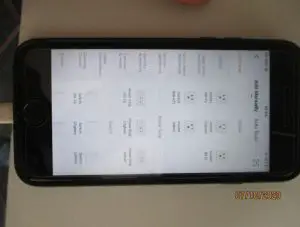
|
| 9 | Place the radiator on standby, by clicking. Once in standby, press and hold the | 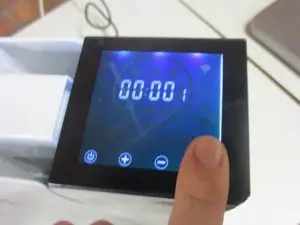 |
| 10 | After holding
|  |
| 11 | While the radiator is counting down a symbol for the radiator should appear on the app. Click next on the app. | 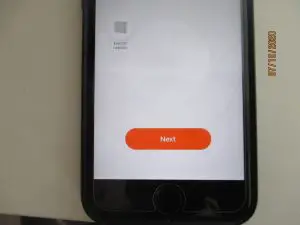 |
| 12 | Once next has been clicked enter the WIFI details for the WIFI network that the device is going to be connected to. Then press ‘Confirm’. | 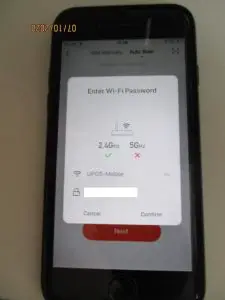 |
| 13 | The Connecting pairing screen will show up on the app whilst it is connecting to the radiator unit. Once paired. Push the button on the app to turn the radiator on. |  |
| 14 | Once the button has been turned on in the app. You will be brought to this menu – the main menu. From here, you are able to change the settings and functions of the radiator remotely. | 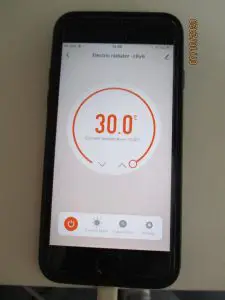 |
| 15 | While open in the app, the radiator will show a display something like this – slight variations may exist through different symbols – this is because of different features selected. | 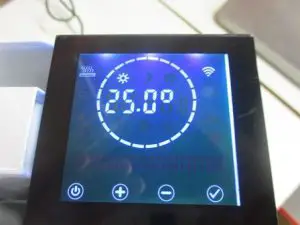 |
| 16 | Once the app is connected, it will sync the time up to the time on the mobile device. Showing the correct time in the standby view. | 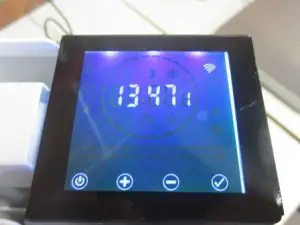 |