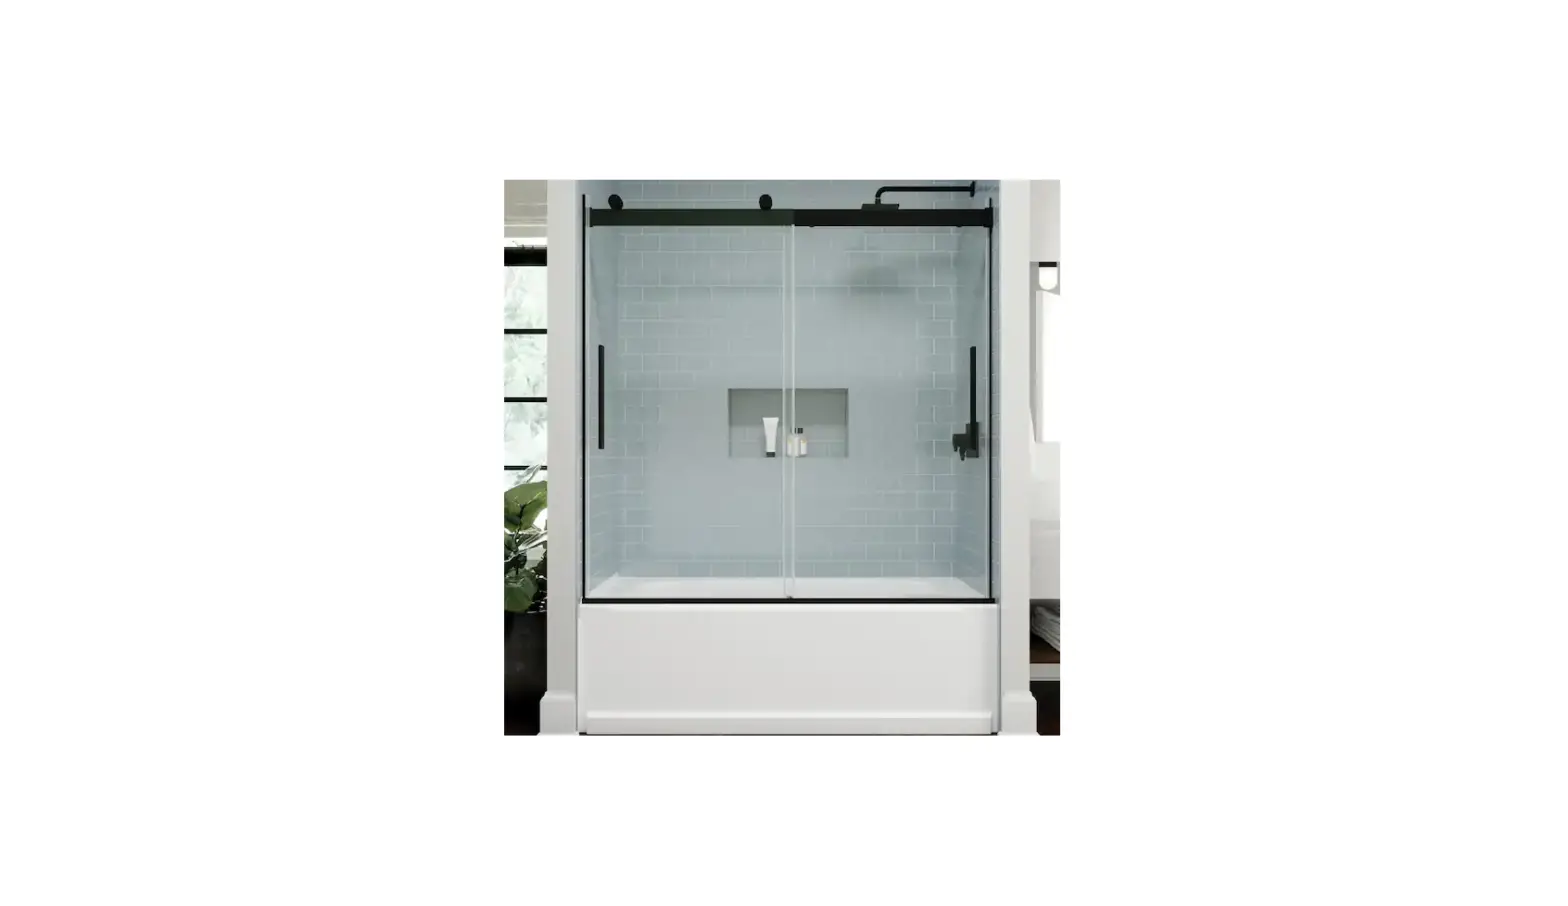
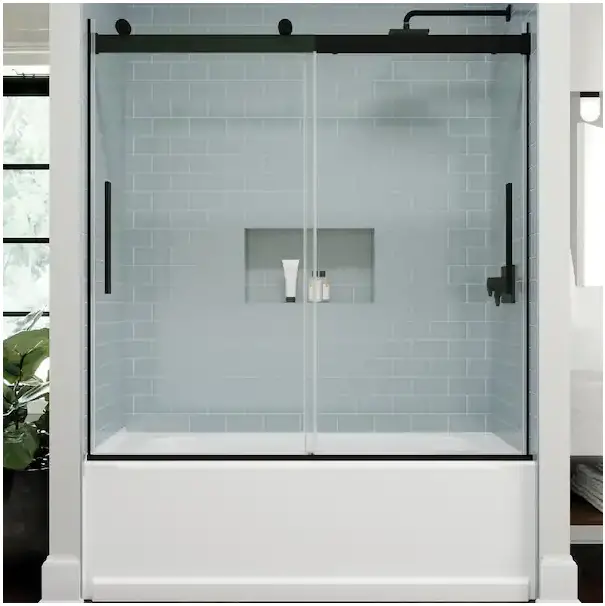
ES-DIY KJFXSD5658CH08V1 58-60 Inch W x 58 Inch H Sliding Semi Frameless Tub Door in Chrome with Clear Glass
PACKAGE CONTENT
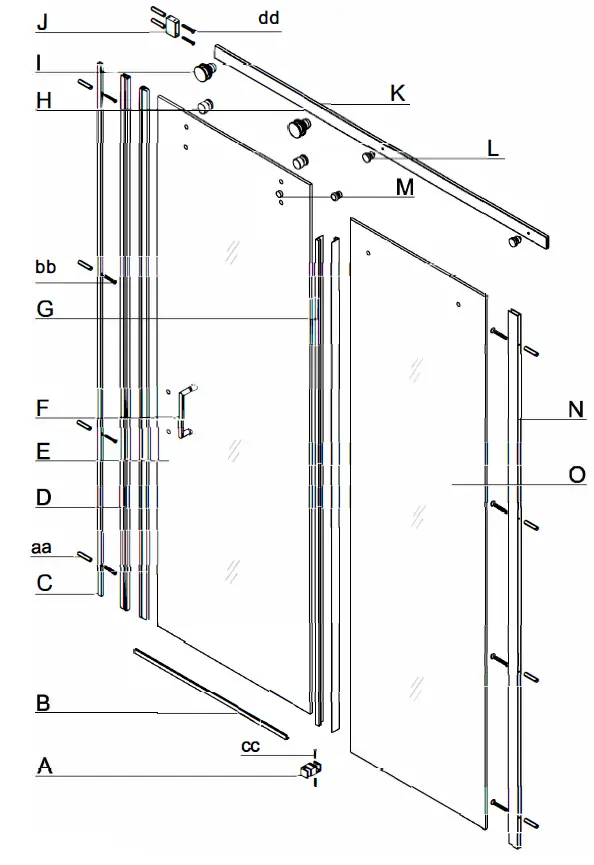
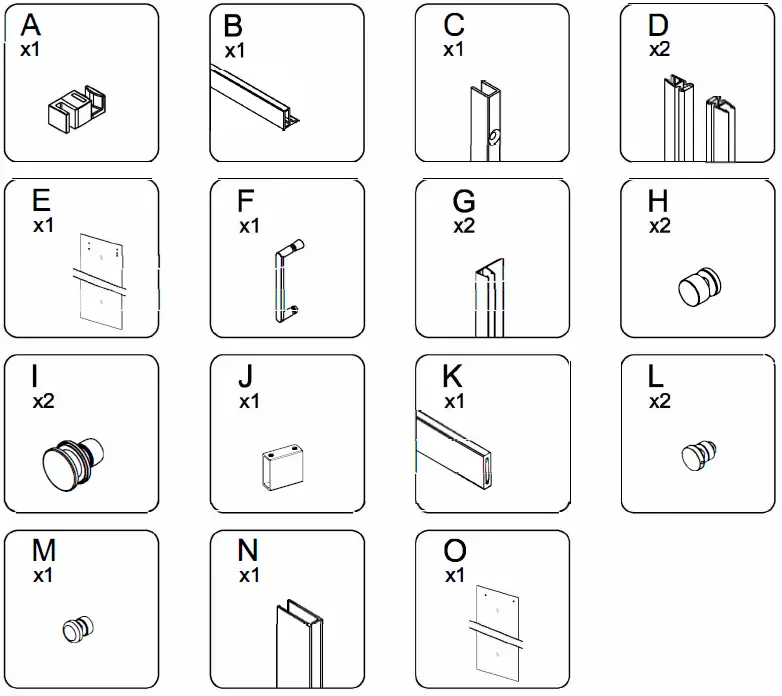
| PART# | DESCRIPTION | QTY |
| A | Bottom guild | 1 |
| B | Water seal | 1 |
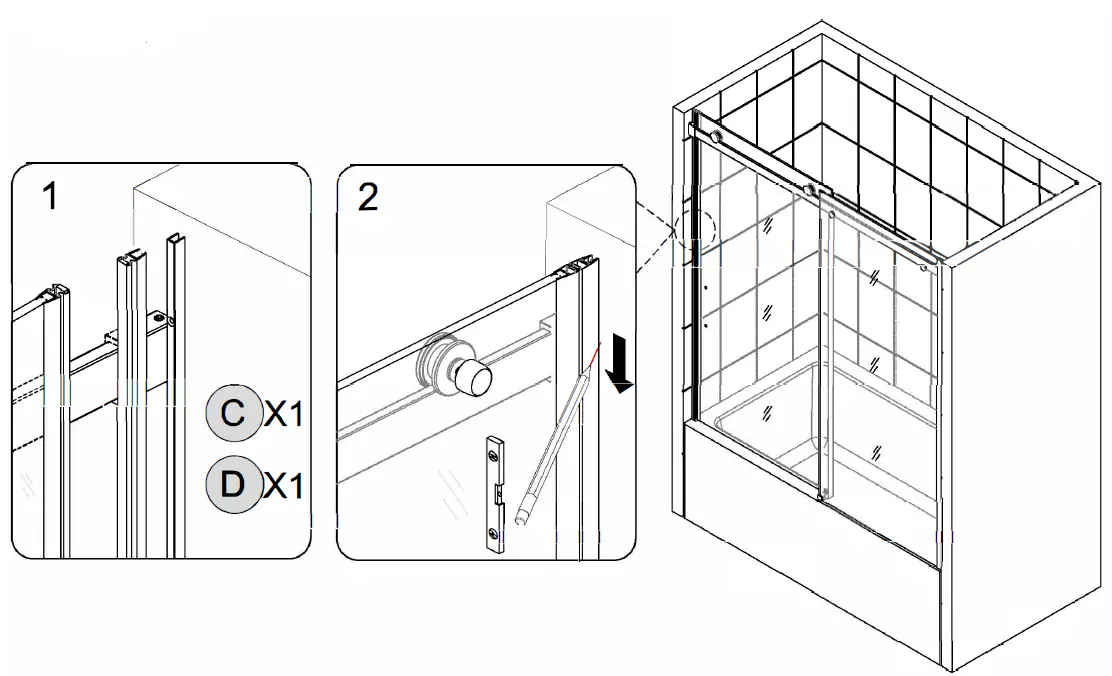
| c | U channel-1 | 1 |
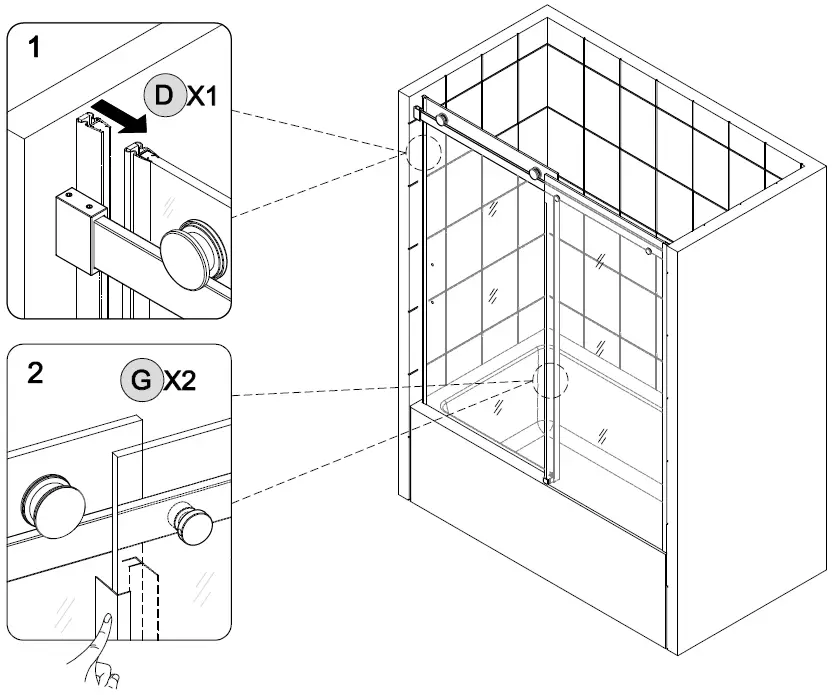
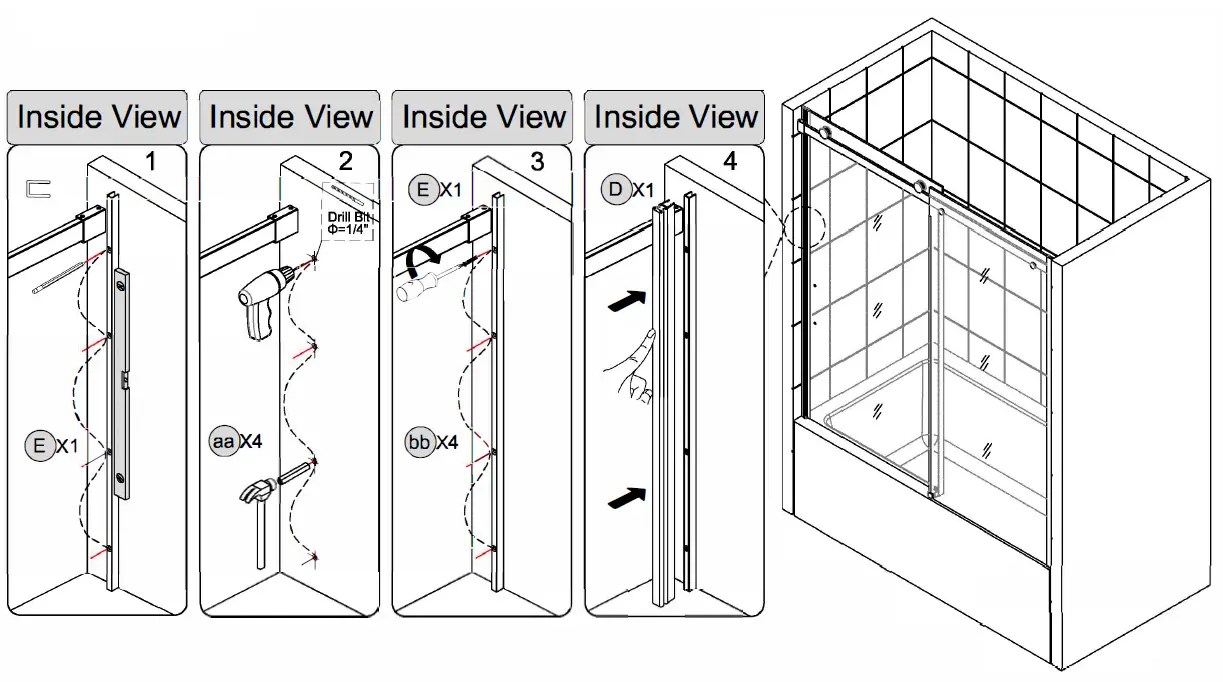
| D | Magnetic door seal strip | 2 |
| E | Door panel | 1 |
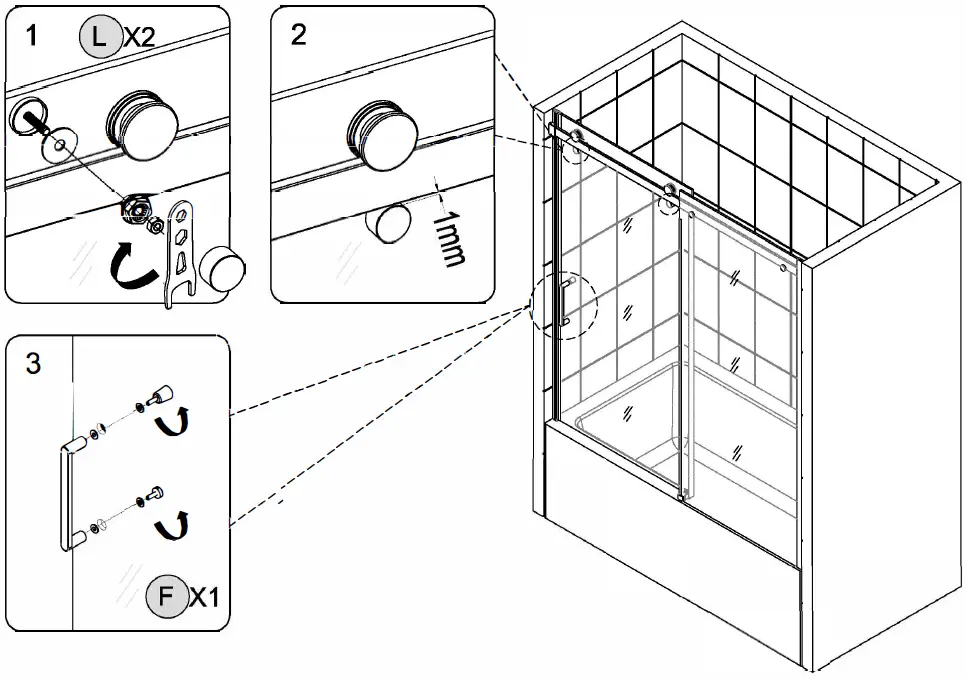
| F | Handle | 1 |
| G | F shape seal | 2 |
| H | Anti-Jump Assembly | 2 |
| PART# | DESCRIPTION | QTY |
| Roller | 2 | |
| J | Wall Bracket Assembly | 1 |
| K | Top Track Assembly | 1 |
| L | Glass holders | 2 |
| M | Stopper | 1 |
| N | U channel-2 | 1 |
| O | Fixed panel | 1 |
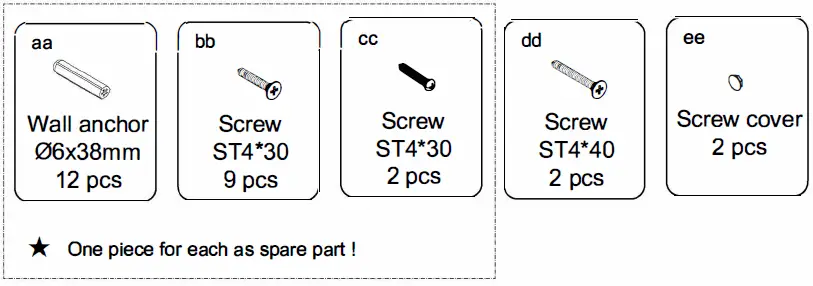
HARDWARE CONTENT
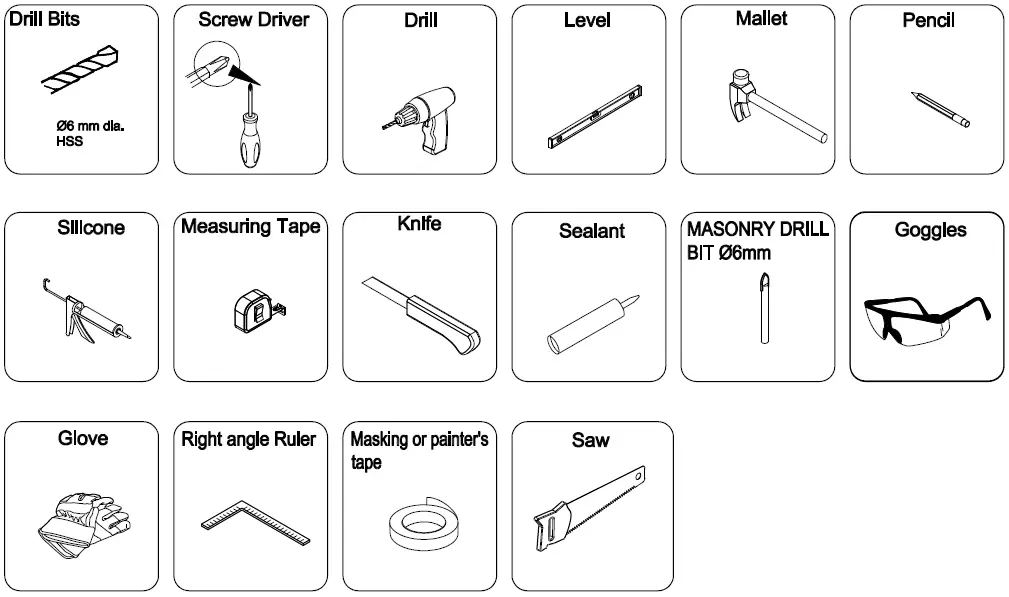
TOOLS REQUIRED
SAFETY INFORMATION
CAUTION
Please carefully read the following important safety information before handling or installing this shower. There is a risk of serious injury while handling this product. To minimize these risks, please note:
- Always wear safety glasses and gloves while handling.
- Always read and follow all the steps in the installation instructions.
- Inspect all contents and glass for damage before installation.
- Extreme caution should be taken while handling the glass during installation as the tempered glass may shatter if in contact with a hard surface.
- Handle the tempered glass with caution! Improperly handling the glass can cause it to break suddenly in small pieces (never in pointed fragments).
- Always take all precautions not to touch the tempered glass with any tools during the installation, or after installed.
- Do not cut or modify the tempered glass as it will shatter if cut.
- Carefully remove the product from the packaging and keep the packaging until installation is complete.
- Inspect all parts for damage; if there is damage to the unit prior to installation, please contact customer service at the number provided in this guide.
- Install the shower on a floor that is level and able to accommodate the weight of the unit and an occupant.
- Consult local building codes and compliance standards prior to installation and ensure conformity.
- After installation, and from time to time, check the glass for fit and finish to ensure that nothing has come loose since installation.
- Keep this installation manual for future reference.
NOTE: Heavy product! You will need at least two people to install this unit properly.
INSTALLATION
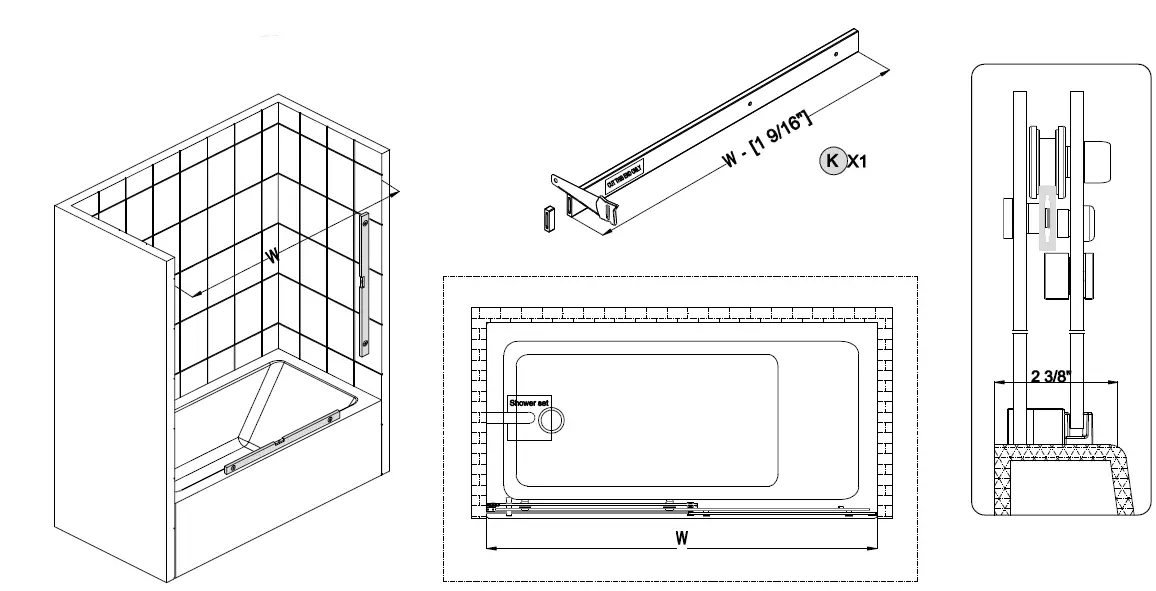
- Check both of the Finished walls for plumb and the threshold for level.
NOTE: This model requires a minimum of 2-3/8″ of flat threshold space for installation.
Measure “W” and cut the the threshold same length as “W -1 9/16”.
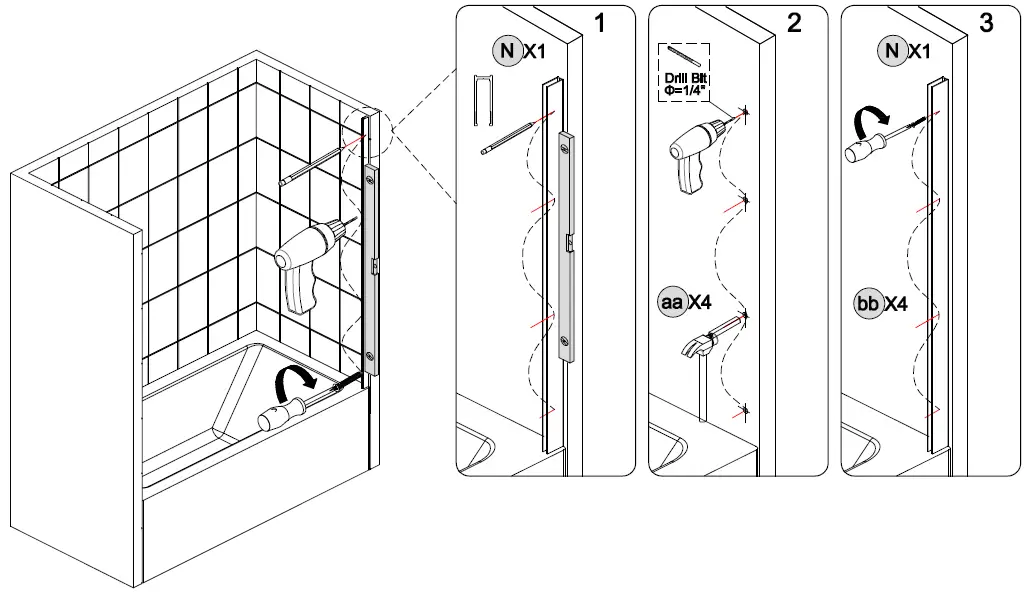
- U channel-2 Installation

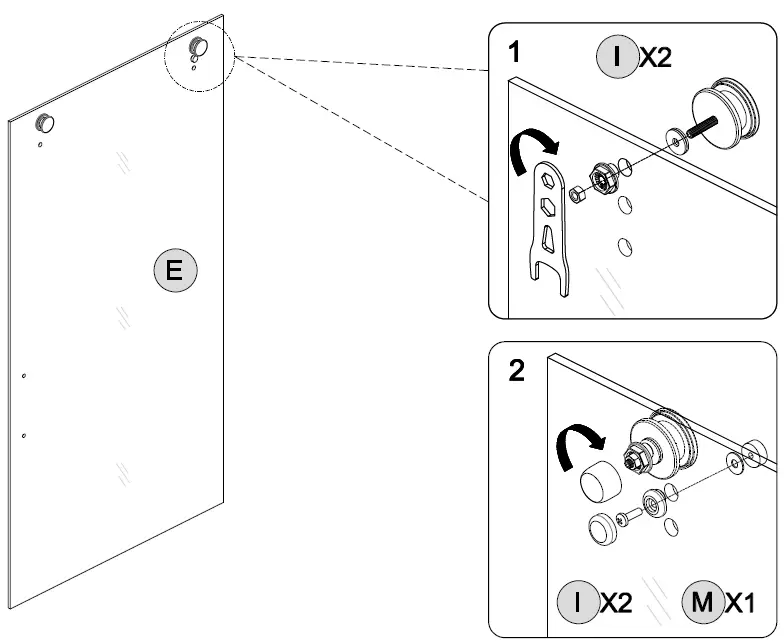
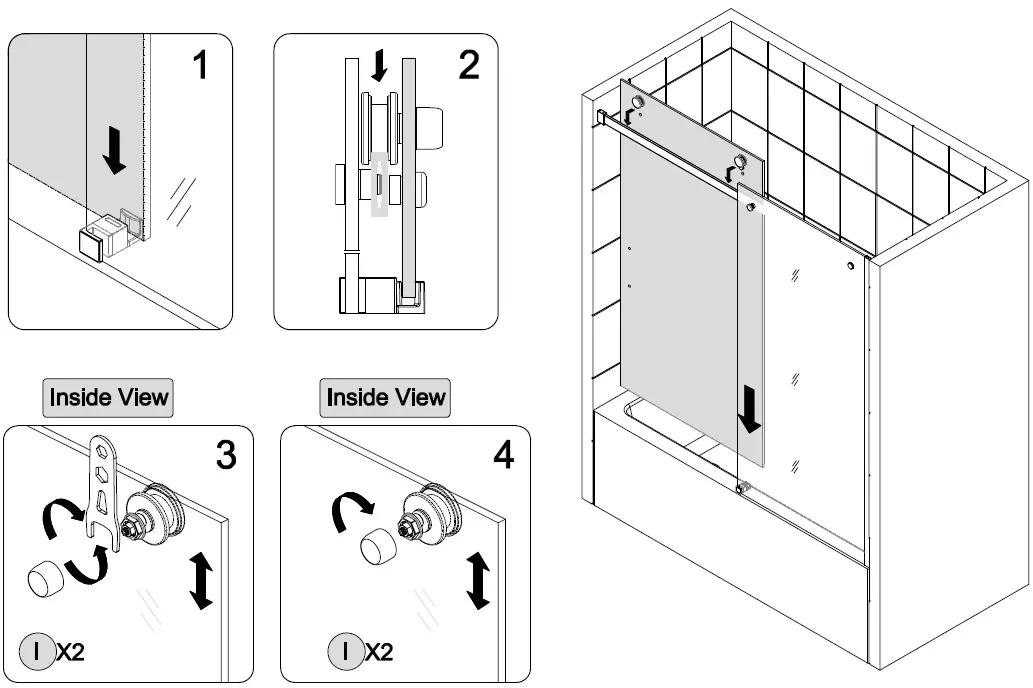
- Roller & Stopper Installation

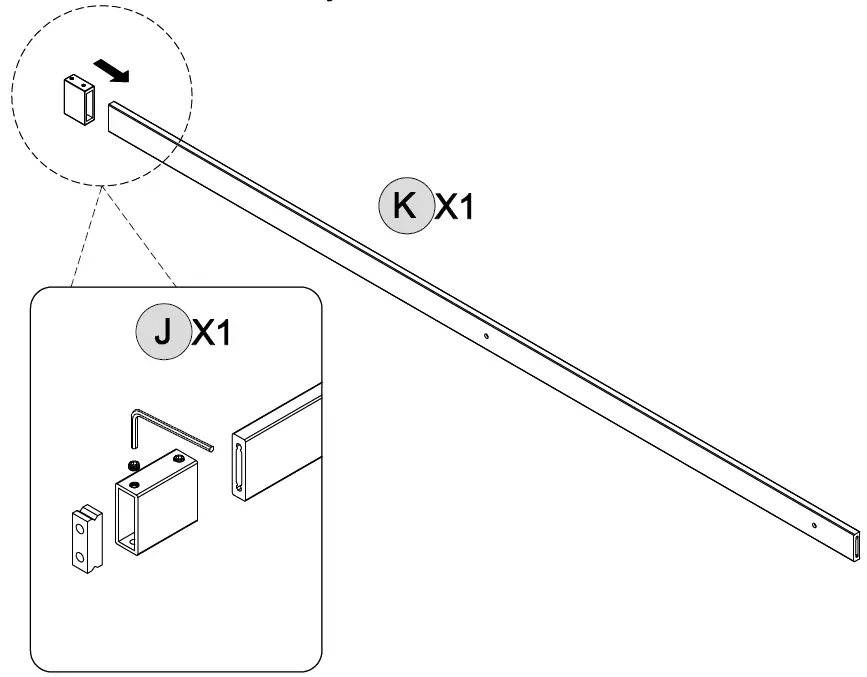
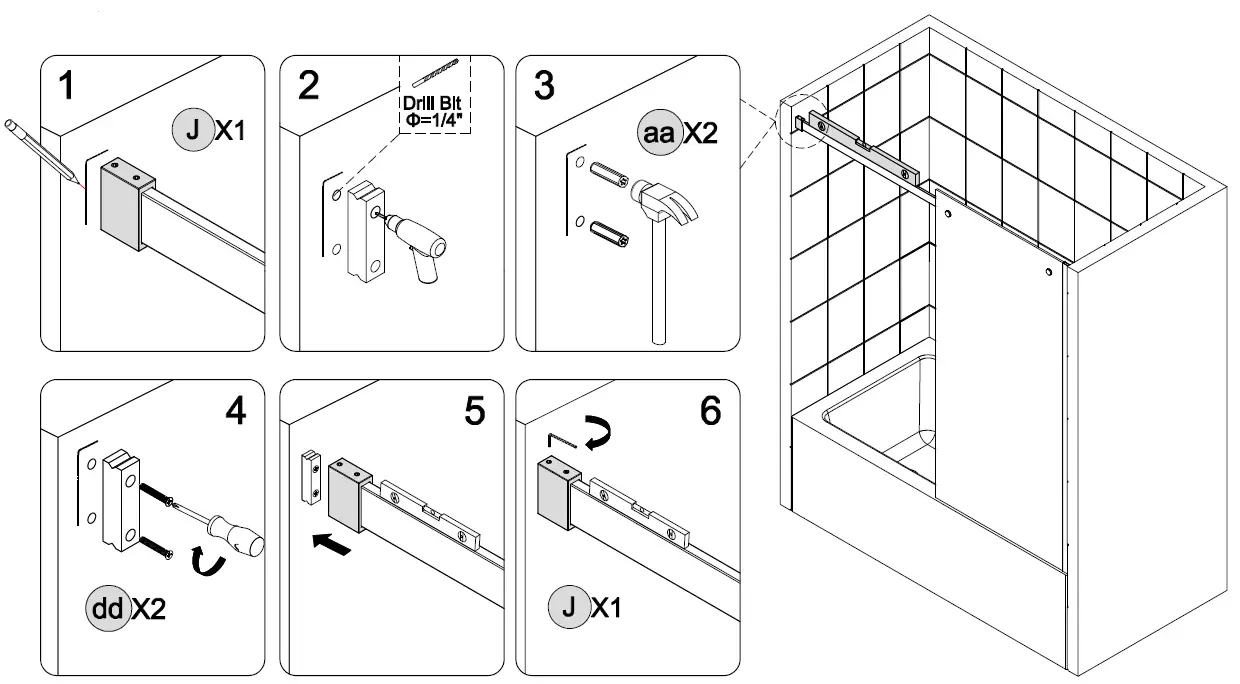
- Wall Bracket Assembly Installation

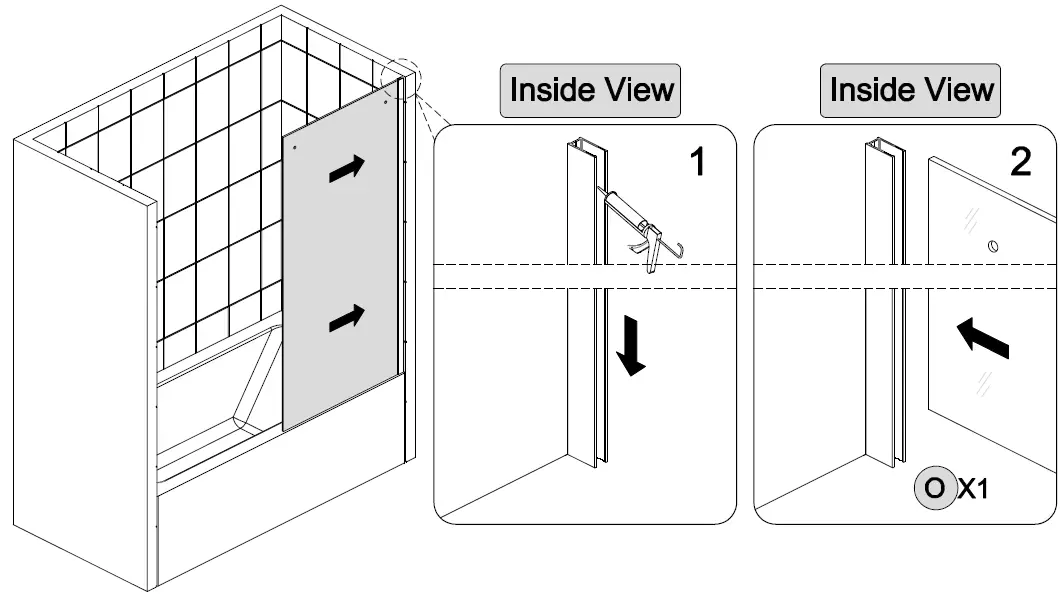
- Fixed panel Installation

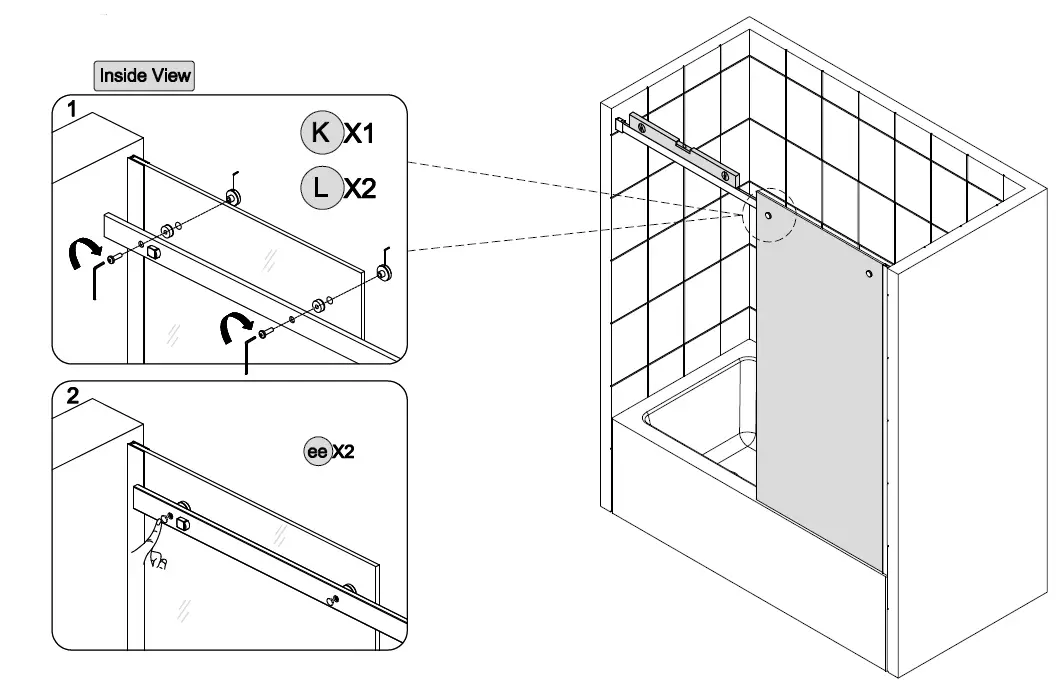
- Top Track Assembly Installation

- Wall Bracket Assembly Installation

- Bottom guild Installation

- Door Panel Installation

- Magnetic strip Install to the door panel

- Determine the C & D position

- U channel-1 Installation

- Anti-Jump Assembly & Handle Installation

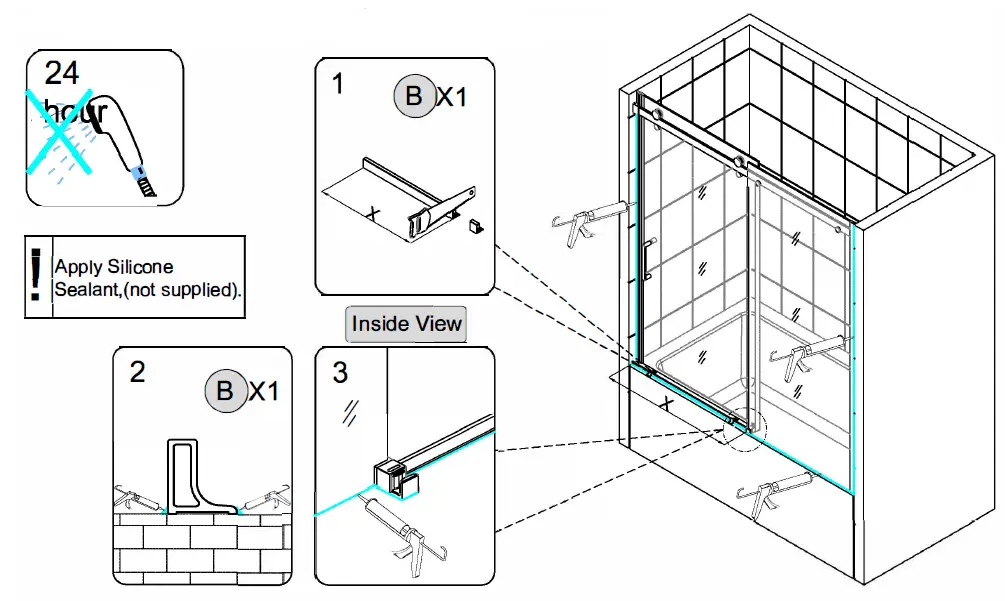
- SEALING
Ensure that the Shower door closes tightly and opens smoothly.
Apply a good quality silicone sealant along the wall Jamb(C) and Water seal (B) Allow 24 hours for the silicone to dry before use. Measure “X” and cut the Water seal(B) the same length as “X”.