![]() Instruction Manual
Instruction Manual
STEM – CEILING MOUNTED
38.6V PRODUCT SPECIFICATION
![]() approx 17kg (38lb)
approx 17kg (38lb)
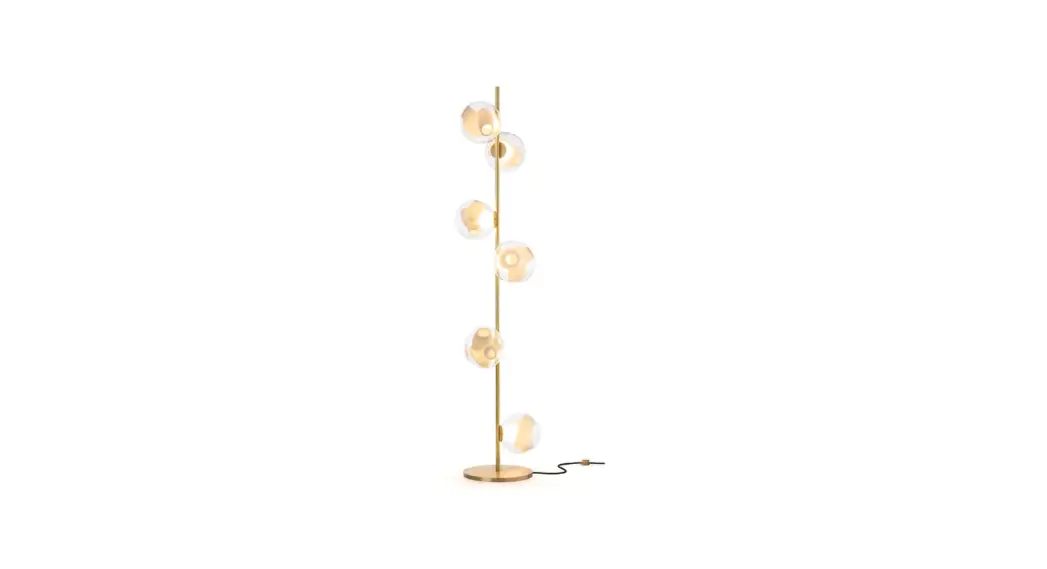
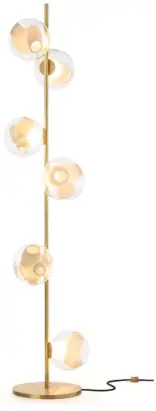
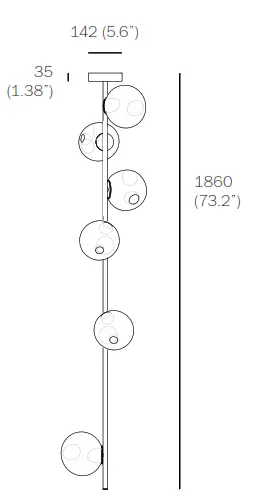
| PENDANTS: MOUNTING: LAMPING: STEM LENGTH ADDITIONAL EXTENDERS MATERIALS: WEIGHT: POWER SUPPLIES: | six 142mm (5.6”) x 35mm (1.38”) 1.5w LED 1.8m (6’) long stem 153mm (6”) / 305mm (12”) / 914mm (36”) / 1524mm (60”) blown glass, electrical components, unlacquered brass or black powder coated brass stem, black or white canopy approximately 17kg (38lb) integral |
DESCRIPTION
The stem ceiling-mounted system comes in unlacquered brass or black powder coated stem with a 142mm (5.6”) diameter mounting plate rated for ceiling use. 38V is a variant of the original 38 series where a large glass sphere is blown with a multitude of haphazard interior cavities, which intersect and collide in unpredictable ways. 38V is smaller, lighter, and suspended with coaxial cables. The interior cavities can be fi filled with plants or left empty.. Standard 38V is made with clear glass exterior spheres and milk-white interior lamp holder cavities.
NOTES
- Purchase replacement lamps online at www.bocci.com/shop/bulbs
- The power supply can be remotely mounted with 94mm (3.7”) x 6mm (0.24”) canopy.
- The brass used in our Stem Series is untreated and, as such, will develop a natural patina over time. To avoid any marking or tarnish on the brass during handling and installation, please use the gloves provided in your shipment.
- To maintain your fi xture, please regularly dust with a lint-free cloth. If further cleaning is required, dampen a lint-free cloth with water only and wipe gently to remove dust or debris.
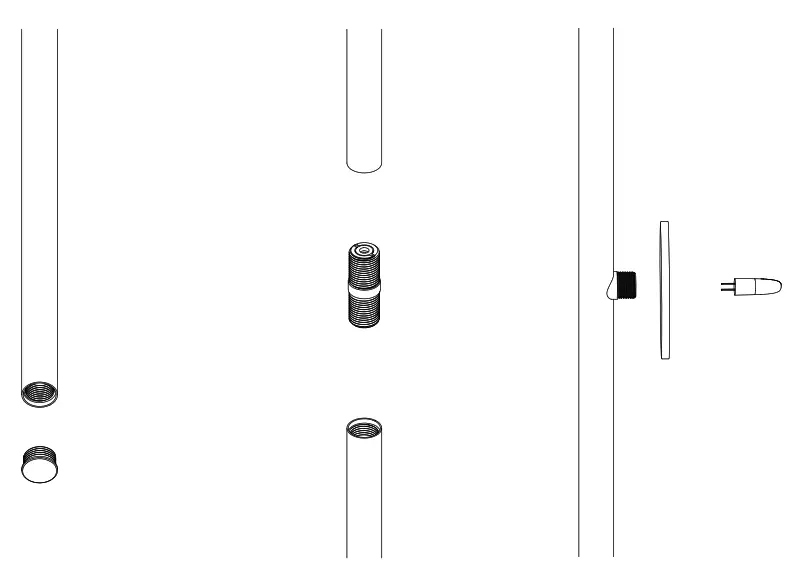 | ||
| 1 Thread the cover cap on one end of the stem. Note: Bocci recommends wearing thin gloves during installation to protect the stem fi nish and the glass surface. | 2 Connect the stem pieces by threading the stem connector to the stems. Note: This step is only necessary for overall stem lengths longer than 1.8m (6’). | 3 Thread the pendant mounting plate onto the stem. Carefully insert the provided lamp into the socket. |
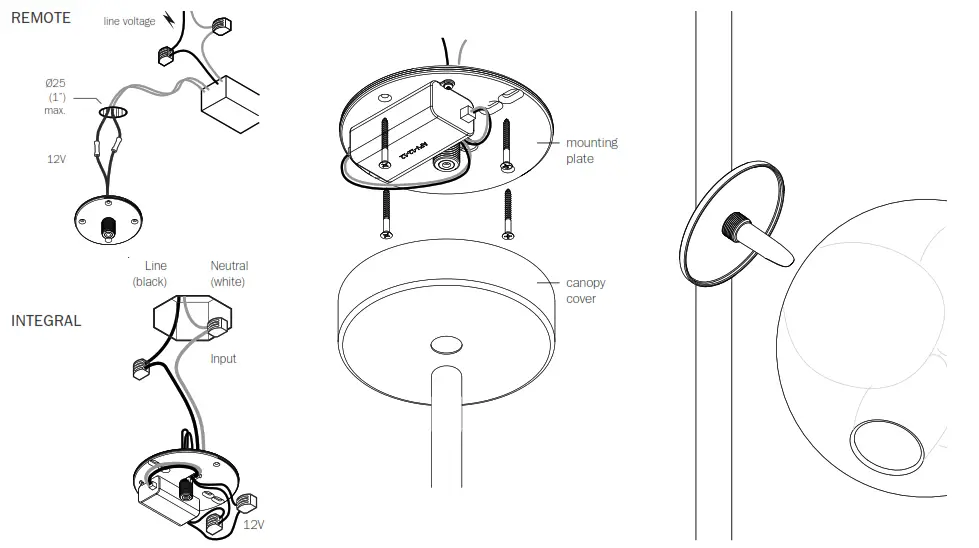 | ||
| 4 Connect the power supply to line voltage. i. Connect input low voltage wire to 12V DC output wires by feeding the wires through the slots on the mounting plate. ii. Connect the black wire to line wire and the white wire to the neutral wire. iii. Ensure that line voltage is not active during this part of the installation! Note: As an option, Bocci recommends mounting power supplies remotely in a close, accessible and hidden location for ease of long-term maintenance. Installation to be done by certifi ed personnel to ensure compliance with the code. | 5 The client is responsible to ensure fasteners are attached to a robust structural substrate. Affi x mounting plate to surface with fasteners provided. Thread canopy covers onto the mounting plate. Thread on the stem to the canopy. Turn power to fi texture on. | 6 Gently thread the pendant onto the stem. Be sure to carefully place the pendant so as not to damage the lamp during installation.. Clean fi fingerprints from fi xture surfaces. For additional assistance, please contact Bocci: Vancouver [email protected] www.bocci.com Berlin [email protected] www.bocci.com EU Patent # 002071019-001 Made in Vancouver, Canada |
EU Patent # 002071019-001
Made in Vancouver, Canada
Vancouver
[email protected]
www.bocci.com
Berlin
[email protected]
www.bocci.com
© 2021, Bocci Design and Manufacturing Inc. All rights reserved. Any inquiries should be directed to:
[email protected]


