![]()
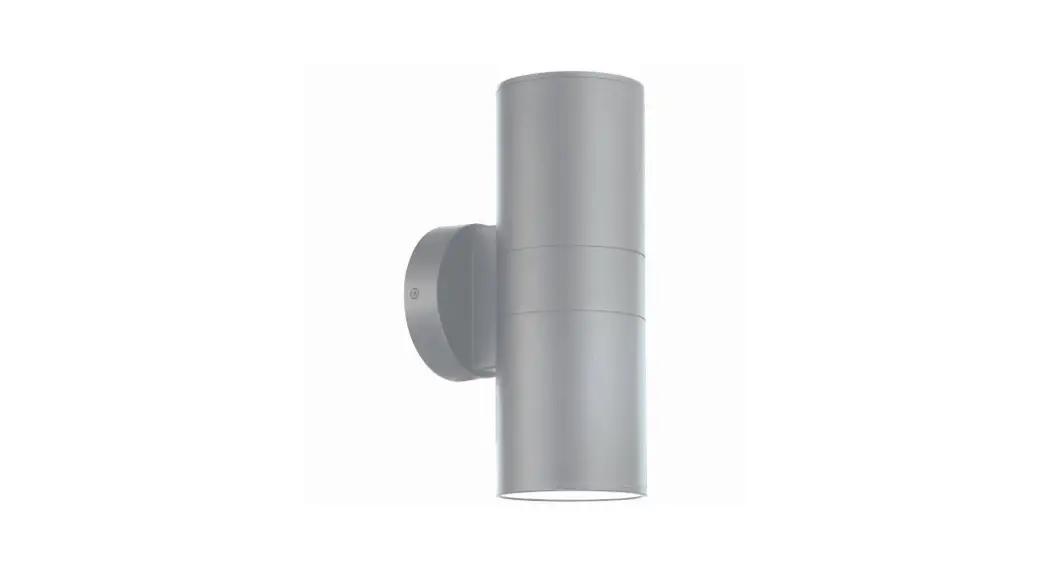
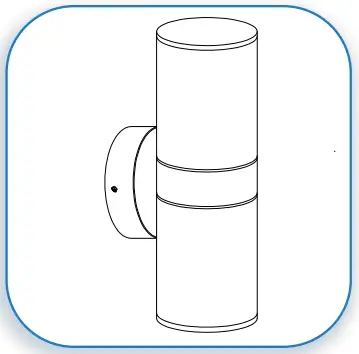
20149LEDDMGLP Wall Fixture
Instruction Manual
IMPORTANT SAFETY INSTRUCTIONS
Before assembling your ACCESS LIGHTING fixture, please make sure that you carefully read through this instruction sheet. Save this instruction sheet and refer to it when additions to or changes in the fixture configuration are made.
CONSULT A QUALIFIED ELECTRICIAN TO ENSURE THE CORRECT BRANCH CIRCUIT CONDUCTOR. CONSULTER UN ELECTRICIAN QUALIFIED POUR VOUS ASSURER QUE LES CONDUCTEURS DE LA DERIVATION SONT ADEQUATE THIS PRODUCT MUST BE INSTALLED IN ACCORDANCE WITH THE APPLICABLE INSTALLATION CODE BY A PERSON FAMILIAR WITH THE CONSTRUCTION AND OPERATION OF THE PRODUCT AND THE HAZARDS INVOLVED.
NOTE: The important safeguards and instructions that appear in this manual are not meant to cover all possible conditions and situations that may occur. It must be understood that common sense, caution and care, are factors that can’t be built into any product. These factors must be supplied by the person(s) caring for and operating the fixture. Read all instructions
Do not install this fixture in hazardous locations.
Do not install any fixture assembly closer than 6 inches from any curtain or similar combustible material.
“WARNING Risk of Fire and Electric Shock.”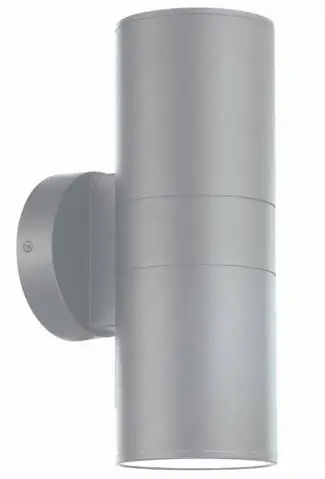
| COLLECTION | APPLICATION | MODEL NO. |
| MATIRA | Wall Fixture | 20149LEDDMGLP |
| WHAT WE PROVIDE | WHAT YOU NEED |
| • Mounting Hardware • Mounting bracket • 2 x Glass shades • 2 x A19 E26 LED bulbs | • Screwdriver • Wire Cutters • Wiring Supplies as Specified by Electrical Code |
Recommended Dimmers for Supplied LED bulb
(ELV) LUTRON Skylark SELV-300P
(MLV) COOPER Aspire 9530SW
(TRIAC) LEGRAND Titan CD703-PW
STEP-BY-STEP INSTRUCTIONS
Before starting your installation disconnect the Power by turning off the Circuit Breaker or by removing the fuse at the fuse box. Just turning the light off at the light switch is not sufficient to prevent electrical shock.
- PREPARE FIXTURE
If there is an existing fixture remove it.
Expose the supply wires from the J-box.
Secure the mounting bracket to the J-box with the supplied screws.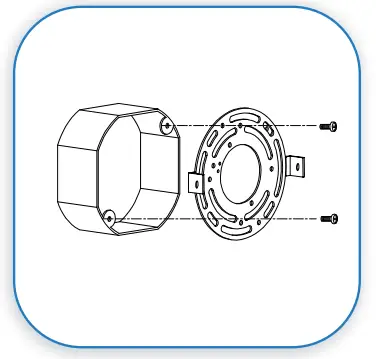
- MAKE WIRE CONNECTIONS
Connect the black supply wire to the black fixture wire. Secure with the supplied wire nuts. Connect the white supply wire to the white fixture wire. Secure with the supplied wire nuts. Attach the green J-Box wire around green hexagonal head screw or connect it to the green supply grounding wire of the fixture. Secure all wire with electrical tape (not supplied). Tuck all wires carefully into the J-Box.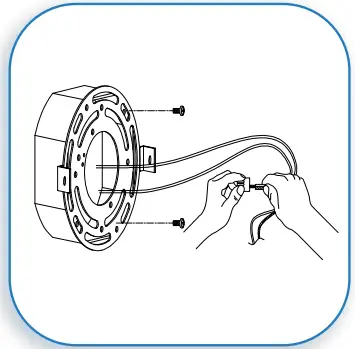 MOUNT THE FIXTURE TO THE MOUNTING BRACKET AND INSERT THE BULBS
Align the fixture over the mounting bracket and secure with the supplied screws. Insert the bulbs and secure the glass shades.
DO NOT EXCEED THE MAXIMUM WATTAGE AS STATED ON THE WARNING LABEL
**This fixture is wet location rated. In order to ensure that moisture does not enter the outlet box and cause a short circuit, clear caulking should be used to seal the space between the fixture mounting bracket and the wall. Ensure that a space is left at the bottom to allow for the escape of moisture. It is recommended that Outdoor Silicon Sealant is used for that purpose**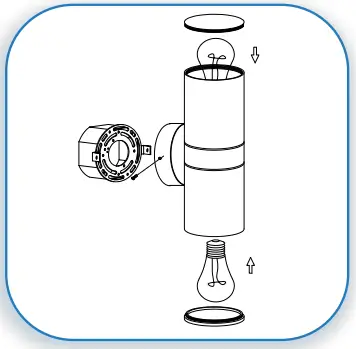
- RESTORE THE ELECTRICITY AND CHECK THE OPERATION OF YOUR NEW ACCESS LIGHTING FIXTURE
CAUTION
Please ensure that the fitting is cool and switched off before replacing the bulb. DO NOT use bulbs that might exceed the maximum wattage, stated on the caution label.
![]()


