![]() AD1 ACE LED Door Kit
AD1 ACE LED Door Kit
Instruction Manual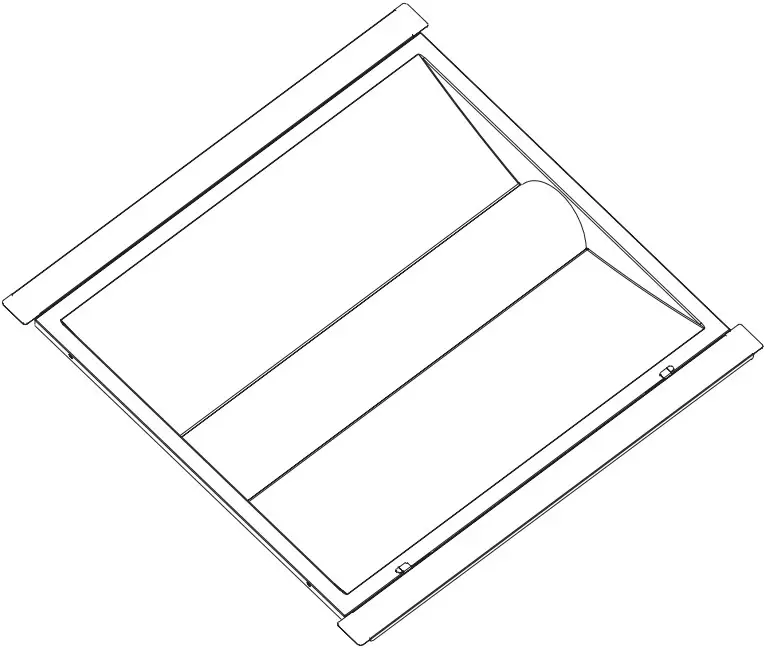
INSTALLATION INSTRUCTIONS
Fixtures must be installed and wired in accordance with the National Electrical Code (NEC) and all applicable local codes by a person familiar with the construction and operation of the product and hazards involved.
Proper grounding is required for safety.
Check that voltage is compatible with fixture driver, use approved connectors for all electrical connections.
Be cautious of any sharp edges. Wear proper PPE (personal protected equipment) while handling.
Fixture not suitable for use in corrosive environments, and with thermal insulation.
Must use appropriate strain relief in accordance with local code when connecting power cord to junction box.
READ CAREFULLY BEFORE INSTALLING THE FIXTURE.
PLEASE KEEP THIS MANUAL FOR FUTURE USE. WARNING
Risk of Fire or Electric Shock
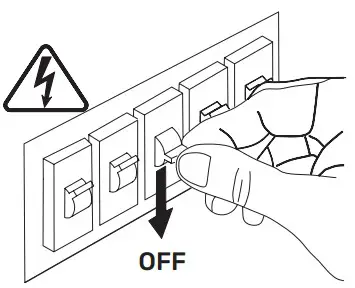
Risk of fire or electric shock. Make sure power is off at the circuit breaker before installing or maintaining the product.
To prevent wiring damage or abrasion, do not expose wiring to edges of sheet metal or other sharp objects.
Installation guide requires knowledge of luminaire electrical systems. If not qualified, do not attempt installation. Contact a qualified electrician.
Never perform maintenance or cleaning while fixture is energized. Disconnect power and allow fixture to cool off before maintaining. MAINTENANCE CAUTION
Review the diagrams before beginning and make sure the fixture is grounded properly.
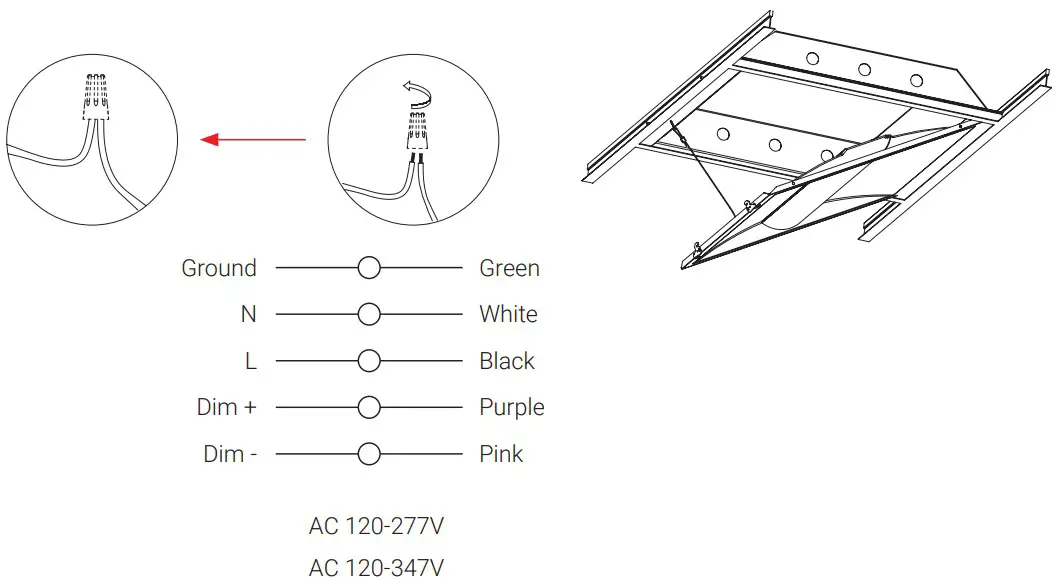
For lighting controls, use driver wiring diagram.
Maintenance must be done by qualified electricians.
Use a clean, dry cloth to clean the fixture.
For any questions regarding wiring, installation, or use of this fixture, please call 559-485-6010 or email [email protected]
TECHNICAL SPECS
| Part No. | Watts | Input Voltage | PF | CCT | CRI | Dimmable | Warranty |
| AD10S-A2-ADJ-22-ADJ-80-FR-LV-GRID-10V | 30/35/40W | AC 120-277V | ≥0.9 | 3500K/ 4000K/ 5000K | ≥80 | 0-10V | 5 Years |
| AD10S-A2-ADJ-24-ADJ-80-FR-LV-GRID-10V | 30/40/50W |
Ambient range operation: -40°C up to 35°C (-40°F up to 95°F)
Selectable CCT and Wattage
Dimensions
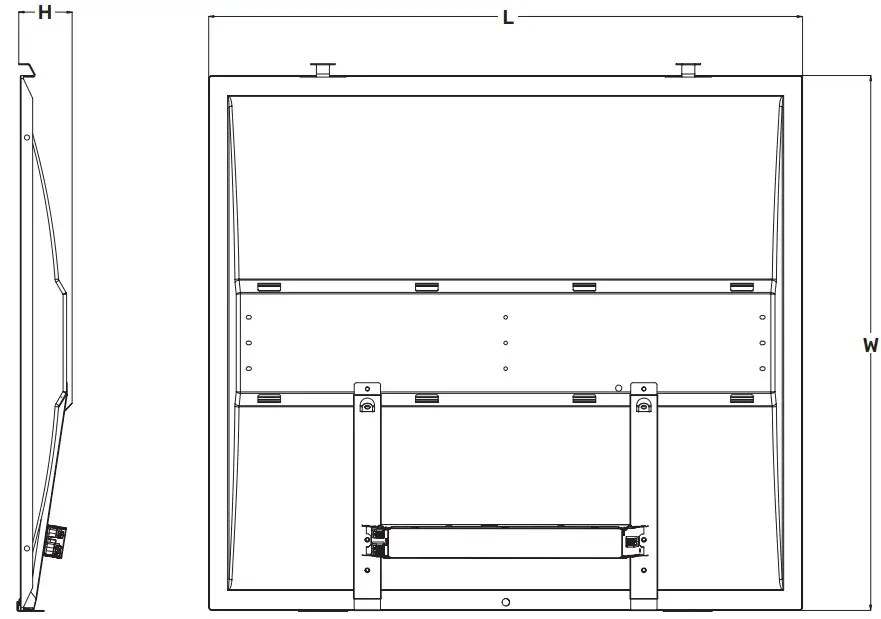
| DIMENSIONS | 2×2 | 2×4 |
| L | 22.75” | 46.76” |
| W | 21.11” | 21.11” |
| H | 2.05” | 2.05” |
| Weight | ~4 lbs | ~8 lbs |
INSTALLATION GUIDE
- Disconnect power at the circuit breaker.

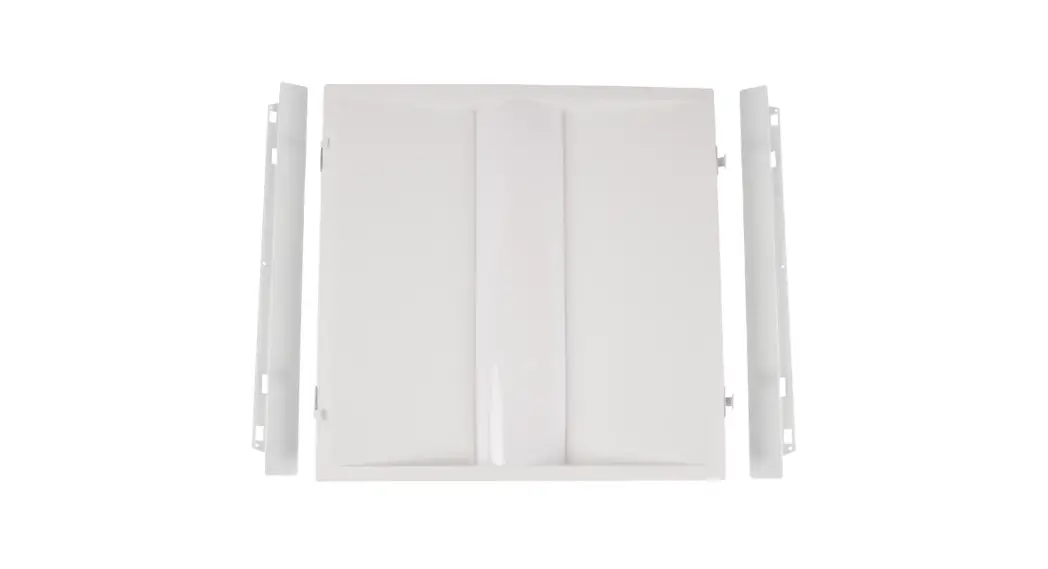
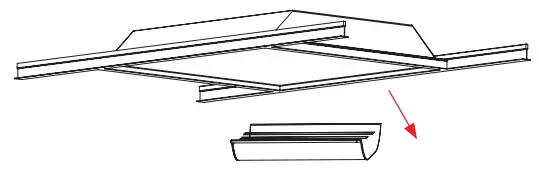
- Remove the existing troffer’s cover, fluorescent lamps, lamp holders and ballast from the frame.

- Slide in both side-mounting brackets between the existing frame and T-grid.

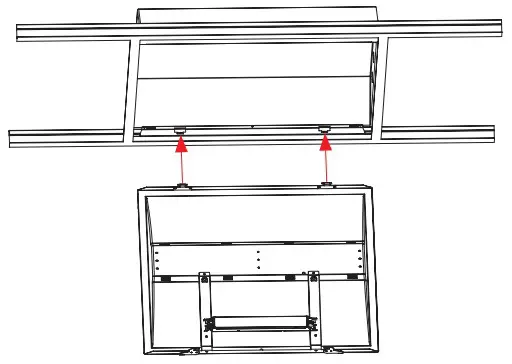
- Hook the troffer retrofit kit body to the existing frame through the clasps in body to the sidemounting bracket.

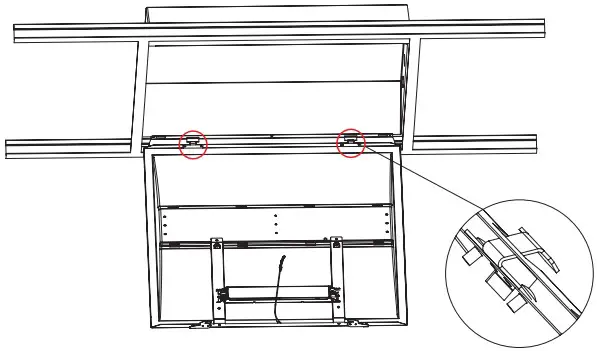
- Make sure the doorkit is clamped tightly to the side-mounting bracket.

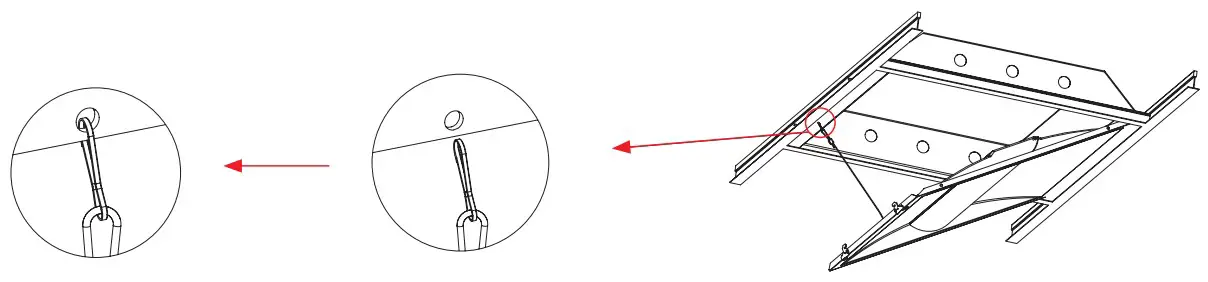
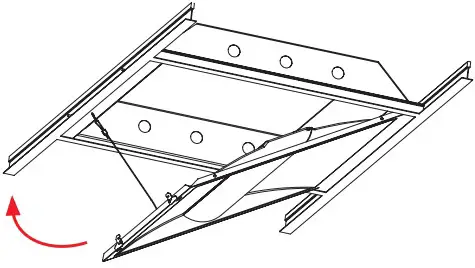
- Hook the door kit safety cable to the hole of corresponding side-mounting bracket, suspend the door kit body.

- Disconnect power, connect line, neutral, ground, and dimming wires using wire nuts.

- Rotate retrofit kit into body toward the side mounting brackets.

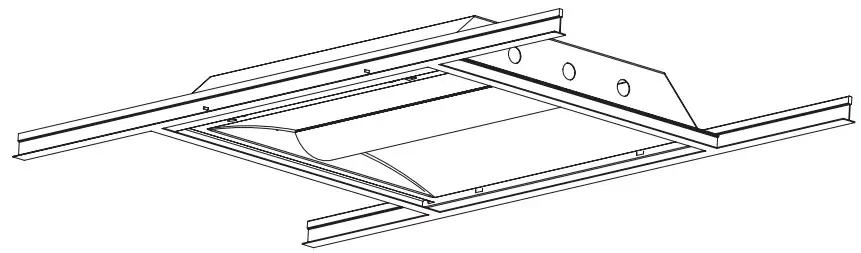
- Push retrofit kit firmly into fixture body until latches click into place. Ensure latches are securely in place.

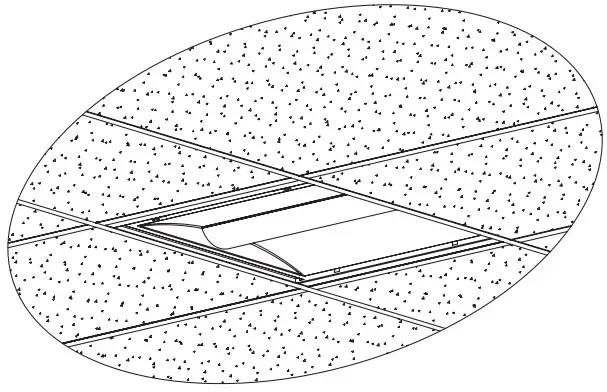
- Installation complete.

- Reconnect power to the circuit.


![]() Linmore LED Labs, Inc.
Linmore LED Labs, Inc.
2360 S Orange Ave, Fresno CA 93725
559-485-6010
linmoreled.com
[email protected]

 Instruction Manual")


