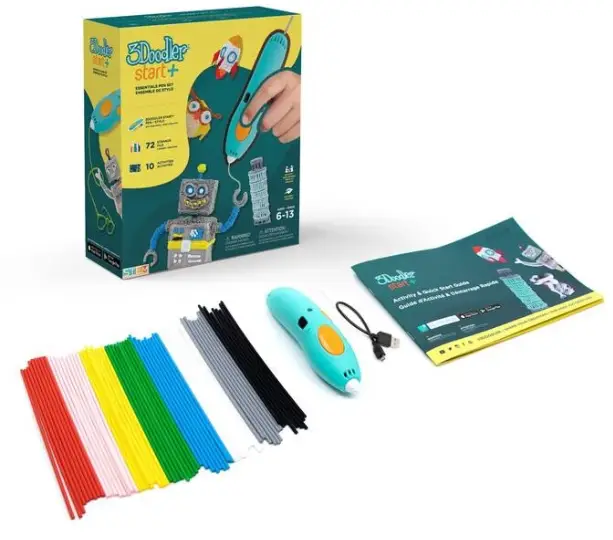
3Doodler Start+ Essentials 3D Printing Pen Set
CHOKING HAZARD.
Not suitable for children under 36 months. May contain small parts.
STEP 1: Turn It On
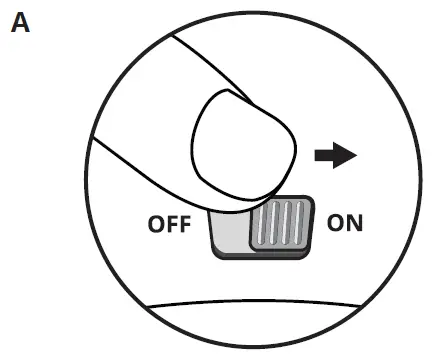 To turn on your 3Doodler Start, slide the power switch from OFF to ON.
 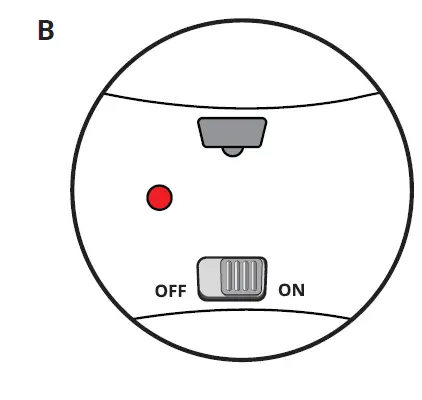 The LED light will turn SOLID RED to indicate the pen is warming up.
 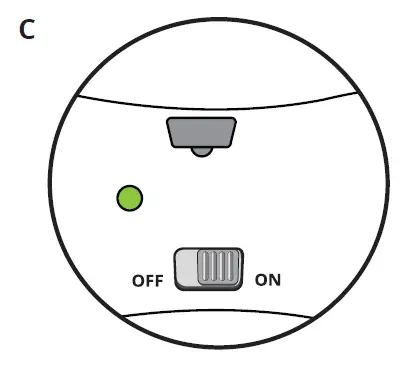 Wait until the light turns SOLID GREEN.
STEP 2: Start and Stop
 Click the button once to start your pen. The LED light will SLOWLY FLASH GREEN to show that your pen is active.
 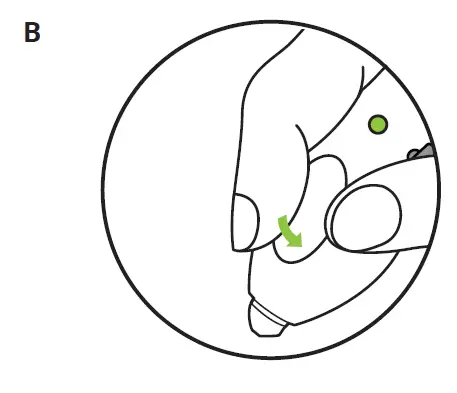 Click the button again to stop pen. The LED light will turn to SOLID GREEN.
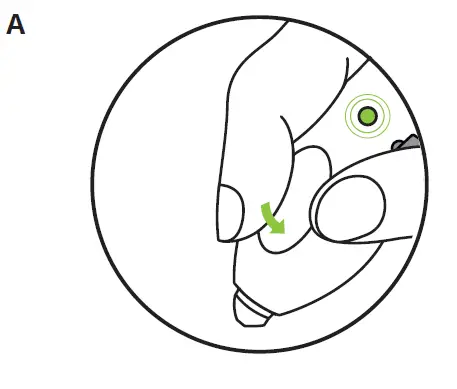
STEP 3: Insert Plastic and Doodle 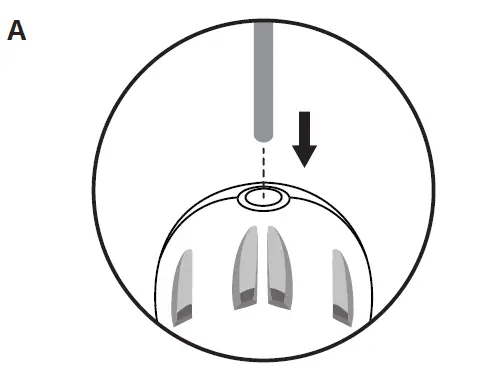
Insert a strand of plastic into the back of the pen until you feel it grip.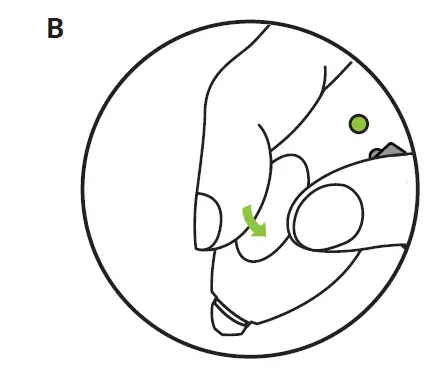
Click to start. 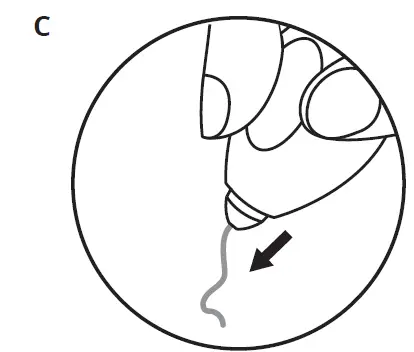 After a few seconds, you should see plastic appear from the Nozzle of your 3Doodler Start
How to Charge your 3Doodler Start
When the 3Doodler Start’s battery is running low, the LED light will SLOWLY FLASH ORANGE.
 Turn off your 3Doodler Start, by sliding the power switch to OFF.
 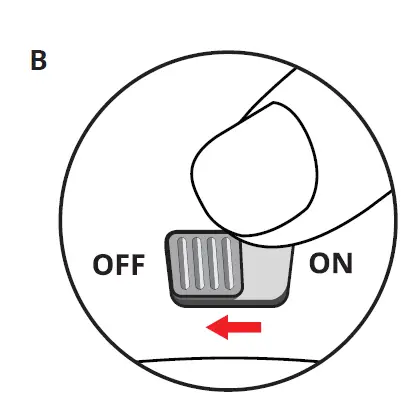 Connect your 3Doodler Start to a power source using a micro USB cable (as provided).
 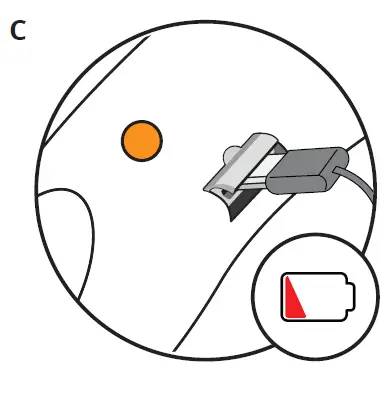 The LED light will FAST FLASH ORANGE while charging.
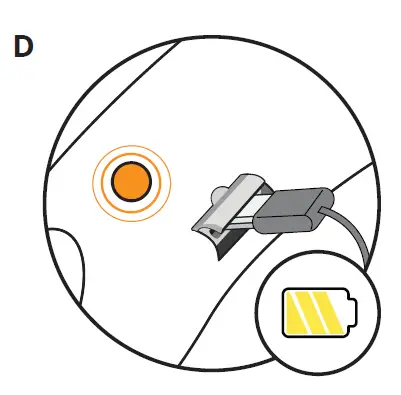 When your 3Doodler Start is fully charged, the LED light will stop flashing and change to SOLID ORANGE.
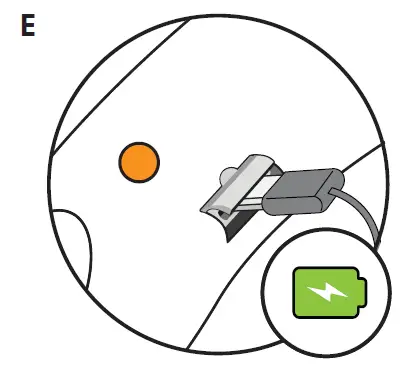
How to Reverse Plastic
 While your pen is idle and the LED is SOLID GREEN, DOUBLE CLICK the button on your 3Doodler Start.
  The plastic will reverse for around 10 seconds.
The LED light will Quickly FLASH GREEN while reversing. 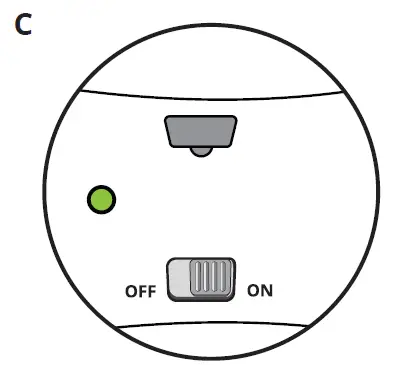 Once reversing is complete, the LED light will change to SOLID GREEN.
 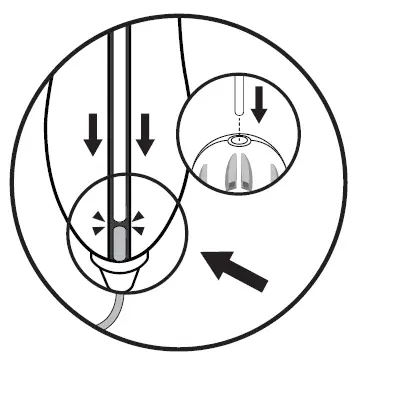 NOTE: If your Plastic is too short to fully reverse you will be unable to remove it. Instead of reversing,
Tips & Tricks

If you want your plastic to stick to surfaces (for example paper), or stick to other Doodles, push your 3Doodler Start into the surface or into the other Doodle while Doodling.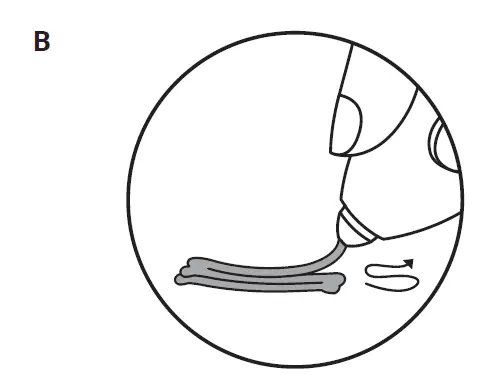
Want to strengthen your Doodles? Try layering! The more plastic you add, the stronger your Doodles will be. 
Doodled plastic cannot be reused 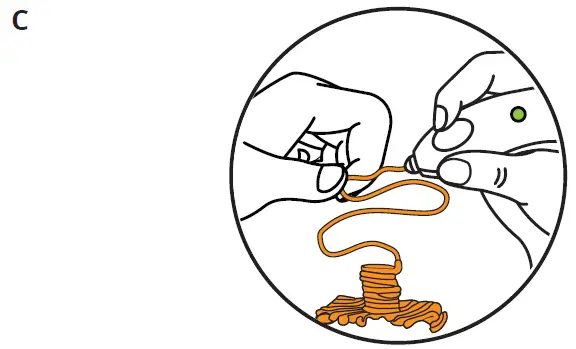
To get the exact shape you want, wait a few seconds after the plastic comes out of the nozzle, then mold and shape your Doodles for a few more seconds before they harden. 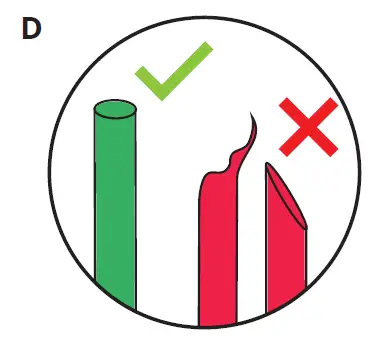 Ensure the filament is cut correctly before inserting into the pen.
 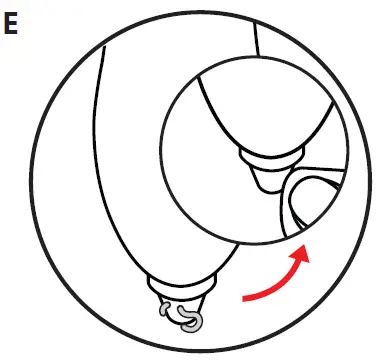 If you have trouble extruding, try cleaning away any plastic that may be stuck to the nozzle while the pen is switched on.
For inspiration visit our website: www.the3Doodler.com/resources
For troubleshooting visit
www.the3Doodler.com/start/troubleshooting/
FAQs on our website: www.the3Doodler.com/start/FAQs/
Packaging has to be kept since it contains important information.
Rechargeable batteries are only to be charged by adults or by children at least 8 years.
The toy must only be used with a transformer for toys.
The transformer is not a toy.
The toy is only to be connected to
Class II equipment bearing with symbol.
The transformer/charging unit (Not Included) should be regularly examined for potential hazard, such as damage to the cable or cord, plug, enclosure of other parts and if in the event of such damage, the toy must not be used until that damage had been properly removed.
- Minimum transformer specification —
- Input: 100~240V 50~60Hz. Output: 5V 1A
- Recommended transformer specification —
- Input: 100~240V 50~60Hz. Output: 5V 2A
FCC Statement: This device complies with Part 15 of the FCC Rules. Operation is subject to the following two conditions:
- This device may not cause harmful interference, and
- This device must accept any interference received, including interference that may cause undesired operation.
CAUTION: This equipment has been tested and found to comply with the limits for a Class B digital device, pursuant to Part 15 of the FCC Rules. These limits are designed to provide reasonable protection against harmful interference in a residential installation. This equipment generates, uses, and can radiate radio frequency energy and, if not installed and used in accordance with the instructions, may cause harmful interference to radio communications. However, there is no guarantee that interference will not occur in a particular installation. If this equipment does cause harmful interference to radio or television reception, which can be determined by turning the equipment off and on, the user is encouraged to try to correct the interference by one or more of the following measures:
- Reorient or relocate the receiving antenna.
- Increase the separation between the equipment and receiver.
- Connect the equipment into an outlet on a circuit different from that to which the receiver is connected.
- Consult the dealer or an experienced radio/TV technician for help.
You are cautioned that any changes or modifications not expressly approved in this manual could void the user’s authority to operate the equipment.
CAUTION: This Class B digital apparatus complies with Canadian ICES-003.
CAN ICES-3 (B)/NMB-3(B)
* Colors may vary: http://the3Doodler.com/patents.
3DOODLER START: Australia 2013101514; 201613539, 201613542, 201613543, 201613544; Canada 169292; China ZL201320686485.5; ZL201630309120.X; Germany 202013010264.0, 202013011820.2; Hong Kong 1185219, 1601297.7M001, 1601297.7M002, 1601297.7M003, 1601297.7M004; Korea 30-0906740-0001, 30-0906740-0002, 30-0906740-0003, 30-0906740-0004; Mexico 3553; Russia 155234; Taiwan M502562; and other patents pending.
Manufactured by WobbleWorks (HK) Limited.
Distributed by WobbleWorks,Inc. /
WobbleWorks (HK) Limited, 89th 5th Avenue, Suite 802, NY, NY, 10003.
© 2018 WobbleWorks, Inc. All rights reserved.
3DSP-ALL-IM (1)


