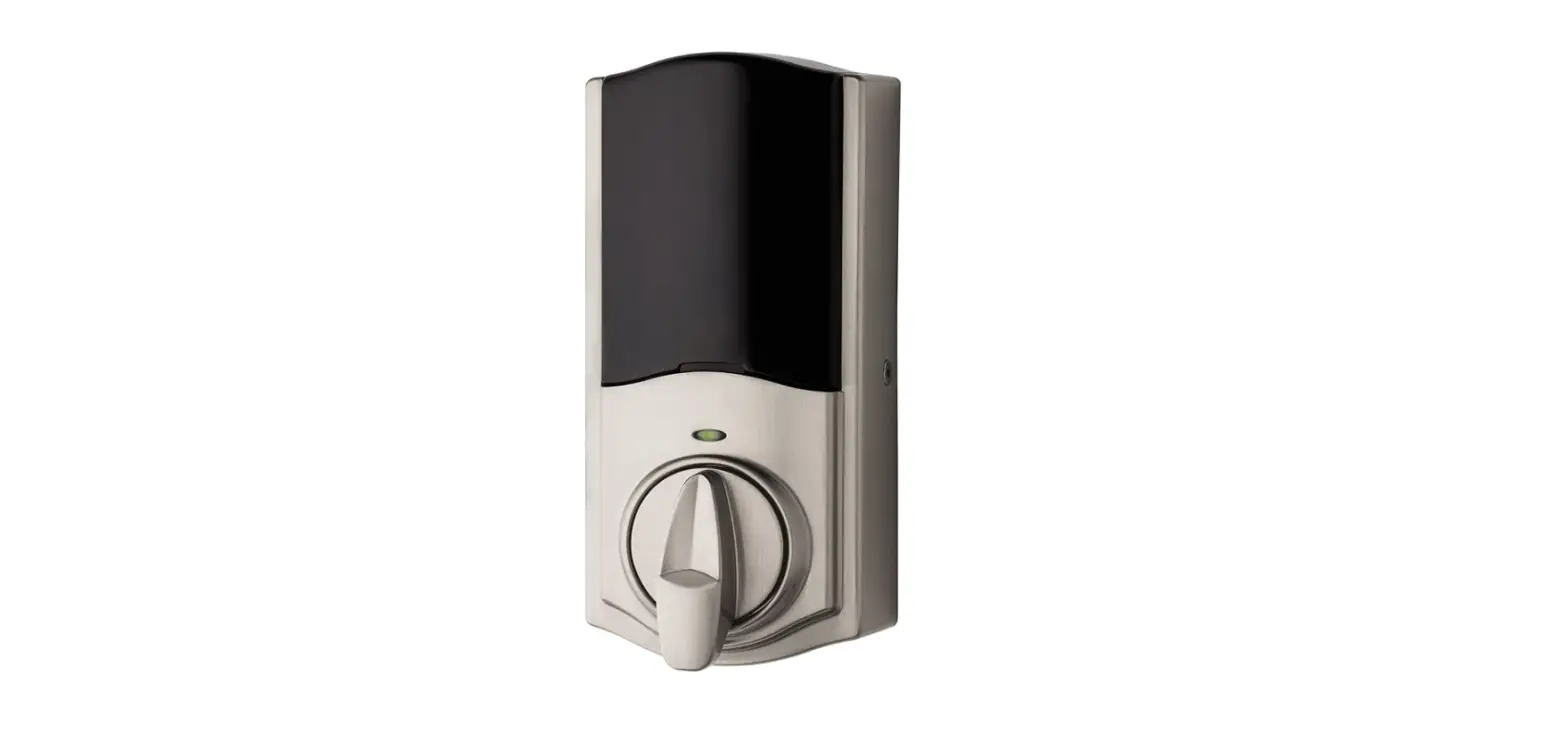
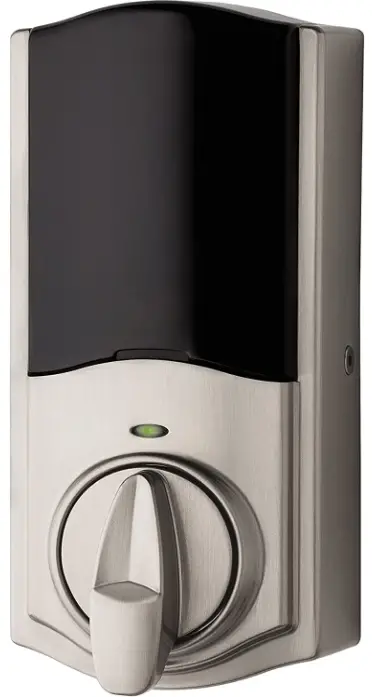
 Kwikset 99140-102 Smart Lock Conversion Kit
Important Safeguards
- Read all instructions in their entirety.
- Familiarize yourself with all warning and caution statements.
- Remind all family members of safety precautions.
- Always have access to your lock’s standard key.
- If using the Auto-Lock feature, make sure to have your standard key with you to prevent locking yourself out.
- Replace low batteries immediately.
CAUTION: Prevent unauthorized entry. Restrict access to your lock’s back panel and routinely check your settings to ensure they have not been altered without your knowledge.
WARNING: This Manufacturer advises that no lock can provide complete security by itself. This lock may be defeated by forcible or technical means or evaded by entry elsewhere on the property. No lock can substitute for caution, awareness of your environment, and common sense. Builder’s hardware is available in multiple performance grades to suit the application. In order to enhance security and reduce risk, you should consult a qualified locksmith or other security professional.
Tools needed


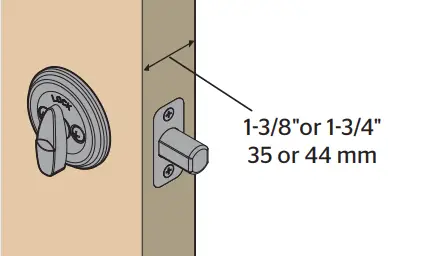
Prepare your door
- Make sure your existing deadbolt is compatible. If you have a standard deadbolt mounted separately from the handle below it, it is compatible with Kwikset Convert.

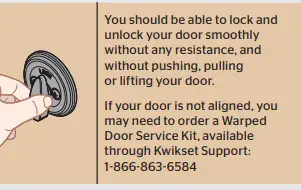
- Make sure your door is aligned before proceeding with the installation.

- Measure to confirm that your door is either 1-3/8″ or 1-3/4″ (35 mm or 44 mm) thick.

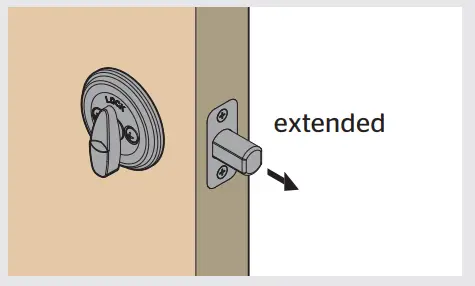
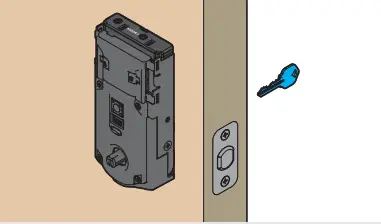
- Make sure your door is open and extend your latch bolt. Make sure your key is NOT in the deadbolt exterior.

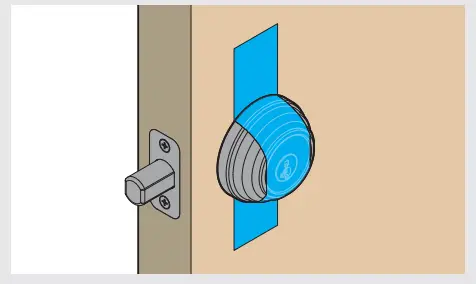
- Optional: Secure your deadbolt exterior with masking tape.

- Remove all existing deadbolt hardware from the interior side of your door.


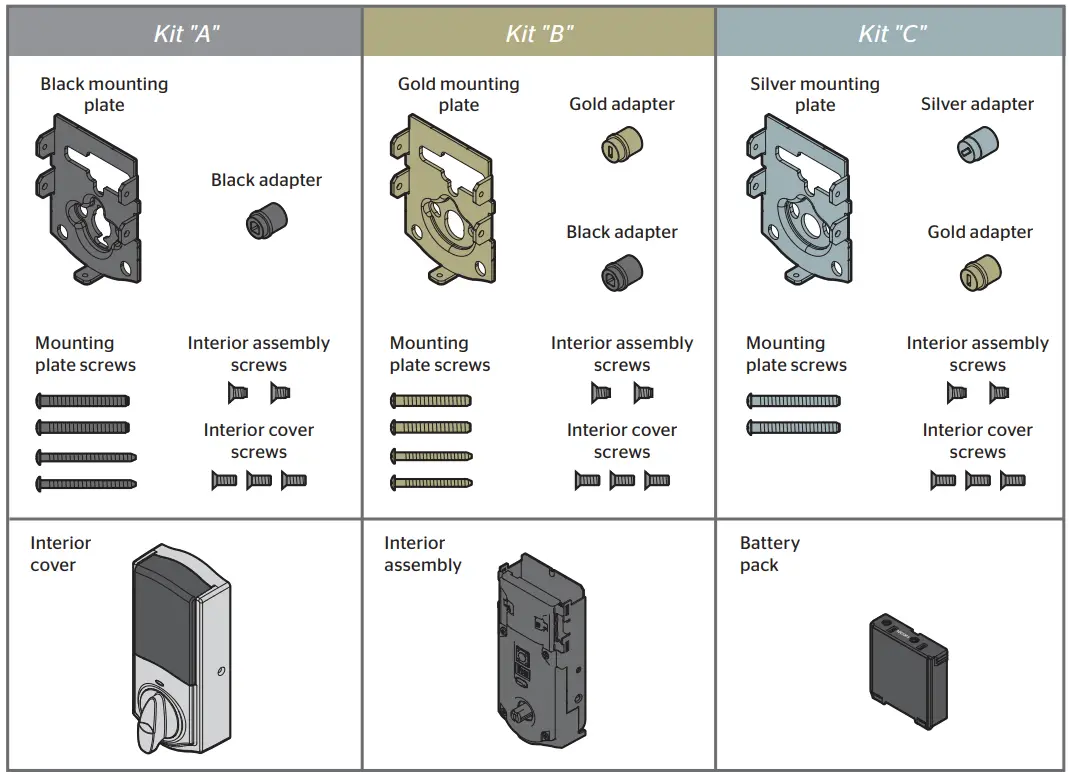
Determine the parts needed for your door
Look into the hole in your door.
What shape is your torque blade (the part sticking out through the latch)?
For a list of compatible deadbolt models, please see the Kwikset
Convert page at www.kwikset.com
Install the mounting plate and test your latch
- Place the mounting plate on the door so that the torque blade inserts through the center hole.
Note: A D-shaped torque blade is shown, but installation is the same for all models.
- Secure the mounting plate with the mounting screws.
- Remove the masking tape from the exterior deadbolt, and insert your key and test the latch for smooth operation.

- Remove your key and make sure the bolt is fully extended.


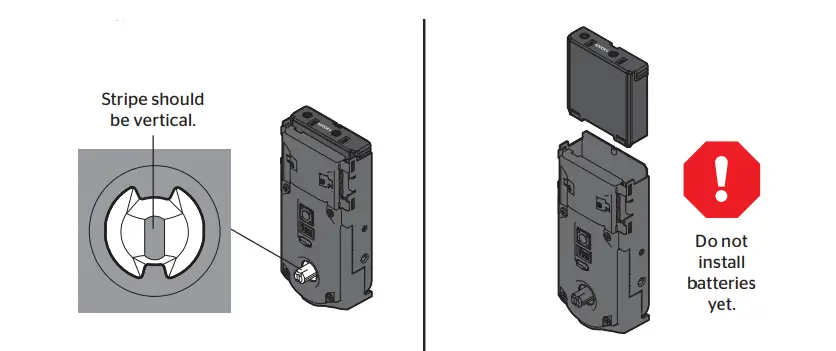
Install the interior assembly
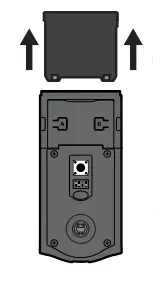
- Remove the interior cover and battery pack.


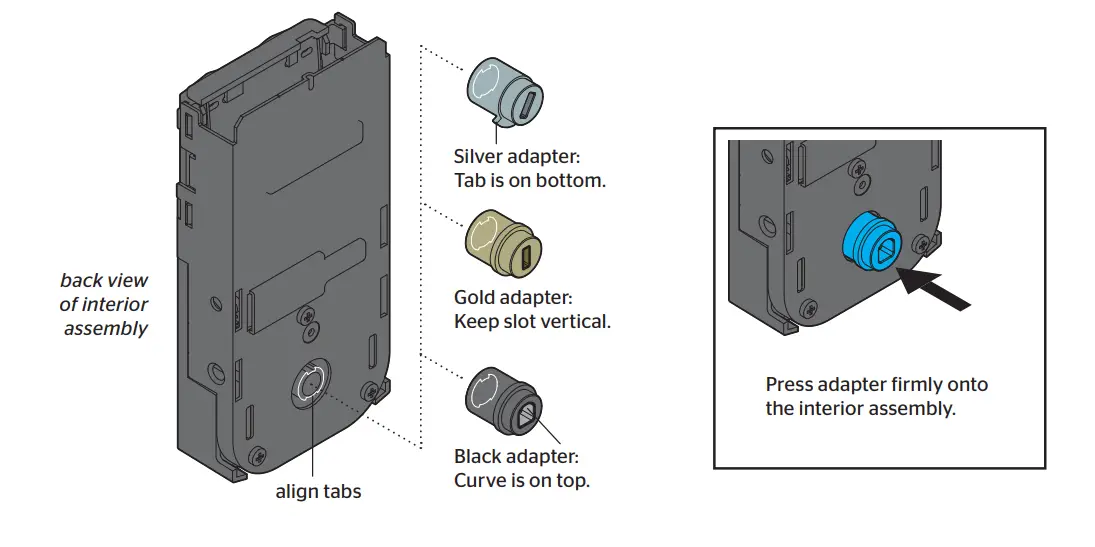
- Install the adapter on the interior assembly.

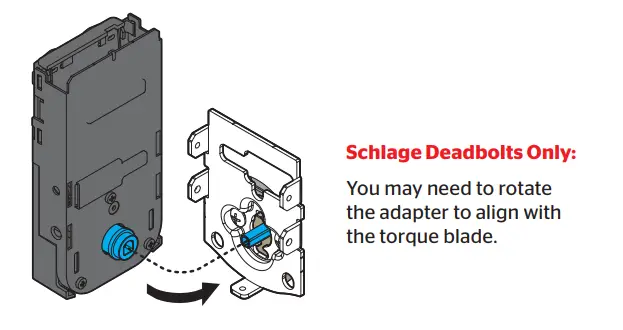
- Align the adapter with the torque blade and push the interior assembly onto the mounting plate.

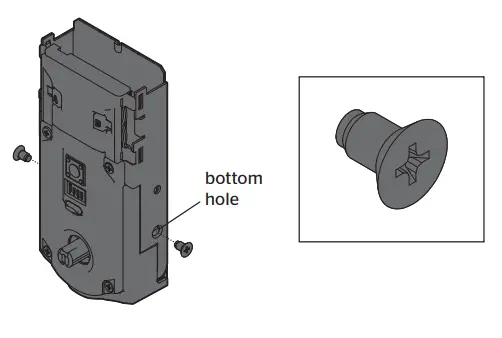
- Secure with two (2) interior assembly screws.

Perform the door-handing process
This step will teach the lock the orientation of your door and is crucial for lock operation.
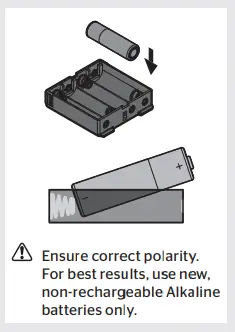
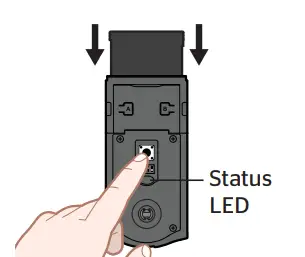
- Install 4 AA batteries in the battery pack.

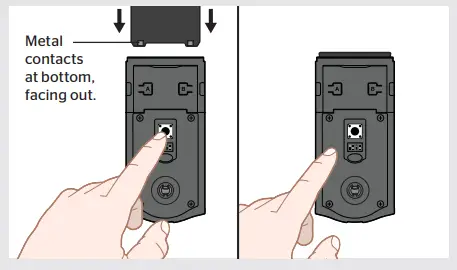
- Make sure the door is open. Insert the battery pack while PRESSING AND HOLDING the Program button. Keep pressing the button for three seconds after the battery pack is installed, then release the button.

- The Status LED will flash red and green, and the lock will beep. Press and release the Program button again.

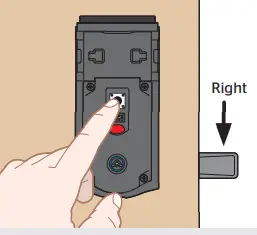
- The latch bolt will retract and extend on its own to learn the orientation of the door. Did the Status LED turn green or red?

Red Status LED
- BALDWIN ESTATE DEADBOLTS:
If your latch bolt is to the RIGHT of your interior assembly, and the Status LED is solid red after door handing, press and release the Program button again. The door handing process will restart.
If you are unsure if your lock is Baldwin Estate, see the chart on page 1 or the compatible deadbolt list online.
OTHER DEADBOLTS:
If the Status LED is solid red after door handing, make sure the batteries are installed correctly and the lock interior is correctly installed. Perform steps 5A-5D again.
Check the Status LED
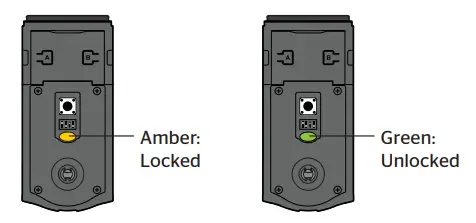
- The Status LED blinks every six seconds to communicate whether the door is locked or unlocked.

- Use your key to lock and unlock your door, and verify that the Status LED is communicating correctly.

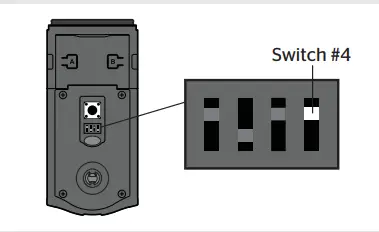
- If the Status LED is displaying the wrong door lock status, flip switch #4 to the ON position.

Add the lock to your smart home system
- Initiate the process to add the lock to your system at your smart home controller. Refer to your smart home system instructions for more information.
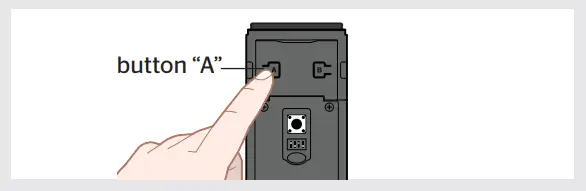
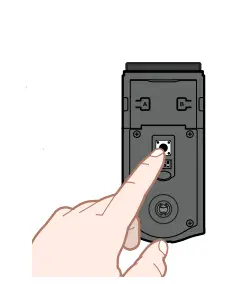
- When prompted by your smart home system to add the lock, press button “A” on the lock interior one time. The red LED will illuminate when the lock enters Add Mode.

- Please allow time for the controller to add the lock.
- If successful, re-name the lock in your system (if applicable).
If unsuccessful, follow your system’s instructions to remove the lock from the controller and any other network, then press button “A” on the lock one time.
Perform steps 7A-7C again.
If still unsuccessful, see “Troubleshooting: Adding the Lock to a Smart Home System” on page 4.
Install the interior cover
Important Information about the interior cover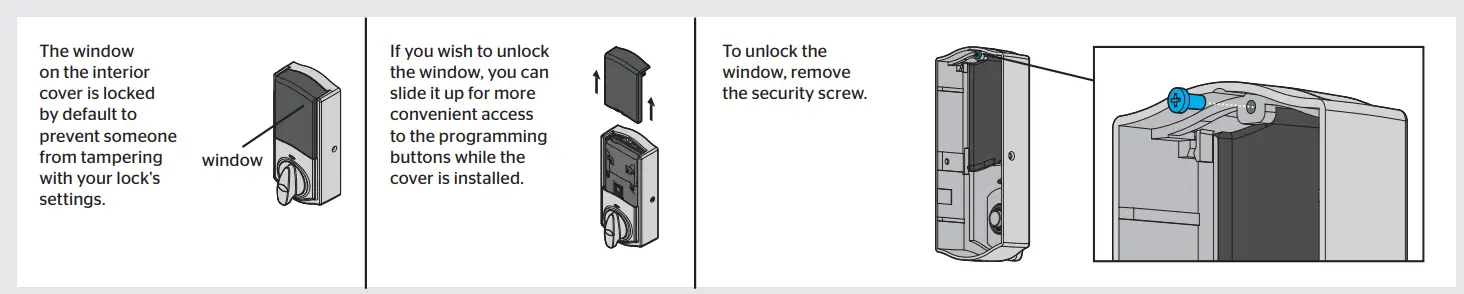
Cover Installation:
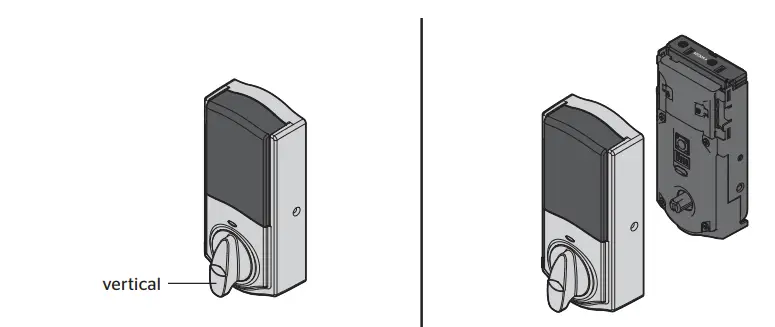
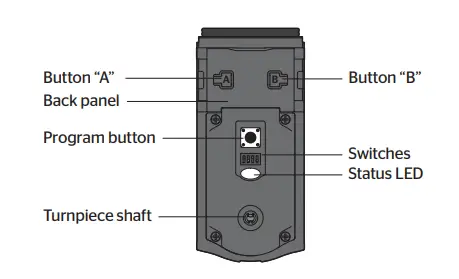
Reference Guide
- Kwikset Convert at a Glance

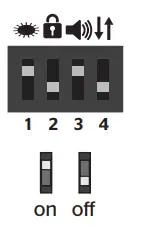
- Switches
 These features can be adjusted in some smart home apps.
- Status LED
The door lock status LED blinks every 6 seconds. ON position is the factory default. - Auto-Lock
Automatically re-locks door 30 seconds after unlocking. The OFF position is factory default.
CAUTION: With this feature enabled, it is possible to lock yourself outside. - Audio
A beeping sound is heard during programming and normal operation. ON position is factory default. - Invert
Only used if the Status LED is communicating the opposite door lock status.
- Status LED
- Status LED Notifications

- Factory Reset
A factory reset will remove your lock from your smart home system.- Remove battery pack

- Press and HOLD the Program button while reinserting the battery pack. Keep holding the button for 30 seconds until the lock beeps and the status LED flashes red.

- Press the Program button once more. When the LED flashes green and you hear one beep, the lock has been reset.

- Perform the door-handing process again to teach the lock the orientation of the door and pair the lock to your smart home system.
- Remove battery pack
 These features can be adjusted in some smart home apps.
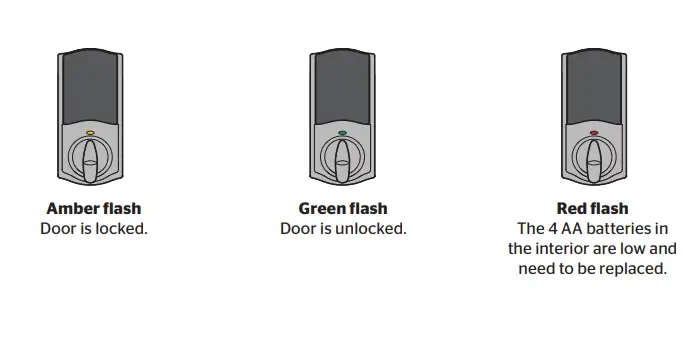
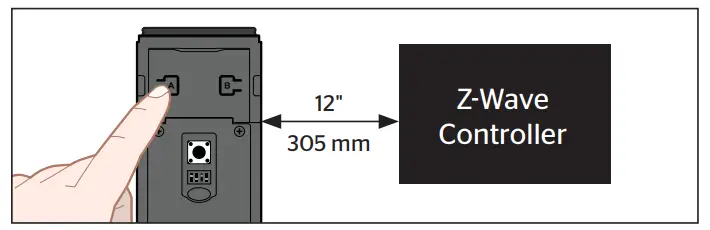
Troubleshooting: Adding the Lock to a Smart Home System
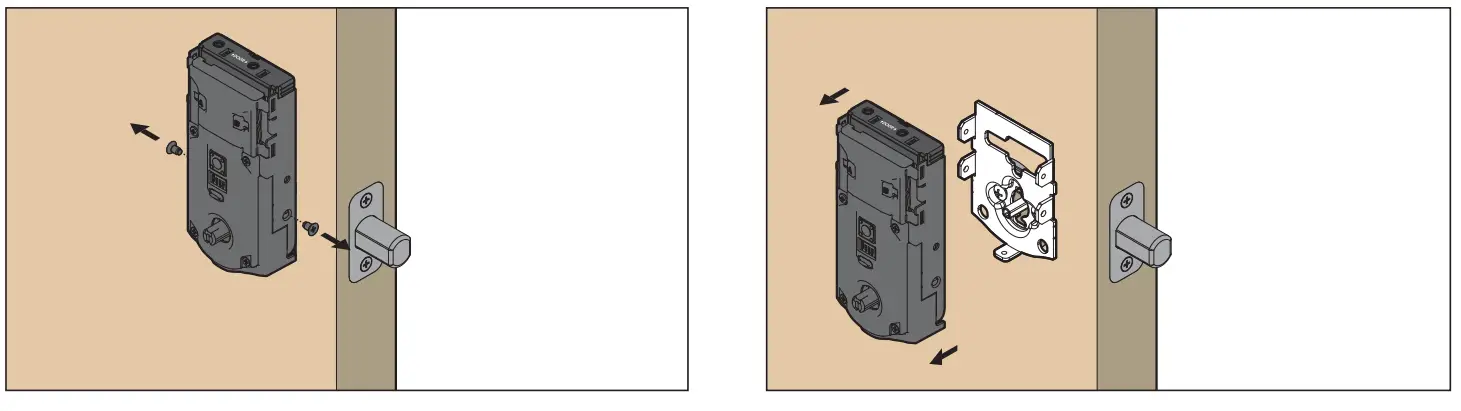
Some Z-Wave® systems require that the lock is within 12″ of the controller during the adding process. If this is the case, follow the steps below to remove the lock interior from the door to perform the process closer to the controller:
- Remove the small screws that secure the interior assembly to the mounting plate.

- Remove the interior assembly from the door.
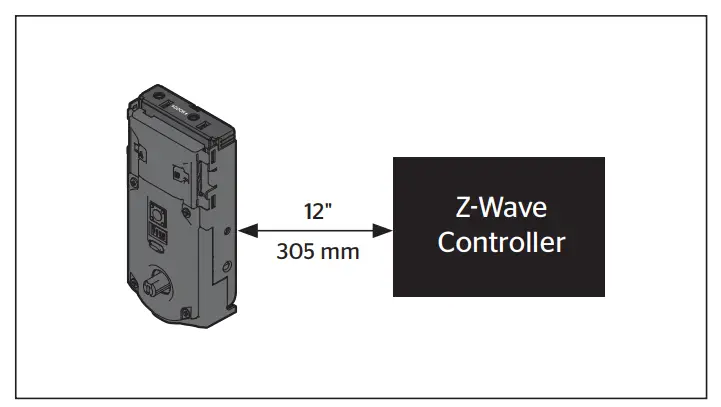
- Hold the interior assembly a maximum of 12″ (305 mm) from your smart home controller for the rest of this process.

- Initiate the process to add the lock to your system at your smart home controller. Refer to your smart home system instructions for more information.
- When prompted by your smart home system to add the lock, press button “A” on the lock interior one time. The red LED will illuminate when the lock enters Add Mode.

Please allow time for the controller to add the lock. - Once successful, re-name the lock in your system (if applicable). Then, reinstall the lock interior on the interior assembly.
Network Information
Removing the lock from the network
Follow your smart home system’s instructions to remove the lock from the network. When prompted by the system, press button A” on the lock interior once.
Z-Wave System Notes
This product is a security-enabled Z-Wave Plus product and must be used with a Security Enabled Z-Wave controller to be fully utilized. Z-Wave is a “Wireless mesh network,” and results may vary based on building construction and communication path.
To assure interoperability, each Z-Wave product must pass a stringent conformance test to assure that it meets the Z-Wave standard for complete compliance with all other devices and controls. The Z-Wave identity mark assures consumers, integrators, dealers, and manufacturers that their products will reliably perform with any other Z-Wave device. And, regardless of the vendor, always-powered nodes may act as a repeater for Kwikset/Weiser/Baldwin products. Z-Wave Configuration and Association Parameters are available on the Kwikset Convert page at www.kwikset.com.
FAQS
does this work with alarm.com?
Yes. We use 2gig GC2 or GC3 and its working great.
What do i need to purchase in order to use this lock when im away from the house (connect to wifi)? Or do i not need anything else?
You need a Z-wave hub, like SmartThings
Does it work with BHP locks?
This will act as a replacement for most standard deadbolts.
If i installed two of these in the same house would i be able to control each door lock independently from each other or would they both open and clos
Yes. You just name them differently in your Zwave hub.
Will it work with an Emtek deadbolt ?
It comes with a few different adapters for deadbolt check there website just to double check.
Can I use this with a kwikset Arlington?
The Arlington would need more space than typical handlesets. You may want to be sure the boreholes would allow for both this and the handle to mount.
Do you need a hub with this one or is built in?
Yes, you need a z-wave compatible hub.
Can I use this to convert a Zigbee 914 to wave and will the front keypad still work?
No. This will not support the keypad from your old lock. You will only be able to use the key
Can i “upgrade” my current kevo 2 with this? does it have connectors to plug into the exterior part of a kevo?
Kwikset model # 99140-102 is not compatible with Kevo products. SmartCode Z-Wave door locks are not connected via the internet and are not Wi-Fi-enabled devices. SmartCode locks are equipped with Wave technology.
Can I have multiple codes with this lock?
No. This lock doesn’t come with a keypad. This just connects to your Z-Wave hub if you have one. So really it can only be controlled by your phone or computer.
is it compatible with the Ring security system?
Yes. Compatible with ring alarm.
is it touch-to-open?
No.
If connected to a smart things hub, can you voice control through google home and alexa?
You need a Z-Wave hub. Can be connected to Alexa. Don’t know about Google.
Is Kwikset convert compatible with the Ring alarm system?
Yes, through Z-Wave connect.
what is the name of the app that I need to download to my phone to use it with my Kwikset convert smart lock?
There is no particular app, as it connects to the base station of another system with Z-Wave, i.e. it integrates with the management app of your main system. In case you do not have a z-Wave based system and you do not intend to get one, you might want to look for the Bluetooth version, for which an app exists.


