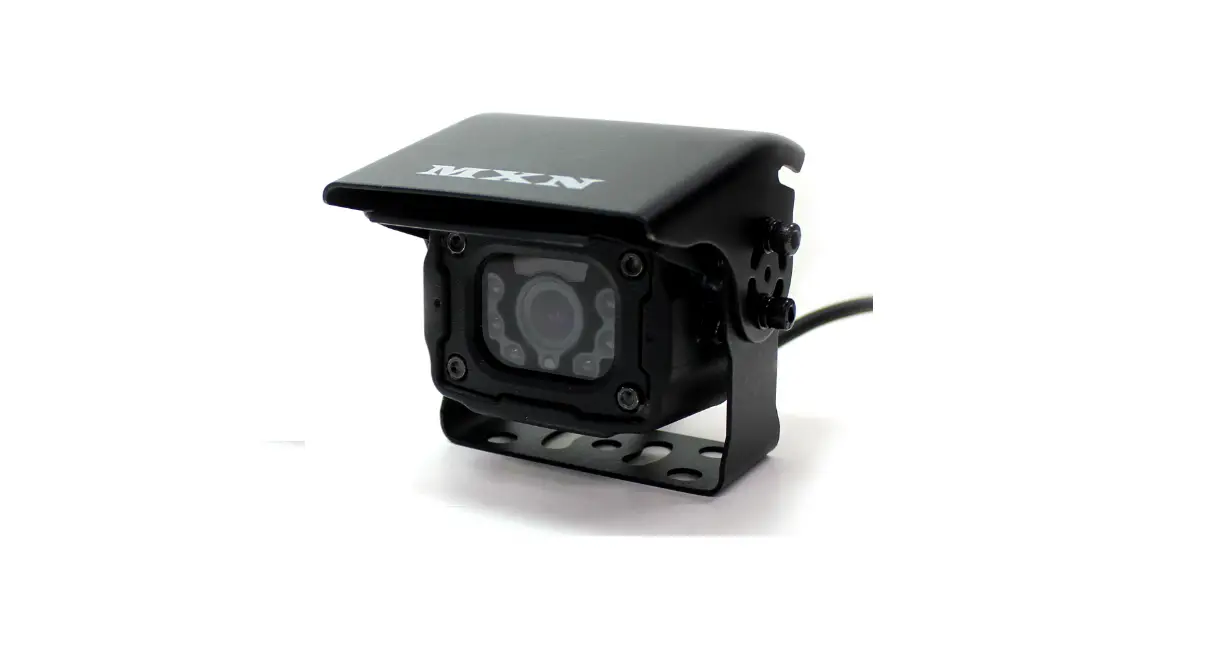
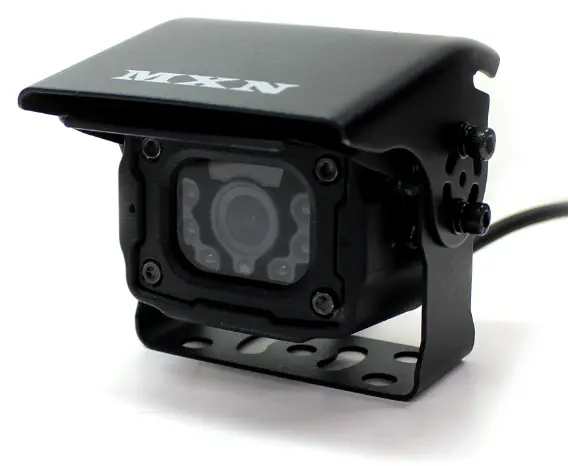
MXN81C Auto Heated Infra Red Color Camera 
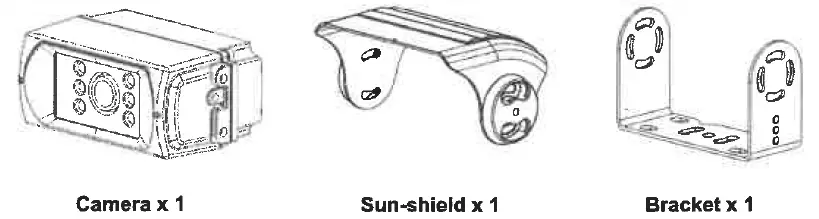
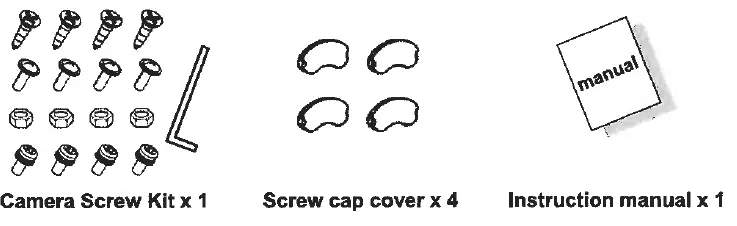
Contents

Features
- Best picture quality (in combination with a Digital LCD monitor)
- High-resolution CMOS camera (1.23Mega pixels)
- 1/3.2″ Color CMOS high-resolution Image sensor
- IP69K Waterproof Rating
- Diagonal 130″ Viewing
- Normal/Mirror Image switching
- Ultra low light performance
- Automatic Electronic Iris
- Built-in Microphone
- Built-in IR LED’s
- Built-in Automatic Heater (below +10″C)
- Temp. -40″C – S0″C
- Vibration resistant
- Waterproof screw type connector (IP67), 4-pin mini-DIN.
- E-mark.
Technical Specifications
- Image Sensor
- 1/3.2″ Color SONY CMOS(Exmor)
- Scanning System
- PAL, 1.23Mega pixels(1280×960 )
- Resolution
- 750 TV Lines
- S/N ratio
- Minimum 45dB (at AGC off)
- Minimum Illumination
- 0 lux (IR LED’s on)
- Power supply
- DC 9-48V
- Power Consumption
- DC 12V, 220mA(Heater on)
- DC 12V, 132mA(Heater off)
- Operating Temperature
- -40·c to +80·c
- Field of View angle
- 130″ (Diagonal), 102.2″ (Horizontal ), 72.8″ (Vertical)
- Dimensions
- 95.9(W) x 43(H ) x 62 .8(0) mm
- 109.2(W) x 85.5(H) x B0(D ) mm (incl.bracket & sunvisor )
- Weight
- 326 g (total weight incl. bracket & Sunvisor: 464 g)
Front View 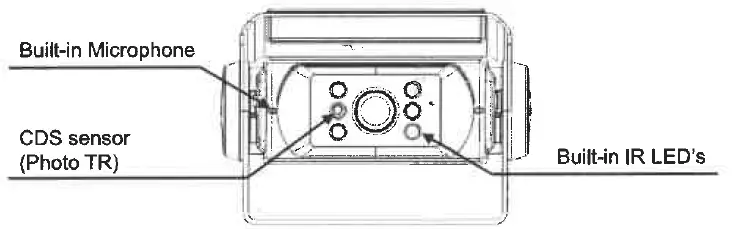
Rear View 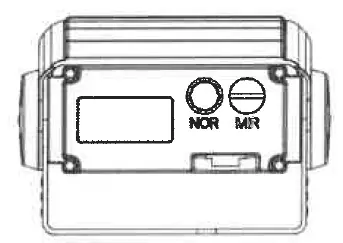
Installation
CAMERA ASSEMBLY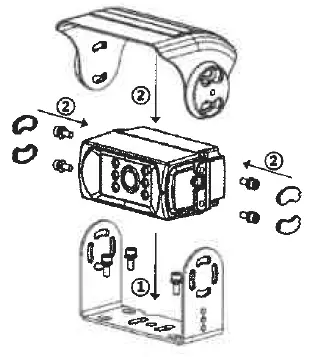
- Fix the supplied mounting bracket to the vehicle.
- Fix the bracket with camera and sun-shield according to the drawing.
- Adjust the vlewln9_!!’_gle of the came!• and fasten the screws firmly.
Cable grommet
Drill a suitable hole (approx. 9 19mm) and insert the cable grommet.
Just before final fixation, please apply a proper sealant (for prevention) between the hole and the grommet and also between the cable and the grommet. 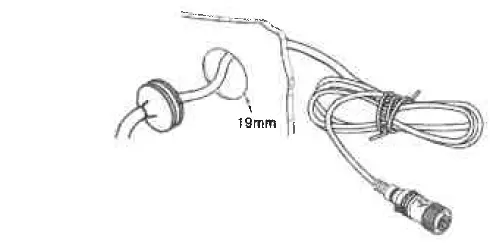
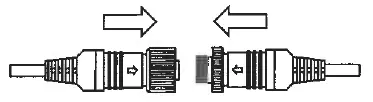
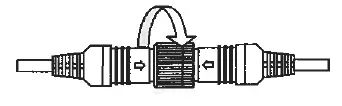
Securing cable connection
- Match the arrow marks and press the connectors together.

- Screw the camera connector up clockwise.

- Tighten cable connection firmly In order to prevent water Ingress.
Note! The -warranty will not be valid if the problem Is related to moist and corrosion in -the connector.
Wiring to Monitor
Run the cable from the camera to the monitor. 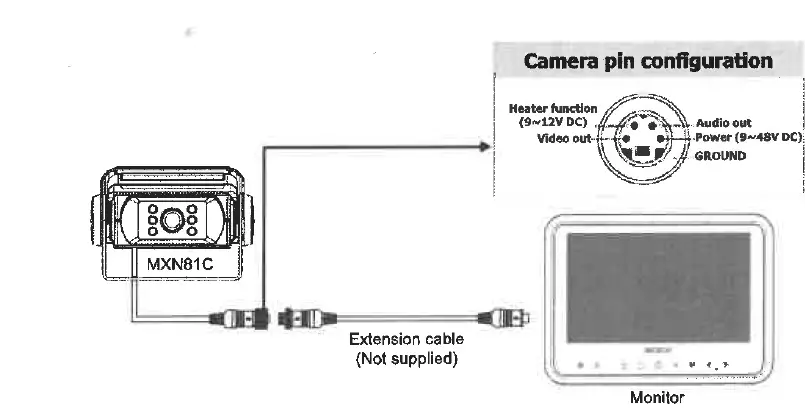
Caution
- Before making the connection, disconnect the ground. terminal from the battery to avoid short circuits.
- The plugs should be fully inserted Into the connectors or jacks.
A loose connection may cause malfunctioning of the unit. - A damaged cable may affect the operation of the camera and may even cause a malfunction of the camera or monitor: Avoid a damaged cable!
- Protect the cable by using a guide tube, or pipe or run the cable inside the vehicle as much as possible. Caution! Run the cable In natural shapes In order to prevent cable breaks.
- Preferably use an acid-free grease in between the waterproof screw type connectors and tighten them firmly each other.


