![]() Rackmount KVM Console
Rackmount KVM Console
User Manual
SW1701/ SW1801
User Manual
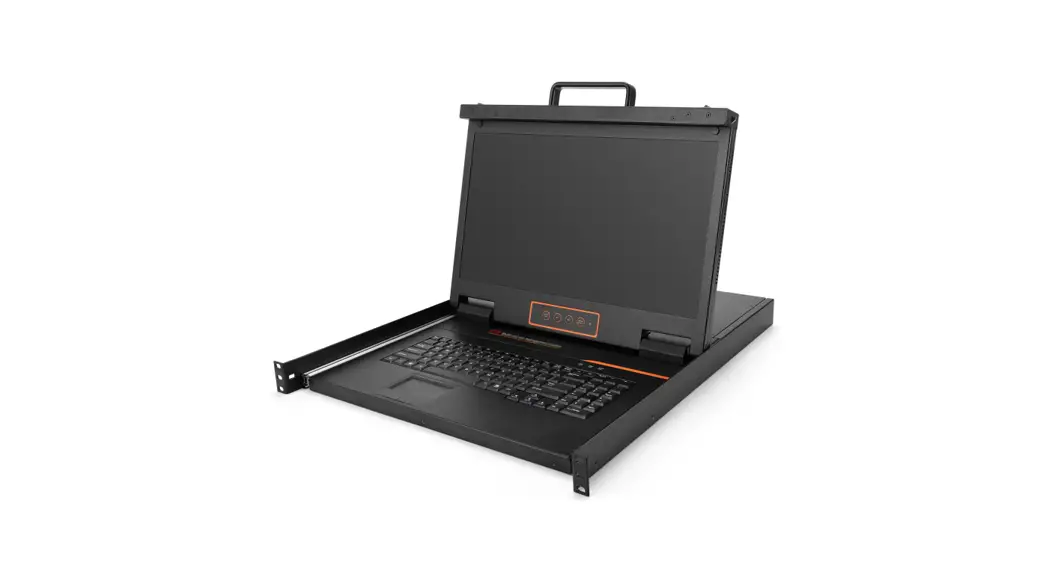
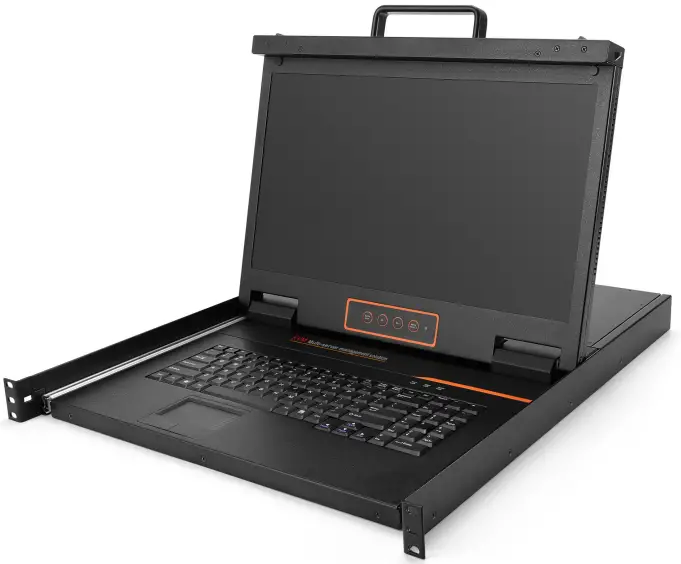
Description
Single port console integrates the monitor, keyboard, and mouse in a 1U height device, it can be installed in a standard 19” rack. It can connect one computer to control the monitor, keyboard, and mouse.
Features
- 3 in 1 LCD console integrating the monitor, keyboard, and mouse.
- Directly connect computer or KVM switch to control single or multiple computers.
- 17.3& 18.5 LCD monitor with high brightness, high definition, and high resolution.
- Ultra-slim keyboard with 99 keys(82+17).
- Standard PS/2 touchpad.
- With release catch in the front panel.
- Automatic-locking guide rail
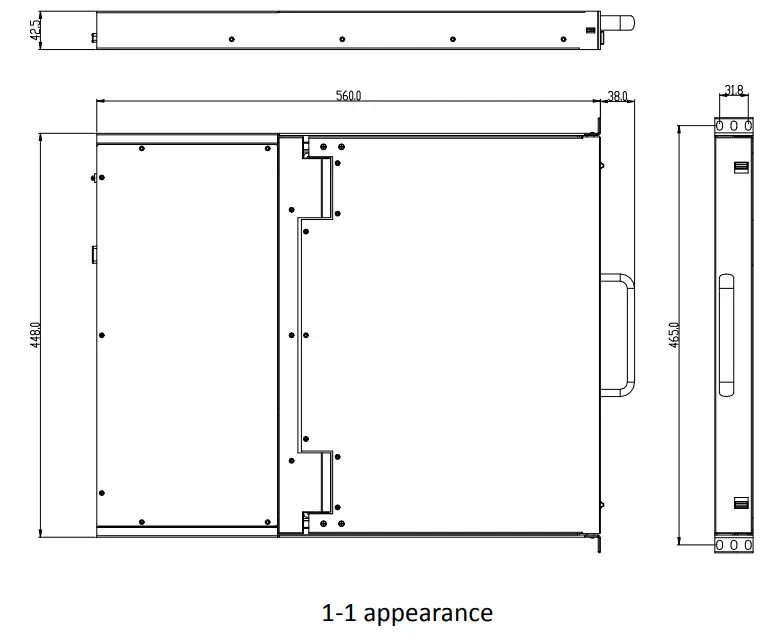
Appearance
Front View
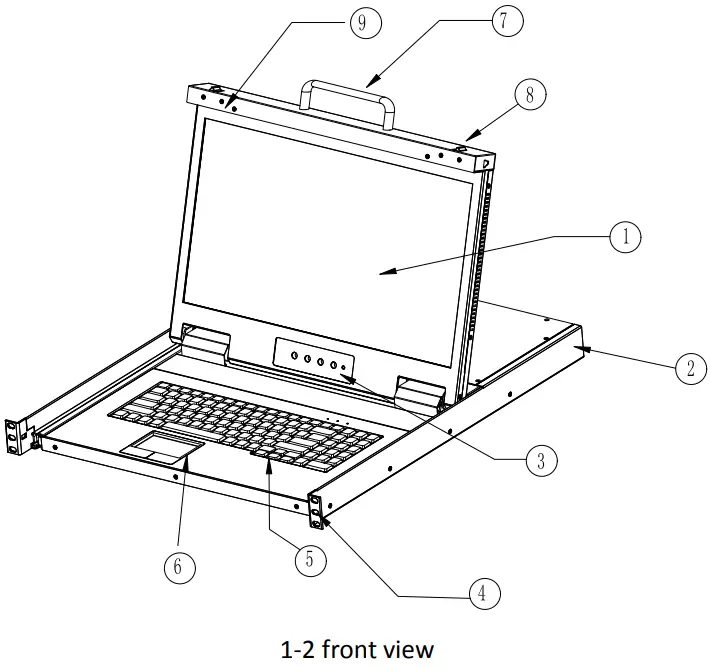
- LCD Monitor
- Rear Bracket Slot
- Display Menu Buttons
- Mounting Bracket
- Keyboard
- Touchpad
- Handle
- Release Switch
- Display Panel
Back View
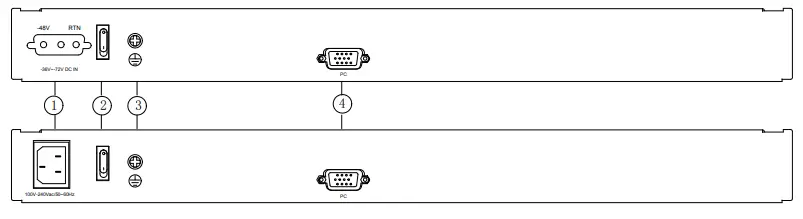
1-3 back view
- Power input (AC or DC)
- Power Switch
- Ground connecting screw
- PC connection port: integrating VGA, keyboard, and mouse signal
Cable Connection

To ensure signal integrity and simplify cable layout, we strongly recommend you use high-quality cables with different lengths as shown in the above table.
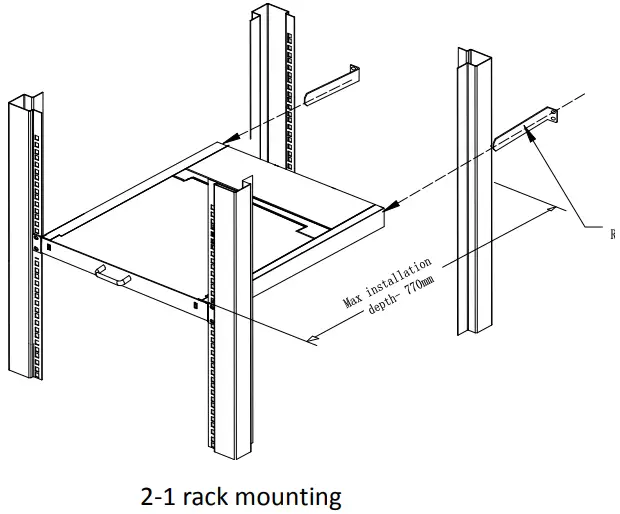
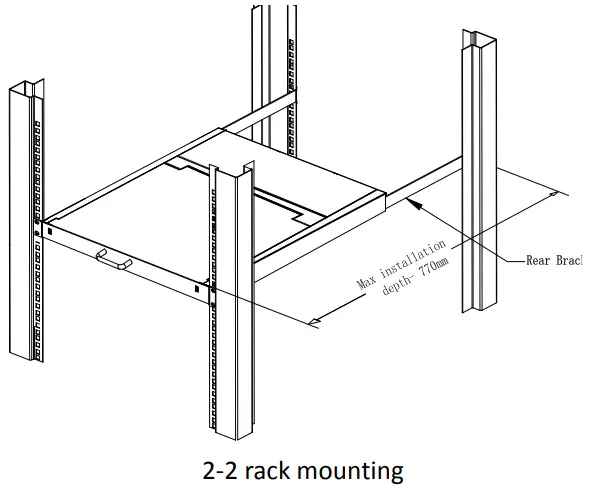
Rack Mounting
A standard rack mounting kit is provided to mount the switch at a depth of 686-770mm n a standard 19” rack. For other mounting distances, the rear brackets need to be customized accordingly With one person holding the switch in place and the other person sliding the L bracket into the switch’s side mounting brackets from the front to the back, then screwing the brackets to the rack. ( See below installation drawing)
 |  |
Opening the Console
- Power on the KVM after connecting cables.
- Power on the server or PC after power on the KVM.
- Release the release catch.
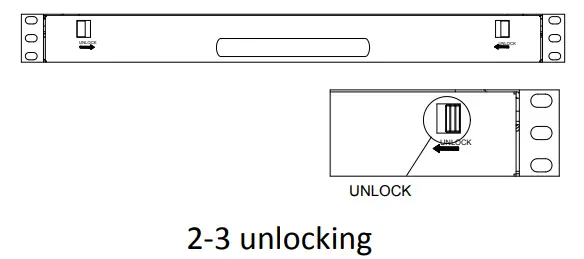
*Note: The release catch can only do horizontal locking, it can’t bear any load.
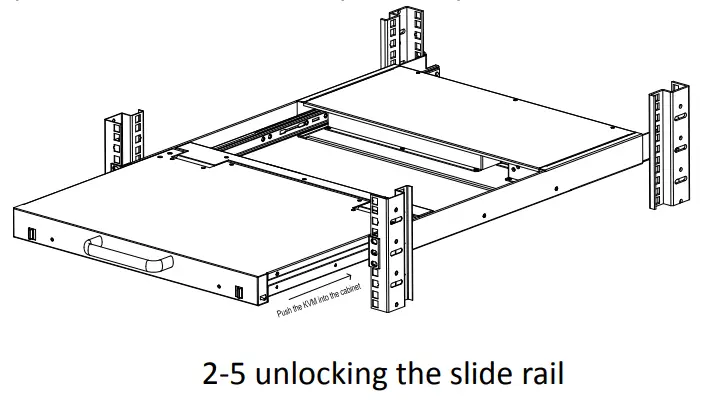
- Pull the KVM console all the way out and the slide rail automatically locked to its place.
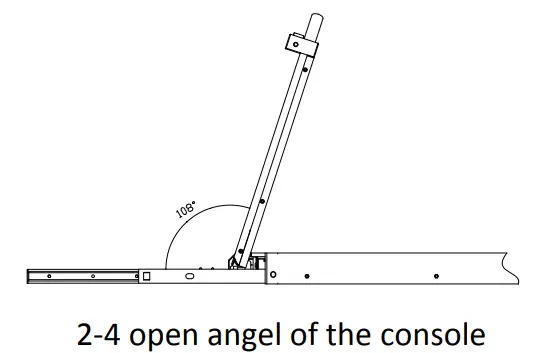
- Rotate the LCD panel all the way back to expose the LCD screen; the LCD module can be rotated up to 108°.
Closing the Console
- Close the console and the power automatically shut down.
- Push the release catch in the direction of the arrow, push the LED panel all the way in until it automatically locks up.
Operating the Monitor
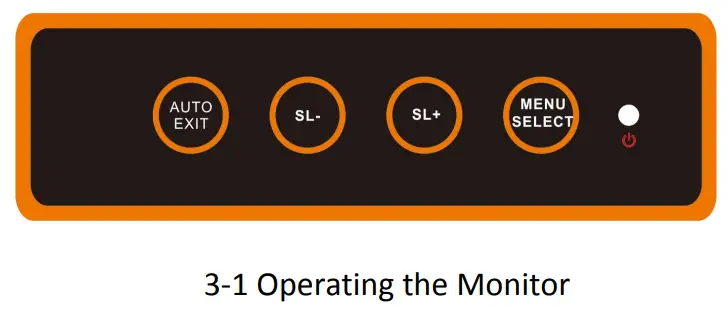
The LED OSD allows you to set up and configure the LED display.
| Buttons | Functions |
| MENU SELECT | Brings up the main menu. |
| EXIT/AUTO | Exits the current menu and returns to the previous menu or exits the LED OSD. Press AUTO for automatic configuration. |
| SL-/SL+ | Moves the menu to make the corresponding adjustments. |
| LED state | Green: Running Red: Power off or access nonstandard VESA signal Flashing green: Energy saving mode or no signal |
Press AUTO if the screen migrates after power on or under other circumstances, then the screen auto-configures to its best display state.
Note:
- It may not be adjusted to its best state if part of the display mode is not standard VESA mode. If so, return back to the OSD menu to RESET, then it will revert back to normal.
- It is recommended to set up the display mode at 1920×1080, refresh rate of 60Hz.
Specifications
| Model | SW1701 | SW1801 | ||
| Computer Connections | Direct | 1 | 1 | |
| Max | 1 | 1 | ||
| Port emulation | Keyboard, mouse | PS/2, USB | PS/2, USB | |
| LCD monitor | LCD model | FHD TFT | FHD TFT | |
| View area | 17.3″ | 18.47″ | ||
| Optimum resolution | 1920×1080@60Hz | 1920×1080@60Hz | ||
| Display color | 262K | 16.7 M | ||
| Brightness | 300cd/m2 (T y p) | 250cd/ m2 (T y p) | ||
| Contrast ratio | 800: 1(T y p) | 1000: 1 (T y p) | ||
| Pixel pitch(mm) | 0.1989(H)x0.1989(W) | 0.213(H) x0.213(W) | ||
| Mouse | X/Y resolution | >1000 points / inch, (40 points/mm) | ||
| Scroll wheel | Support scroll wheel function | |||
| Keyboard | 99 keys (82 keys main keyboard +17 independent small numeric keyboard) | |||
| Input power | 100V-240Vac, 50-60Hz, <1.5A | |||
| Power consumption | 11W | 20W | ||
| Mounting distance | 686-770mm (L=262mm Mounting bracket can be customized for Other mounting distance | |||
| Operating temperature | 0-50 °C | |||
| Store temperature | -20-60 °C | |||
| Humidity | 0-80% RH, non-condensing | |||
| Net weight | 11kg | 11.2kg | ||
| Product dimension (Wx DxH) | 448mmx560mmx42.5mm | |||
| Package dimension (Wx DxH) | 765mmx615mmx185mm | |||
| Optional power input | -36V— -72Vdc | |||
www.kinankvm.com
@all right reserved Shenzhen Kinan Technology Co., Ltd
Print date: 2022 / 03
Version: V2.1


