![]() Quick Start Guide
Quick Start Guide
MODEL: K-Cam4K
4K PTZ Camera
K-Cam4K 4K PTZ Camera
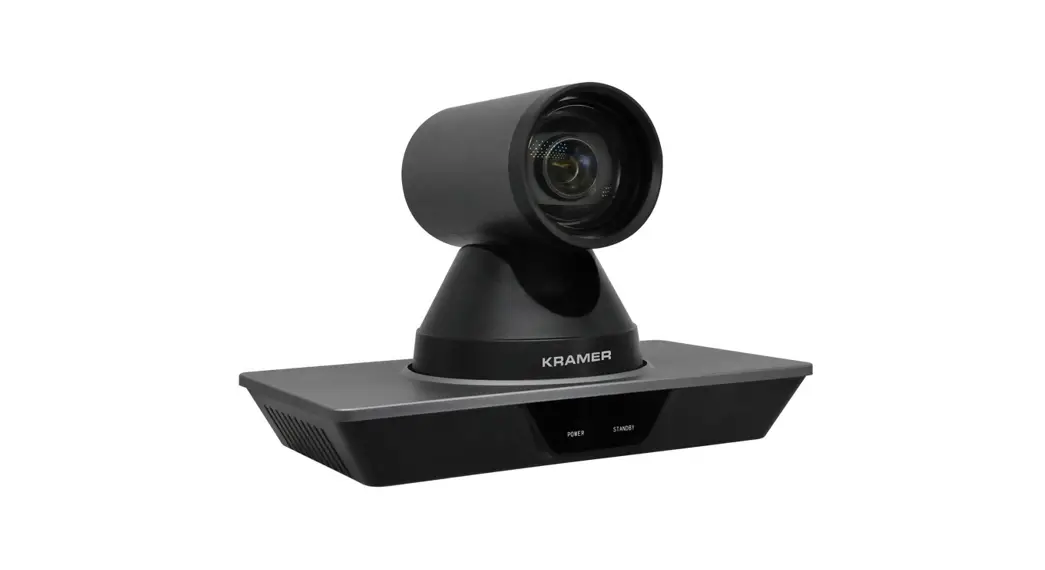
Congratulations on purchasing your Kramer K-Cam4K 4K PTZ Camera (Pan Tilt Zoom camera). K-Cam4K includes an ultralow, 8.51Mpixel CMOS image sensor that together with 3D DNR technology, delivers the high image quality of up to 4K at 30fps. K-Cam4K includes HDMI, RJ-45 and USB 3.0 outputs for easy plug-and-play and features x12 zoom, a ±30° tilt, a 71° field of view, and a ±170° pan. Control K-Cam4K via the IR remote controller, OSD or embedded webpages. Go to www.kramerav.com/downloads/K-Cam4K to download the latest user manual and check if firmware upgrades are available. Get to know your K-Cam4K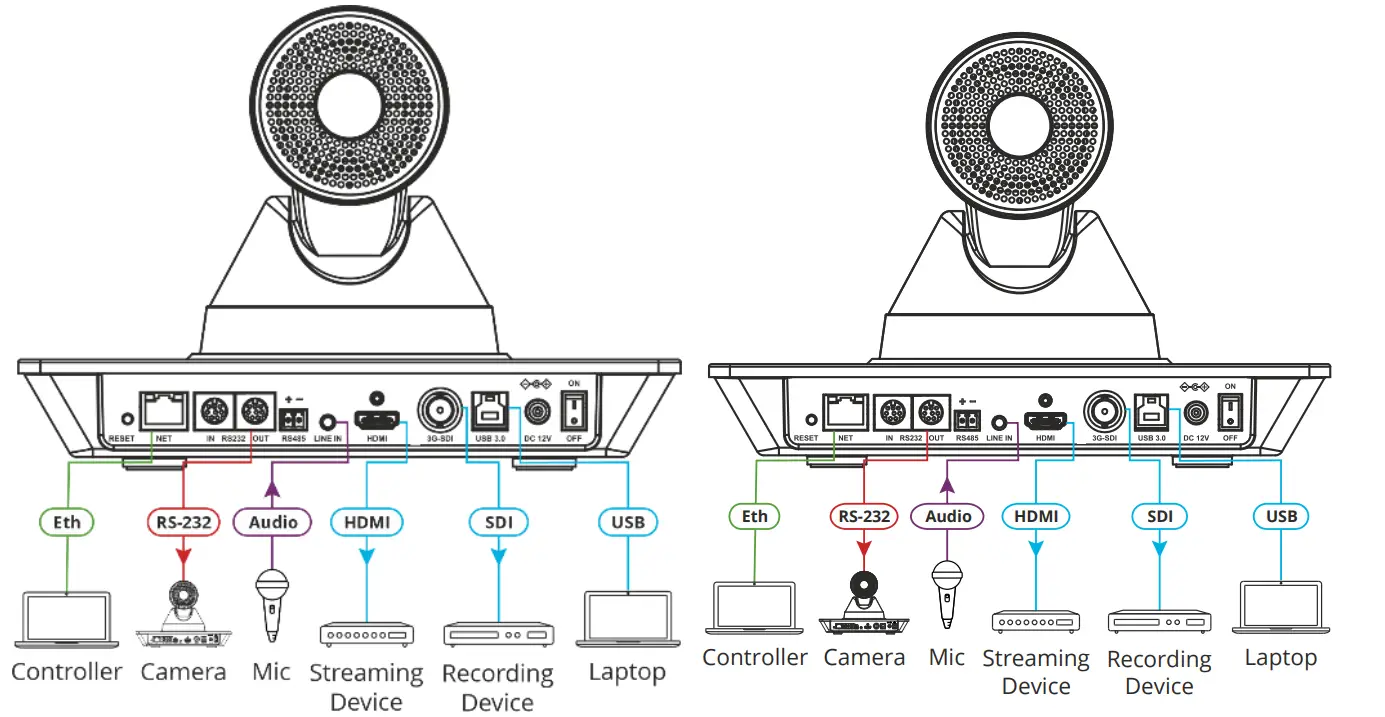
| # | Feature | Function | |
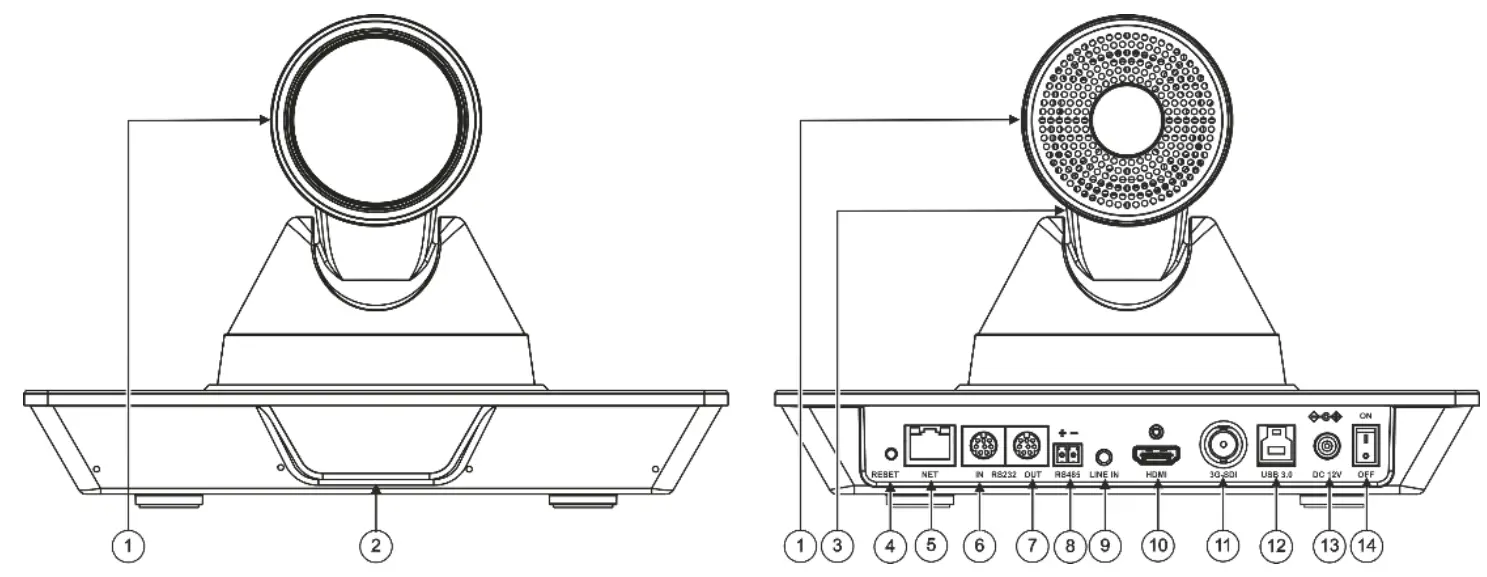
| Camera | Front and rear views. | ||
| 1 | |||
| 2 | Front Panel OLED | Displays frame rate and resolution for HDMI and SDI output signals, as well as the IP address. | |
| 3 | Tilting Mechanism | Can be set to any of 255 preset positions. | |
| 4 | RESET | Press for 5 seconds to reset to factory default parameters. | |
| 5 | NET RJ-45 Connector | Connect to your network or directly to a computer (supports PoE). | |
| 6 | RS-232 8-pin DIN Connector | IN | RS232 8-pin DIN Connector |
| 7 | OUT | ||
| 8 | RS 485 2-pin Terminal | Block | Connect to a controller. |
| Connector | |||
| 9 | LINE IN 3.5mm Mini Jack | Connect to a microphone. | |
| 10 | HDMI Out Connector | Connect to a recording/streaming device. | |
| 11 | 3G-SDI Out BNC Connector | Connect to a recording/streaming device. | |
| 12 | USB 3.0 Type-B Connector | Connect to a computer or collaboration device using the USB-3 cable (included). | |
| 13 | DC12V Power Connector | Connect to the 12V power adapter. | |
| 14 | ON/OFF Switch | Turn the unit on and off. | |
Mounting K-C am4K
You can mount K-Cam4K on the wall, or the ceiling, or place it on a tabletop. The built-in gravity sensor automatically corrects the image orientation.
- Ensure that the environment (e.g., maximum ambient temperature, humidity & air flow) is compatible for the device.
- Avoid exposing the product to direct sunlight or any other heat source.
- Keep away from children – product includes small accessories and components.
- Avoid uneven mechanical loading.
- Do not insert any sharp objects into the product.
- Avoid dropping or hitting the product to avoid damaging the product.
- For maintenance, call tech support.
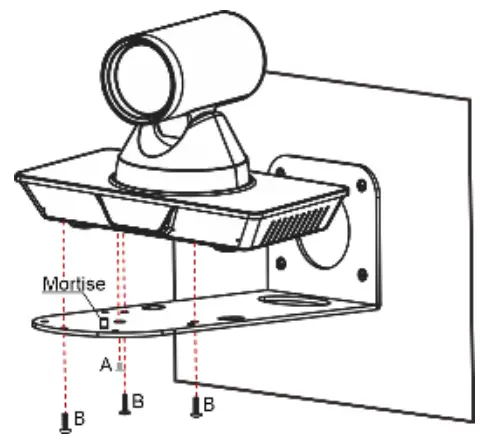
To attach K-Cam4K onto a wall: 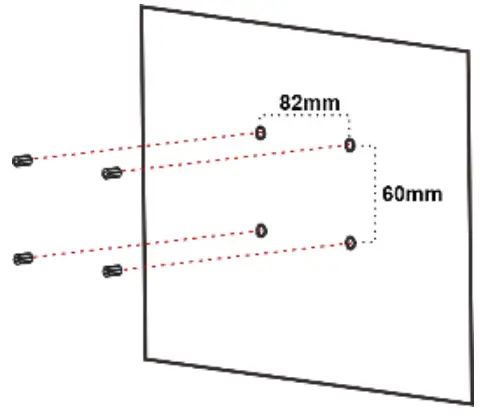
- Find the correct location on the wall.
- In the desired location, mark the hole locations, then drill 4 holes 82mm and 60mm apart (using a 6mm drill-bit) to fit the 4 holes of the wall-mounting bracket.
- Insert the four expansion plugs into the holes.

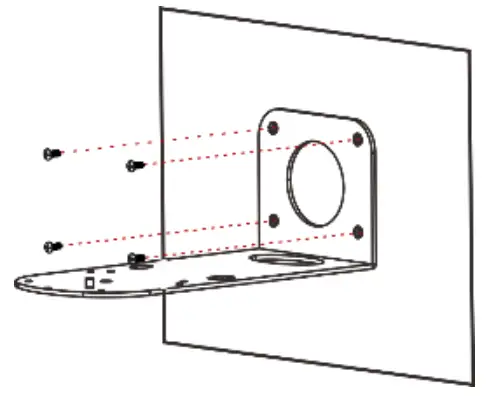
- Attach the wall bracket to the wall, using the four wall bracket screws.
Note that you can also attach the device upside down, from under the bracket.
- Attach the device to the wall bracket by fitting the mortise (on the bracket) into the tenon (on the camera).
- Fix the camera by screwing (A) Nickel screw to the center and (B) then tighten with 3 black screws.
Connecting K-Cam4K
Always switch OFF the power on each device before connecting it to your K-Cam4K.
Connect the power cord to K-Cam4K and plug it into the mains electricity.
Safety Instructions (See www.kramerav.com for updated safety information)
Caution:
- There are no operator serviceable parts inside the unit.
 Warning:
 - Use only the power cord that is supplied with the unit.
- Disconnect the power and unplug the unit from the wall before installing.
- Do not open the unit. High voltages can cause electrical shock! Servicing by qualified personnel only.
- To ensure continuous risk protection, replace fuses only according to the rating specified on the product label which located on the bottom of the unit.
Controlling K-Cam4K via the IR remote controller 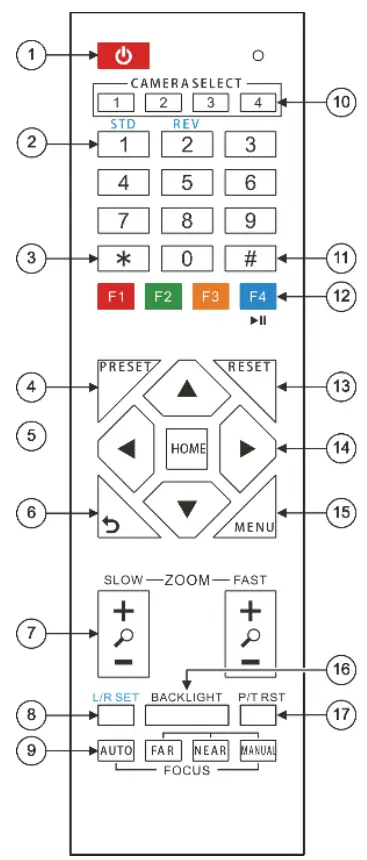
Shortcut Keys
*+#+1: OSD default (English)
*+#+3: OSD default (Chinese)
*+#+4: Display current IP address
*+#+6: Quickly recover the default
*+#+8: View the camera version
*+#+9: Quickly set up inversion
*+#+MANUAL: Restore default IP address
| # | Key | Function | ||
| 1 | Power | Press once to enter standby mode. Press again to enter normal operation mode. | ||
| 2 | Number (0 to 9) | Configure or edit a preset. | ||
| 3 | •Key | Use together with other keys for various functions. | ||
| 4 | PRESET | Press PRESET + a numerical key (0 to 9) to save the current configuration to that preset number. | ||
| 5 | HOME | Press to return K-Cam4K to its default position. When in the OSD, press to enter a submenu or confirm menu. | ||
| 6 | Return | Return to previous item on the menu. | ||
| 7 | ZOOM | SLOW | Press for slow zoom in (+) or out (-). | |
| FAST | Press for quick zoom in (+) or out (-). | |||
| 8 | L/R Set | STD (1) | Press L/R + STD (1) keys to set Pan-lilt to the same direction as UR setting. | |
| REV (2) | Press UR + REV (2) keys to set Pan-Tilt to the direction opposite to the UR setting. | |||
| 9 | FOCUS | AUTO | Press to automatically set the focus to the center of the image. | |
| MANUAL | Press to enter manual focus mode. Then press FAR or NEAR. | |||
| FAR | When in MANUAL mode. press to focus on a far object | |||
| NEAR | When in MANUAL mode, press to focus on a near object | |||
| 10 | CAMERA SELECT | Select the camera to configure and control (1 to 4). | ||
| 11 | # Key | Use together with other keys for various functions. | ||
| 12 | IR RC | Press • + # + (F1 to F4) to assign a camera address to the remote. For example, point the remote to a camera. press •+#+Fl. The remote assigns CAMERA SELECT 1 key to this camera. To use the remote to control camera 1 press the CAMERA SELECT 1 key. Press F4 to freeze the image. | ||
| 13 | RESET | Press RESET+ a key number (0 to 9) to delete a preset configuration. Press *+#+RESET to delete all preset configurations. | ||
| 14 | PTZ Control | Control camera paying and tilting using arrow keys (left, right. up and down). | ||
| 15 | MENU | Enter/exit OSD menu. | ||
| 16 | BACKLIGHT | Press to turn backlight compensation on or off. Available when the exposure mode is set to Auto (via the OSD menu). | ||
| 17 | P/T RST | Press to self-check preset Pan/Tilt on camera. | ||
Default Communication Parameters
| RS-232 | |
| Baud Rate: | 9600 |
| Data Bits: | 8 |
| Stop Bits: | 1 |
| Parity: | None |
| Command Format: | ASCII |
| Ethernet | |
| To reset the IP settings to the factory reset values go to: Menu->Setup -> Factory Reset-> press Enter to confirm | |
| IP Address: | 192.168.100.88 |
| Subnet mask: | 255.255.0.0 |
| Default gateway: | 192.168.1.2 |
| Default username: | admin |
| Default password: | admin |
| Full Factory Reset | |
| OSD | Go to: Menu-> RESTORE DEFAULT -> confirm |
| Reset button | Press the RESET button for 5 seconds to reset the machine |
K-Cam4K 4K PTZ Camera

![]() SAFETY WARNING
SAFETY WARNING![]() Disconnect the unit from the power supply before opening and servicing
Disconnect the unit from the power supply before opening and servicing
www.kramerAV.com
[email protected]
For the latest information on our products and a list of Kramer distributors, visit our Web site where updates to these installation instructions may be found.
We welcome your questions, comments, and feedback.


