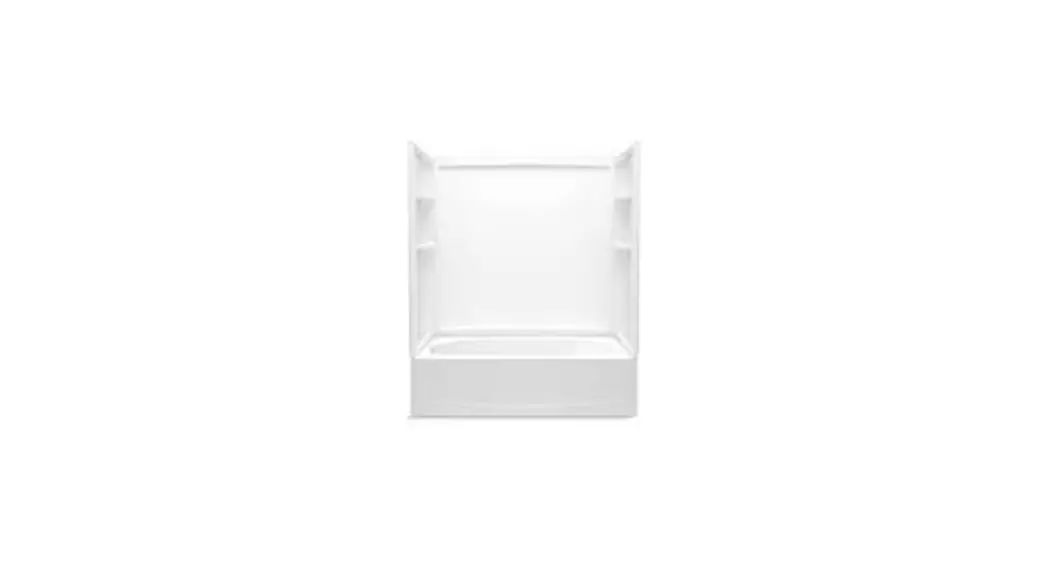
![]() Installation Instructions
Installation Instructions
Watch this installation online; visit the product page at www.sterlingplumbing.com.
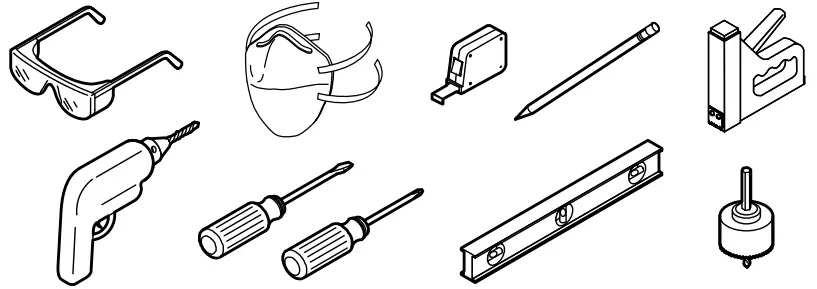
![]() Square
Square![]() Colored 100% Silicone Sealant
Colored 100% Silicone Sealant![]() 1-1/4″ Galvanized or Plated
1-1/4″ Galvanized or Plated
Truss Head Screws
Optional :
- Mortar cement
- Shims
- Furring Strips
- Drop cloth
Record your model number below for future reference:
Observe all local building and plumbing codes.
Install on an adequately supported subfloor.
If the subfloor is not level and access to shim is difficult, install with a 1″ (25 mm) to 2″ (51 mm) bed of mortar cement.
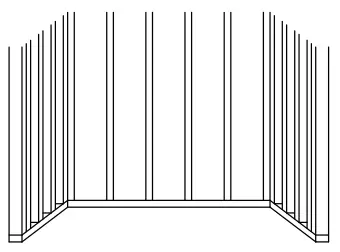
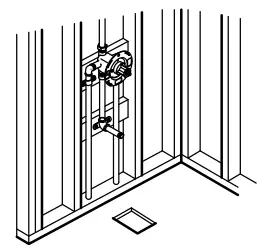
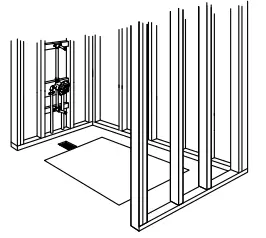
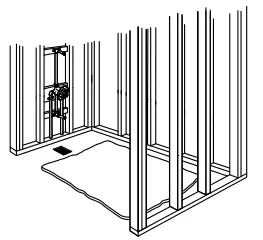
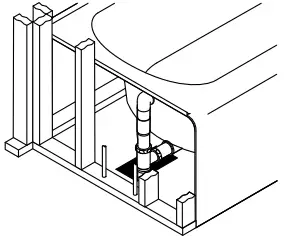
- Construct a plumb stud pocket according to the roughing-in information on the back page.

- Install the rough plumbing.

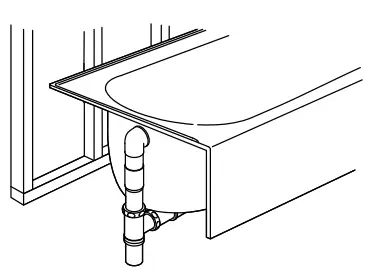
- Install the drain to the bath.

- Staple the felt pad, if provided, to the subfloor so it will contact all the support feet.

- Without a pad, set the basin area in 1″ (25 mm) to 2″ (51 mm) of mortar cement.

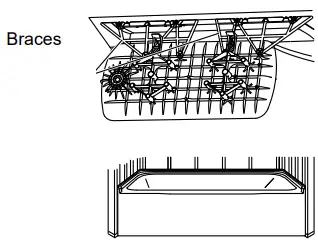
- Attach the apron brace, if provided. Lift and position the bath in the stud pocket.

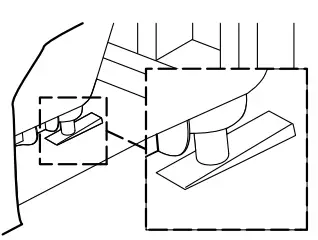
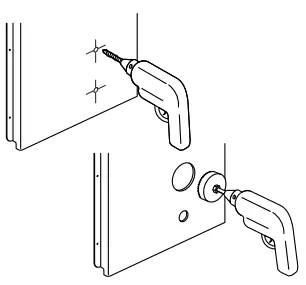
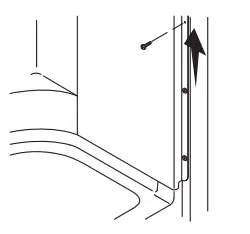
- Attach metal support clips to the flange at the locations shown in the roughing-in information.

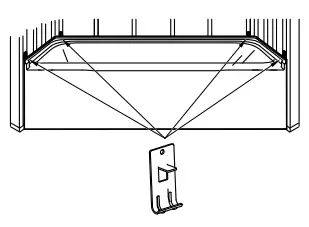
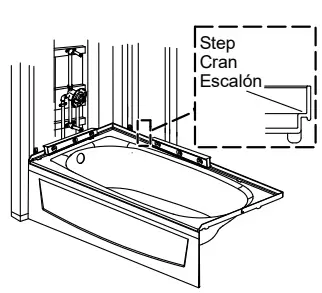
- Level the unit using the step of the flange.

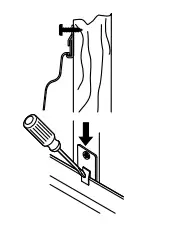
- Secure the metal support clips to the studs. Bend the tabs over the flange.

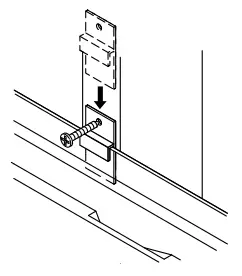
- Install plastic attachment clips at all remaining stud locations.

- With the unit level, shim under the support feet as needed.

- Connect the bath drain to the drain pipe. Position a protective liner in the bath.

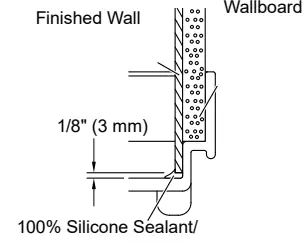
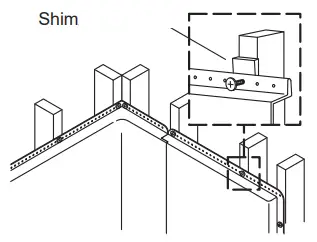
- Custom Walls: Install furring strips, wallboard, and the finished wall as shown.

- STERLING Wall Set: Install the back wall. Insert the tabs into the slots.

- Measure, mark, and drill the faucet holes in the end wall.

- Verify the seal is installed, undamaged, and fully seated.

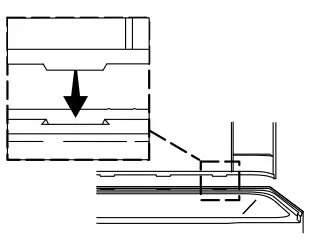
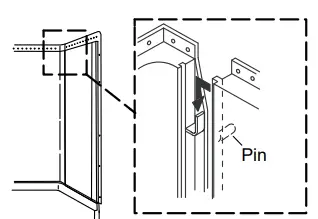
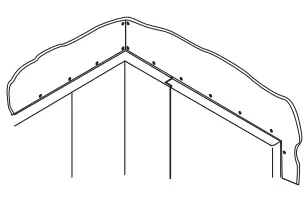
- Install the end walls. Engage the pins in the slots.

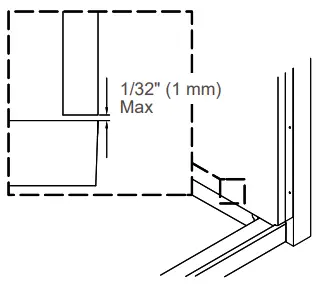
- The front edges should be flush, with no more than a 1/32″ (1 mm) gap.

- Starting at the bottom, install screws through the dimples to secure the flanges to the studs.

- Secure the walls to the studs along the top. Use shims as needed.

- Cover the framing with water-resistant wallboard. Install the finished wall material.

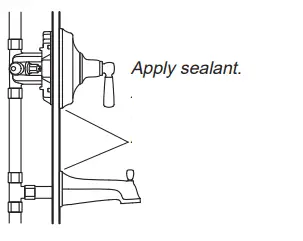
- Install the faucet trim and accessories, and seal where they contact the wall panels.

- After painting, apply 100% silicone sealant where the unit contacts the finished wall.


| A | B | C | D | E | |
| 71340110, | 30-3/8″ | 72-1/2″ | 15-1/4″ | 16-5/8″ | 5/8″ |
| 71340120 | (772 mm) | (1842 mm) | (387 mm) | (422 mm) | (16 mm) |
| 71340112, | 30-3/8″ | 74-3/4″ | 17-1/2″ | 18-7/8″ | 2-15/16″ |
| 71340122 | (772 mm) | (1899 mm) | (445 mm) | (479 mm) | (75 mm) |
| 71341110, | 29-1/8″ | _ | 15-1/4″ | 16-5/8″ | 5/8″ |
| 71341120 | (740 mm) | (387 mm) | (422 mm) | (16 mm) | |
| 71341112, | 29-1/8″ | 17-1/2″ | 18-7/8″ | 2-15/16″ | |
| 71341122 | (740 mm) | – | (445 mm) | (479 mm) | (75 mm) |

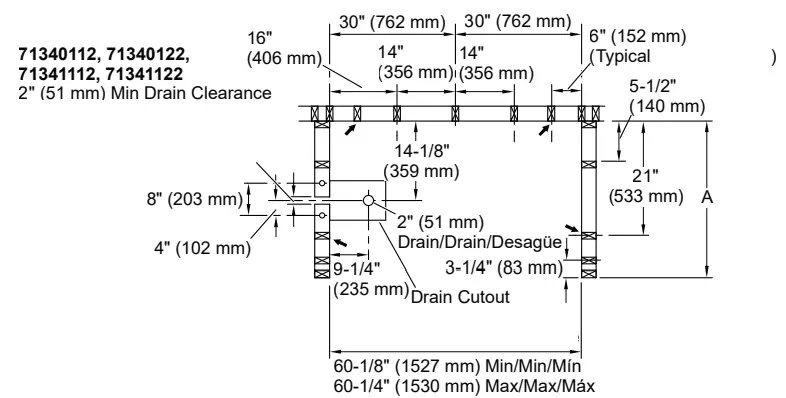
71340112, 71340122,
71341112, 71341122
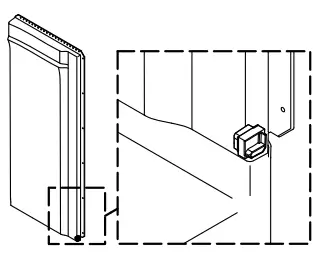
2″ (51 mm) Min Drain Clearance![]() Support Clip Locations (4 total)
Support Clip Locations (4 total)
Need help? Contact the Customer Care Center.
USA/Canada: 1-800-STERLING (1-800-783-7546),
Mexico: 001-877-680-1310
For service parts information, visit
sterlingplumbing.com/parts.
For care and cleaning, visit
sterlingplumbing.com/care-and-cleaning.
Patents: kohlercompany.com/patents
This product is covered under the STERLING® Vikrell® or Acrylic Baths and Shower Bases Ten-Year Limited Warranty, found at sterlingplumbing.com/warranty. For a hardcopy of warranty terms, contact the Customer Care Center.
USA/Canada: 1-800-STERLING (1-800-783-7546)
Mexico: 001-877-680-1310
www.SterlingPlumbing.com
1462504-2-B
© 2022 Kohler Co.
References
 Kohler Co. Portfolio | Innovation and Design | Patents | Kohler | Kohler
 Care & Cleaning Tips for Kitchen & Bathroom | Sterling Plumbing
-
Find Service Parts | Sterling Plumbing
-
View Warranty Info | Sterling Plumbing
-
Kohler Co. Portfolio | Innovation and Design | Patents | Kohler | Kohler
-
Showers, Tubs, Toilets, Sinks & More for Kitchen & Bath | Sterling Plumbing
-
Care & Cleaning Tips for Kitchen & Bathroom | Sterling Plumbing
-
Find Service Parts | Sterling Plumbing
-
View Warranty Info | Sterling Plumbing


