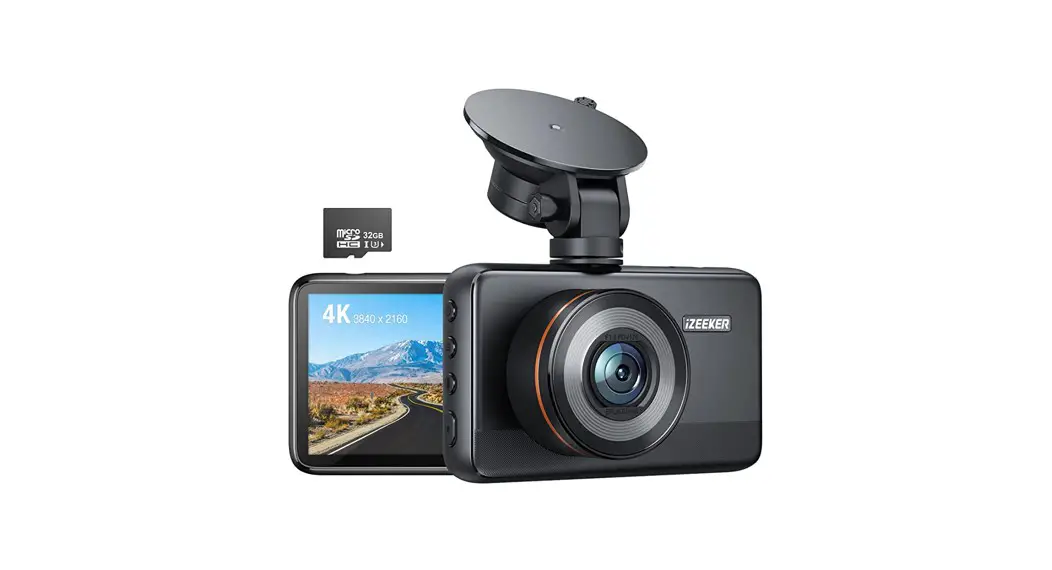
![]() ID600 Full HD Dash Cam for Cars
ID600 Full HD Dash Cam for Cars
User Guide
ID600 Full HD Dash Cam for Cars
Dear Customer,
Thank you for choosing iZEEKER as your dash cam provider. We value the trust our customers place in us and will demonstrate our company’s superior product and service quality through our dash cams themselves and our high-level customer service.
Please note that items purchased from iZEEKER are covered by a one year warranty. Let us know if there is anything we can do to assist.
Please kindly contact us via [email protected] You can also search for “iZEEKER Dash Cam” on YouTube to know more about the dash cam operation.
We look forward to serving you for many years to come.
Warmest regards,
iZEEKER Team
 |  |
| https://www.qrfy.com/TIMakuYjSu | https://www.qrfy.com/WSV5NHieed |

Support Service & Warranty
- Item NOT as described?
- Damaged or defective?
- Missing items?
- Any issues what so ever?
Items purchased from iZEEKER are covered by a one year warranty.
Contact us before returning the item and we will help you solve any issues ASAP.
Email: [email protected]
Facebook: iZEEKER Dash Cam
 https://www.qrfy.com/TIMakuYjSu
Camera Specifications
| Chipset / Sensor | NOVATEK 98529 / SONY IMX415 |
| LCD Screen | 3.0 Inch IPS Touchscreen |
| Lens | 150° Ultra HD Wide Angle |
| Video Resolution | 2160P+1080P+1080P 1600P+1080P+1080P 1440P+1080P+1080P 1080P+1080P+1080P |
| Lens Aperture | F 1.8 |
| GPS | Built-in GPS |
| WiFi | Built-in 2.4G&5.0G |
| Photo / Video Format | JPEG / MP4 |
| Memory Card | TF Card U3 Speed, Max Support 256 GB |
| G-Sensor | Built-in 3-Axis Impact Accelerometer Gravitational Sensor to lock & protect current video. |
| Anti Flicker | 60 Hz, 50 Hz |
| Loop Recording | Support |
| Motion Detection | Support |
| Parking Mode | Support |
| Mic / Speaker | Built-in Micro Phone & Speaker |
| Type-C USB Function | 1. Mass Storage, 2. PC camera ,3. Charging mode |
| Auto Power ON/OFF | Support |
| Power Interface | 5V, 2.5A |
| Power Reserve | Supercapacitor |
| Temperature Guideline | Operating Temperature 14°F (-10°C) ~ 140°F(60°C), |
Package Contents
Before starting, please check that all the following items have been included in the box. If anything is missing, please contact the seller.
Primary camera
Secondary camera*2
GPS bracket
3.5m car charger
2 in 1 Type-C cable
0.4m/2m/6m USB cable for secondary camera
Type-C USB cable
Installation tool
Electrostatic film *3
Camera Overview
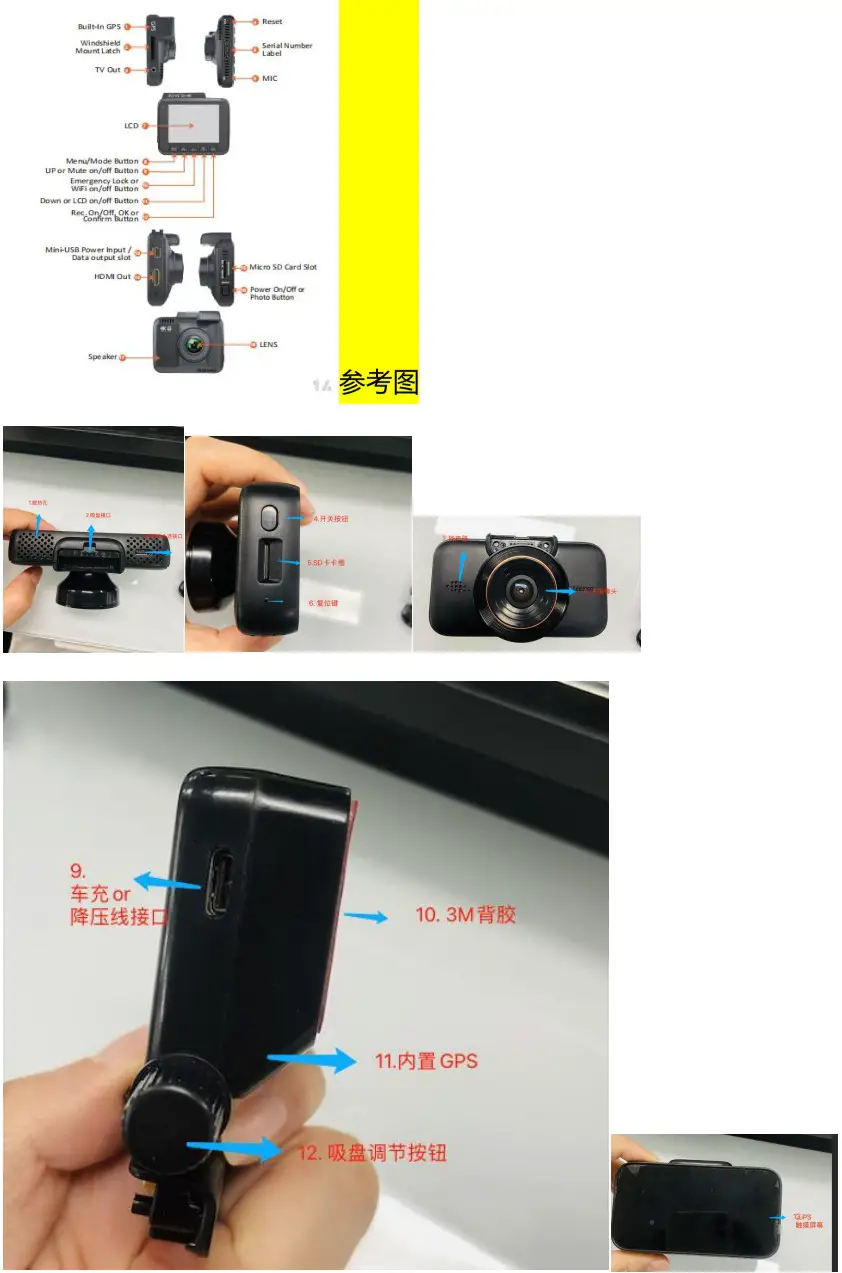
- Cooling holes
- GPS bracket slot
- Type-C port for secondary cameras
- Power On/Off button
- Memory card slot
- Rese
- Speaker
- Primary camera lens
- Type-C port for car charger or hardwire kit(not included)
- 3M adhesive mount
- Built-in GPS
- Tightness adjustment screw
- IPS touch screen
Preparation before Use
The camera comes with the default settings which allows you to start using your camera right out of the box without changing any settings.
Make sure to format the memory card before first time use.
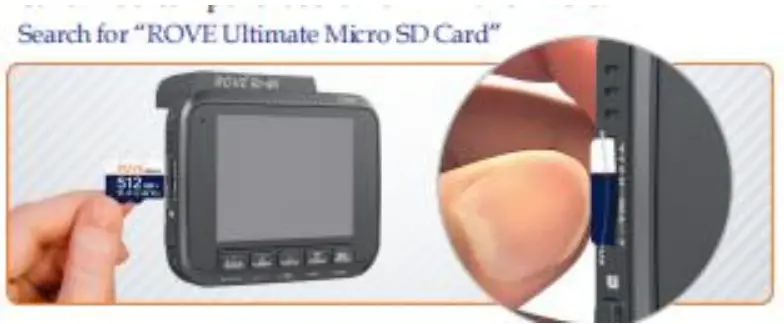
INSERTING OR REMOVING MEMORY CARD
For reliable operation, please prepare only brand new, U3 speed microSD card. Max support up to 256GB.
Insert the microSD card into the memory card slot located on the left side of the screen. Be aware of the orientation shown in the picture below.
When the memory card is successfully inserted, you will hear a clicking’ sound. To remove the microSD card, gently push its top edge inward until it clicks. It will pop up and can be removed.
TIPS:
If you experience camera FREEZING or LAGGING or STOPS Recording after few seconds, then it is the issue of the MEMORY CARD.
(Card speed is too slow for 4K videos).
Absolutely do NOT buy any generic cheap memory cards. For your high-end dash cam, please invest in a good reliable memory card. Do
NOT Purchase it from third party seller on eBay or any online place.
Otherwise they may be a counterfeit cards and will NOT work.
FORMATTING MEMORY CARD
iZEEKER iD600 dash cam uses a super capacitor. Unlike batteries, it is more resistant to heat, and it extends the overall product life span of the camera.
The super capacitor allows the camera to keep on for 2-3 seconds after a power failure to save the last recorded video. This also means that you need to KEEP DASH CAM CHARGED when formatting.
Format memory card on camera:
- Click system settings
- Find the format option
- Click “OK”
If the dash cam still prompts you to format the memory card, try doing a full format on the PC:
- Please connect the dash cam containing the card to your computer with the included USB cable, then select “Mass Storage” on the camera.
- Find the memory card on the computer and right click to format it (For OS system the operation is different, if you don’t know how to do it, please kindly search the operation video online or contact us)
- Please format it to the FAT32 file system and avoid to choose “quick format”
Product Installation
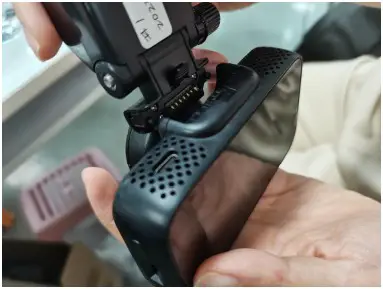
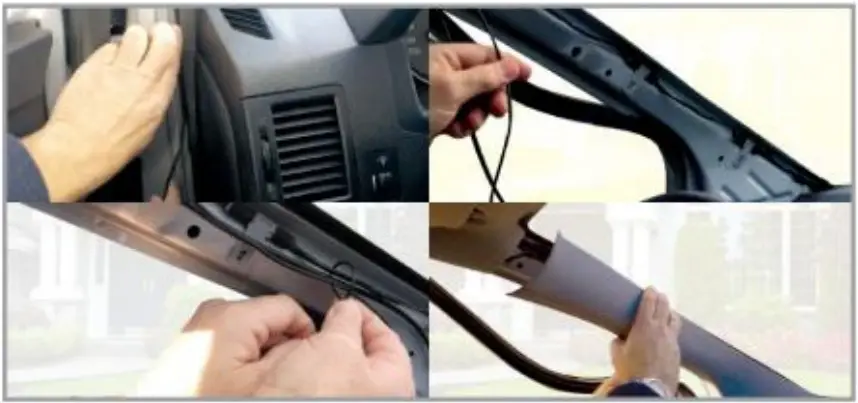
Install the GPS bracket into the camera notch. Please make sure that the two are clamped tightly to prevent it from falling off during driving.
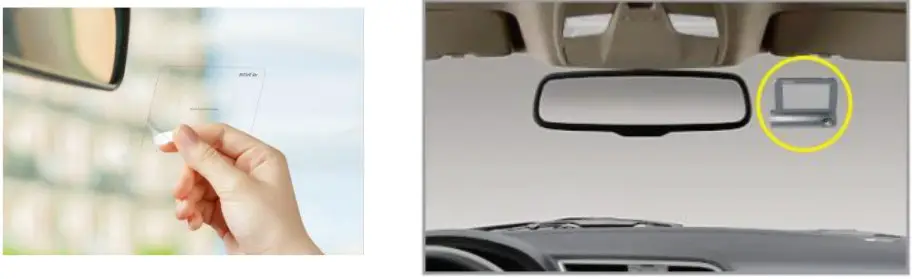
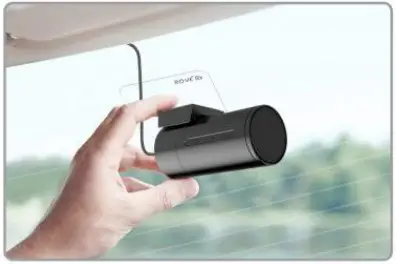
Clean the windshield and apply the electrostatic film in a suitable place.
Remove the protective film from the GPS bracket and place it on the electrostatic film. We recommend placing the camera behind the rear-view mirror to prevent obstructing your view while driving.
TIPS:
We strongly suggest that you use the included electrostatic film before placing the sticky mount on your car’s windshield.
If you ever need to remove the 3M Mount, then you can simply peel off the electrostatic film off the windshield for an easy and clean removal.
Connect the car charger to the camera’s USB portside of the suction cup and cigarette lighter. Tuck the cable neatly across the top of the windshield and down the side to keep the cable out of eyesight and tidy.
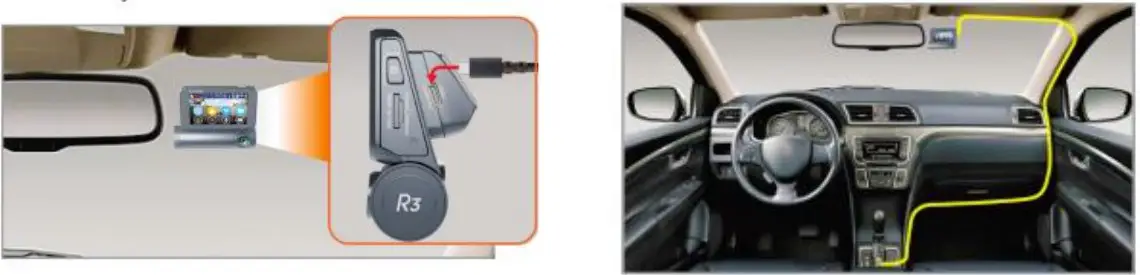
Plug the male end of the 2-in-1 type-C cable into the type-C connector of the camera, and the two female ends into the USB cable of the secondary camera respectively (0.4m for inside camera, 6m for rear camera, 2m can be DIY in the car at will)

Before attaching the two cameras, thoroughly clean the windshield and apply the electrostatic film. Attach the secondary camera to the front and rear windshield (or anywhere you want to DIY) on top of the static film, and adjust the viewpoint.
Check the complete wiring at a glance diagram below to ensure everything is connected properly.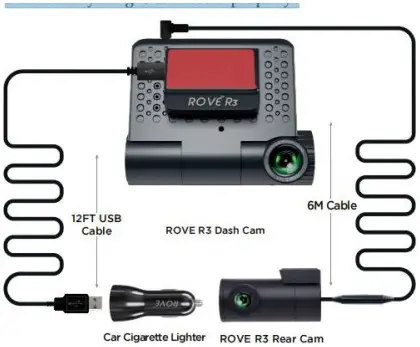
Tuck the cable neatly across the top of the windshield and down the side to keep the cable out of eyesight and tidy.
Operations
Power On
This dash cam is designed to turn ON and start recording automatically when it receives power. i.e., when the car engine is started.
Note: When the camera is in use, it is both forbidden and dangerous to remove and insert the memory card, 2 in 1 Type-C cable or GPS bracket ; these actions may cause the recorded video files or the camera to be damaged.
Power Off
- When the car’s engine is turned off, the device will automatically turn off after a few seconds.
- You can manually turn it off by pressing and holding the power button for at Least 3 seconds. The memory card should not be ejected immediately to prevent damaging to the last recorded file.
- To switch the device back on, please press and hold the power button.
FCC Statement
This equipment has been tested and found to comply with the limits for a Class B digital device, pursuant to part 15 of the FCC rules. These limits are designed to provide reasonable protection against harmful interference in a residential installation. This equipment generates, uses and can radiate radio frequency energy and, if not installed and used in accordance with the instructions, may cause harmful interference to radio communications.
However, there is no guarantee that interference will not occur in a particular installation. If this equipment does cause harmful interference to radio or television reception, which can be determined by turning the equipment off and on, the user is encouraged to try to correct the interference by one or more of the following measures:
- Reorient or relocate the receiving antenna.
- Increase the separation between the equipment and receiver.
- Connect the equipment into an outlet on a circuit different from that to which the receiver is connected.
- Consult the dealer or an experienced radio/TV technician for help.
To assure continued compliance, any changes or modifications not expressly approved by the party.
Responsible for compliance could void the user’s authority to operate this equipment. (Example- use only shielded interface cables when connecting to computer or peripheral devices).
This equipment complies with Part 15 of the FCC Rules. Operation is subject to the following two conditions:
- This device may not cause harmful interference, and
- This device must accept any interference received, including interference that may cause undesired operation.
FCC Radiation Exposure Statement:
The equipment complies with FCC Radiation exposure limits set forth for uncontrolled environment. This equipment should be installed and operated with minimum distance 20cm between the radiator and your body.![]()


