![]()
User Manual
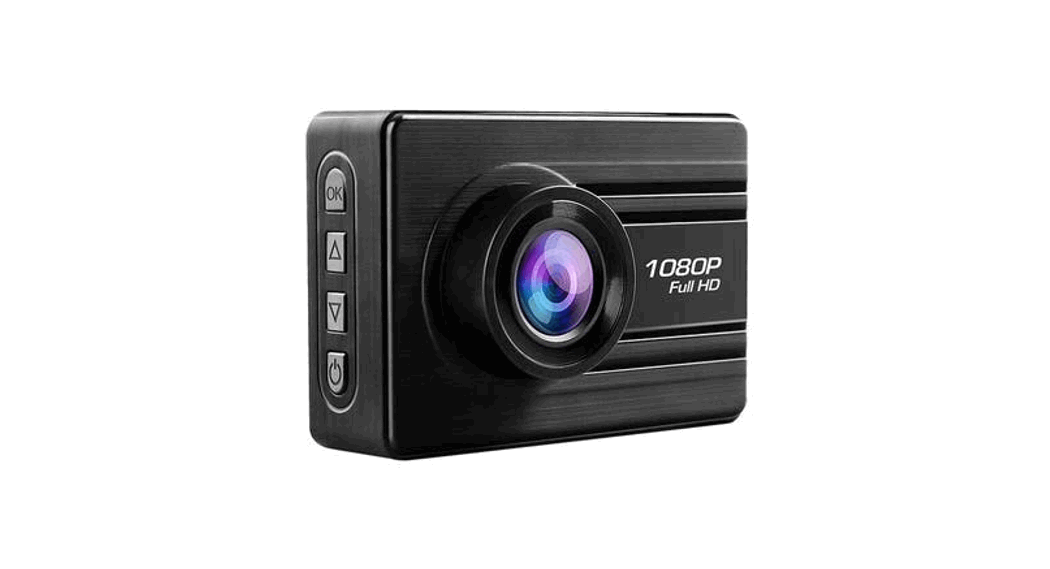
Product Introduction
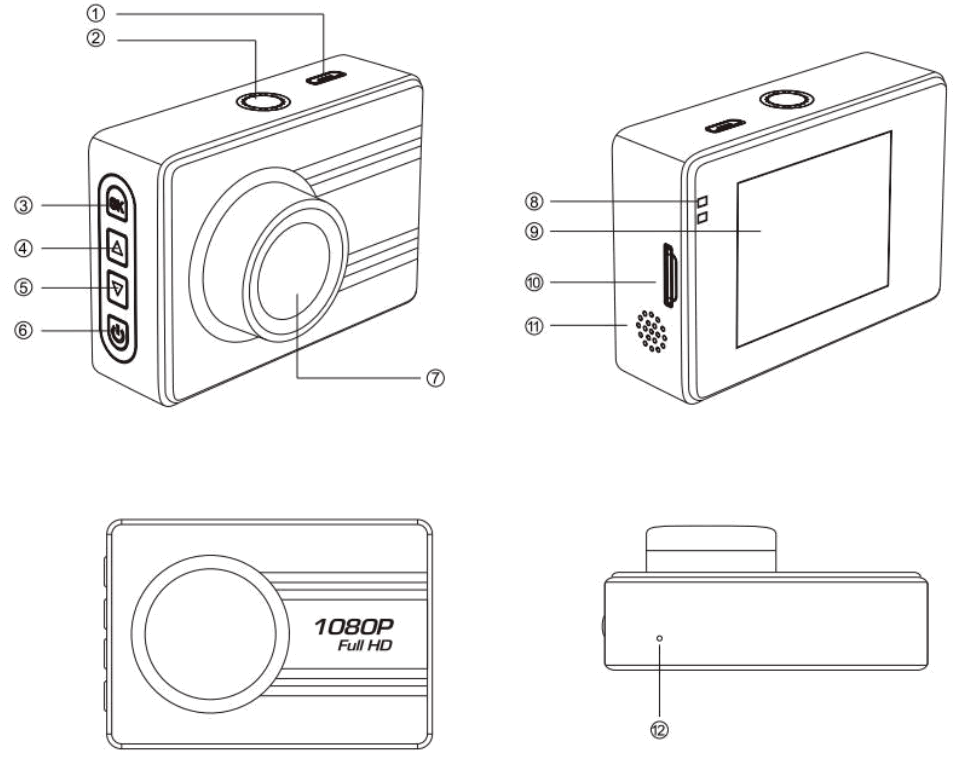
| 1)USB 2)Bracket Mounting Hole 3)OK 4)Up Button | 5)Down Button 6)Power 7)Lens 8)LED | 9)Display 10)SD Card Slot 11)Microphone 12)Reset |
Description of Function Keys:
- 1)USB
USB data interface, (1) Storage; (2) PC Camera - 2) Bracket Mounting Hole
Connect the car bracket mounting screw holes; - 3) OK
Video and take pictures to confirm button, the camera mode, short press this key to start recording again press stop recording; camera mode Short Press to take pictures; - 4) UP Button
Used for upward movement in menu - 5) Down Button
Used for downward movement in menu - 6) Power
You can turn up the camcorder by long-pressing the button. You’ll turn off the camcorder in the same way. - 7) Lens
Used to capture videos and photographs - 8) LED
Indicative LED - 9) Display
2.0inch camera display screen - 10) Slot SD Card Slot
Used to receive the micro SD when inserted - 11) Microphone
Used to record sound around the camcorder - 12) Reset
Restarts the camcorder if necessary
Special Function Description:
- G-sensor
The setting of the G-Sensor intensity. G-Sensor will start-up emergency recording in response to shocks. - Park mode
With the function activated the camcorder shall start-up recording whenever sensing shocks.it is necessary to deactivate the camcorder by means of the automatic turn-off function upon power-off condition. - Screen Saver
The setting of the automatic screen deactivation.
REC/photo operation specifications
- Power on/off
Press the power button, the blue indicator light lights up at boot time
Again press the power button is turned off, the blue light goes out
Note: The recording instrument will be prompted to low battery voltage automatic shutdown when battery is low - REC mode
Short press key, switch to video mode, the upper left corner of the screen displays a video icon;
Short press button to start the camera, the video icon will appear flashing red dot, indicating the video work
 - Photo mode
Short press key, switch to camera mode, the upper-left corner of the screen displays the camera icon;
Short press key camera, take pictures of the screen flashes once said camera to complete. - Video/photo playback
Short press key, switch to playback mode, the upper-left corner of the screen to display the playback icon
Short press key up to select the file;
Short press key down to select the file;
Short press button to play the selected video files; - Menu setting
Long press key to enter the video settings state, then the “video icon” field is a yellow background;
Again long press key, switch to setting mode, the “Settings icon” field a yellow background, short press key, the key to exit the setting.
Bring up the settings, short press key, you can set the subkey up and down select switch, short press key to enter set subkey. - Short press to quit menu setting.
- Time setting
Long press key to enter the set state, though button to select the date and time options, short press key enter, key in Year/Month/Day/Minutes/Seconds between each other to switch though adjust the required value, press confirm the modification
USB mode
Connect DVR with computer by USB Cable, car DVR will automatically show USB menu, there are 2 modes available :
Storage: In this mode, we can access video files and photo files
PC Camera: In this mode, the model can be used as pc cam
Battery instruction
- Battery indication image:

- There are three methods to charge, the red indicator lights up when charging, the entire charging time is about 180 minutes, and the red indicator light is automatically off when charging is completed.
1. Use a power adapter to charge
2. Use PC-USB to charge
3. Use vehicle power to charge

Remark: when appearing crash because of improper operation, use the pin to hit the “reset” hole to restart.
Products specifications
| Features | 2.0inch Video Camera |
| G-sensor | Off, 2G, 4G, 8G |
| LCD screen size | 2.0inch Screen |
| Resolution | FHD 1920*1080, HD 1280*720, VGA 640*480 |
| Lens | 120 degree |
| Motion Detection | Off, On |
| Loop Recording | Off,1 Minute, 5 Minutes, 8 Minutes |
| Camera | 12M, 10M, 8M, 5M, 3M, 2MHD, 1.3M, VGA |
| Date Stamp | Off, On |
| Quality | Fine, Normal, Economy |
| Sharpness | High, Normal, Soft |
| White Balance | Auto, Daylight, Cloudy, Tungsten, Fluorescent |
| Anti-Shaking | Off, On |
| Auto power off | Support auto ignition boot, turn off shutdown |
| Quick Review | Off,2 Seconds,5 Seconds |
| Date/Time | Support (YY/MM/DD) |
| Photo format | JPEG |
| Memory card | TF (max 32GB) |
| MIC | Support |
| Current frequency | 50HZ/60HZ |
| USB function | 1: Storage 2: PC Cam |
| Power interface | 5V 1A |
| Battery | Built-in 400mAh |
Troubleshooting:
For problems in the normal operating situation, please try these methods below:
- Can’t take photos and recording
Check if the TF card has enough space or locked - Automatically stop when recording
Use the compatible high-speed TF card with SDHC because of big HD video data, the high-speed TF card have identified of C4 and C6 - Appear “files error” when replaying photo or video
Uncompleted files because of TF card storage error, please use formatting function to format your TF card - Unclear video
Check if there is any dirt or fingerprint, and use lens paper to clean the camera lens. - Color is not perfect on cloudy days and outdoor light
Set the “white balance” function to automatic - Cross stripe interference in the image
Because of the wrong “light frequency”, please set it to 50Hz or 60Hz according to the local power supply frequency - Crash
Restart by pressing shortly on” RESET” hole after crash


