![]() 800 935 4002 Side Boxes
800 935 4002 Side Boxes
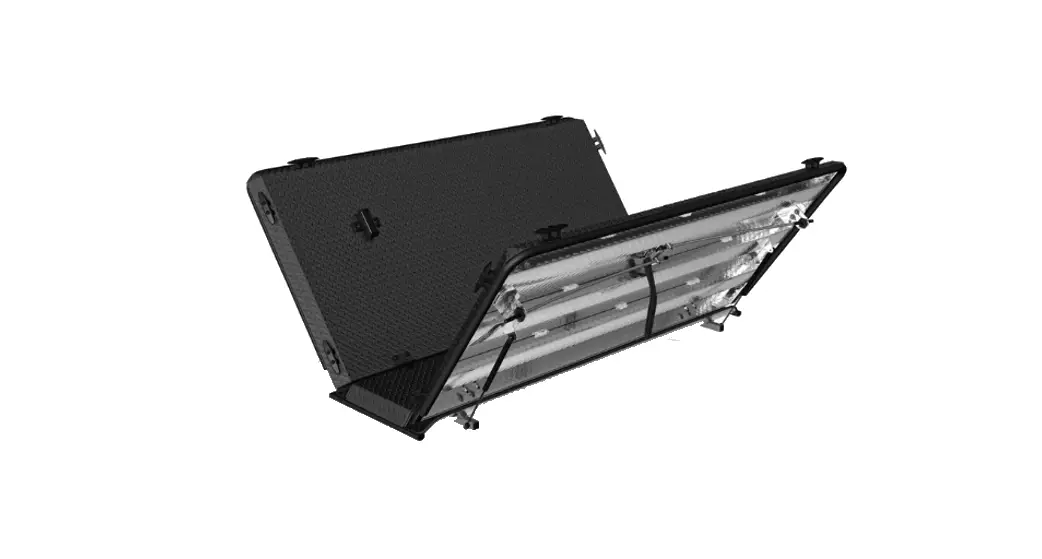
Installation Guide
800 935 4002 Side Boxes
Normal install time | Keep an eye out for these icons: | ! IMPORTANT! Important installation information | Important installation information |
PARTS INCLUDED

TOOLS REQUIRED

PRE-INSTALLATION NOTES:
You must install your DiamondBack cover prior to installing the Side Boxes. Refer to the DiamondBack HD/SE or 270 Installation Guide for details. Use of Side Boxes with the DiamondBack ToolBar may require trimming of the ToolBar.
MOUNT THE FIRST BOX
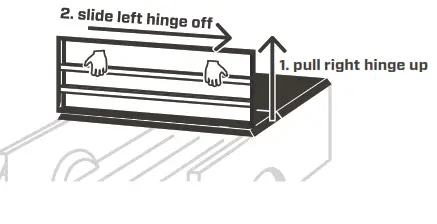
- Remove both access panels of the cover by detaching their gas springs, tilting the panels to 90 degrees, and sliding them oFF their hinges.

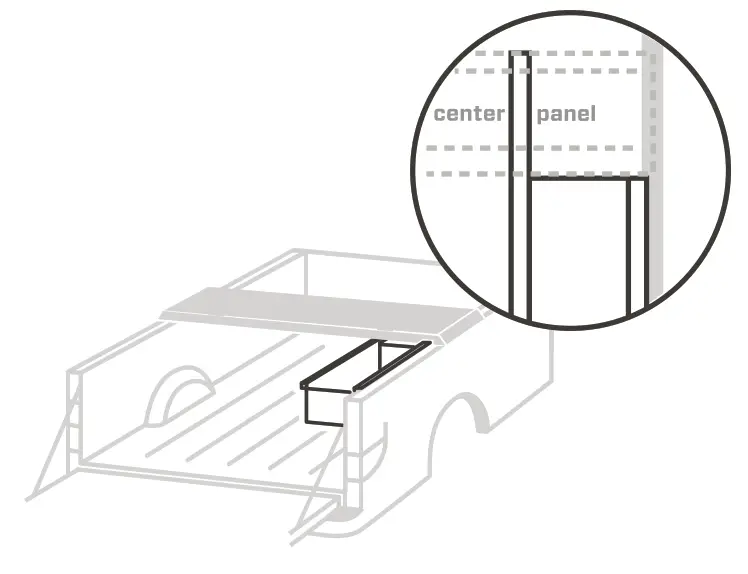
- slide left hinge off1. pull the right hinge up Set one Side Box under the cover so that:
a. its square tube arm is underneath the center panel,
b. its support flange is on the truck bed rail, and
c. its rear edge is tight against the center-panel gutter.
- Clamp the square tube arm in place.
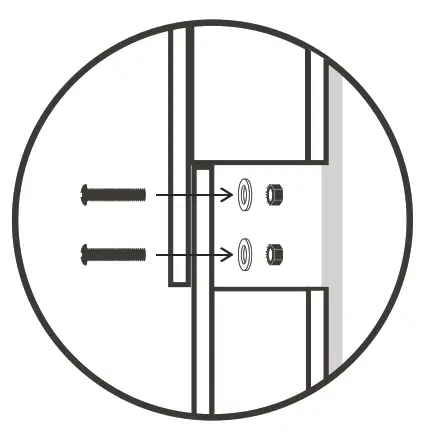
- Drill down through the center-panel gutter closest to the side box and through the square tube arm using a 5/16″ bit.
 Locate this hole as far toward the side box as possible.
- SIDE BO Drop a bolt through a stainless washer, through a foam washer, and into the new hole.
- Put a stainless washer and lock nut onto the bolt end. Tighten the lock nut with a 1/2″ socket and 3/16″ hex key.
! Do not crush the square tube arm.

MOUNT THE SECOND BOX
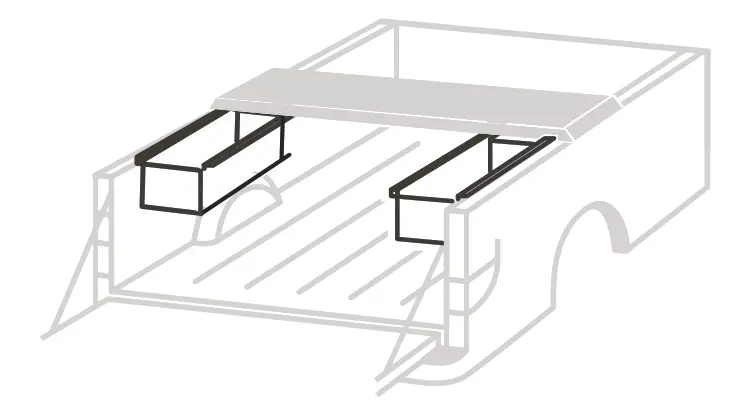
- SIDE BOX If you plan to mount the second box on the opposite side of the truck, finish installing the first box by repeating steps 4–6 at the far end of its square tube arm, through the other center-panel gutter.
 If you plan to mount the second box in line with the first, skip to steps 9 and.
 - To mount the second box on the opposite side of the truck, repeat steps 2–7, then skip to step 13.

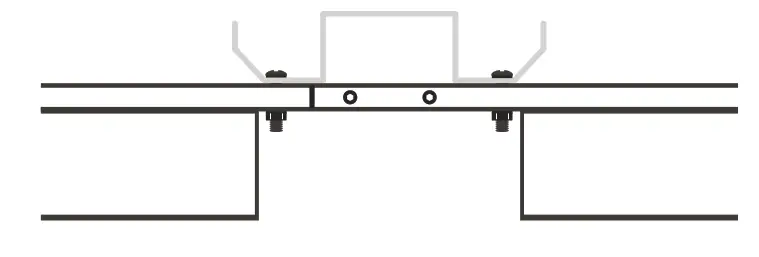
- To mount the second box in line with the first, repeat steps 2–6. The boxes’ square tube arms should pass by and align with each other under the center panel. (One box is slightly narrower than the other.)
- Drill two holes that travel through both arms using a 5/16″ bit.

- Insert a bolt through each new hole.
! Point the bolt ends toward the bed rails.
- Put a plain washer and lock nut onto each bolt. Tighten each lock nut with a 1/2″ socket and 3/16″ hex key.

- Reattach the access panels of the cover by tilting them to 90 degrees, fully mating their hinges, and reattaching their gas springs.


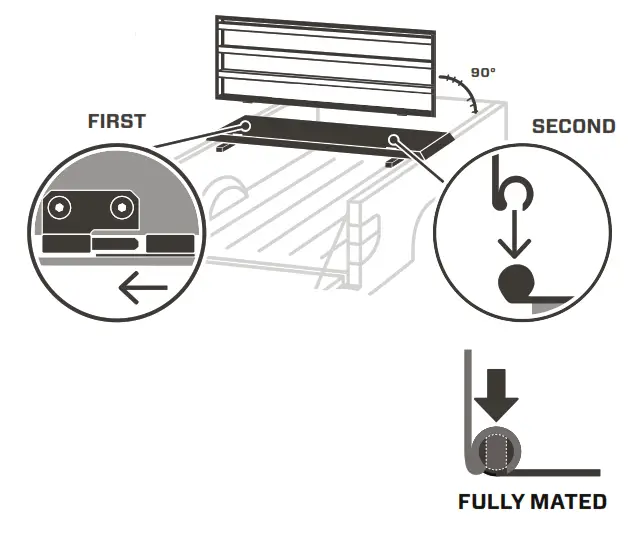
! To avoid hinge damage, make sure to fully mate the hinges before bringing the cab panel back into its closed position. To avoid hinge damage, make sure to fully mate the images before bringing the cab panel back into its closed position.
! If you have installed a Side Box under the driver’s side of the cab panel, remember to keep the cargo in the box clear of safety catch to avoid interference.
![]() DiamondBackCovers.com
DiamondBackCovers.com
800 935 4002


