![]()
’15-up Colorado & Canyon
with 61.7″ Bed
CVR-3
INSTALLATION GUIDE
CVR-3 15-Up Colorado-Canyon Short Box
![]() 45 minutes
45 minutes
Normal install time
Keep an eye out for these icons:![]() IMPORTANT!
IMPORTANT!
Important installation information![]() Helpful Hints
Helpful Hints
Tips to assist installation
PARTS INCLUDED:

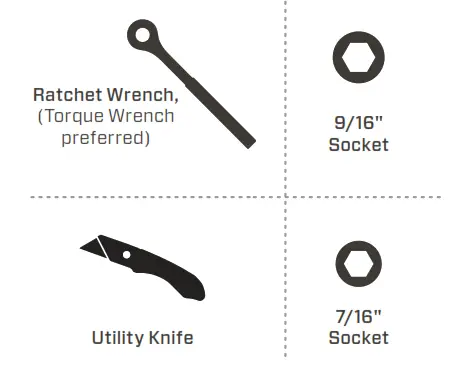
TOOLS REQUIRED:
PRE-INSTALLATION NOTES
(REVIEW ALL OTHER INCLUDED INSTALLATION GUIDES BEFORE BEGINNING)
If you’re installing a rear window protection accessory, mount it prior to mounting the cover. Some models require bulkhead preparation first. Please refer to the instructions in the bulkhead prep kit prior to mounting the cover. If your cover includes shims, affix the included bed rail shims first and reference their included instructions.
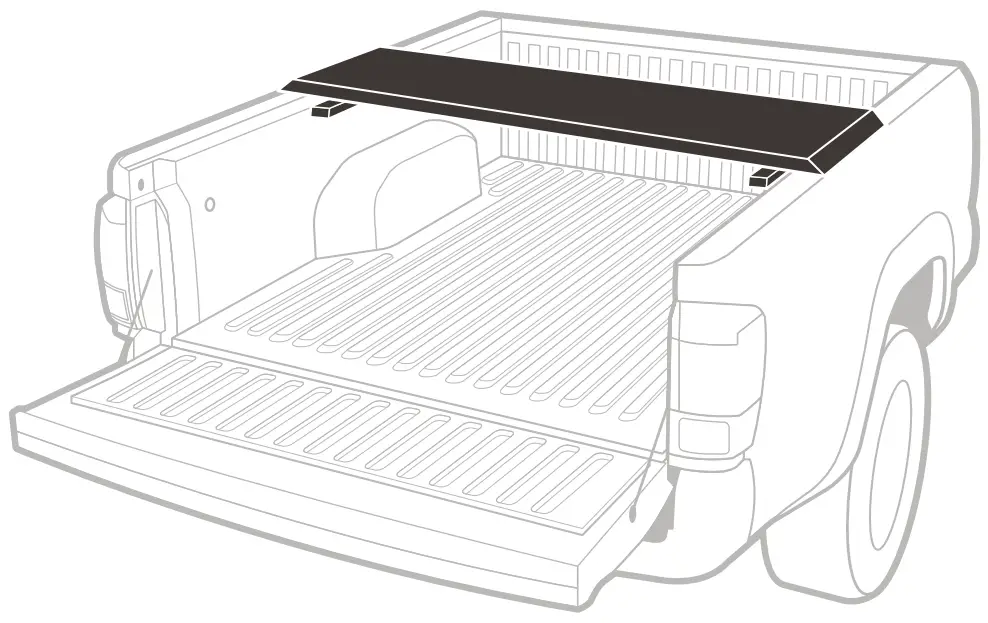
MOUNT THE PANELS
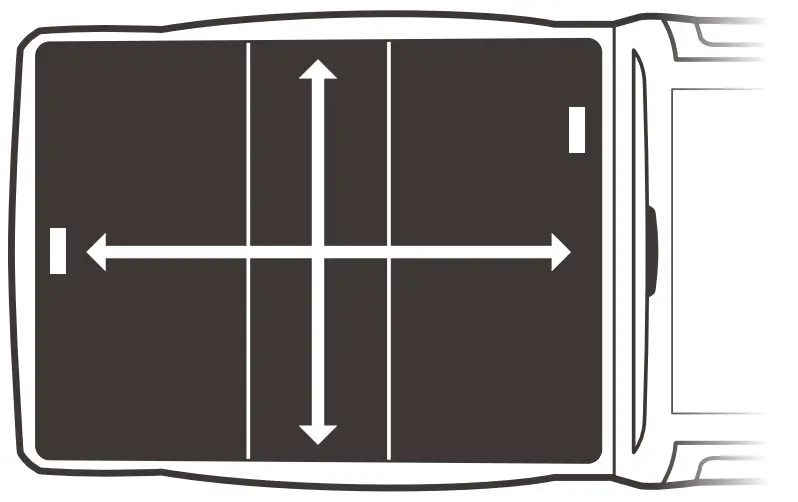
- Place the center panel across the bed, cheated toward the tailgate.
Each panel is tapered front to back. Make sure the arrow on the underside of the panel is pointed toward the tailgate.
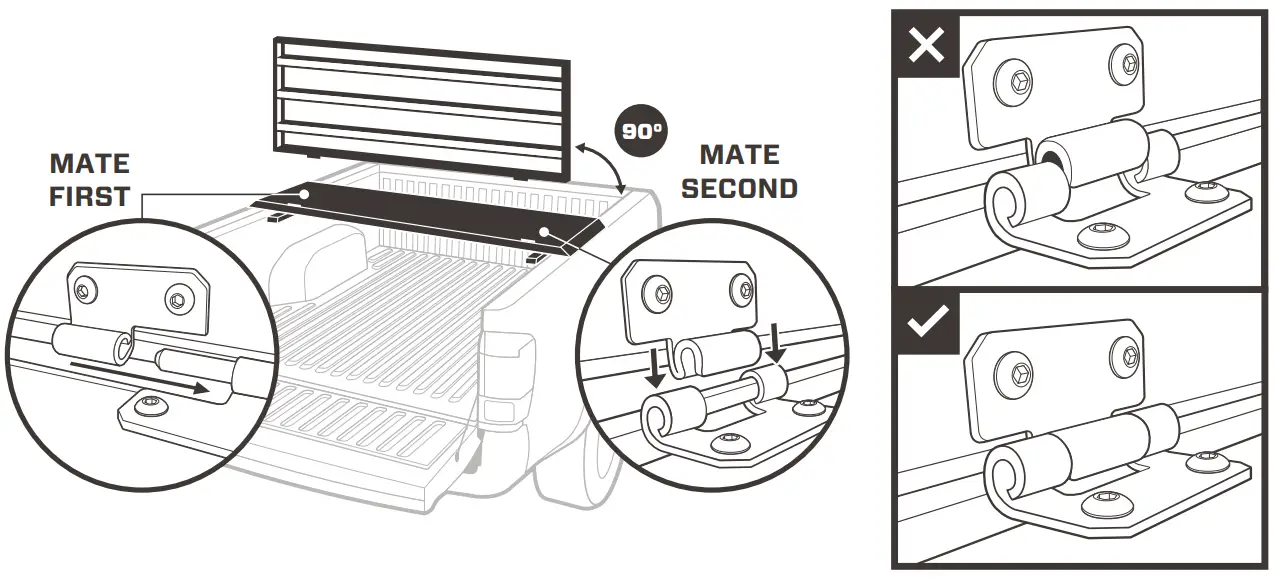
- Attach the tail panel by holding it at a 90° angle from the bed rails and mate the driver’s side hinge first, followed by the passenger side’s c-shaped hinge.

 CAUTION! Be sure all hinges are fully mated before lowering panels.
 - In the same way, attach the cab panel but start by mating the passenger side first. Make sure the safety catch has been untaped and then lower panel into position.
- Position the cover front to back so that the front of the cab panel lines up with the outside edge of the center of the bulkhead. Center the cover side-to-side on the truck.

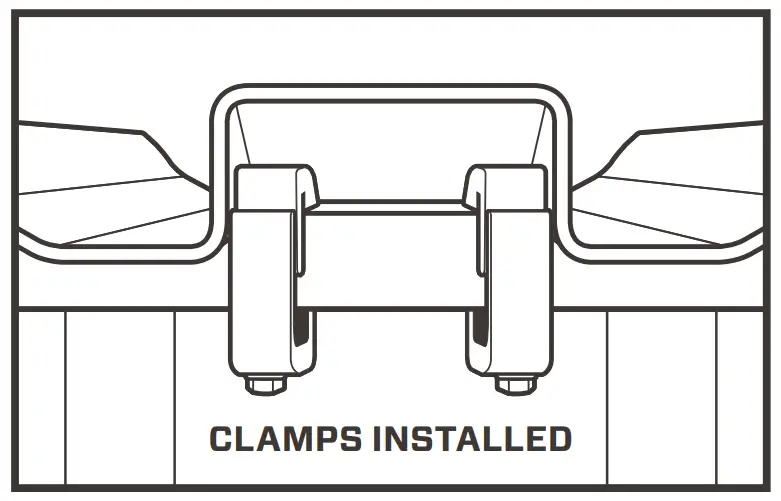
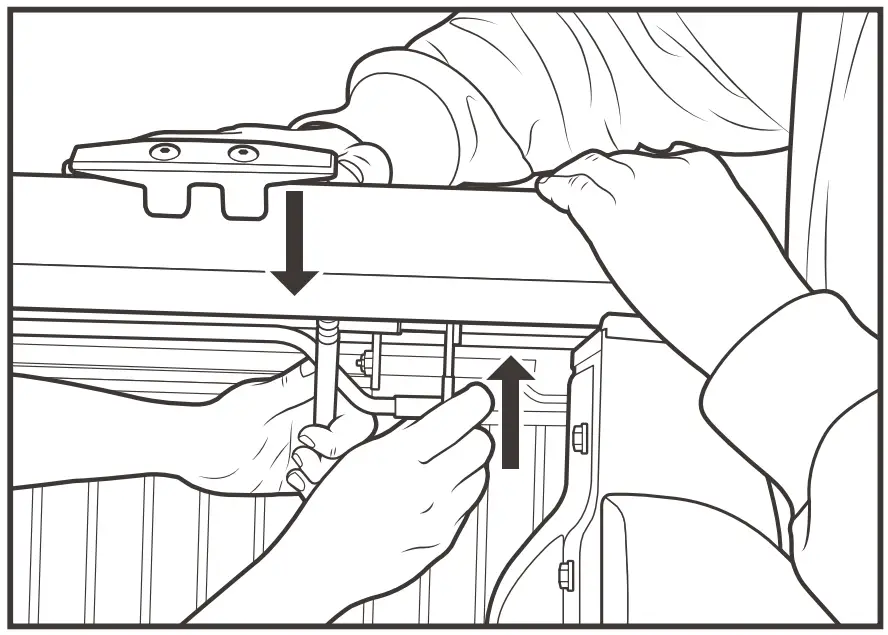
- Position the cap clamps as far apart as possible under the center panel. Attach the center panel by uniformly tightening a cap clamp using a 9/16″ socket to between 5-6 ft-lbs. While tightening clamps, be aware of possible bed rail cap deformation. Overtightening clamps will damage bed rail caps and cause leaking. Retighten after a week of use. Check them every time you haul on top.
 ADJUST THE LOCK RODS
 - Unbolt and move one of the bolts of the lock-rod guide brackets to the second, unoccupied slot using a 7/16” socket. Repeat this on each of the cover’s four brackets.

- Press the plastic bushings until they snap into place in each of the factory holes in the bed walls under the panels.
 There may be plastic plugs in the factory holes. If so, remove them.
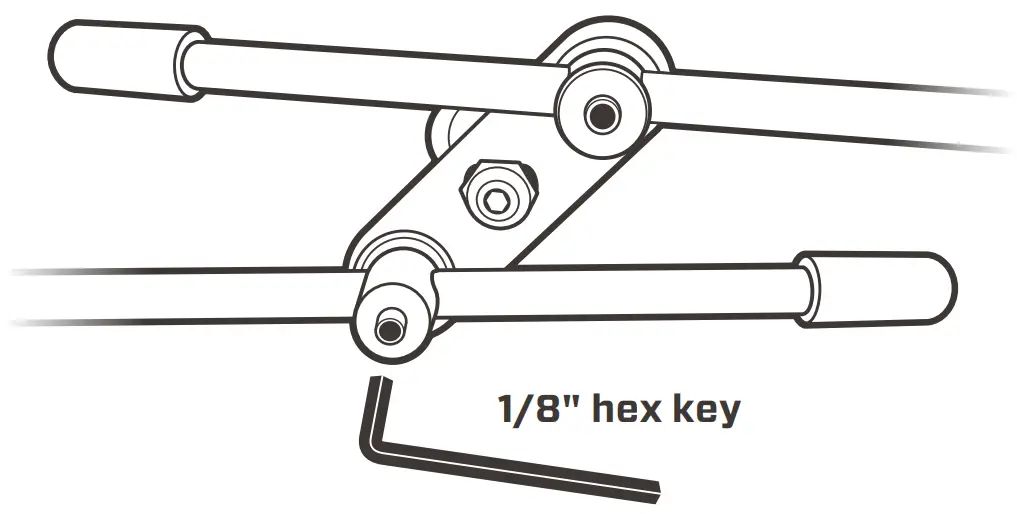
- Loosen set screws for the tail and cab panel lock rods with the provided hex key and retighten each lock rod after ensuring three things…
 CORRECT ORIENTATION
 HANDLE OPEN
  HANDLE CLOSED
The Z bend orientation is always maintained With the lock handle in the open position, adjust the length of the lock rods so that their tips stop about 1/4″ short of the factory holes. With the handle in the closed position, ensure the lock rods pass through the plastic bushing. - After properly aligning the lock rods in the closed position, it is time to tighten all brackets using a 7/16″ socket. To ensure a tight seal, it is crucial to simultaneously push up on the bracket AND apply downward pressure on the cover. Repeat for all bracket locations.
 The panels may be tough to open and close at first. Leave the panels closed as much as possible to allow the weatherstrip to break in. After a few days, you’ll find things working smoothly. The cab panel has a safety spring lock handle ensuring you engage the lock rods when closing the panel. This helps prevent accidental opening of the panel while driving. If you are installing a Cross Bin, do so now. Refer to the Cross Bin Installation Guide for details. If the lock rods are still diffcult to operate after the break-in period, rub a small amount of petroleum jelly on the top of their rubber end caps.
ATTACH THE GAS SPRINGS & SAFETY CATCH
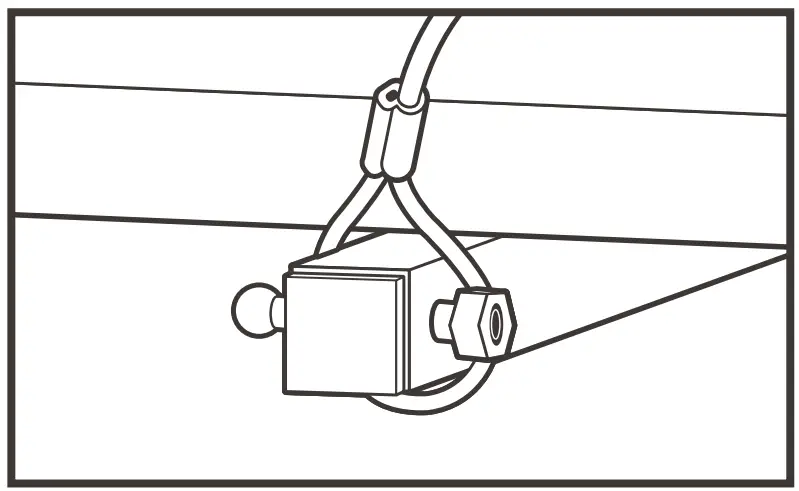
- Open the cab panel. Have a 2nd person support it in the open position. Loop the end of the cable tethers around the ball stud arms, making sure to go beyond the ball stud and nut.

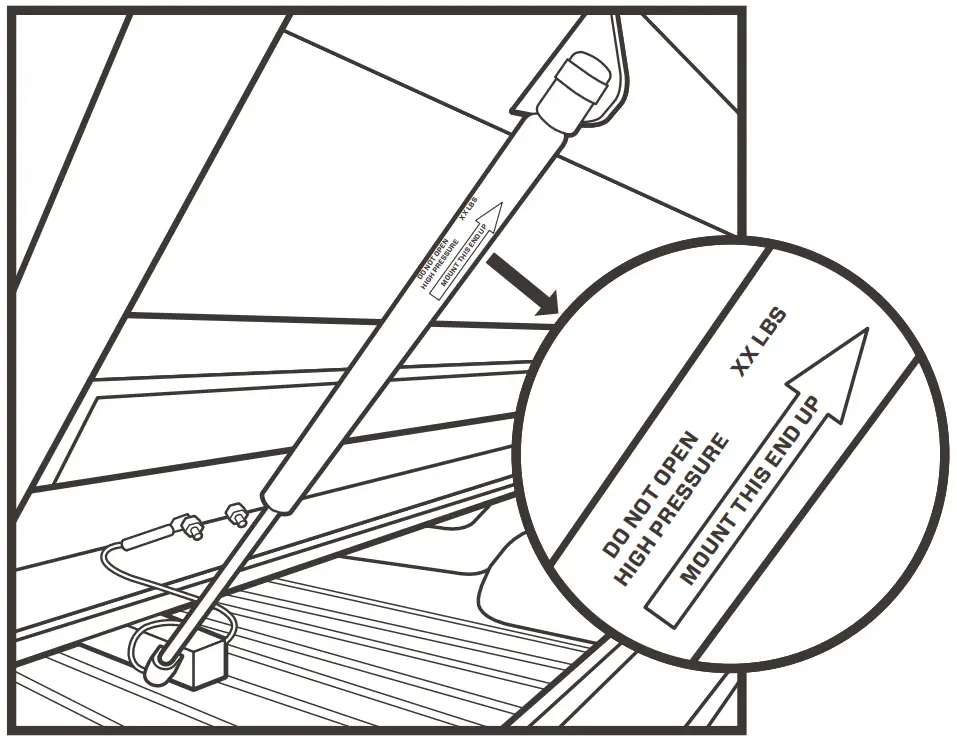
- Attach 2 gas springs to the cab panel. Make sure the barrel end is up. If you install your gas springs upside down, they’ll fail.
 If 2 of your gas springs have heavier poundage printed on them, use them here.
 - Attach the safety catch by pulling down on the panel and pushing the keyhole at the bottom of the safety catch around the nut, making sure to engage the spring clip.
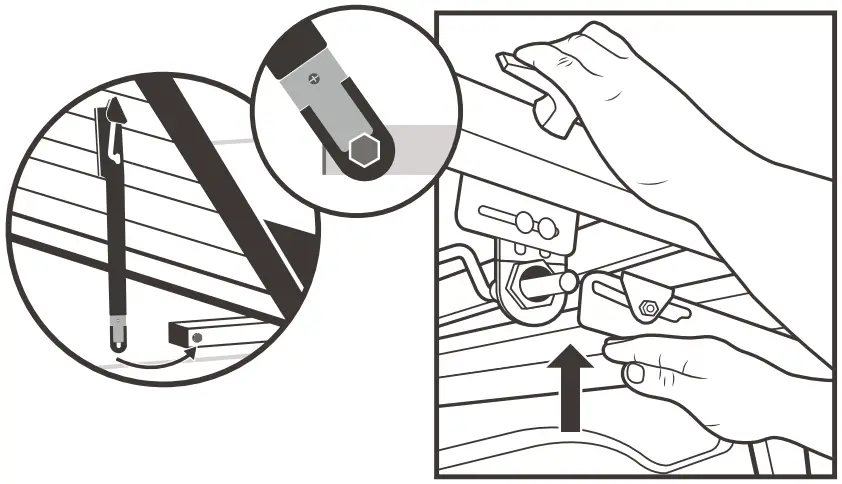
 With the safety catch in place, your cab panel will only open partially. To fully open the panel, pull down on panel while using your other hand to push up on the flat part of the catch until it disengages.
 - Attach the 2 remaining gas springs on the tail panel, again making sure the barrel end is up.
- Leave the cover closed and locked for 24 hours to allow the pressure-sensitive weatherstrip adhesive to fully cure.
 ADJUST THE LOCK RODS
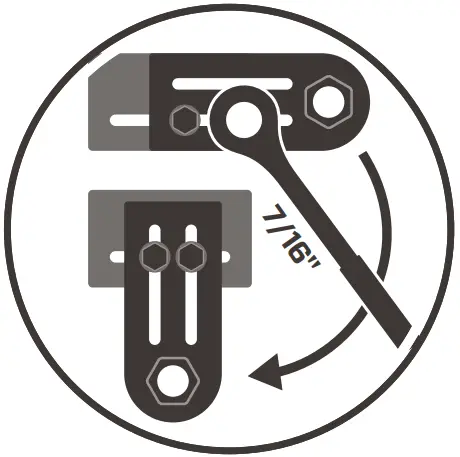

 CORRECT ORIENTATION
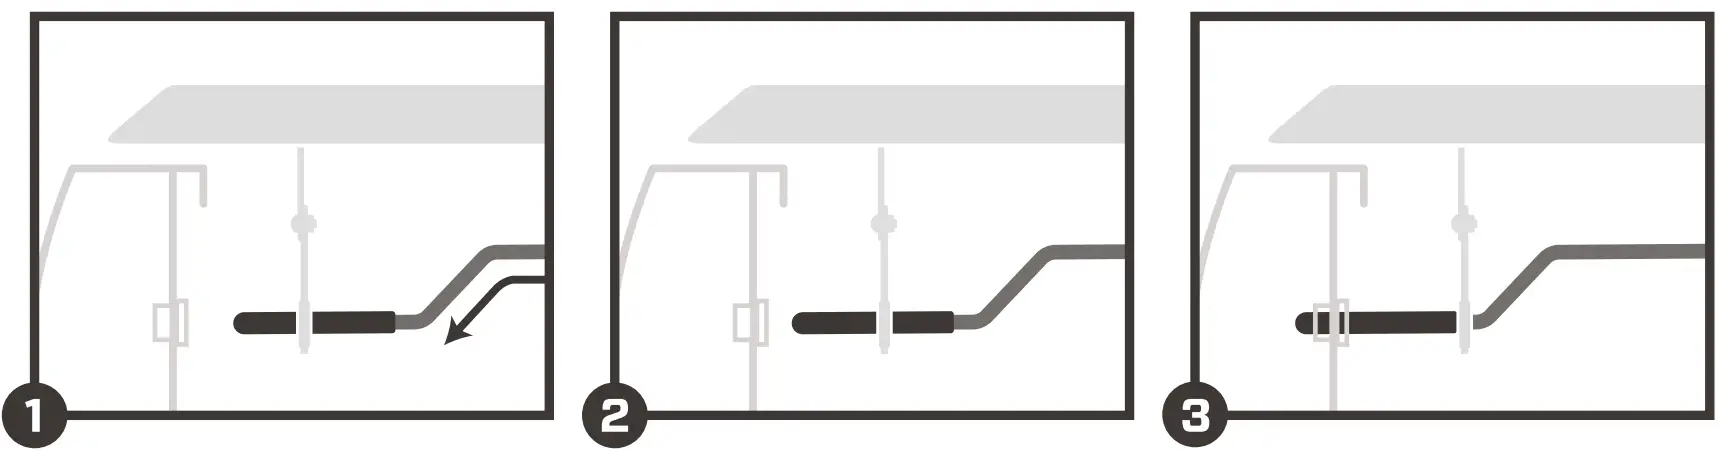
![]() 24 hours
24 hours
Adhesive cure time![]() For first 2 weeks after installation
For first 2 weeks after installation
open tail panel on cover before operating tailgate.
DiamondBackCovers.com / 800 935 4002
AUGUST 2022


