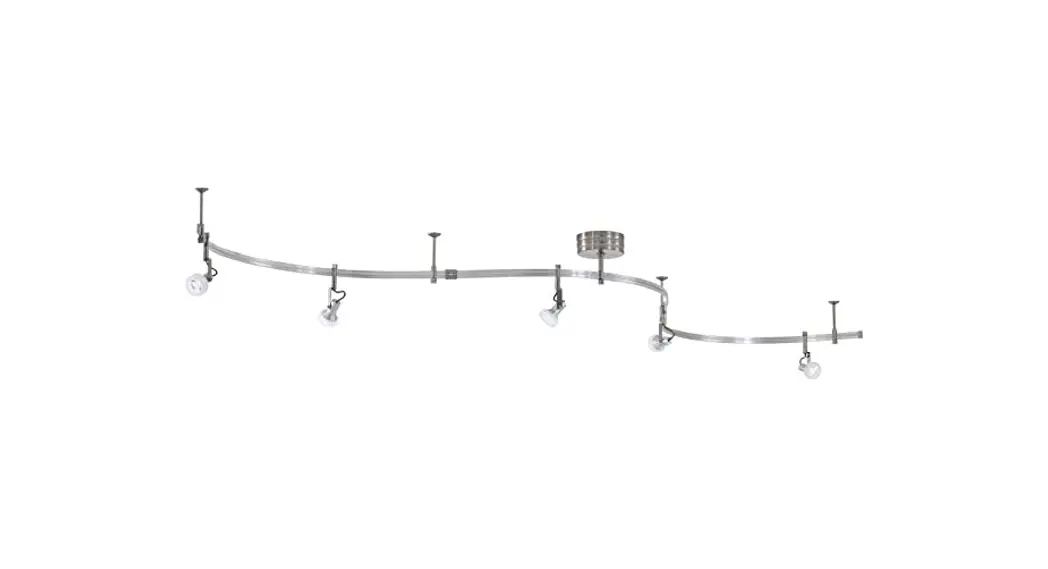
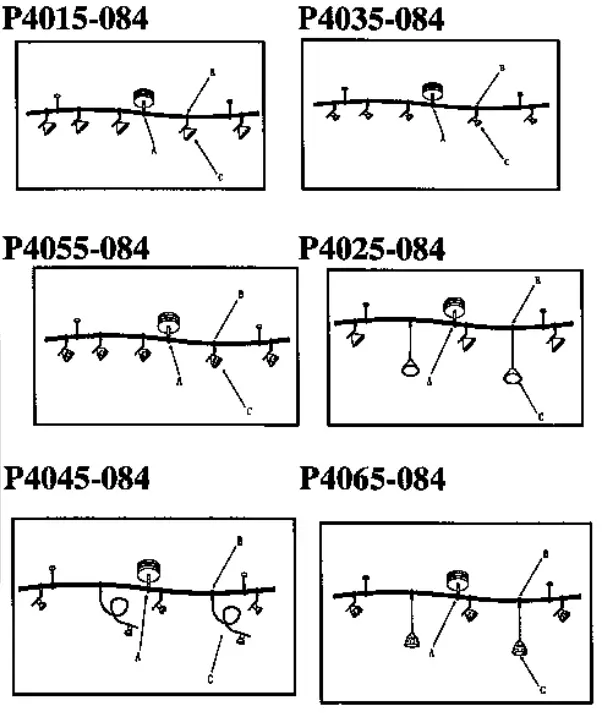
![]() P4015 GK Light rail 5 Light Monorail Kit
P4015 GK Light rail 5 Light Monorail Kit
Installation Guide
For Models: P4015, P4025, P4035, P4045, P4055, P4065
WARNING! SHUT POWER OFF AT FUSE OR CIRCUIT BREAKER.
RAIL SYSTEM
Installing your Rail System
READ THESE INSTALLATION INSTRUCTIONS BEFORE YOU BEGIN INSTALLING THIS NEW LIGHTING RAIL SYSTEM.
- Use maximum 20 Watt bulbs on this system.
- Make sure all connections are tight and secure.
- Do not install any components of this system to any metal surface.
- This system may be dimmed with a low voltage electronic dimmer.
- For use with P4015-P4065 rail systems only.
Tools needed for Installation:
Phillips Screwdriver; Flat Head Screwdriver; Hammer, Wire Cutters and Allen wrench.
Rail System: Use only with electrical fittings identified for use with the P4015-P4065 rail systems.
This track system i s to be supplied by a single branch circuit of 120 volts, single phase. Not ‘intended fer use with a power supply cord or convenience receptacle adapter.
CAUTION: Before you begin installing your new rail system; disconnect the power by removing the fuses or turning off the circuit breakers.
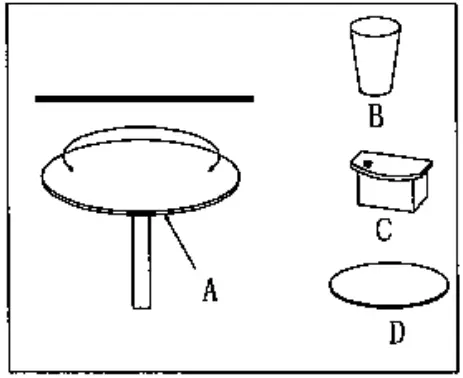
A. Package Contents
Unpack your new rail system; you should have the following;
(A)- Rail track,
(B)- Transformer,
(C)- Ceiling standoffs,
(D)- Fixture
(E) & (F)- Box of mounting hardware including spare par
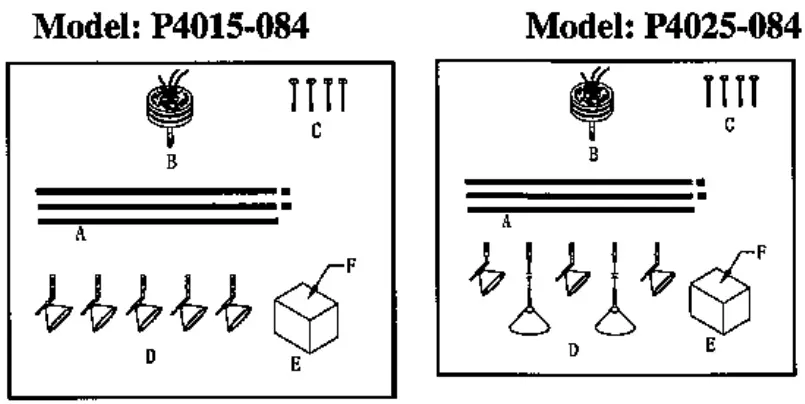
Models: P4015 include 5 pcs white glass
Models: P4025 include 5 pcs blue glass and 5 pcs white glass
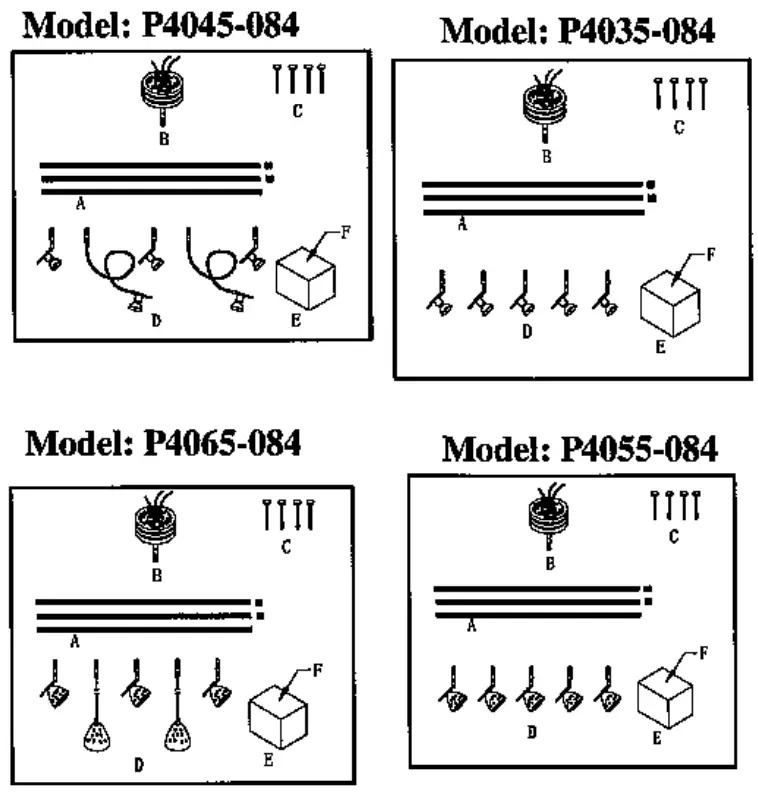
Models: P4055, P4065 include 5 pcs blue glass and 5 pcs white glass
B . Installing the Transformer
Step 1. Locate transformer(a) and transformer mounting hardware package in box(A) which contains 2 pcs Screws and 3 pcs wire nuts.
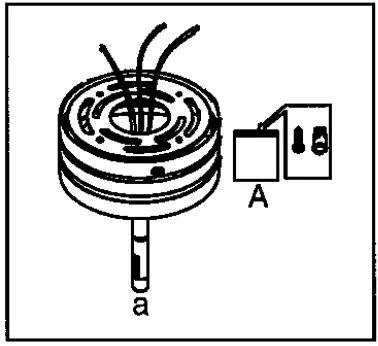
Step 2. Remove and set aside the 3 screws from the transformer to release the back plate.
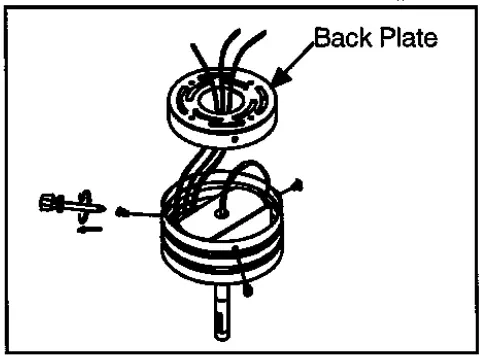
Step 3. Line up the back plate with the two screw holes from the junction box and secure the two screws supplied with the junction box.

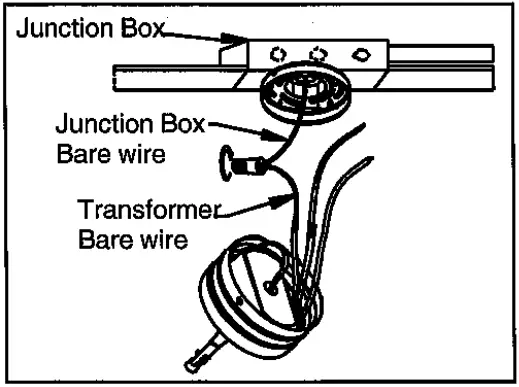
Step 4. Connect the bare (ground) wire for the transformer to the bare or green ground wire from the junction box use a wire nut to secure the connection.
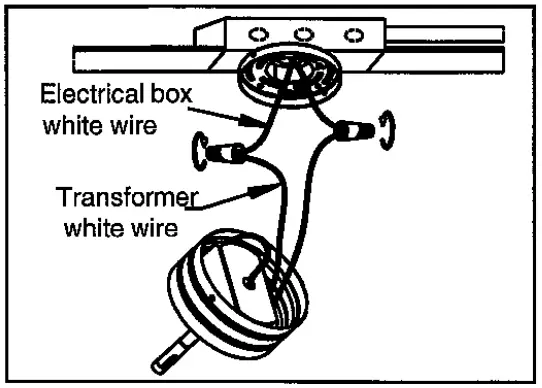
Step 4. Connect the white (neutral) wire from the transformer to the white wire from the junction box. use a wire nut to secure the connection,
Step 5. Connect the black (hot) wire from the transformer to the black wire from the junction box use a wire nut to secure the connection.
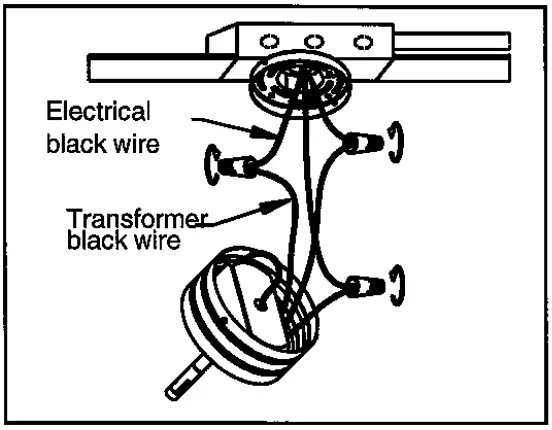
Step 6. Tuck the wire nut connections into the electrical junction box. Slide the transformer housing up until the holes line up to the back plate,make sure all wires are tucked in. secure it in place with the 3 screws previously removed.
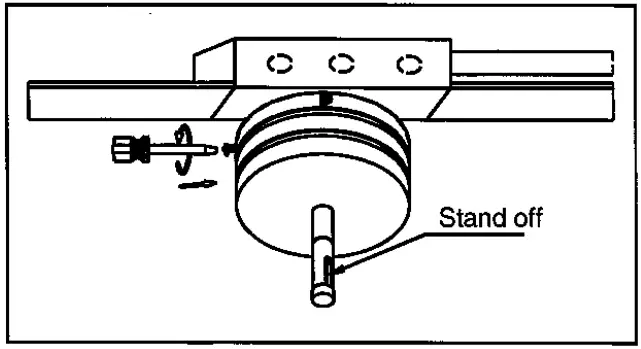
Note: MAKE SURE THAT THE STAND OFF IS IN ALIGNMENT WITH THE RAIL.
C. Preparing the Rail Sections for Installation
Step 1. Locate the three sections of rail and the rail joiners packet (E), which contains the 2 pcs rail joiners, 1 pc alien wrench and several extra set screws.
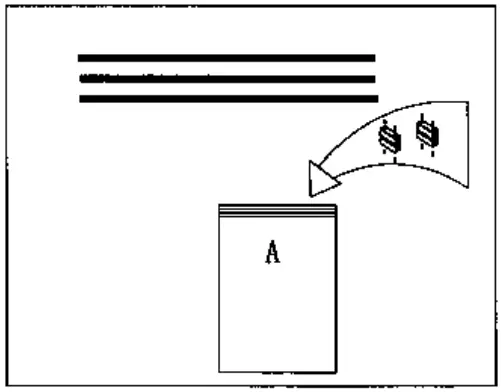
Step 2. If you would like to customize the length of the rails, use a hacksaw to cut to the desired length. Use a file or equivalent to remove any burs from the rails. Remove and replace the end caps to the ends of the rails.
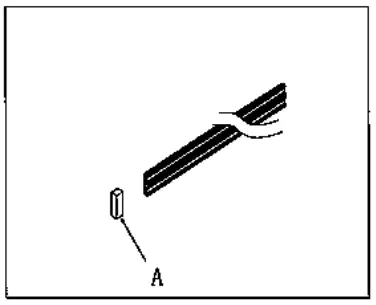
A. End cap
Step 3. To bend or curve the rail, follow step 4, If the rail will be mounted as a straight run, skip to step 5.
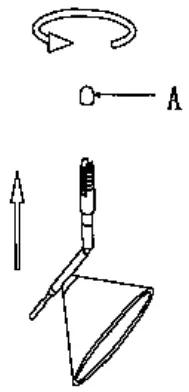
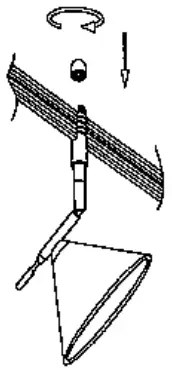
Step 4. Use a round kitchen tabletop or similar household item as a template to bend the rail. Carefully hold the rail with one hand starting from the center and working towards the ends. Table Top ( A ), Waste Paper Basket (B), Counter Top (C) Plywood Template (D)
Step 5. Secure the pieces of rail together by inserting the ends of the rail firmly into the rail joiners. Tighten the Allen set screws with the Allen wrench provided.

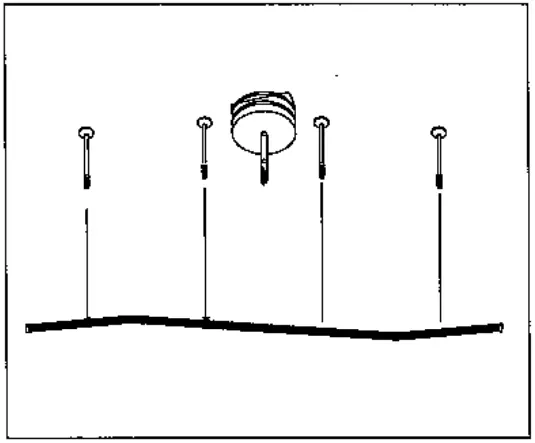
D. Installing the Rails to the Ceiling
Step 1. Locate the four standoffs and the standoff mounting hardware packet (E) which contains 4 pcs screws, 1 pc Allen wrench, 4 pcs drywall anchors and 4pcs threaded washers

Step 2. Lay the assembled rail on the floor directly under the transformer.
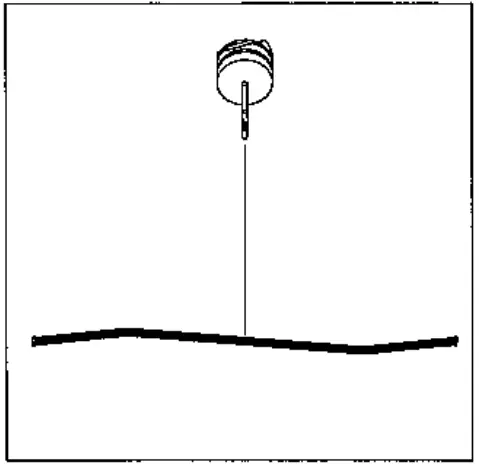
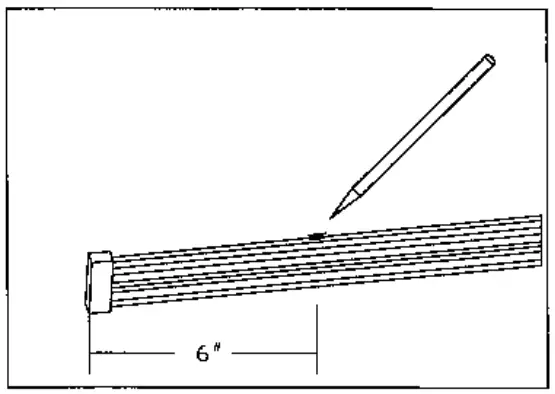
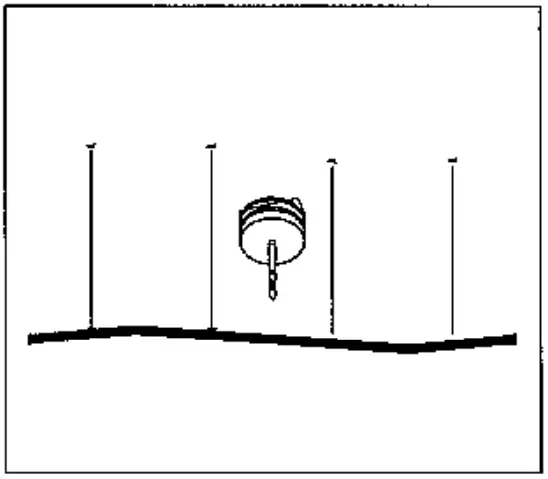
Step 3. The transformer and the standoffs will be used to support the rail from the ceiling providing a total of five supports. Use a pencil and tape measure to mark two of the support locations on the rail 6″ from each end of the rail.
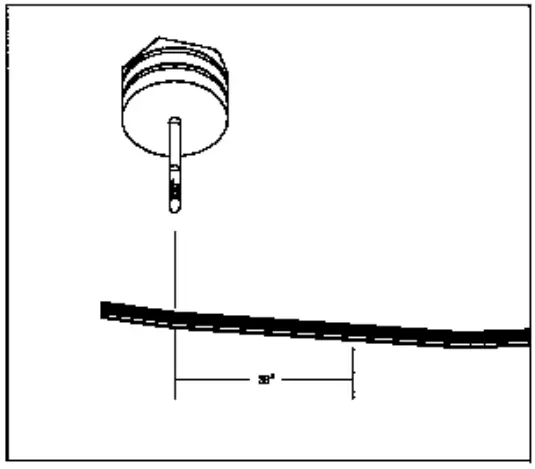
Step 4. Mark the remaining support locations on the rail no more than 38″ apart. It is acceptable for a support location to fall directly over a rail joiner.
Step 5. Lift the rail to the ceiling. Lining the rail up with the Transformer, Use a pencil to transfer the standoff locations to the ceiling.
Step 6. Line up the drywall anchors with the marks on the ceiling and use a hammer to tap the anchor approximately 1/2″ into the ceiling. Stop just before the threaded portion of threaded portion of the anchor enters the ceiling.
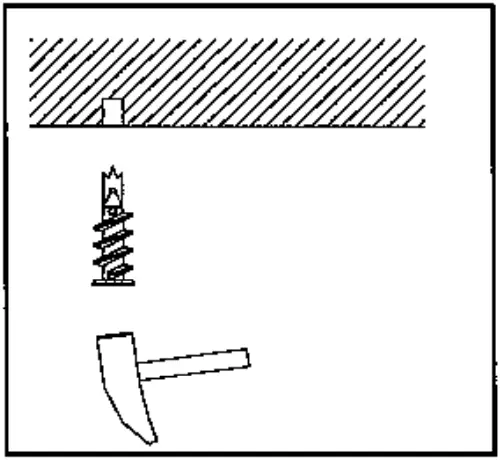
Step 7. Finish the installation using a screw driver to screw the anchor until is flush to the ceiling.
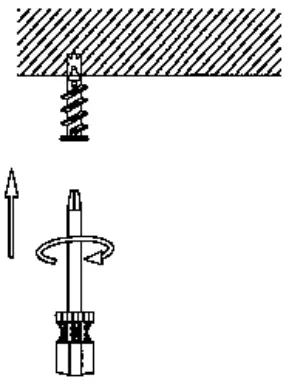
Step 8. Secure a threaded washer to the flushed anchor by driving a screw into the anchor. Threaded Washer A).
Step 9. Secure the standoff assembly to the threaded washer.
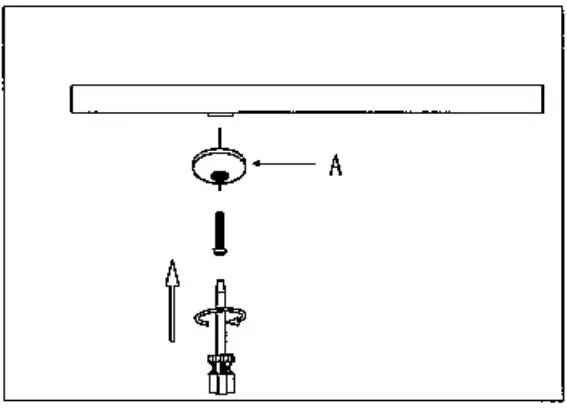
Standoff Assembly A)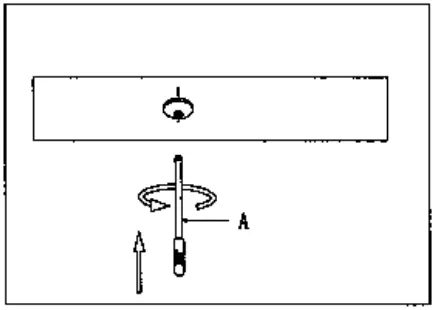 Step 10. Repeat step 6 and 8 for the remaining standoffs.
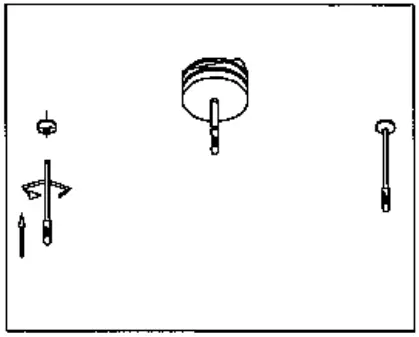
E. Securing the Rail to the Ceiling
Step 1. Remove the transformer power feed cap from the base of the power feed. (A) Power Feed Cap
Step 2. Remove the standoff caps. (A) Standoff Cap
Step 3. Slide the rail into the standoffs and the transformer power feed.
Step 4. While supporting the rail, screw the transformer power feed cap back onto the transformer. The connection must be tight.
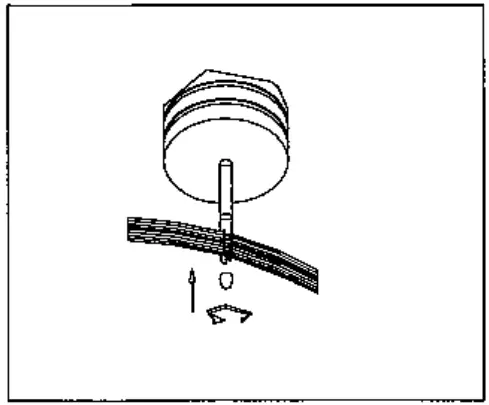
Step 5. Screw the standoff caps back onto each of the standoffs.
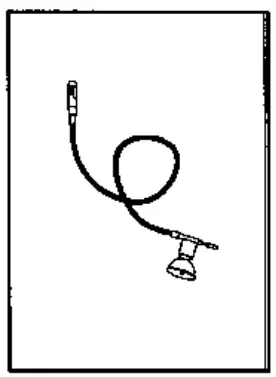
F. Installing the Mini Pendants
Step 1. Locate the two mini pendants
Step 2. Remove the standoff cap from each of the standoff. Standoff Cap A)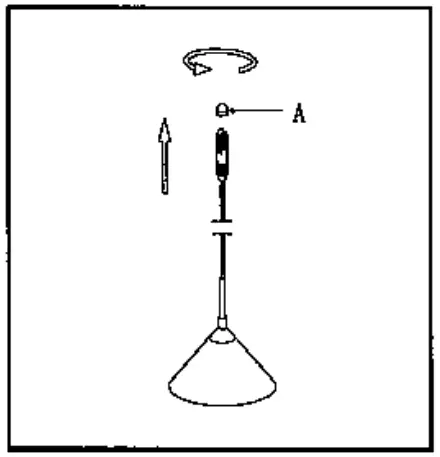 Step 3. Remove the standoff completely.
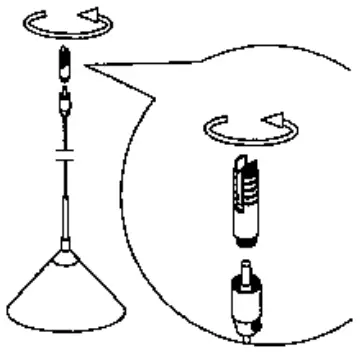
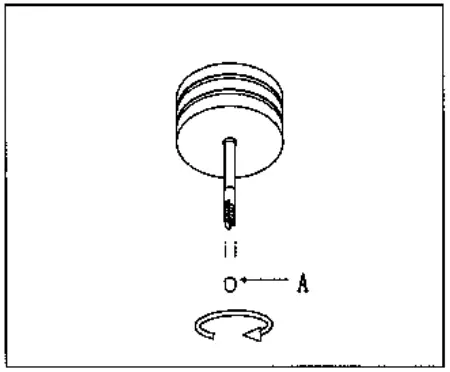
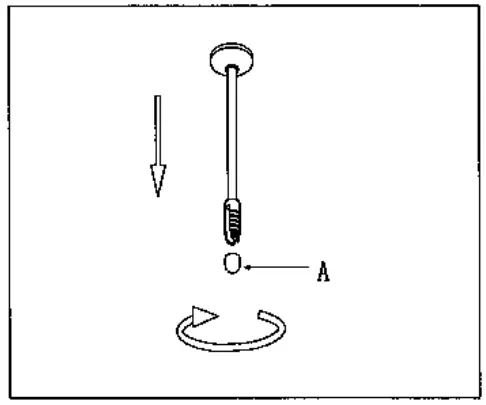
Step 4. Use the Allen wrench provided to loosen the screw (do not remove completely} and install the wire.

Step 5. Adjust the length for wire and cut the residual using the wire cutters.
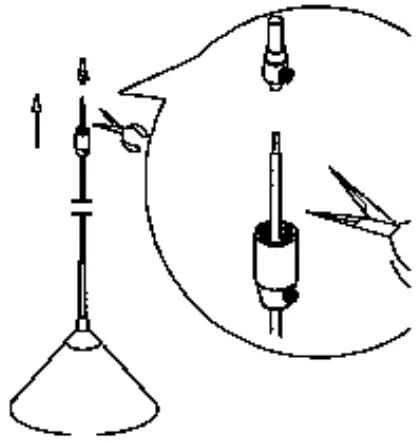
Step 6. Use the Allen wrench to tighten the set screw and secure the wire.
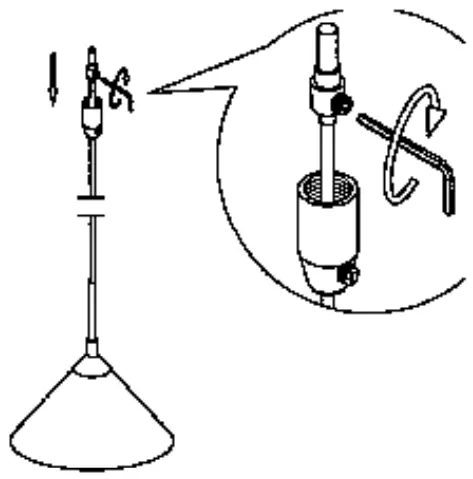
Step 7. Use the screwdriver to tighten the set screw and secure the location of the standoff.
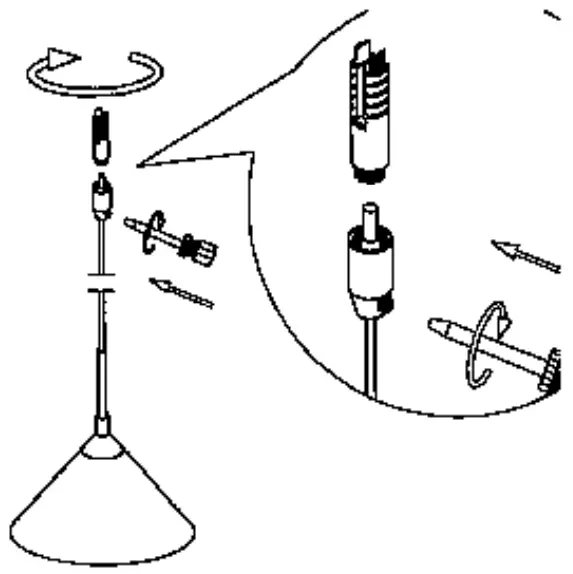
Step 8. Slide the standoff onto the rail and screw a standoff cap onto the standoff. Standoff Cap A)
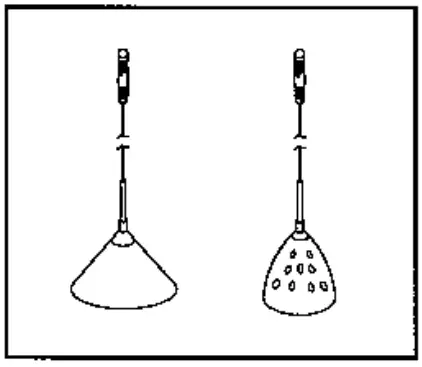
G. Installation the fixtures
Step 1. Locate the five fixtures with adjustable arm.
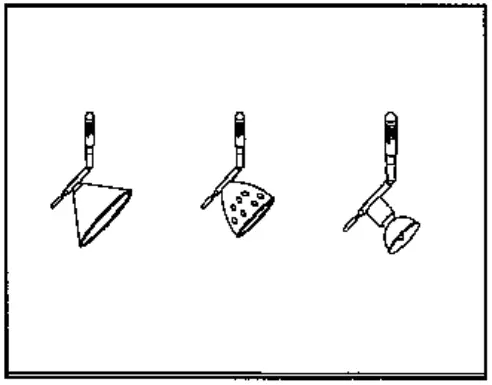
Step 2. Locate the two fixtures with adjustable goose neck.
Step 3. Remove the fixture cap from each of the fixtures. (A) Fixture Cap
Step 4. Slide the fixture onto the rail and secure with a fixture cap.The connection must be tight and secure. Repeat this step for the remaining fixtures.
H. Restoring the Electrical Power
Step 1. Install lamps type MR16, rated for 12V, 20W, Max. (included)
Step 2. Restore the electrical power and proceed to test your new rail system.
Step 3. Turn on the light system and let it run for 5 minutes. Turn the system off, carefully check that all connection points are not hot to the touch (warm is acceptable), if a connection is hot, check the connection and make sure the wire nut is tightly secured.
Power Feed Connection (A)
Fixture Connections (B) Ensure bulbs Are Secure
IMPORTANT: When replacing MR16 bulbs, be sure the wattage of the bulb is 20W or Less.
Using higher wattage bulb may damage the fixtures and the transformer.

J. Important safety Instructions
Use only the MR16 type of lamp rated 12V 20W, maximum.
CAUTION: To reduce the risk of a burn during relamping. Disconnect power.
CAUTION: Risk of Burn. Before energizing, ensure that the bare conductors are free from any foreign metallic objects not part of this lighting system.
CAUTION: Do not touch hot lens, guard or enclosure.
When installing or using the lighting system, basic safety precautions should always be followed including the following.
a ) Read all instructions.
b ) Do not conceal or extend bus-bar conductors through a building wall.
c ) Do not install this system in damp or wet locations.
d) To reduce the risk of fire and burns, do not install this lighting system where the uninsulated open bus-bar conductors can be shorted or contact conductive materials.
e) To reduce the risk of fire and overheating,make sure all connections are tight.
f) Do not install any luminaire closer than 6-inches(15.25 cm) from any curtain, or similar combustible materials.
g) Turn off electrical power before modifying the light system in any way.
CAUTION: Risk of fire, use only the type of lamp and maximum wattage marked on the fixtures.
CAUTION: To reduce the risk of fire do not use lamps identified for use in enclosed fixtures.
CAUTION: Keep protective glass in place.
CAUTION: INDOOR USE.
CAUTION: Use only a tungsten halogen lamp, Type MR-16,rated 1 2 volts, 20W maximum, having an integral outer glass envelope.
INSTRUCTIONS PERTAINING TO A RISK OF FIRE, OR INJURY
- Lighted lamp is HOT!
- WARNING-To reduce the risk of FIRE OR INJURY
- Turn off power and allow to cool before replacing lamp.
- Lamp gets HOT quickly! Contact only switch/plug when turning on.
- Keep lamp away from materials that may burn.
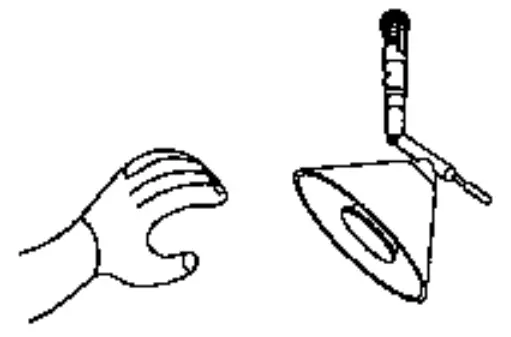
- Do not touch the lamp at any time. Use a soft cloth. Oil from skin may damage lamp.
- Do not operate the luminaire with a missing or damaged shield.
SAVE THESE INSTRUCTIONS.
IMPORTANT: FIXTURE SHOULD BE INSTALLED BY A QUALIFIED ELECTRICIAN TO ENSURE PROPER WIRING AND INSTALLATION.
![]()
![]() LA-1187E
LA-1187E


