![]() SPORTS LIGHT SERIES
SPORTS LIGHT SERIES
SPT Series Installation Guide
WARNING
- To avoid electric shock, disconnect power at source prior to installation.
- The installation should be performed by qualified electricians or lighting technicians.
- Before conducting any installation, maintenance, or removal, disable all power to the luminaries and wait until the fixture cools down.
- Do not touch the fixture while it is in service.
- If there is any problem with the fixture, DO turn off power and DO NOT attempt repair unless you are a qualified technician or the customer service member.
Light Shield Installation
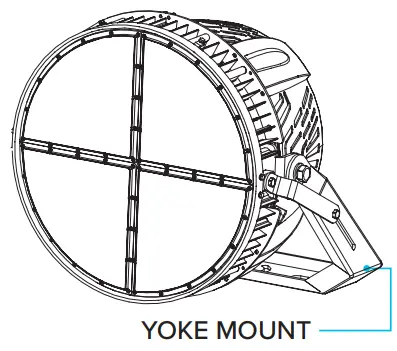 | 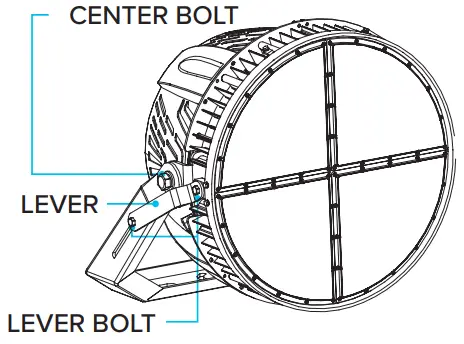 |
| Each SPT fixture includes a Yoke Mount. The Yoke has a 240° tilt range. | To adjust the angle loosen the center bolt and the two lever bolts, adjust the angle of the fixture, and then tighten the center bolt and two lever bolts. |
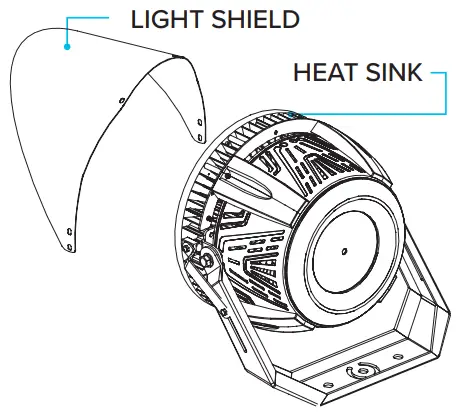 | 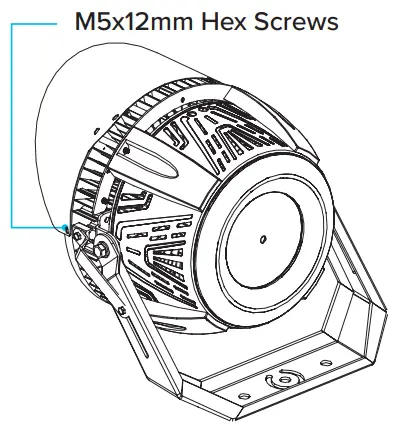 |
| Place the light barrier on the fixture body. | Fasten the light barrier to the fixture body using the M5x12mm hex screws. |
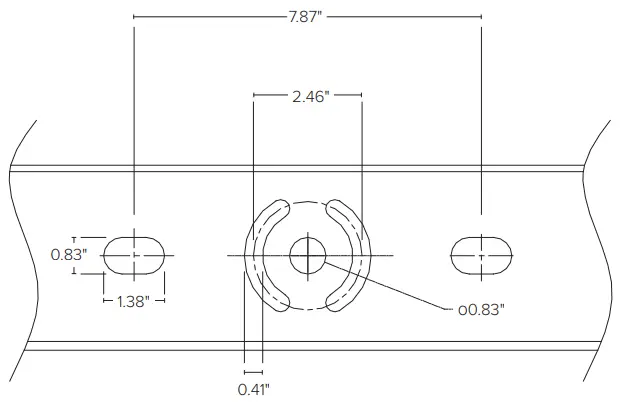
Yoke Mount Bolt Pattern
Installation
Yoke Mount
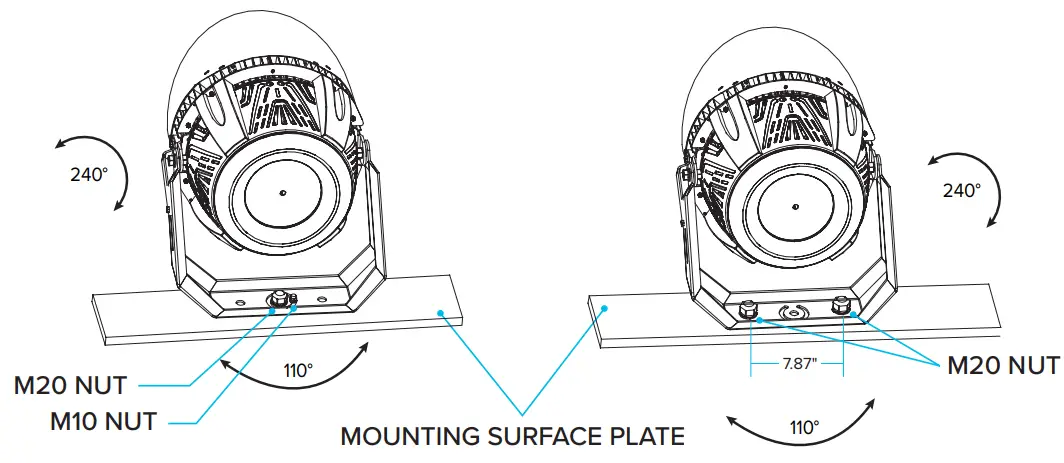 | |
| Place SPT Series fixture on mounting surface plate. Tighten the fixture to the mounting plate using the M20 and M10 screws (do not tighten down fully). Adjust the fixture to it’s desired position vertically (240°) and horizontally (110°). | Once the fixture is in its desired position fully tighten all screws. |
Slip Fitter Mount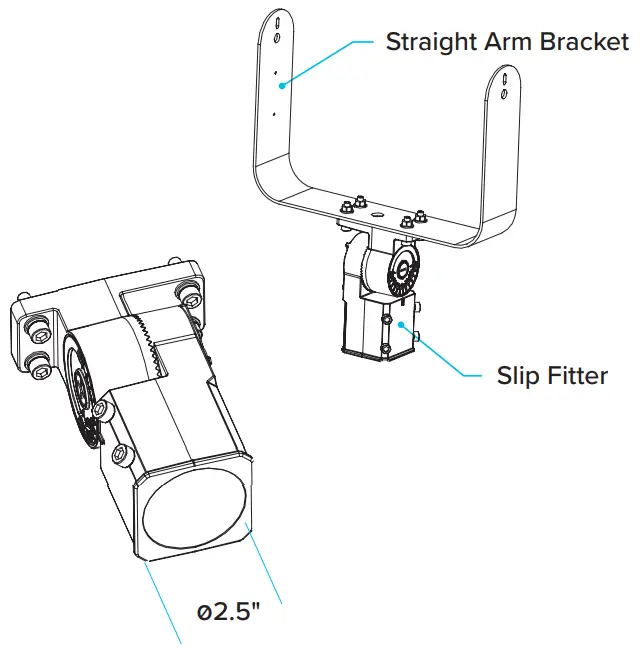
Slip Fitter
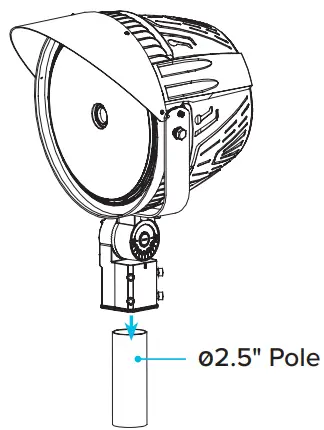 | 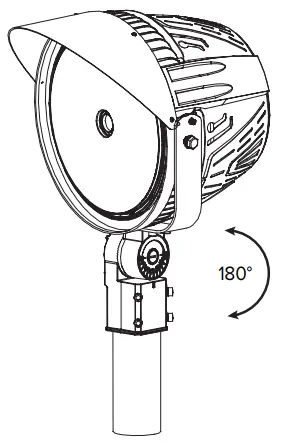 |
| Mount the SPT Fixture to the Slip Fitter Mount. Place the fixture onto the mounting pole. | Adjust the fixture to it’s desired position vertically (180°) and on the mounting pole. Once the fixture is in its desired position fully tighten all screws. |
1200W Fixture Installation
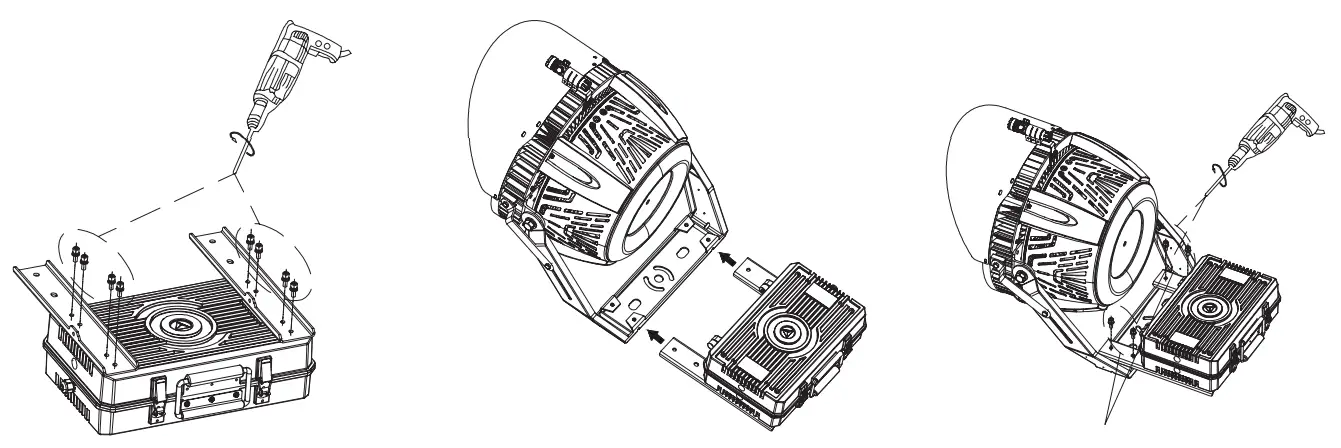 | ||
| Attach stints to the external driver box with the M6 16mm screws | Slide the driver box onto the bracket. | Secure the driver box using the M8 20mm screws |
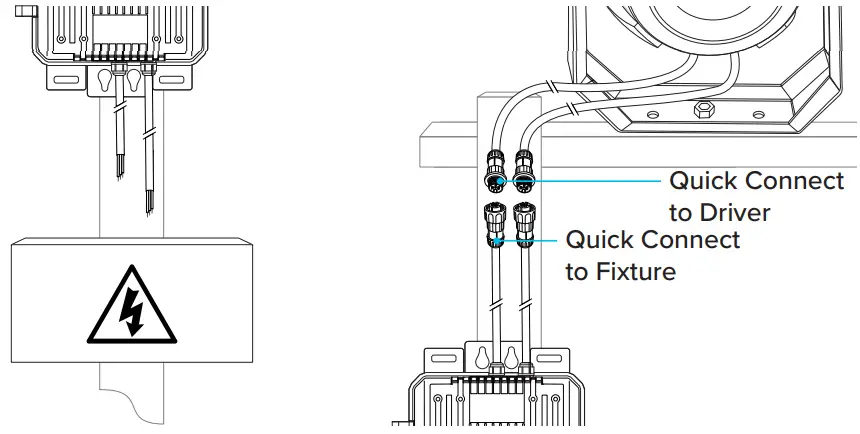 | |
| Run the power to the driver. | Connect to the fixture using the Quick Connect cables. |
WARNING
DO NOT CONNECT FIXTURE DIRECTLY TO AC POWER. 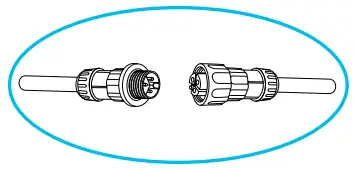
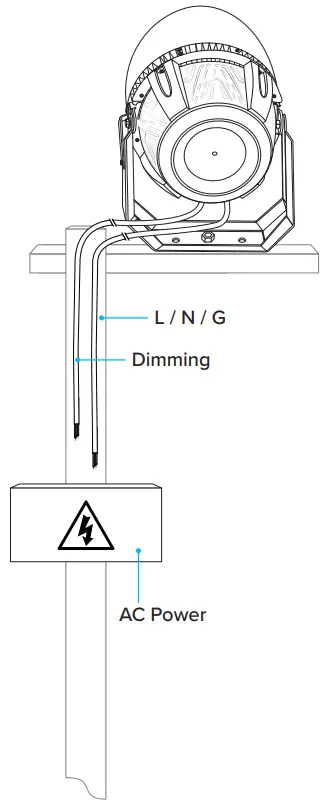
300–750W Fixture
- The 300 Watt to 750 Watt fixtures have an internal driver.
Connect directly to AC Power.
Copyright © 2022 ESL Vision, LLC. All rights reserved. Rev: 10/17/22
888.493.5559
[email protected]
www.esivision.com


