![]()
Installation Guide
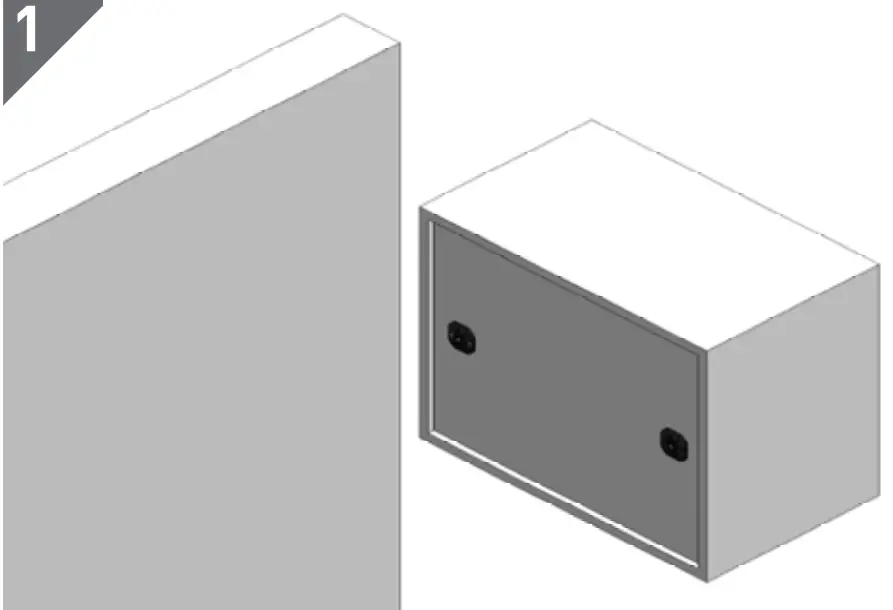
Clip 50 Jig
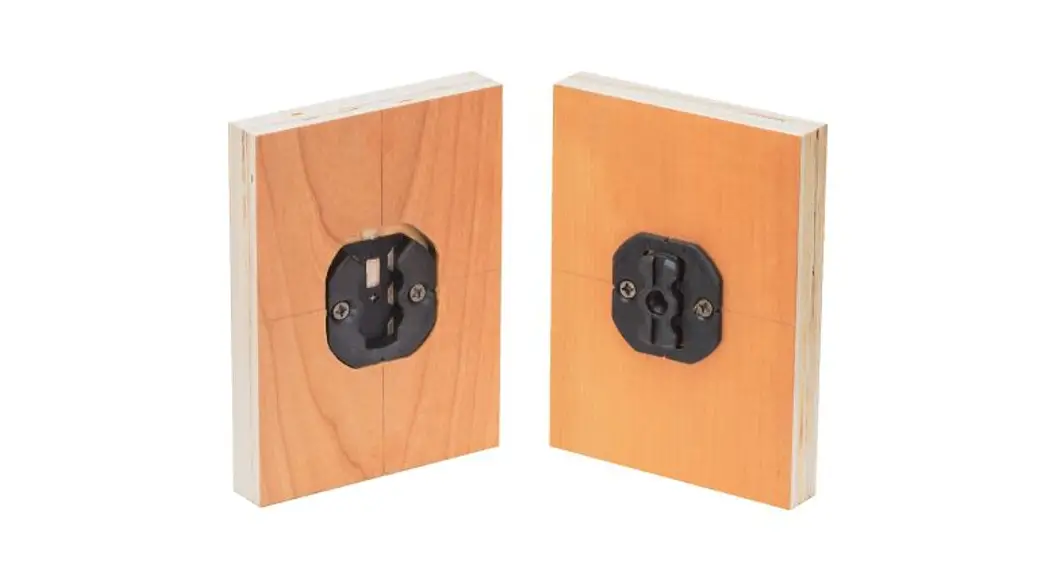
Clip 50 Connector
To be used in conjunction with the Striplox Clip 50 installation guide.
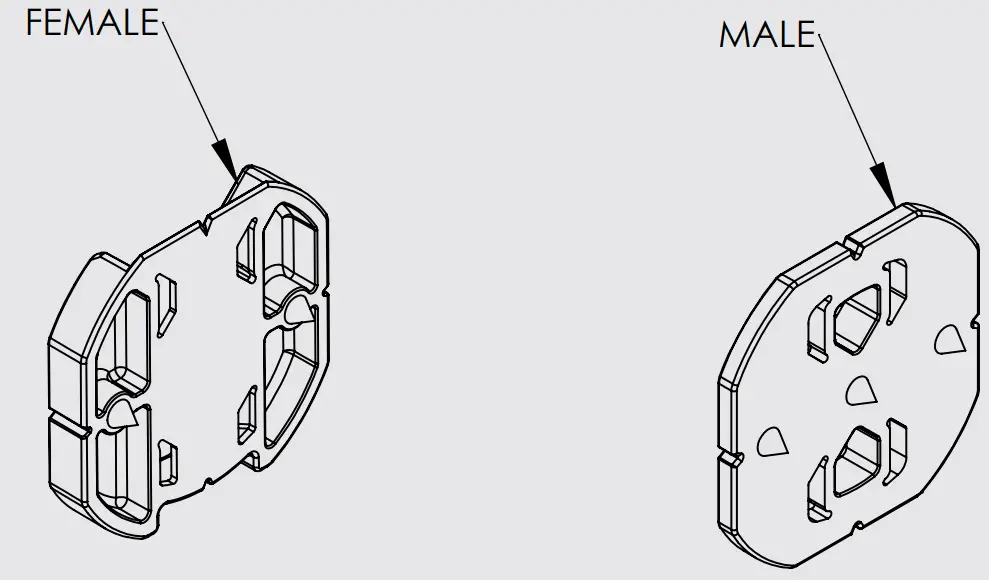
Attach male Striplox Clip 50 onto the object following Striplox Clip 50 installation guide and use the female Striplox Clip 50 part on the wall.
Attach the Striplox Clip 50 Jig onto the Striplox Clip 50 part by sliding into its fully locked position.
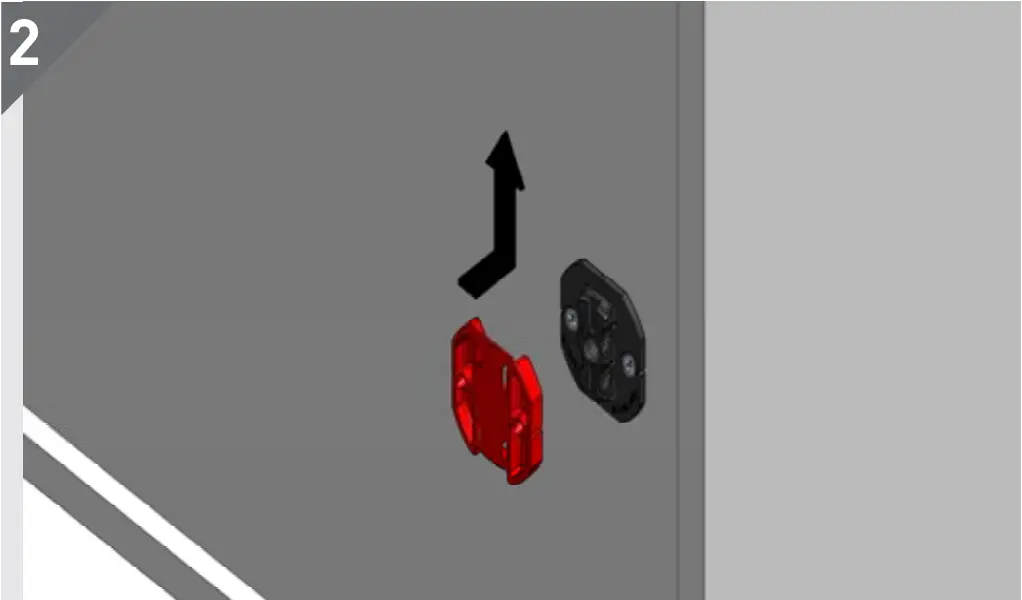
Position object and push against the wall firmly. The jig will indent the corner screw positions for the opposing Striplox Clip 50 part.
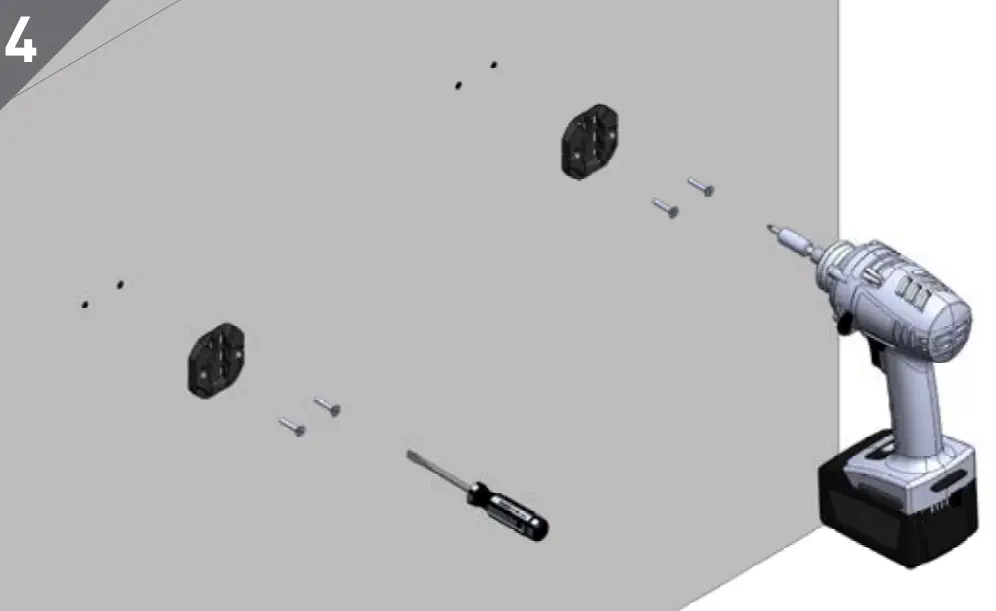
Fix the Striplox Clip 50 part into position using the indented markings using sufficient screws for satisfactory embedment. (note: dry wall mountings may need to be used)
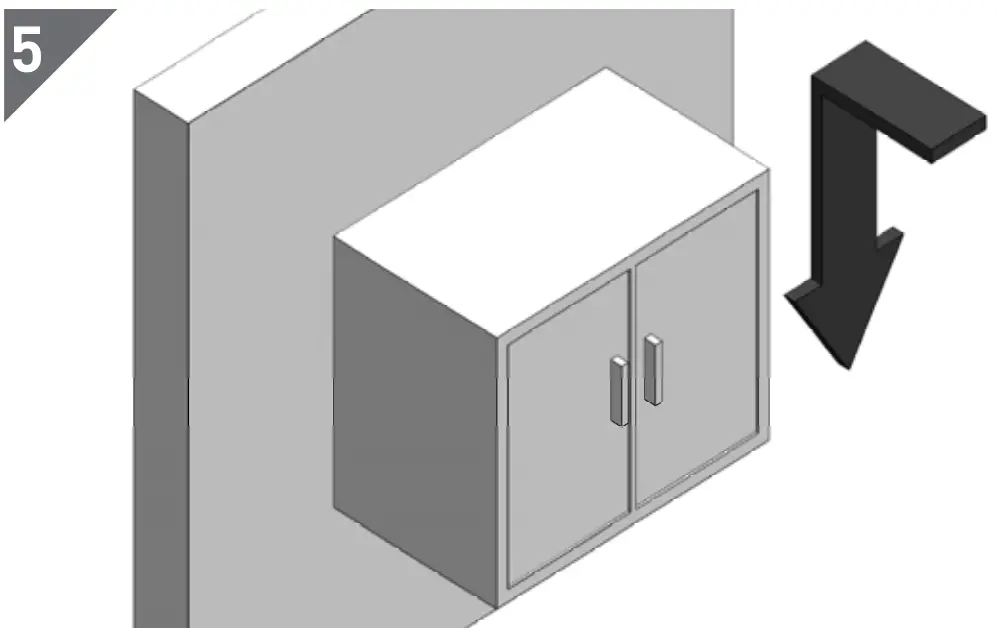
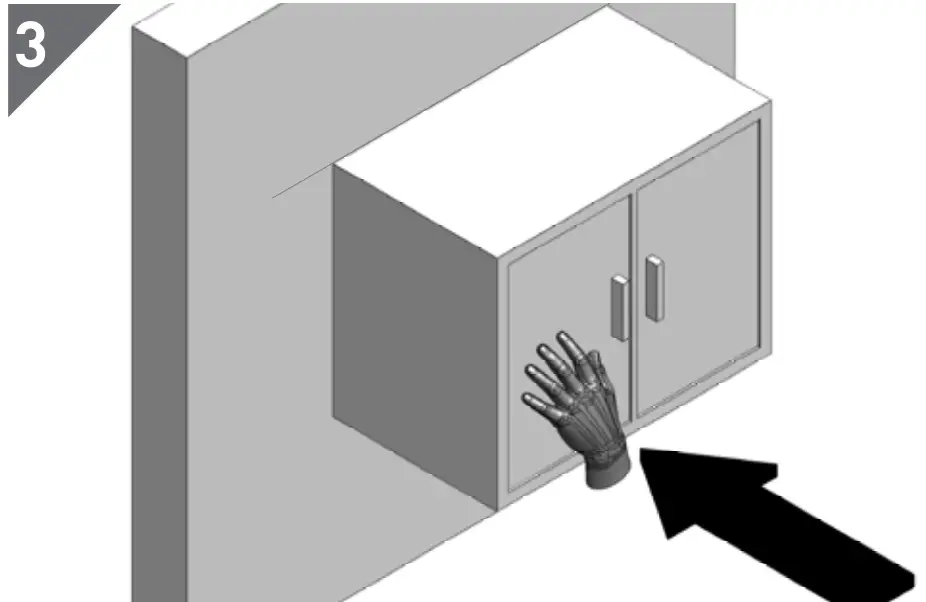
Place the object onto the wall push and slide into position ensuring the parts have interlocked.
| Material | Grivory GV |
| Colour | Red |
| Fixing Method | Slide to fit |
Striplox™ use is subject to variable material and conditions. Technical information and load capacities are a guide only without warranty
Striplox™ and Joinlox® are trademark and patent protected internationally. – Installation Guide Clip 50 Jig
![]()


