![]()
106305 UTV Pro 2.0 Actuator Brackets
Instruction Manual
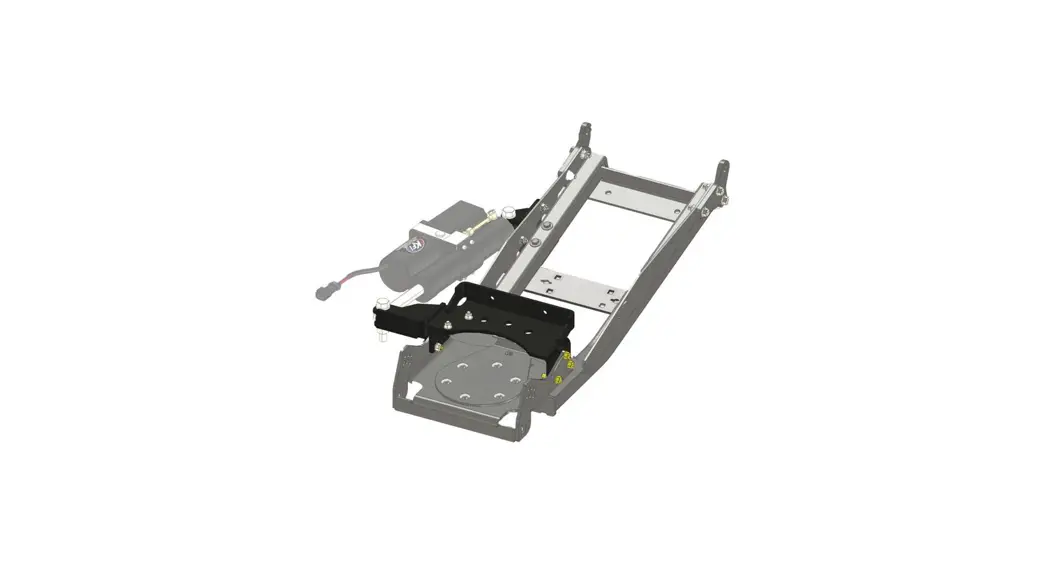
HYDRAULIC PLOW ACTUATOR BRACKETS
Plow Accessory
PART #106305
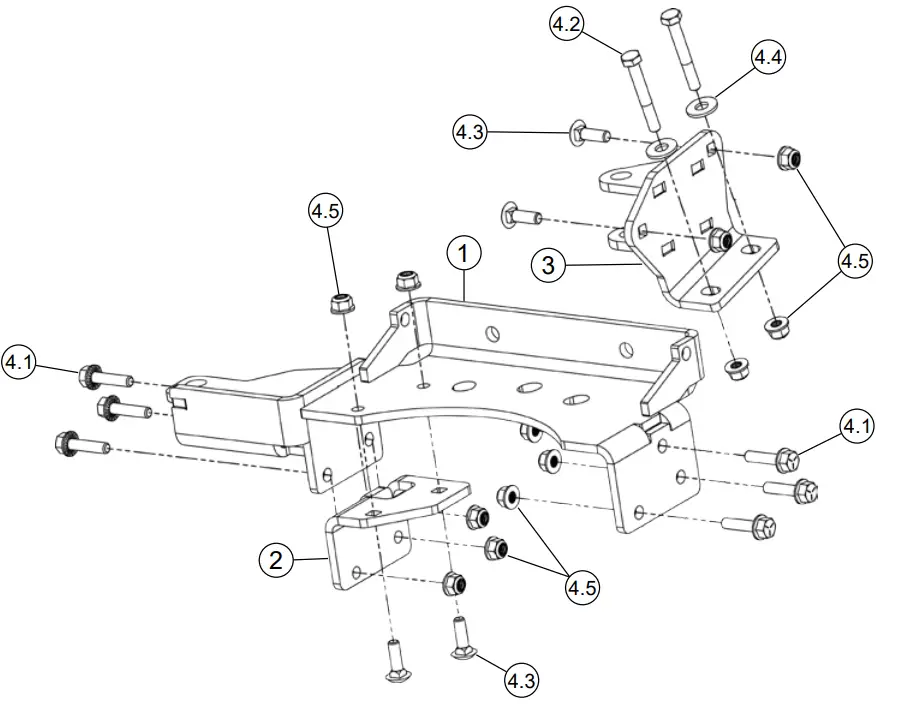
| Item # | Qty. | Description |
| 1 | 1 | Cradle Bracket |
| 2 | 1 | Inner Cradle Bracket |
| 3 | 1 | Rear Tube Bracket |
| 4 | 1 | Hardware Kit (HK-404) |
| 4.1 | 6 | 5/16”-18 X 1.25 Hex Flange Bolt GR 8 |
| 4.2 | 2 | 5/16”-18 X 2.25 Hex Bolts GR 5 |
| 4.3 | 4 | 5/16”-18 X 1.00 Carriage Bolts GR5 |
| 4.4 | 2 | 5/16” Flat Washer |
| 4.5 | 12 | 5/16”-18 Hex Flange Lock Nut |
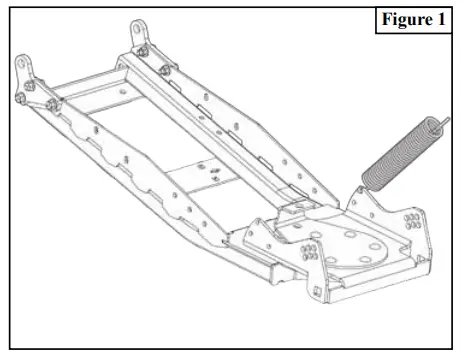
BRACKET INSTALLATION INSTRUCTIONS
Note: Make sure all hardware needed to complete this mount is in the package. Thoroughly read through and understand the instructions before installing.
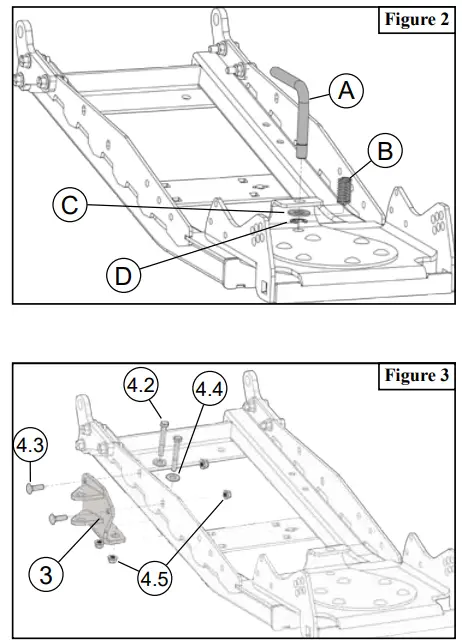
- Remove springs from cradle

- Pull up on the lift latch handle (A), compressing spring (B). Remove the E-retaining clip (D) located under washer (C) as shown in Figure 2. Items (A,B,C, and D) can be discarded as they will not be reused.

- Attatch rear tube bracket (3) to the push tube using bolts (4.2 & 4.3) and nuts (4.5). Place bolts (4.2) through washers (4.4) before placing through the push tubes. As shown in figure 3.
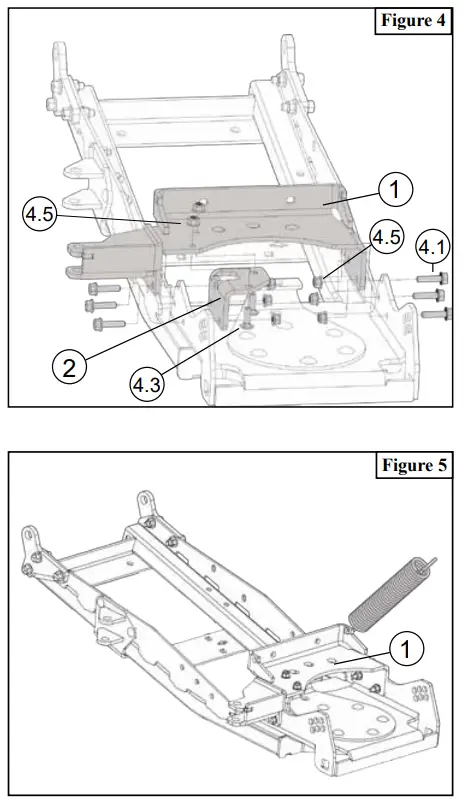
- Loosely assemble inner cradle bracket (2) to the cradle bracket (1), using carriage bolts (4.3) and lock nuts (4.5), as shown in Figure 4.

- Place cradle bracket (1) over the push tube cradle and attatch with bolts (4.1) and lock nuts (4.5), as shown in Figure 4.
- Tighten all hardware evenly.
- Springs will attatch to the bent flange on the front cradle bracket (1). As shown in Figure 5.
ACTUATOR INSTALLATION INSTRUCTIONS
Note: Actuator is not included with this kit. Items below come with kit #ACT203
| Item # | Qty. | Description |
| 5 | 1 | Actuator |
| 6 | 1 | Hardware Kit |
| 6.1 | 2 | M14-2.00 X 80 Hex Bolts GR8.8 |
| 6.2 | 12 | M14 Flat Washer |
| 6.3 | 2 | M14 X 2.00 Hex Lock Nut |
INSTALLATION INSTRUCTIONS
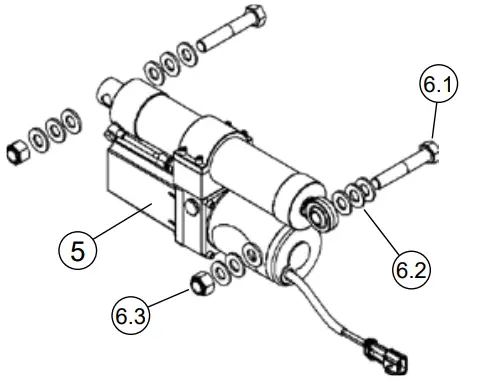
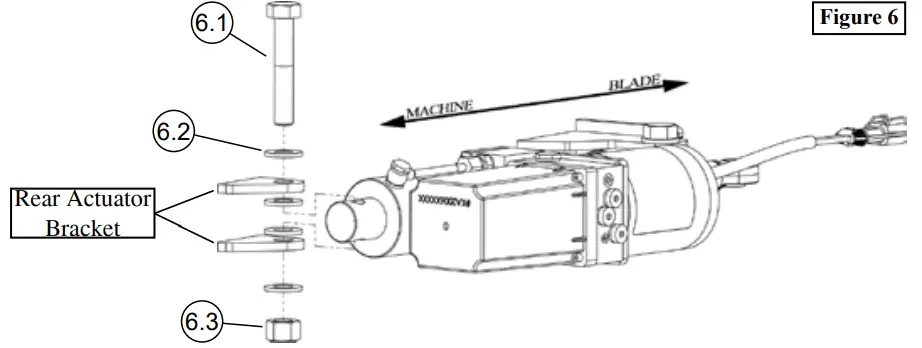
- Place bolt (6.1) through flat washer (6.2), top tab of rear actuator bracket, flat washer (6.2), Hydraulic Actuator (5), flat washer (6.2), bottom tab of rear actuator bracket, and flat washer (6.2). Place nylock nut (6.3) onto bolt (6.1) as shown in Figure 6. (This orientation of hardware is just a guideline)

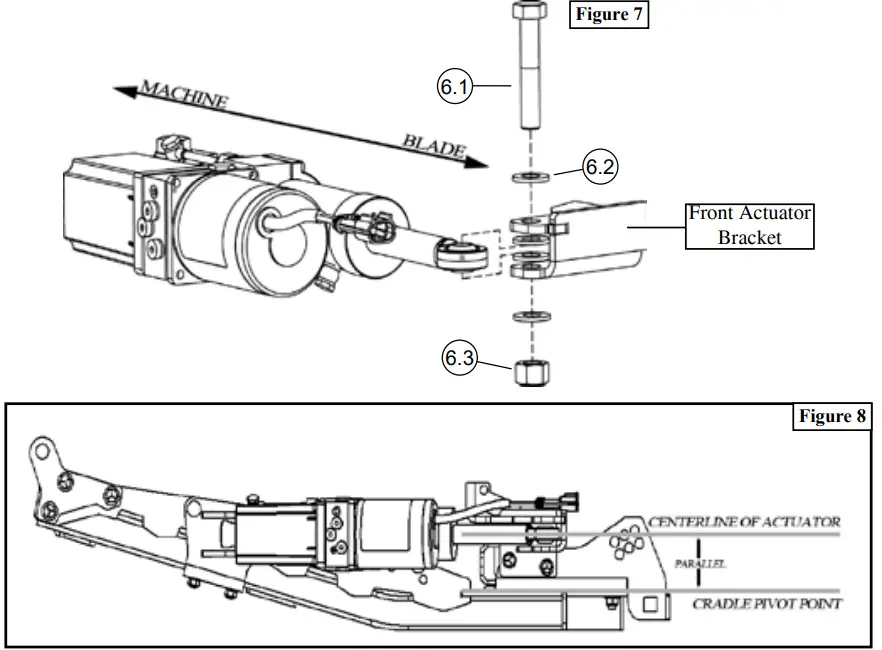
- Repeat previous step for mounting the front half of the actuator, as shown in Figure 7. It is most important that you use the washers to make sure that the actuator is parallel to the cradle swivel point, as shown in Figure 8.
Both front, and rear bolts should not be tight, thread the nut on until Nylock is engaged.
Note: Periodically apply lubricant to actuator attachment points.
 ©2022 Copyright Kappers Fabricating, Inc.
All rights reserved


