![]()
 Modem & Wi-Fi Router
Self-Connect Guide
Arris CM9200 & GigaSpire BLAST u6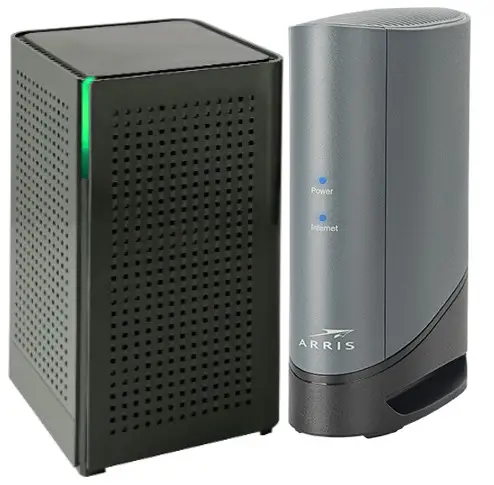
Wi-Fi Modem Self-Connect Guide
What’s in the kit.
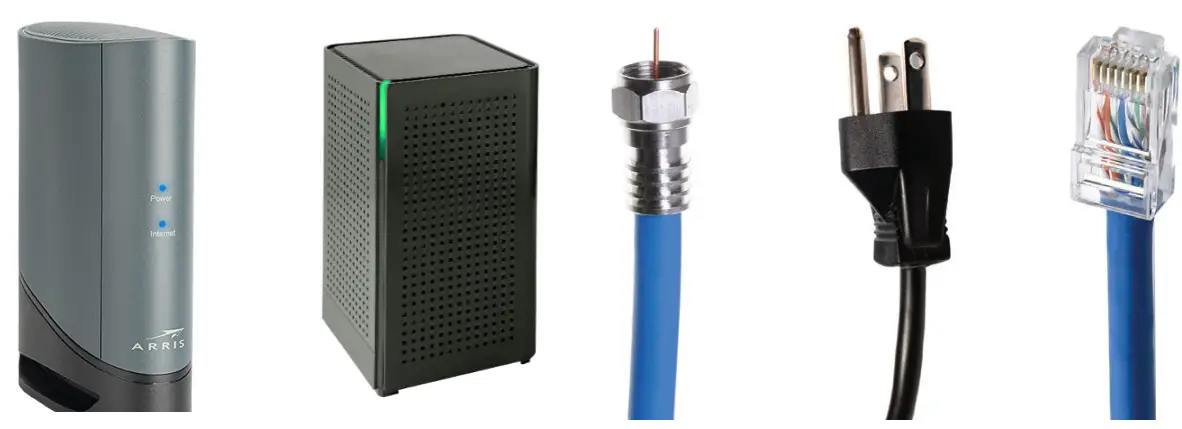 | ||||
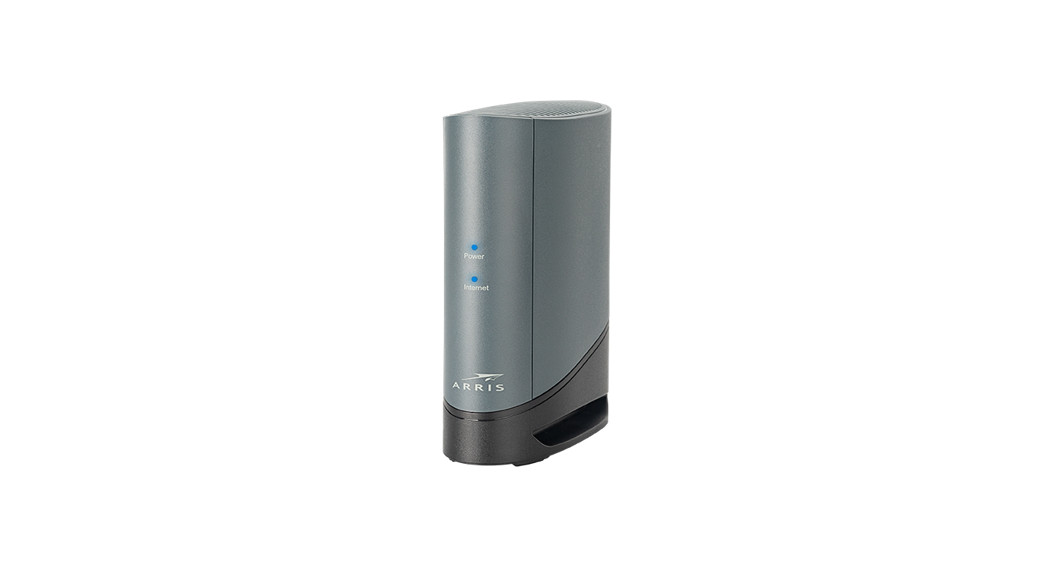
| Modem (Arris CM9200) | Router (Calix GigaSpire) | Coax Cable | Power Cords (Specific for each) | Ethernet Cord |
Connect Your Modem
- Connect the supplied coaxial cable to the wall plate.
- Connect the other end of the coax cable to the modem.
- Tighten connectors rotating clockwise until securely fastened.
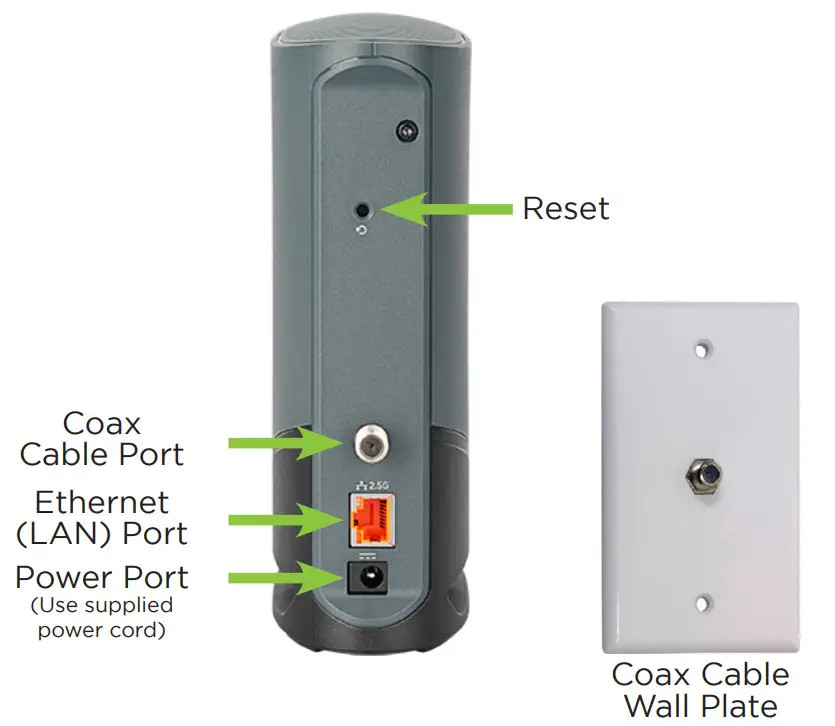
Power on Your Modem
- Plug in the supplied power cord to the modem.
- Plug the other end of the power cord into the wall.
- The lights should come on.
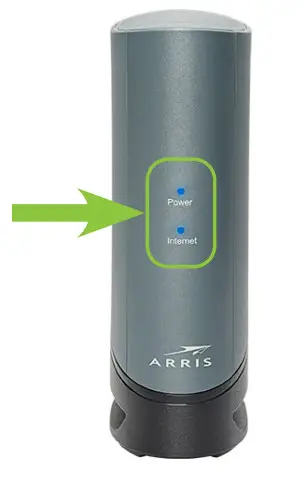
Confirm Modem is Online
- Wait until 2 lights are solid blue.
This may take up to 10 minutes.
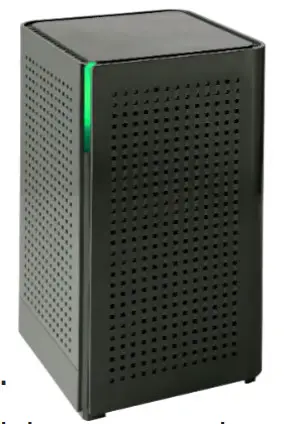
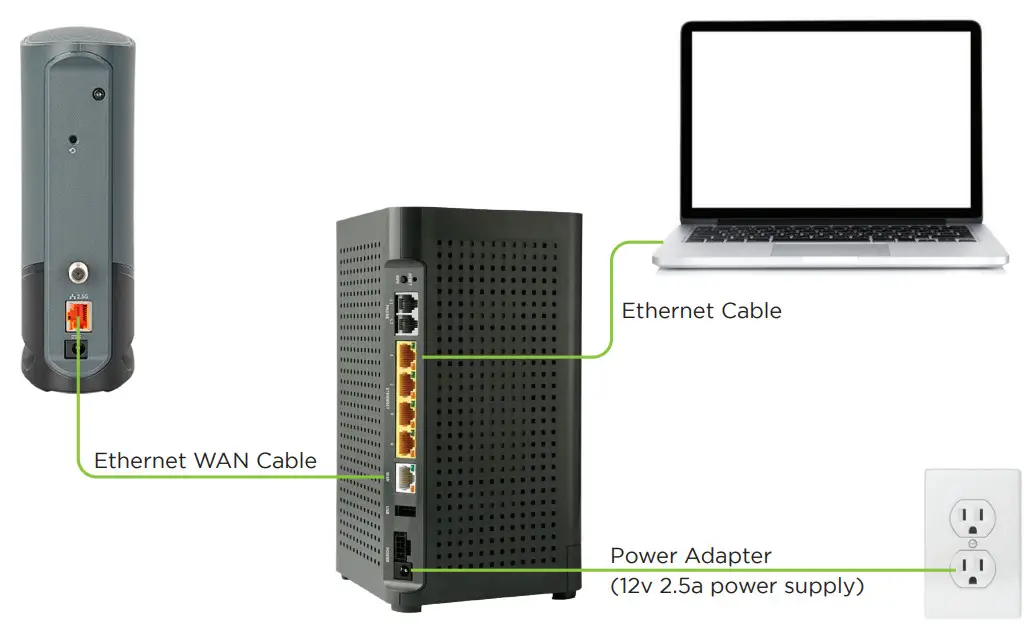
Connecting Your GigaSpire BLAST Wi-Fi Router
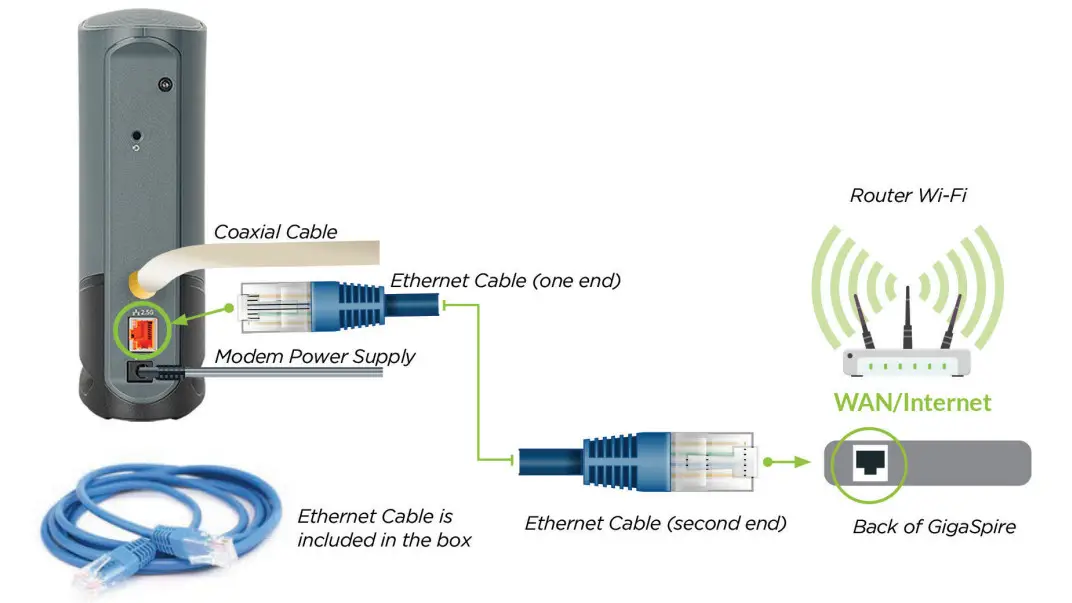
- Plug in the power adapter shipped with the GigaSpire to an available wall socket and attach the other end to the GigaSpire’s power port.

- Connect one end of the supplied Ethernet cable to the Yellow LAN Port 1 on the back of the Arris CM9200 internet modem and the other end of the cable to the WAN port on the back of the GigaSpire.
- Once the light is solid green (or blue), and you are able to see the WCG-***** SSID with your Wi-Fi devices, the initial setup is complete.
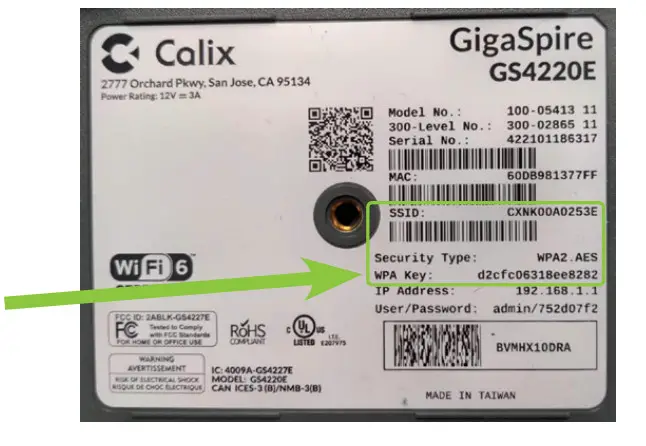
Note: The SSID (network name) of your new GigaSpire will update from CXNK******* to WCG-******** when the system has updated. The password remains the default setting; found on the bottom of your GigaSpire beside ‘WPA Key’.
Connecting Hardwired Devices
- Connect CAT5 or better cabling to the yellow LAN Ethernet
(RJ-45) ports for direct-attached devices. - Secure all subscriber service wiring as appropriate.
Get the My Westman Wi-Fi App to set up Wi-Fi
- Please refer to My Westman Wi-Fi User Guide.
We’re here to help.![]() Please visit support.westmancom.com and search for
Please visit support.westmancom.com and search for
“self-connect” for more info, or call our support team
at 204.717.2802 or 1.800.665.3337.
![]() 204.725.4300
204.725.4300
1.800.665.3337
westmancom.com


