Mercedes-Benz NTG 5.5 / 6 / MBUX Camera Video Interface
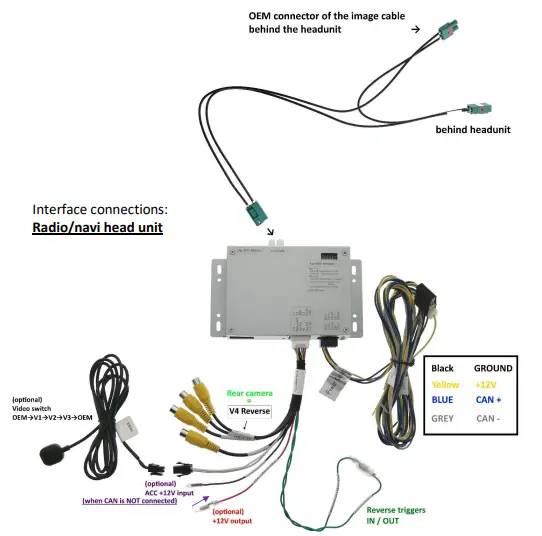
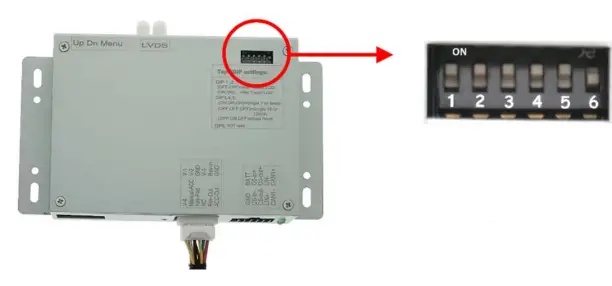
Diagram
 DIP 6 settings
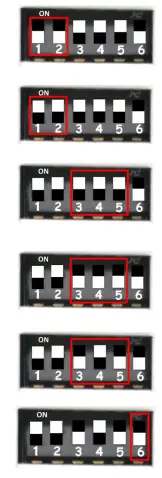
- WITH TOUCHSCREEN LCD
- NO TOUCHSCREEN LCD
- 7 or 8 INCH LCD
- 10 or 12 INCH LCD
- DUALSCREEN 7 INCH
- NOT USED
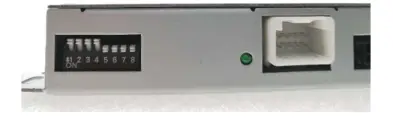
DIP 8 SETTINGS
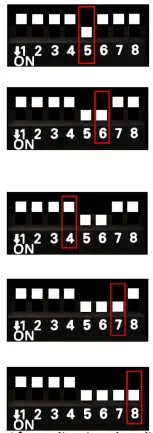
- REARVIEWCAMERA (V4)
- Show FRONT CAMERA 10 seconds after reverse
- MUST BE UP (OFF)
- Guide lines (only on 7 inch)
- Down / ON 7 and 8 inch UP / OFF 10 and 12inch
After adjusting the dipswitch 8, please disconnect the power supply and connect this again (black connector)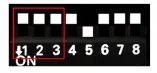
- Dip 1 Video 3 – FRONT (V3)
- Dip 2 Video 1 – LEFT (V1)
- Dip 3 Video 2 – RIGHT (V2)
Switching from OEM screen to external sources:
- Video 1/2/3: User may use the “CALL-END” key on the steering wheel or external switch (included) to switch from OEM screen to external video sources
(OEM → V1→V2→V3→OEM)
If you don’t use any video inputs, please turn dipswitch 1, 2 and 3 OFF (up)
Rearview camera activation
- When put gear in Reverse the interface switches automatically to Reverse camera input, usually detected by CANbus system of the car.
- Unfortunately sometimes reverse it’s not reacting by CANbus because the car can have different CAN protocol/codes.
- Also the guide lines can not be guaranteed.
- In this case the reverse trigger wire of the interface should be connected with the analog reverse licht signal like shown below.
When Reverse is NOT reacting by CANbus:
If the reverse light is LED, use a relay like this: 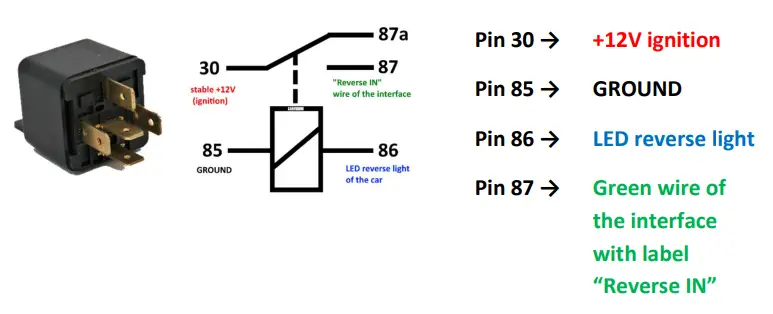 Attention: MB Sprinter interface installation place
Place the interface box behind the storage part as mentioned below. 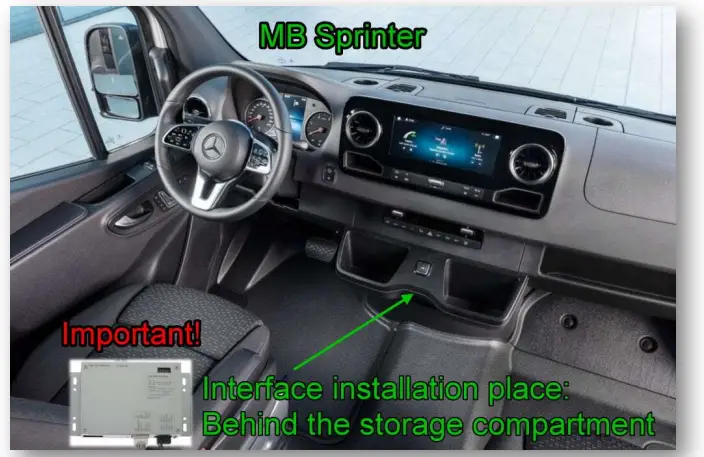
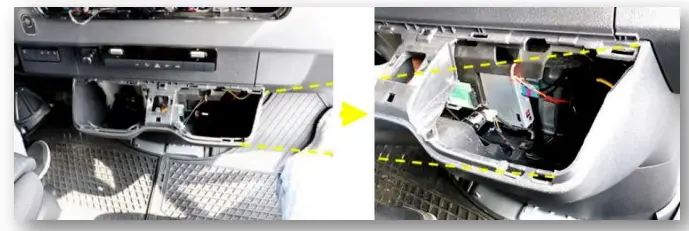
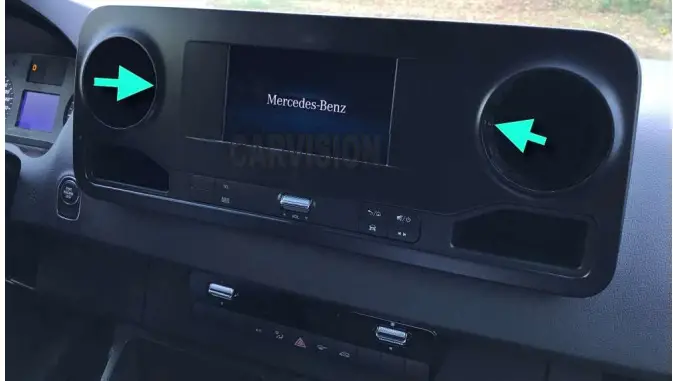
Example installation MB Sprinter MBUX
 Take out the LCD part as shown below:
 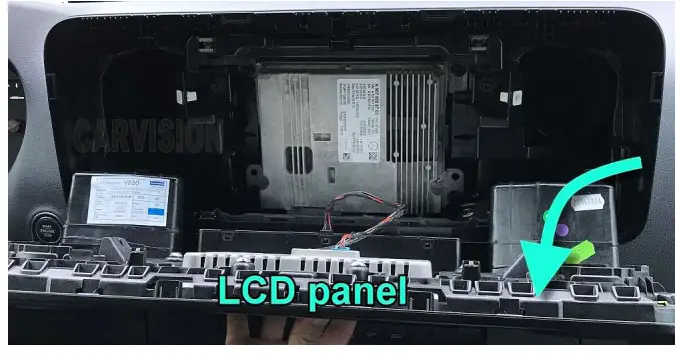 Take out the headunit:
 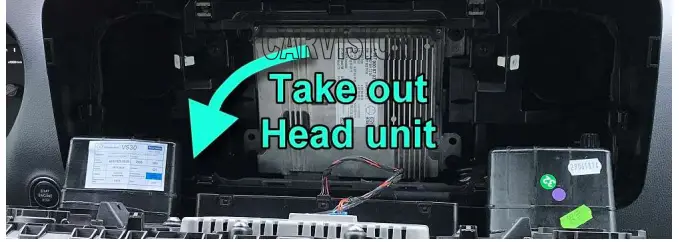 Backside of headunit (version 1):
 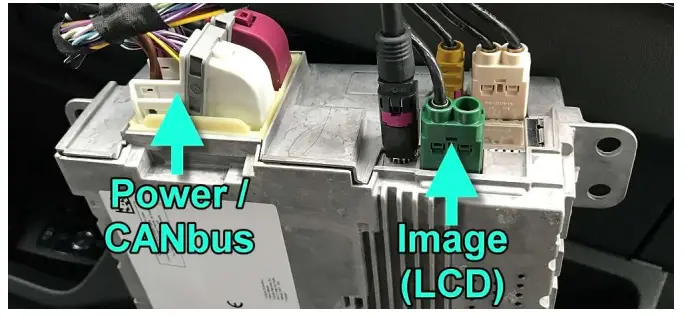 or
orBackside of headunit (version 2):
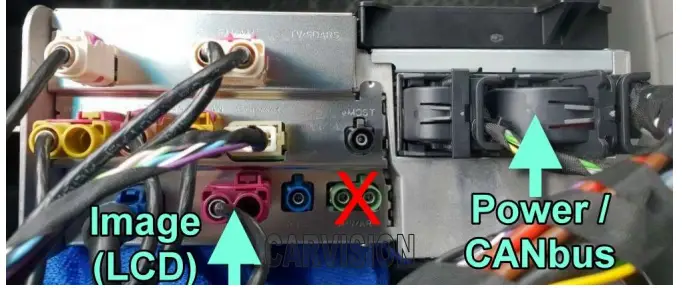 Take out the GREEN or VIOLET LCD connector:
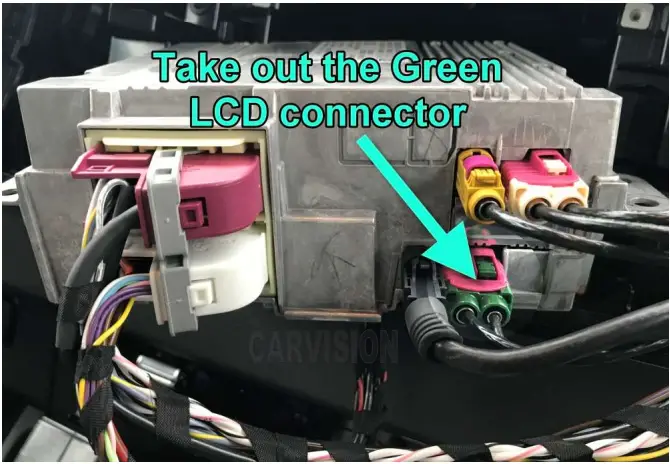 Connect the interface LVDS cables in between like shown below:
 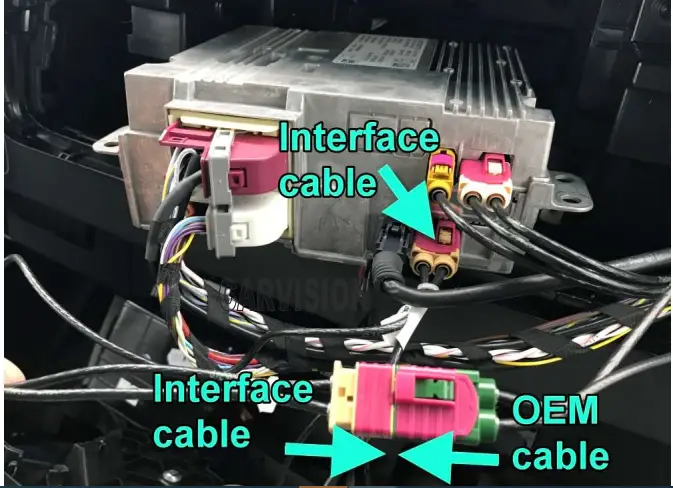 Take out the white (or black connector on some headunits) power connector:
 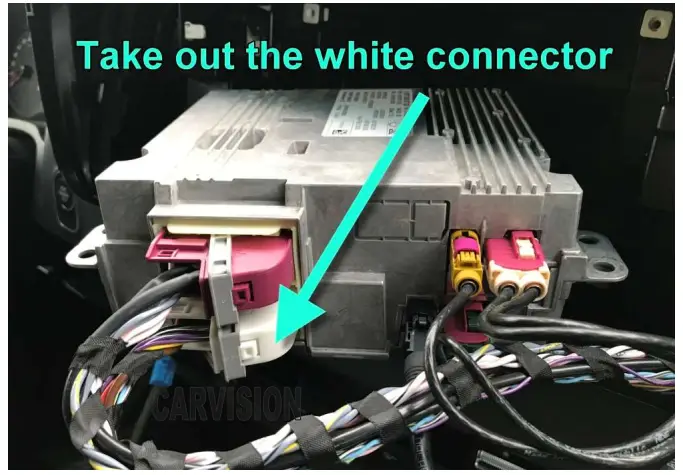 Take out the GREY part from the black housing in the white connector:
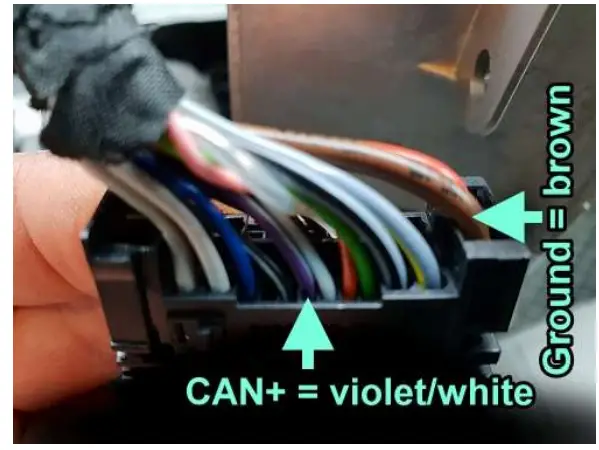
 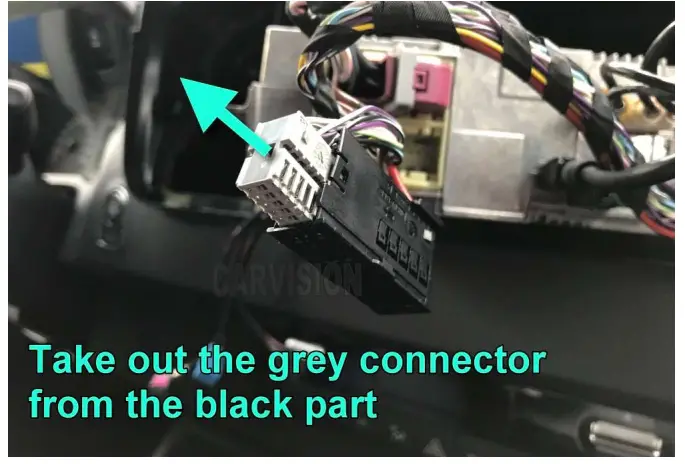 Connect the CANbus wires of the interface (version 1):
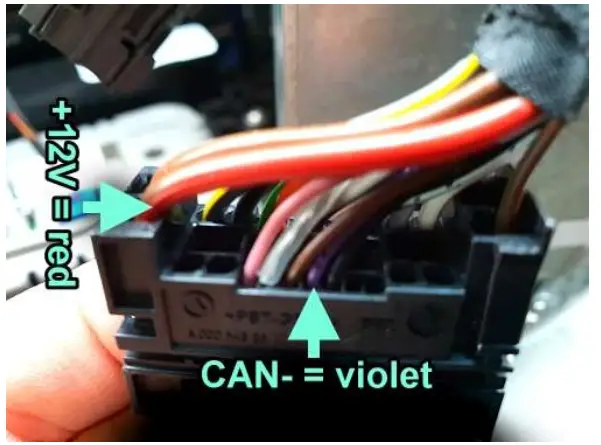
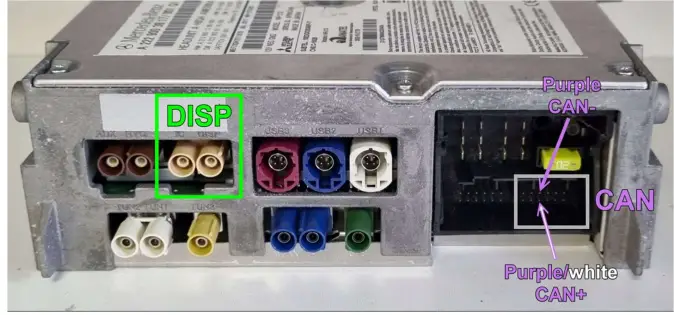
 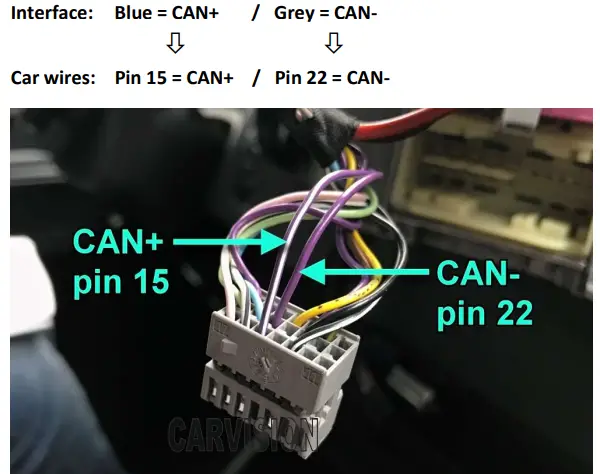 Connect the power wires (version 1):
Additionally
 or
orNTG 5.5 with beige (double) LVDS connector and regular Quadlock power/CAN plug:

Troubleshooting
When you DON’T have OEM image (only black screen with sound of the radio)
Please check the LVDS cable 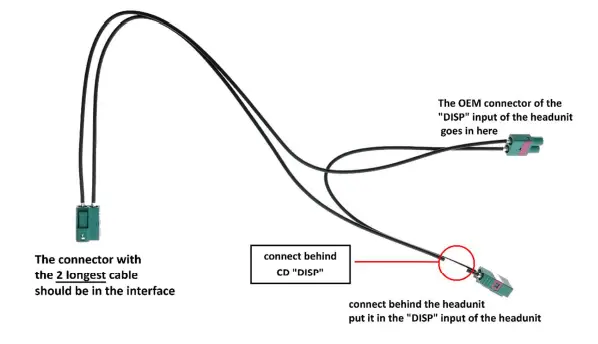
Please check the power supply of the interface 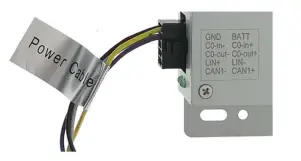
- Installation with CANBUS: Yellow wire has +12 Volt ?
- Installation WITHOUT CANBUS: Yellow and purple wire has +12 Volt ?
When you have OEM image.
After putting in reverse, nothing is happening (no rearviewcamera image, it stays in OEM image)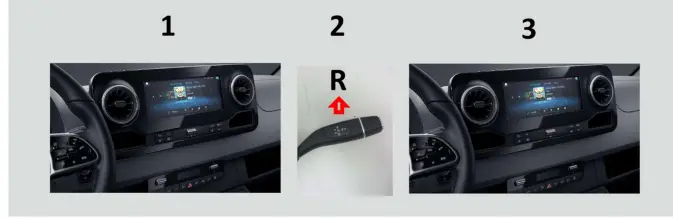
Please check the green wire (“Reverse IN”) 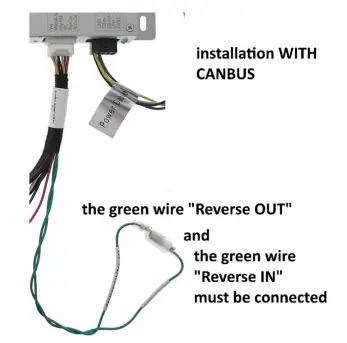 When you put the car in reverse. Do you measure 12 V in the green wire “Reverse IN”??
If you don’t, connect this green wire “Reverse IN” with an analogue reverse signal/ light.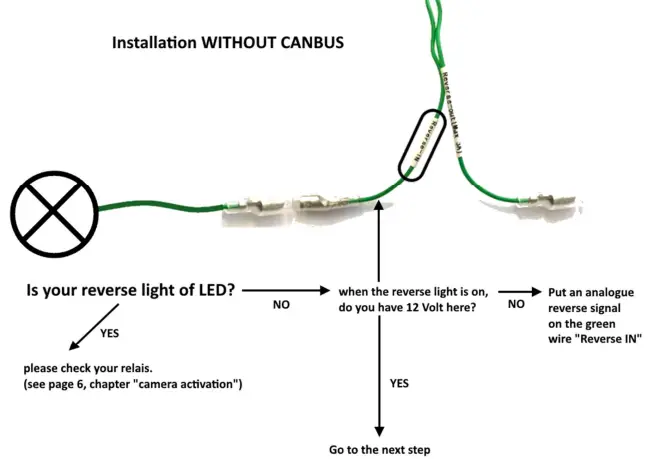 Please check your dipswitch 5 (dip 8 settings)
 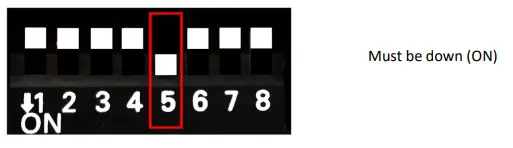 When you have OEM image, but no rearviewcamera image. After putting in reverse, it switch to black image.
 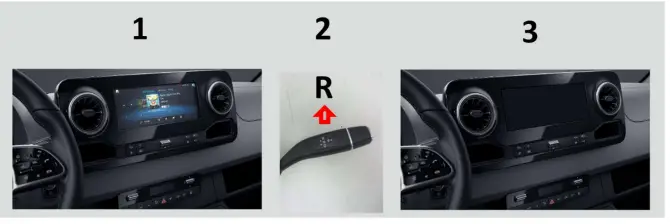 Check the power supply of the rearviewcamera
 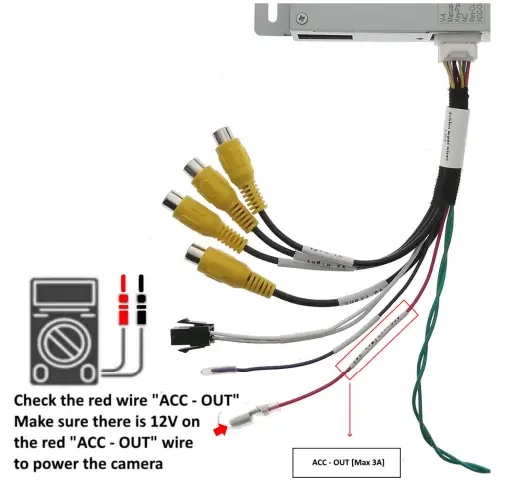 Check camera input of the interface
 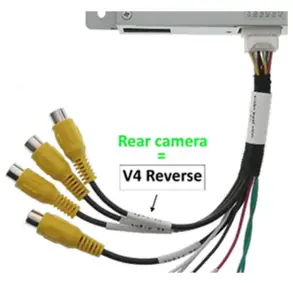 Power supply of the rearviewcamera
Do NOT connect the powercable of the rearviewcamera to the reverselight. This 12V is NOT stable, most of the cars have “duty circle” in the 12V reverselight.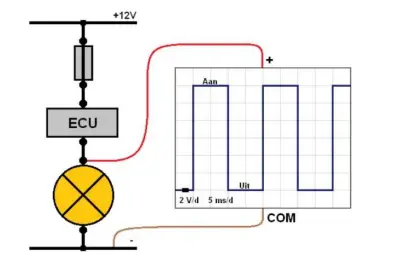 We suggest to find a stable 12V in the fusebox.
To extend the service life of the rearviewcamera, we recommend a ignition 12 Volt.
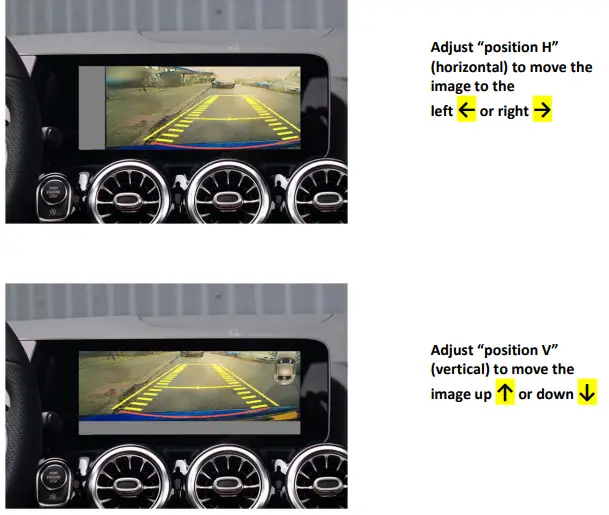
Rearview image adjustment
When you have black/grey border in the rearview image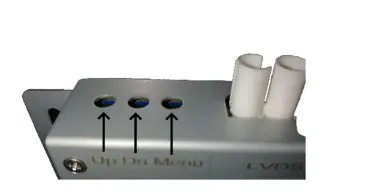
- When you have camera image, press the menu button on the side of the interface.
- The interface menu will pop up in the screen.
- With Up or Dn you can move the selection bar.
- Select position H or position V to adjust the position of the camera image.
Caution:
Do NOT use H-Size or V-Size (This has nothing to do with adjusting the position of the image)